1
AMTECH
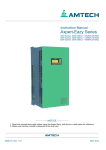
Instruction Manual
Axpert-Opti torque
200V System, 15kW (20Hp) ~ 500kW (670Hp)
400V System, 30kW (40Hp) ~ 710kW (950Hp)
500V System, 37kW (50Hp) ~ 800kW (1075Hp)
600V System, 45kW (60Hp) ~ 900kW (1205Hp)
Norm
415 Vry
0 . 0% L
0 0 Vo
0 . 0l r
V R a m p . L c l , Stop
NOTICE
1. Read this manual thoroughly before using the Axpert-Opti torque, and store in a safe place for reference.
2. Make sure that this manual is delivered to the final user.
AMTECH
IMAOT-01, Rev. 1.9
NOV 2012
Amtech
ii
TABLE OF CONTENTS
PREFACE
Precautions for safety
CHAPTER-1
DELIVERY, INSPECTION AND STORAGE
1.1 Delivery, inspection and storage
1.2 Details of rating nameplate and type display method
CHAPTER-2
INSTALLATION AND WIRING
2.1 Installation environment
2.2 Precautions for power supply and motor wiring
2.3 Simplified block diagram of Axpert-opti torque soft starter
2.4 Power terminal layout
2.5 Precautions for control signals wiring
CHAPTER-3
DIGITAL OPERATION PANEL (LCD KEYPAD MODULE)
3.1 Status
3.2 Modes and parameters
3.3 Parameter display & setting
CHAPTER-4
TEST OPERATION AND ADJUSTMENT
4.1 Preparation before turning power ON
4.2 Initialization of motor constants in Mode-B
4.3 Test operations
CHAPTER-5
CONTROL INPUT / OUTPUT TERMINALS
5.1 Input/output terminal functions of PCA-2005B
5.2 Programmable sequence input (PSI) wiring
5.3 Programmable analog input (PAI) wiring
5.4 Programmable analog output (PAO) wiring
5.5 Programmable sequence output (PSO) wiring
CHAPTER-6
PARAMETER SETTINGS & FUNCTIONS
6.1 Mode-M monitor mode parameters
6.2 Mode-A parameters
6.3 Mode-B parameters
6.4 Mode-C parameters
6.5 Mode-P parameters
6.6 Function explanations
6.7 In-built PLC function explanations
CHAPTER-7
ELECTRONICS CIRCUIT BOARDS
7.1 Main control board PCA-2005B
Axpert-Opti torque Electronic Soft Starter
iii
7.2 Digital operation panel
7.3 Power supply unit
7.4 RC snubber board PCA-82
7.5 MOV board PCA-77
CHAPTER-8
MAINTENANCE, INSPECTION AND PART
REPLACEMENT
8.1 Inspection items
8.2 Measuring devices
CHAPTER-9
OPTIONS
9.1 Metering
9.2 Enclosure
9.3 Remote operator box
9.4 Bypass operation
CHAPTER-10 TYPICAL CONNECTION DIAGRAM
10.1 Bypass contactor connections
10.2 Inside delta connections
CHAPTER-11 SERIAL COMMUNICATION SET-UP
11.1 Connection method
11.2 Connecting the host computer & Axpert-opti torque (1-to-1)
11.3 Connecting the host computer & Axpert-opti torque (1-to-n)
11.4 Communication specifications
CHAPTER-12 UL INSTRUCTIONS
CHAPTER-13 CE INSTRUCTIONS
Appendix-A Standard specifications
Appendix-B Outline dimension
Appendix-C Fault codes
Appendix-D Trouble shooting guidelines
Appendix-E Software revision history
Amtech
iv
PREFACE
THANK YOU for purchasing the “AMTECH Axpert-opti torque Electronic Soft Starter”.
Axpert-opti torque Electronic Soft Starter is a modern Digital Signal Processor based highly
functional Soft Starter that is easy to use.
PLEASE READ THIS MANUAL THOROUGHLY before use, and keep the manual at hand for later
reference. Also make sure that this manual is delivered to the final users.
The purpose of this Instruction Manual is to provide basic information on Installation, Start-up,
Operational and Troubleshooting for the Axpert-opti torque Electronic Soft Starter.
WARNING
ALWAYS READ THIS MANUAL THOROUGHLY BEFORE USING THE SOFT STARTER.
THIS SOFT STARTER CONTAINS HIGH VOLTAGE CIRCUITS THAT MAY BE FATAL TO
HUMANS. USE EXTREME CAUTION DURING INSTALLATION. MAINTENANCE MUST BE
PERFORMED BY QUALIFIED TECHNICIANS, AND ALL POWER SOURCES MUST BE
DISCONNECTED BEFORE ANY MAINTENANCE. SUFFICIENT NOTICE MUST BE GIVEN TO THE
GENERAL OPERATORS AND WORKERS BEFORE STARTING.
• ELECTRIC SHOCK MAY OCCUR IF THE FOLLOWING POINTS ARE NOT OBSERVED.
(1) DO NOT OPEN THE FRONT COVER WHILE THE POWER IS ON.
(2) ALWAYS GROUND THE UNIT CASE. THE GROUNDING METHOD MUST COMPLY WITH THE
LAWS OF THE COUNTRY WHERE THE UNIT IS BEING INSTALLED
• THE UNIT MAY BE DESTROYED BEYOND REPAIR IF THE FOLLOWING POINTS ARE NOT
OBSERVED.
(1) OPERATION WITHIN THE UNIT SPECIFICATIONS.
(2) PROPER CABLE CONNECTIONS TO INPUT/OUTPUT TERMINALS.
(3) CLEANING AND ENOUGH VENTILATION TO THE UNIT INTAKE/OUTTAKE PORTS.
(4) OBSERVATION OF CAUTIONS LISTED IN THIS INSTRUCTION MANUAL.
• THERE MAY BE SOURCES OF NOISE AROUND THIS UNIT AND MOTOR DRIVEN BY THIS
UNIT. CONSIDER THE POWER SUPPLY SYSTEM, INSTALLATION PLACE AND WIRING
METHOD BEFORE INSTALLATION
INSTALL THE UNIT AWAY FROM DEVICES THAT HANDLE MINUTE SIGNALS, SUCH AS
MEDICAL EQUIPMENT IN PARTICULAR. ALSO SEPARATE THE DEVICES ELECTRICALLY, AND
TAKE SUFFICIENT NOISE MEASURES.
• TAKE SUFFICIENT SAFETY MEASURES WHEN USING THIS UNIT FOR PASSENGER
TRANSPORTATION, SUCH AS IN LIFTS (ELEVATORS).
Axpert-Opti torque Electronic Soft Starter
v
Precautions for Safety
Items to be observed to prevent physical damage or property damage and to ensure safe use of this
product are noted on the product and in this instruction manual.
Please read this instruction manual and enclosed documents before starting operation to ensure
correct usage. Thoroughly understand the device, safety information and precautions before starting
operation. After reading, always store this manual where it can be accessed easily.
The safety precautions are ranked as "DANGER" and "CAUTION" in this instruction manual.
DANGER
CAUTION
: When a dangerous situation may occur if handling is mistaken, leading to
fatal or major injuries.
: When a dangerous situation may occur if handling is mistaken, leading to
medium or minor injuries, or physical damage.
CAUTION
may lead to major problems depending
Note that some items described as
on the situation. In any case, important information that must be observed is described.
This instruction manual is written on the presumption that the user has an understanding of the soft
starter. A qualified person must do installation, operation, maintenance and inspection of this product.
Even qualified persons must undergo periodic training.
Qualified refers to satisfying the following conditions.
The person has thoroughly read and understood this instruction manual.
The person is well versed in the installation, operation, maintenance and inspection of this
product, and understands the possible dangers.
The person is informed on matters related to starting, stopping, installation, locks and tag displays,
and has been trained in the operation and remedies.
The person has been trained on the maintenance, inspection and repairs of this product.
The person has been trained on protective tools used to ensure safety.
KEEP SAFETY FIRST IN YOUR SYSTEM
AMTECH puts the maximum effort into making products better and more reliable, but there is always
the possibility that trouble may occur with them. Trouble with soft-starter may lead to personal injury,
fire or property damage. Remember to give due consideration to safety when making your system,
with appropriate measures such as isolating devices, mechanical brakes, prevention against any
malfunction or mishap.
Amtech
vi
CHAPTER-1: DELIVERY, INSPECTION AND STORAGE
1
CAUTION
2
Always transport the product with an appropriate method according to the products weight.
Failure to observe this could lead to injuries.
Do not place the product near inflammable items.
Failure to observe this could lead to fires.
Do not hold the product with front cover while transporting the product.
Failure to observe this could lead to injuries from dropping.
Do not let conductive materials such as screws or metal pieces and inflammable materials such
as oil enter into the product.
Failure to observe this could lead to fires.
Install the product in a place that can withstand the weight of the product, and follow the
instruction manual.
Failure to do so could lead to injuries from dropping.
Do not install and operate the unit that is damaged or that has missing parts.
Failure to observe this could lead to injuries.
Always observe the conditions described in the instruction manual for the installation
environment.
Failure to observe this could lead to faults.
3
4
5
6
7
1.1 Delivery, inspection and storage
Axpert-Opti torque Electronic Soft Starter has gone through rigorous quality control tests at the
factory before shipment. After receiving the unit, check for the following.
(1) Check to make sure that the package includes unit and User Manual
(2) Remove the unit from packaging, and check the details on the rating nameplate to confirm that the
unit is as ordered.
(3) Confirm that the product has not been damaged during shipment.
The Axpert-Opti torque Electronic Soft Starter should be kept in the shipping carton before
installation. In order to retain the warranty coverage, the unit should be stored properly when it is not
to be used for an extended period of time. Some storage suggestions are:
(1) Store in a clean, dry location.
(2) Store within an ambient temperature range of -20°C (-4°F) to +60°C (140°F).
(3) If possible, store in an air-conditioned environment where the relative humidity is less than 95%,
non-condensing.
(4) Do not store the unit in places where it could be exposed to corrosive gases.
(5) Do not store the unit on a shelf or on an unstable surface.
(6) If the unit is not to be used for a while (more than 2 months) after purchasing, store it in a place
with no humidity or vibration in the packaged state.
(7) Always inspect the unit before using after storing for a long period.
8
9
10
11
12
13
A
Axpert-Opti torque Electronic Soft Starter
1.1
1
1.2 Details of rating nameplate and type display method
The following details are listed on the rating nameplate.
2
3
4
5
Using the above type as an example, the type is displayed as follows:
6
AMT - OT - 045 - 4 - 1
Axpert-opti torque Series
7
-030: For 30 kW Capacity
-037: For 37 kW Capacity
-045: For 45 kW Capacity
-055: For 55 kW Capacity
-075: For 75 kW Capacity
-090: For 90 kW Capacity
-110: For 110 kW Capacity
-132: For 132 kW Capacity
-160: For 160 kW Capacity
-200: For 200 kW Capacity
-250: For 250 kW Capacity
-315: For 315 kW Capacity
-400: For 400 kW Capacity
-450: For 450 kW Capacity
-500: For 500 kW Capacity
-575: For 575 kW Capacity
-630: For 630 kW Capacity
-710: For 710 kW Capacity
8
9
10
11
12
13
A
Amtech
1.2
-1: For 1- Phase 115V Fan
& Control Supply
-2: For 1- Phase 230V Fan
& Control Supply
-2: For 3- Phase 200V series, 200Vac ~ 240Vac
-4: For 3- Phase 400V series, 380Vac ~ 480Vac
-5: For 3- Phase 500V series, 500Vac ~ 575Vac
-6: For 3- Phase 600V series, 600Vac ~ 690Vac
CHAPTER-2: INSTALLATION AND WIRING
1
This chapter provides the information needed to properly install and wire the unit. Make sure that the
unit is wired according to the instructions contained in this chapter. The instructions should be read
and understood before the actual installation begins.
2
CAUTION
Install the unit and other peripheral devices on noncombustible material such as metal.
Failure to observe this could lead to fires.
Do not place the product near inflammable items.
Failure to observe this could lead to fires.
Do not let conductive materials such as screws or metal pieces and inflammable materials such
as oil enter the product.
Failure to observe this could lead to fires.
Install the product in a place that can withstand the weight of the product.
Failure to do so could lead to injuries from dropping.
Do not install and operate the unit that is damaged or that is missing parts.
Failure to observe this could lead to injuries.
Always observe the conditions described in the instruction manual for the installation
environment.
Failure to observe this could lead to faults.
2.1 Installation environment
Places subject to direct sunlight
•
Places with oil mist, dust or cotton lint, or subject to salty winds
•
Places with corrosive gas, explosive gas or high humidity
levels
•
Places near vibration sources such as dollies or press
machines
Places made of in-flammable materials such as wood, or
places that are not heat resistant
(4) Ensure ventilation space around the unit as shown in fig. 2-1-1
5
6
8
AXPERT
OPTI torque
50mm (1.97")
•
4
7
200mm (7.87")
50mm (1.97")
Observe the following points when installing the unit.
(1) Install the unit vertically to provide proper ventilation.
(2) Make sure that the ambient temperature is –10°C (14°F) to
50°C (122°F).
(3) Avoid installation in the following environment.
3
9
10
•
200mm (7.87")
11
Fig. 2-1-1
12
13
A
Axpert-Opti torque Electronic Soft Starter
2.1
1
2.2 Precautions for power supply and motor wiring
2
3
DANGER
4
5
6
Always turn the device's input power OFF before starting wiring.
Failure to do so could lead to electric shocks or fires.
Carry out grounding that complies with the standards of the country where the unit is being
installed.
Failure to do so could lead to electric shocks or fires.
Wiring must always be done by a qualified electrician
Failure to observe this could lead to electric shocks or fires.
Always install the device before starting wiring.
Failure to do so could lead to electric shocks or injuries.
Use a circuit breaker such as an MCCB or fuses that match with the capacity of the unit power
supply.
Failure to do so could lead to fires.
CAUTION
7
8
9
10
Do not connect an AC power supply to the output terminals (U, V, W).
Failure to observe this could lead to injuries or fires.
Confirm that the product's rated input voltage and frequency match the power supply voltage and
frequency.
Failure to do so could lead to injuries or fires.
Tighten the terminal screws with the designated tightening torque.
Failure to do so could lead to fires.
Correctly connect the output (U, V, W) to motor terminals to ensure proper phase sequence.
Failure to do so could cause the motor to rotate in reverse and the machine to be damaged.
Failure to observe this could lead to reverse rotation or abnormal acceleration of the motor, and to
injuries or machine damage.
11
12
13
A
Amtech
2.2
2.3 Simplified block diagram of Axpert-Opti torque soft starter
1
U'
V'
W'
3-Phase,
380~480Vac,
50/60Hz
Input
Note:1
2
L1
CT
L2
CT
L3
CT
U
V
IM
3-Phase
W
4
PE
1-Phase, 115/
230Vac, 50/60Hz
control supply
3
L
5
N
E
AXPERT
OPTI torque
6
Electronic Soft Starter
Digital
Operation Panel
FSV
Main Control
Board
PCA-2005B
VIN
TX
FSI
RX
7
IIN
RUN
STOP
PSI-1
PSI-2
PSI-3
PSI-4
PSI-5
PSI-6
VO1
VO2
8
IO1
IO2
FA
FB
9
FC
R1A
PSO1
R1B
PSO2
R1C
PSO3
R2A
PSO4
R2B
10
R2C
Fig. 2-3-1 - Simplified Block Diagram of Axpert-Opti torque Soft starter
11
(Note 1) Input / Output and Bypass terminals
The input terminals are L1, L2 & L3. The output terminals to the motor are U, V & W. Connect the
power supply to input terminals L1, L2 & L3 only. Never connect the power supply to the U, V,
and W terminals. Connect bypass contactor between L1, L2, L3 and U’, V’, W’. Input voltage
range is varies according to voltage series for 200V series input voltage ranger 200VAC to
240VAC, for 400V series input voltage range 380VAC to 480VAC, for 500Vsereis input voltage
range 500VAC to 575VAC and for 600V series input voltage range 600VAC to 690VAC.
(Note 2) Wire size
Use wires having the size (or larger) shown in the below table for the main circuit wiring shown in
the above figure. The applicable wire size range, applicable ring terminal and tightening torque for
the main circuit terminals are shown in the Table-2-3-1, for 200V Series, Table-2-3-2 for 400V
Series, Table-2-3-3 for 500V Series and Table-2-3-4 for 600V Series.
Axpert-Opti torque Electronic Soft Starter
2.3
12
13
A
1
Table-2-3-1: 200V series Axpert-Opti torque (Terminal and applicable wire/bus bar for Input,
Output & Bypass)
2
AMTRated
OTCurrent
XXX-2-X
(A)
wire/bus bar
size for Input /
Output+
2
3
4
5
6
wire size for
Grounding
terminal
2
mm
AWG
mm
AWG
Lug ID Lug
Terminal
Hole
Terminal Tightening
mm
width width (I/P, diameter screw
torque
(inch)
mm
O/P &
mm
size
N*m
(inch) Bypass)
(inch)
(lb-inch)
#
mm (inch)
015
60
25
4
10
8
8.4
(0.33)
15
(0.59)
19 (0.75)
9 (0.35)
M8
9 (79.7)
018
72
35
2
10
8
8.4
(0.33)
15.2
(0.60)
19 (0.75)
9 (0.35)
M8
9 (79.7)
022
87
50
1
10
8
8.4
(0.33)
18.5
(0.73)
19 (0.75)
9 (0.35)
M8
9 (79.7)
030
110
50
1/0
16
6
8.4
(0.33)
18.5
(0.73)
19 (0.75)
9 (0.35)
M8
9 (79.7)
037
147
35 x 2p
2 x 2p
16
6
10.5
(0.41)
15.2
(0.60)
32 (1.26)
10.5
(0.41)
M10
22.5 (199)
045
175
50 x 2p
1 x 2p
16
6
10.5
(0.41)
18.5
(0.73)
32 (1.26)
10.5
(0.41)
M10
22.5 (199)
055
215
50 x 2p
1/0 x 2p
25
4
10.5
(0.41)
18.5
(0.73)
32 (1.26)
10.5
(0.41)
M10
22.5 (199)
075
245
70 x 2p
2/0 x 2p
25
4
10.5
(0.41)
21.4
(0.84)
40 (1.58)
11
(0.43)
M10
22.5 (199)
076
245
70 x 2p
2/0 x 2p
25
4
50 (1.97)
13
(0.51)
M12
31.2 (276)
090
320
120 x 2p 4/0 x 2p
-
3
40 (1.58)
11
(0.43)
M10
22.5 (199)
091
320
120 x 2p 4/0 x 2p
-
3
50 (1.97)
13
(0.51)
M12
31.2 (276)
110
360
40 x 10
(400)
-
-
3
50 (1.97)
13
(0.51)
M12
31.2 (276)
470
40 x 10
(400)
-
50
1
50 (1.97)
13
(0.51)
M12
31.2 (276)
590
50 x 10
(500)
-
50
1
50 (1.97)
13
(0.51)
M12
31.2 (276)
200
720
75 x 10
(750)
-
50
1/0
50 (1.97)
13
(0.51)
M12
31.2 (276)
250
800
75 x 10
(750)
-
70
2/0
50 (1.97)
13
(0.51)
M12
31.2 (276)
315
880
100x10
(1000)
-
95
3/0
75 (2.95)
13
(0.51)
M12
31.2 (276)
400
950
100x10
(1000)
-
95
3/0
75 (2.95)
13
(0.51)
M12
31.2 (276)
450
1065
100x10
(1000)
-
95
3/0
75 (2.95)
13
(0.51)
M12
31.2 (276)
7
8
111
132
9
133
160
161
10
11
12
+
13
10.5
(0.41)
28.3
(1.11)
2p = Two parallel
# - Listed ZMVV, Lugs shall be used
Wire size for external control supply for cooling fan is 14 AWG (2.5 mm2).
A
Amtech
2.4
Table-2-3-2: 400V series Axpert-Opti torque (Terminal and applicable wire/bus bar for Input,
Output & Bypass)
AMTRated
OTCurrent
XXX-4-X
(A)
wire/bus bar
size for Input /
Output+
2
wire size for
Grounding
terminal
2
mm
AWG
mm
AWG
1
Lug ID Lug
Terminal
Hole
Terminal Tightening
mm
width width (I/P, diameter screw
torque
(inch)
mm
O/P &
mm
size
N*m
(inch) Bypass)
(inch)
(lb-inch)
#
mm (inch)
030
60
25
4
10
8
8.4
(0.33)
15
(0.59)
19 (0.75)
9 (0.35)
M8
9 (79.7)
037
72
35
2
10
8
8.4
(0.33)
15.2
(0.60)
19 (0.75)
9 (0.35)
M8
9 (79.7)
045
87
50
1
10
8
8.4
(0.33)
18.5
(0.73)
19 (0.75)
9 (0.35)
M8
9 (79.7)
055
110
50
1/0
16
6
8.4
(0.33)
18.5
(0.73)
19 (0.75)
9 (0.35)
M8
9 (79.7)
075
147
35 x 2p
2 x 2p
16
6
10.5
(0.41)
15.2
(0.60)
32 (1.26)
10.5
(0.41)
M10
22.5 (199)
090
175
50 x 2p
1 x 2p
16
6
10.5
(0.41)
18.5
(0.73)
32 (1.26)
10.5
(0.41)
M10
22.5 (199)
110
215
50 x 2p
1/0 x 2p
25
4
10.5
(0.41)
18.5
(0.73)
32 (1.26)
10.5
(0.41)
M10
22.5 (199)
132
245
70 x 2p
2/0 x 2p
25
4
10.5
(0.41)
21.4
(0.84)
40 (1.58)
11
(0.43)
M10
22.5 (199)
133
245
70 x 2p
2/0 x 2p
25
4
50 (1.97)
13
(0.51)
M12
31.2 (276)
160
320
120 x 2p 4/0 x 2p
-
3
40 (1.58)
11
(0.43)
M10
22.5 (199)
161
320
120 x 2p 4/0 x 2p
-
3
50 (1.97)
13
(0.51)
M12
31.2 (276)
200
360
40 x 10
(400)
-
-
3
50 (1.97)
13
(0.51)
M12
31.2 (276)
470
40 x 10
(400)
-
50
1
50 (1.97)
13
(0.51)
M12
31.2 (276)
590
50 x 10
(500)
-
50
1
50 (1.97)
13
(0.51)
M12
31.2 (276)
400
720
75 x 10
(750)
-
50
1/0
50 (1.97)
13
(0.51)
M12
31.2 (276)
450
800
75 x 10
(750)
-
70
2/0
50 (1.97)
13
(0.51)
M12
31.2 (276)
500
880
100x10
(1000)
-
95
3/0
75 (2.95)
13
(0.51)
M12
31.2 (276)
585
950
100x10
(1000)
-
95
3/0
75 (2.95)
13
(0.51)
M12
31.2 (276)
630
1065
100x10
(1000)
-
95
3/0
75 (2.95)
13
(0.51)
M12
31.2 (276)
201
250
251
315
316
10.5
(0.41)
28.3
(1.11)
2
3
4
5
6
7
8
9
10
11
12
+
2p = Two parallel
# - Listed ZMVV, Lugs shall be used
2
Wire size for external control supply for cooling fan is 14 AWG (2.5 mm ).
13
A
Axpert-Opti torque Electronic Soft Starter
2.5
Table-2-3-3: 500V series Axpert-Opti torque (Terminal and applicable wire/bus bar for Input,
Output & Bypass)
1
2
AMTRated
OTCurrent
XXX-5-X
(A)
wire/bus bar
size for Input /
Output+
2
3
4
5
6
7
8
9
10
11
12
2
mm
AWG
mm
AWG
Lug ID Lug
Terminal
Hole
Terminal Tightening
mm
width width (I/P, diameter screw
torque
(inch)
mm
O/P &
mm
size
N*m
(inch) Bypass)
(inch)
(lb-inch)
#
mm (inch)
037
60
25
4
10
8
8.4
(0.33)
15
(0.59)
19 (0.75)
9 (0.35)
M8
9 (79.7)
045
72
35
2
10
8
8.4
(0.33)
15.2
(0.60)
19 (0.75)
9 (0.35)
M8
9 (79.7)
055
87
50
1
10
8
8.4
(0.33)
18.5
(0.73)
19 (0.75)
9 (0.35)
M8
9 (79.7)
075
110
50
1/0
16
6
8.4
(0.33)
18.5
(0.73)
19 (0.75)
9 (0.35)
M8
9 (79.7)
090
147
35 x 2p
2 x 2p
16
6
10.5
(0.41)
15.2
(0.60)
32 (1.26)
10.5
(0.41)
M10
22.5 (199)
110
175
50 x 2p
1 x 2p
16
6
10.5
(0.41)
18.5
(0.73)
32 (1.26)
10.5
(0.41)
M10
22.5 (199)
132
215
50 x 2p
1/0 x 2p
25
4
10.5
(0.41)
18.5
(0.73)
32 (1.26)
10.5
(0.41)
M10
22.5 (199)
160
245
70 x 2p
2/0 x 2p
25
4
10.5
(0.41)
21.4
(0.84)
40 (1.58)
11
(0.43)
M10
22.5 (199)
161
245
70 x 2p
2/0 x 2p
25
4
50 (1.97)
13
(0.51)
M12
31.2 (276)
200
320
120 x 2p 4/0 x 2p
-
3
40 (1.58)
11
(0.43)
M10
22.5 (199)
201
320
120 x 2p 4/0 x 2p
-
3
50 (1.97)
13
(0.51)
M12
31.2 (276)
250
360
40 x 10
(400)
-
-
3
50 (1.97)
13
(0.51)
M12
31.2 (276)
251
360
40 x 10
(400)
-
-
3
50 (1.97)
13
(0.51)
M12
31.2 (276)
315
470
40 x 10
(400)
-
50
1
50 (1.97)
13
(0.51)
M12
31.2 (276)
316
470
40 x 10
(400)
-
50
1
50 (1.97)
13
(0.51)
M12
31.2 (276)
400
590
50 x 10
(500)
-
50
1
50 (1.97)
13
(0.51)
M12
31.2 (276)
401
590
50 x 10
(500)
-
50
1
50 (1.97)
13
(0.51)
M12
31.2 (276)
450
720
75 x 10
(750)
-
50
1/0
50 (1.97)
13
(0.51)
M12
31.2 (276)
500
800
75 x 10
(750)
-
70
2/0
50 (1.97)
13
(0.51)
M12
31.2 (276)
585
880
100x10
(1000)
-
95
3/0
75 (2.95)
13
(0.51)
M12
31.2 (276)
630
950
100x10
(1000)
-
95
3/0
75 (2.95)
13
(0.51)
M12
31.2 (276)
710
1065
100x10
(1000)
-
95
3/0
75 (2.95)
13
(0.51)
M12
31.2 (276)
13
+
A
wire size for
Grounding
terminal
10.5
(0.41)
28.3
(1.11)
2p = Two parallel
# - Listed ZMVV, Lugs shall be used
Wire size for external control supply for cooling fan is 14 AWG (2.5 mm2).
Amtech
2.6
Table-2-3-4: 600V series Axpert-Opti torque (Terminal and applicable wire/bus bar for Input,
Output & Bypass)
AMTRated
OTCurrent
XXX-6-X
(A)
wire/bus bar
size for Input /
Output*
2
wire size for
Grounding
terminal
2
mm
AWG
mm
AWG
1
Lug ID Lug
Terminal
Hole
Terminal Tightening
mm
width width (I/P, diameter screw
torque
(inch)
mm
O/P &
mm
size
N*m
(inch) Bypass)
(inch)
(lb-inch)
#
mm (inch)
045
60
25
4
10
8
8.4
(0.33)
15
(0.59)
19 (0.75)
9 (0.35)
M8
9 (79.7)
055
72
35
2
10
8
8.4
(0.33)
15.2
(0.60)
19 (0.75)
9 (0.35)
M8
9 (79.7)
075
87
50
1
10
8
8.4
(0.33)
18.5
(0.73)
19 (0.75)
9 (0.35)
M8
9 (79.7)
090
110
50
1/0
16
6
8.4
(0.33)
18.5
(0.73)
19 (0.75)
9 (0.35)
M8
9 (79.7)
110
147
35 x 2p
2 x 2p
16
6
10.5
(0.41)
15.2
(0.60)
32 (1.26)
10.5
(0.41)
M10
22.5 (199)
132
175
50 x 2p
1 x 2p
16
6
10.5
(0.41)
18.5
(0.73)
32 (1.26)
10.5
(0.41)
M10
22.5 (199)
160
215
50 x 2p
1/0 x 2p
25
4
10.5
(0.41)
18.5
(0.73)
32 (1.26)
10.5
(0.41)
M10
22.5 (199)
200
245
70 x 2p
2/0 x 2p
25
4
10.5
(0.41)
21.4
(0.84)
40 (1.58)
11
(0.43)
M10
22.5 (199)
201
245
70 x 2p
2/0 x 2p
25
4
50 (1.97)
13
(0.51)
M12
31.2 (276)
250
320
120 x 2p 4/0 x 2p
-
3
40 (1.58)
11
(0.43)
M10
22.5 (199)
251
320
120 x 2p 4/0 x 2p
-
3
50 (1.97)
13
(0.51)
M12
31.2 (276)
315
360
40 x 10
(400)
-
-
3
50 (1.97)
13
(0.51)
M12
31.2 (276)
316
360
40 x 10
(400)
-
-
3
50 (1.97)
13
(0.51)
M12
31.2 (276)
400
470
40 x 10
(400)
-
50
1
50 (1.97)
13
(0.51)
M12
31.2 (276)
401
470
40 x 10
(400)
-
50
1
50 (1.97)
13
(0.51)
M12
31.2 (276)
450
590
50 x 10
(500)
-
50
1
50 (1.97)
13
(0.51)
M12
31.2 (276)
451
590
50 x 10
(500)
-
50
1
50 (1.97)
13
(0.51)
M12
31.2 (276)
500
720
75 x 10
(750)
-
50
1/0
50 (1.97)
13
(0.51)
M12
31.2 (276)
585
800
75 x 10
(750)
-
70
2/0
50 (1.97)
13
(0.51)
M12
31.2 (276)
630
880
100x10
(1000)
-
95
3/0
75 (2.95)
13
(0.51)
M12
31.2 (276)
710
950
100x10
(1000)
-
95
3/0
75 (2.95)
13
(0.51)
M12
31.2 (276)
800
1065
100x10
(1000)
-
95
3/0
75 (2.95)
13
(0.51)
M12
31.2 (276)
10.5
(0.41)
28.3
(1.11)
2
3
4
5
6
7
8
9
10
11
12
13
+
2p = Two parallel
# - Listed ZMVV, Lugs shall be used
Wire size for external control supply for cooling fan is 14 AWG (2.5 mm2).
A
Axpert-Opti torque Electronic Soft Starter
2.7
1
(Note 3) Noise filter
The unit will generate high harmonic electromagnetic noise, so using the following noise
measures is recommended.
2
Insert a noise filter on the input side of the unit. Contact Amtech to select the proper noise filter.
Keep the wiring length between the noise filter and unit to 500mm (19.7”) or less.
3
Use a shield cable for the unit and motor wiring and connect the screen to the unit’s
terminal.
When using the control circuit wiring and power circuit wiring in parallel, separate the wiring by
300mm (11.8”) or more or pass each of the wiring through separate metal conduits. If the control
circuit wiring and main circuit wiring intersect, make sure that they intersect at a right angle.
4
(Note 4) Output
Do not insert a power factor improvement capacitor on the output side of the unit. When inserting
a magnetic contactor on the output side of the unit, prepare a sequence control circuit so that the
magnetic contactor will not open and close when the unit is running. Directly connect only motor
to the unit and do not connect through a transformer etc...without consulting Amtech.
5
6
(Note 5) Grounding
Always ground the unit according to the regulations of the country where the unit is being used to
ensure personnel safety in all circumstances, and to reduce electromagnetic emission and pickup.
Make sure that grounding conductors are adequately sized as required by safety regulations.
7
In European CE compliant installations and in other installations where EMC emissions must be
minimized, make a 360° high frequency grounding of cable entries in order to suppress
electromagnetic disturbances.
8
In addition, connect the cable shields to protective earth (PE) in order to meet safety regulations.
(Note 6) Surge absorber
Install a surge absorber on the magnetic contactor and relay coils installed near the unit.
9
10
11
12
13
A
Amtech
2.8
(Note 7) External Control & Fan supply
1
User has to connect external control and fan supply 1-Phase, 50/60Hz; 115VAC/230VAC. Current
requirement is defined in below table as per the rating. This supply should be derived from
maximum 1kVA transformer. Use of higher rating transformer may damage the power supply unit.
Table 2-3-5: External control and fan power supply requirement
AMT-OT-XXX-2-X AMT-OT-XXX-4-X * AMT-OT-XXX-5-X AMT-OT-XXX-6-X
Voltage
(VAC)*
Current
(A)
2
015/018/022/030
030/037/045/055
037/045055/075
045/055/075/090
115
0.5
075/090/110
090/110/132
110/132/160
230
115
230
0.25
0.70
0.35
3
037/0450/055
075/076/090/091/
111/133/161
132/133/160/161/
201/251/316
160/161/200/201/
251/316
200/201/250/251/
316/401/451
115
230
1.1
0.6
4
110/132/160
200/250/315
250/315/400
315/400/450
115
230
1.55
0.95
200/250
400/450
450/500
500/585
115
1.65
5
630/710/800
230
115
230
0.95
1.65
0.95
6
315/400/450
500/585/630
585/630/710
* AMT-OT-XXX-4-1 series (except 161, 201, 251 and 316) is UL & cUL Listed.
7
8
9
10
11
12
13
A
Axpert-Opti torque Electronic Soft Starter
2.9
2.4 Power terminal layout
1
2
3
4
5
6
BOTTOM VIEW
TOP VIEW
Fig. 2-4-1 - Field Terminal Layout for
200V Series (AMT-OT-015-2-X ~ AMT-OT-030-2-X),
400V Series (AMT-OT-030-4-X ~ AMT-OT-055-4-X),
500V Series (AMT-OT-037-5-X ~ AMT-OT-075-5-X),
600V Series (AMT-OT-045-6-X ~ AMT-OT-090-6-X)
7
8
9
10
11
12
BOTTOM VIEW
TOP VIEW
Fig. 2-4-2 - Field Terminal Layout for
200V Series (AMT-OT-037-2-X ~ AMT-OT-055-2-X),
400V Series (AMT-OT-075-4-X ~ AMT-OT-110-4-X),
500V Series (AMT-OT-090-5-X ~ AMT-OT-132-5-X),
600V Series (AMT-OT-110-6-X ~ AMT-OT-160-6-X)
13
A
Amtech
2.10
1
2
3
4
5
BOTTOM VIEW
TOP VIEW
Fig. 2-4-3 - Field Terminal Layout for
200V Series (AMT-OT-075, -090),
400V Series (AMT-OT-132, -160),
500V Series (AMT-OT-160, -200),
600V Series (AMT-OT-200, -250)
6
7
8
9
10
11
12
BOTTOM VIEW
Fig. 2-4-4 - Field Terminal Layout for
200V Series (AMT-OT-076, -91, -110, -111 ~ -500),
400V Series (AMT-OT-133, -161, -200 ~ -630),
500V Series (AMT-OT-161, -201, -250 ~ -710),
600V Series (AMT-OT-201, -251, -315 ~ -800)
13
A
Axpert-Opti torque Electronic Soft Starter
2.11
2.5 Precautions for control signals wiring
1
When wiring (control circuit wiring) to the control terminal block, separate the main circuit wiring
(terminals L1, L2, L3, U, V, W, U’, V’, W’) and the other starter wires and power wires.
Use a 0.13 (AWG26) to 0.8mm² (AWG18) wire for wiring to the control circuit. The tightening
torque must be 0.6N-m (5.3lb-inch).
Use a twisted pair wire or twisted pair shield wire for wiring to the analog signal circuit such as the
analog references and meters. Connect the shield wire to the 0V terminal of the unit. The wire
length must be 30 meters (98.4’) or less.
The length of the sequence input/output contact wire must be 50 meters (164’) or less.
4
Changing the jumper position JP1 in PCA-2005B between “SINK” and “SOURCE” position
respectively can change the sequence input between sink logic and source logic. Open cover
designated as “Control Unit” to access this jumper.
5
Observe the precautions listed in " 5. Control Input/Output Terminals"
After wiring, always check the mutual wiring.
2
3
6
7
At this time do not carry out a megger check or buzzer check on the control circuit.
• Are there any wire scraps or foreign matter left around the terminals?
• Are any screws loose?
• Is the wiring correct?
• Is any terminal contacting any other terminal?
If so, take the necessary corrective measures before proceeding further.
8
9
10
11
12
13
A
Amtech
2.12
ANALOG REFERENCE INPUT
P15
FSV
0-10V Analog Ref
940R
1
+15V
33k
10k
Ground
0V
4-20mA Analog Ref
FSI
0-10V PID Feedback
VIN
Ground
0V
4-20mA Analog input
IIN
VO1
Output Voltage
(0-10V)
VO2
Output Current
2
33k
270R
10k
3
270R
270R
270R
4
(0-10V)
Ground
0V
Active Power
IO1
(4-20mA)
IO2
Power Factor
50R
50R
(4-20mA)
CANL
SEQUENCE INPUT
Run
Stop
Ramp Hold
5
P
C
A
2
0
0
5
CANH
ANALOG REFERENCE OUTPUT
RUN
STOP
PSI6
+24V
6
7
Jogging
External Fault
Fault Reset
PSI1
5.6k
COM
Terminal
8
PSI2
PSI3
PSI4
9
Emergency Stop
PSI5
COM
10
TB1
(Sink logic operation is considered in this diagram)
Fig. 2-5-1
Jumper Position
1. The equipment is shipped with sink logic (JP1 is kept on Sink position) for the programmable
sequence inputs. To change the sink logic to source, change the jumper JP1 position to Source.
11
2. The equipment is shipped with JP3 in NLD position. This means the terminating resistors are not in
picture. To insert the terminating resistors, keep the jumper to LD position.
12
Refer fig. 5-1-1 for better understanding.
13
A
Axpert-Opti torque Electronic Soft Starter
2.13
1
PSO1
PSO2
2
Programmable Sequence
Outputs
PSO3
PSO4
3
COM
TX
RS-485
RX
4
COM
PB
PBN
5
PA
PAN
P
C
A
2
0
0
5
+5V
6
COM
TB1
7
8
FA
FC
Fault Relay
9
FB
R1A
Programmable
Relay 1
10
R1C
R1B
R2A
Programmable
Relay 2
11
R2C
R2B
NC
TB2
12
Fig. 2-5-2
13
A
Amtech
2.14
P
C
A
2
0
0
5
CHAPTER-3: DIGITAL OPERATION PANEL (LCD KEYPAD MODULE)
1
The configuration of the Digital Operation Panel is shown in the below picture. The structure of it is as
shown below.
2
3
4
5
The Digital Operation Panel is equipped with 8-keys as shown in the above picture. The function of
each key is described below.
This key is utilized to reach to the normal screen of digital operation panel from any
parameter, group or mode. The normal screen displays different parameters and status.
This is the screen displayed at power on.
This key when pressed passes the control to next successive modes i.e. NORM
(Normal), MODE-M (Monitor), MODE-A, MODE-B, MODE-C and so on. After the end of
all modes, it will carry the control again to first mode. When changing the mode, the last
accessed parameter of last accessed group of successive mode will be displayed.
This key passes the control to next group in the same mode. The groups can be
accessed only in the incremental direction. At last it will again come to the first group. If
‘’ENTER’’ key is pressed, this key is used to move the cursor position for parameter value
change.
These keys are used to change parameter numbers & parameter value. When ENTER
key is pressed, these keys are used to change the parameter value, otherwise it is used
to navigate the parameters in upward / downward direction in the group.
6
7
8
9
10
11
This key is used to change and save the parameter value. When pressed first time, it will
allow the user to change the parameter value using up / down keys. Once the desired
value is set, it is pressed again to save the changed value. Press NORM key instead of
ENTER, to discard the change.
This key is used to start the unit when the start control is through Digital Operation Panel.
The key is equipped with the status indicating LED. It will glow, when the unit is running.
12
13
This key is used to stop the unit irrespective of the start control source. It is also used to
reset the fault. The stop key is equipped with status indicating LED. It will glow when the
unit is off.
Axpert-Opti torque Electronic Soft Starter
3.1
A
The Digital Operation Panel is also equipped with the fault indicating LED. It will flash in the fault
condition. It is also equipped with four lines, 80-character, 4-Line LCD display for the user-friendly
parameter navigation, monitoring and setting.
1
In the normal condition the screen will be as below.
2
User Selectable four parameters
N
3
o
Norm 1
r
m
4
1
5
V
r
5
0
H
z
m
p
L
c
Norm 2
V
4
R
a
Start Mode
5
6
7
8
9
10
11
12
,
y
l
0
,
S
t
Start Select
o
.
0
%
L
Norm 3
3
0
O
C
Norm 4
p
Soft Starter Status
V
R
a
m
p
L
c
l
*
*
F
a
u
l
I
R
a
m
p
T
m
l
E
M
S
t
o
p
T
R
a
m
p
S
r
l
S
t
a
r
t
J
o
g
g
i
A
u
t
o
C
u
r
B
y
p
N
o
R
D
t
*
e
l
y
r
n
g
R
e
s
t
L
i
m
i
t
a
s
s
r
m
a
l
R
u
a
m
p
H
o
l
d
R
a
m
p
U
p
R
a
m
p
D
o
w
n
B
r
a
k
n
g
S
t
o
p
M
a
i
n
i
s
O
n
n
Fig. 3-1
The above figure also indicates the selected start mode, start selection and the status. The four user
selectable parameters can be configured using A601 ~ A604.
3.1 Status
The fourth line of the Digital Operation Panel (LCD Keypad Module) is used to display different status
of the unit as shown above. More than one status can exist at one time. In this case, the status having
higher priority will be displayed. The priority is as shown in the figure. Fault has the highest priority
and mains on have least priority.
13
A
Amtech
3.2
Table-3-1-1
NO
NAME
1
DESCRIPTION
1
Fault
It indicates that some fault has occurred in the unit.
2
Emergency Stop
It shows that the unit is stopped due to emergency stop command.
3
Start Delay
It shows that the start is delayed by the programmed start Delay.
4
Jogging
It shows that the present operation is jogging.
5
Auto Restart
It shows that auto restart function is in operation.
6
Current Limit
It shows that the current limit function is active.
7
Bypass
It shows that the unit is running in bypass mode.
8
Normal Run
It shows that ramp up action is over and unit is running in normal condition.
9
Ramp Hold
It shows that ramp is hold.
10
Ramp Up
It shows that unit is ramping up.
11
Ramp Down
It shows that unit is ramping down.
12
Braking
It shows that the Breaking is active.
13
Stop
It shows that the unit is in stop condition.
14
Mains On
It shows that the mains power supply is on.
2
3
4
5
6
When first time MODE key is pressed, lastly accessed parameter of lastly accessed group of Mode-M
will appear with its data. Below figure shows the parameter M101 of Group-1 of Mode-M.
Mode-M
M
o
d
e
M
1
0
2
V
R
7
Group-1
a
m
-
M
R
p
,
-
P
h
a
1
4
.
0
L
c
l
,
s
N
G
r
o
u
p
-
1
e
C
u
r
r
e
n
t
A m
p
o
m
a
l
R
u
n
r
8
9
Parameter Data
Parameter Number and Name
Fig. 3-1-1
10
The first line indicates the present mode and group. The second line indicates the parameter number
with its name and the third line shows its value. The fourth line shows the present status and remains
all the time except fault condition, contact information and fault history.
11
12
13
A
Axpert-Opti torque Electronic Soft Starter
3.3
3.2 Modes & parameters
1
The parameters are grouped into Modes and Groups according to their functions.
The configuration of the parameters is as under.
2
MODE
GROUP
PARAMETER
NORM
3
MODE-M
GROUP-1
M101 Output Current
MODE-A
GROUP-2
M102 R - Phase Current
MODE-B
GROUP-3
M103 Y - Phase Current
4
5
6
7
MODE-C
8
Fig. 3-2-1
9
3.3 Parameter display & setting
10
As shown in the above fig, MODE, GROUP, UP & DOWN keys are used to see the parameter value
setting. The parameter value (except MODE-M) can be changed using ENTER, GROUP, UP &
DOWN keys.
11
For example, the default V-Remp Up Time1 in A106 is 30 sec. To change the V-Remp Up Time1 to
40 sec, first go to the below screen using the MODE, GROUP, UP and DOWN key.
12
M
o
d
e
A
1
0
6
V
R
a
m
-
A
V
p
,
G
-
L
R
c
a
m
3
0
l
,
p
S
t
U
p
S
e
o
p
r
o
u
p
-
1
T
i
m
e
1
c
13
Now, press
A
Amtech
3.4
key. The least significant digit will start blinking as shown in the below fig.
M
o
d
e
A
1
0
6
V
R
a
m
-
A
V
p
,
G
-
L
R
c
a
m
3
0
l
,
p
S
t
U
p
S
e
o
p
r
o
u
p
-
1
T
i
m
e
1
c
2
The parameter value now can be set to the desired value using
or
is pressed, the value will increment or decrement. If
move to the left side as shown in the below fig.
M
o
d
e
A
1
0
6
V
R
a
m
M
o
d
e
A
1
0
6
R
a
A
V
p
,
G
-
L
R
c
a
m
3
0
l
,
p
S
t
U
p
S
e
o
p
r
,
or
keys. When
is pressed, the cursor position will
o
u
p
-
1
T
i
m
e
1
m
-
A
V
p
,
G
-
L
R
c
a
m
4
0
l
,
p
S
t
U
p
S
e
o
p
3
4
c
5
6
key once. The value will be incremented by one.
Now, press
V
-
1
r
o
u
p
-
1
T
i
m
e
1
7
c
8
Once the desired value is set, press
key to save the value. The cursor will stop blinking and the
parameter value will be saved to the non-volatile memory. If you do not want to save the new value,
do not press
key. Press
9
key.
CAUTION
Do not remove or insert the display cable between PCA-2005B (Main Control Card) and PCA-2012
(Display Card) in power-energized condition.
Failure to observe this could lead to component failure and tripping of the unit.
10
11
12
13
A
Axpert-Opti torque Electronic Soft Starter
3.5
This page is intentionally left blank.
1
2
3
4
5
6
7
8
9
10
11
12
13
A
Amtech
3.6
CHAPTER-4: TEST OPERATION AND ADJUSTMENT
1
DANGER
Never touch the unit terminals while the power is ON even if the operation is stopped.
Failure to observe this could lead to electric shocks.
Selection of the restart function could lead to unexpected restarting when a fault occurs. The
machine may start suddenly if the power is turned ON, if the run command is present. Do not go
near the machine.
The machine may not stop according to the set Soft Stop time when a stop command is issued if
the ramp down to stop function is selected and the voltage / current limit function is activated.
Prepare a separate emergency stop switch in such cases.
Failure to do so could lead to injuries.
Resetting of a fault while the run signal is input could lead to restarting. Always confirm that the
run signal is OFF before resetting the fault.
Failure to do so could lead to injuries.
2
3
4
5
CAUTION
The heat sink is heated to high temperatures, so never touch them.
Failure to observe this could lead to burns.
Do not block the unit’s ventilation holes.
Failure to observe this could lead to fires.
Confirm the operation of the motor as a single unit before operating the machine.
Failure to do so could lead to injuries or machine damage due to unforeseen movements.
Always prepare a safety backup device so that the machine is not placed in a hazardous situation
when an error occurs in the unit.
Failure to do so could lead to injuries or machine damage or fires.
6
7
8
9
10
11
12
13
A
Axpert-Opti torque Electronic Soft Starter
4.1
The Axpert-Opti torque Series Electronic Soft starter has various setting items. Some of these
include settings that must be made according to the power supply and motor before actually starting
the operation.
The method of the basic operation is explained in this section.
1
Carry out test operation according to the flow shown below
2
The procedures above the dotted line in the below fig are explained in this section.
Start
↓
3
Installation and wiring
Refer Chapter-2
↓
Preparation before turning
power ON
4
↓
Initialization of motor
constants in Mode-B
5
↓
Test operation with operation
panel
6
↓
Setting of parameters for
external control
7
↓
Test operation including
external control
8
9
10
↓
End of test operation
4-1 Preparation before turning power ON
Always confirm the following points before turning ON the power after completion of wiring.
(1) If problem can occur if the motor runs in reverse direction then remove the coupling and belt
coupling the motor and machine, so that the machine can be run as a single unit.
(2) Confirm that the power supply cables are correctly connected to the input terminals (L1, L2, L3).
(3) Make sure that the power voltage and frequency is within the tolerable range.
11
(4) Refer to Chapter-2: Installation & Wiring and correctly connect the main circuit wiring.
(5) Securely fix the motor with the specified method.
(6) Make sure that none of the terminal section screws are loose.
12
13
(7) Make sure that there is no short circuit state in the terminals caused by wire scraps, etc.
(8) Always correctly install the front cover and outer cover before turning the power ON.
Make sure that there is no abnormal noise, smoke or odors at this time. If any abnormality is found,
turn the power OFF immediately.
4.1.1 Selection of start / stop modes
A
With the Axpert-Opti torque, three start modes and four stop modes can be selected. These are set
with the parameter ‘A104: Start Mode Selection’ and ‘A105: Stop Mode Selection’.
Amtech
4.2
Normally, V-Ramp is used in almost 90% applications. However, where the load has to reach to the
full speed within short time, I-Ramp is the preferred start mode. Where, reduction in the current peak
and linear rise of speed is required, use T-Ramp mode. For the test operation, select V-Ramp Start
as start mode and Coast-to-stop as stop mode.
1
A104: Start Mode Selection
=1: V-Ramp Start
=2: I-Ramp Start
=3: T-Ramp Start
A105: Stop Mode Selection
=1: V-Ramp Stop
=2: T-Ramp Stop
=3: Brake Stop
=4: Coast-to-Stop
2
3
4
4.1.2 Selection of start control
The unit can be controlled from various places like Digital Operation Panel (Local), Terminal or from
Host computer. Select appropriate start control in A101. Use Digital Operation Panel (Local) during
the test operation.
A101: Start Control
=1: Local
=2: Terminal
=3: Serial
5
6
4.1.3 Adjusting the ramp time
The ramp time needs to be adjusted according to the applications and start/ stop mode. Do not keep
long ramp time when using the V-Ramp and I-Ramp start mode.
For the V-Ramp start / stop adjust the below parameters. For the test operations, you can continue
with the default settings and later on change as per the application requirements.
7
A106: V-Ramp Up Time1
A107: V-Ramp Down Time1
If using the dual ramp function, adjust A204: V-Ramp Up Time2 and A208: Ramp Down Time2
8
For the I-Ramp start, adjust
A301: I-Ramp Up Time
9
For T-Ramp start / stop, adjust
A401: T-Ramp Up Time
A406: T-Ramp Down Time
10
4.2 Initialization of motor constants in Mode-B
Input the motor rating parameters. Set the following parameters in Mode-B.
B101: Rated Input Voltage (V)
B102: Motor Voltage (V)
B103: Motor Current (A)
B104: Motor Frequency (Hz)
B105: Motor Speed (rpm)
B106: Motor Capacity (kW)
B107: Motor Poles
B108: SS Connection Type
11
Refer Chapter-10 for the power wiring connections for inside delta connections.
13
12
A
Axpert-Opti torque Electronic Soft Starter
4.3
4.3 Test operations
1
When finished with parameter settings, test run the isolated motor, and make sure that there are no
tripping.
Use Digital Operation Panel mode to test run the motor. Press “RUN” key to start the motor.
2
Check
- Did the motor run?
- Is the run direction correct? Check the wiring and operation if abnormal.
3
- Is the rotation smooth?
- Is motor direction is same as required?
4
Press the “STOP” key and stop the motor.
If the motor direction is not the desired one, interchange any two motor terminals.
This completes the test operation with the operation panel.
5
After this, carry out the parameter settings and adjust the load operation to match the user's
application.
6
7
8
9
10
11
12
13
A
Amtech
4.4
CHAPTER- 5: CONTROL INPUT / OUTPUT TERMINALS
1
5.1 Input/output terminal function of PCA-2005B
JP3
LD
2
VIEW OF PCA-2005B
LD
LD
NLD
NLD
3
JP4
JP1
SINK
SOURCE
K1
K2
K3
Fault Relay Prog Relay-1 Prog Relay-2
+
4
5
TB1
TB2
FA
P15
0V
FSV
VIN
FSI
IIN
0V
VO2
VO1
IO1
0V
CANH RUN
IO2
PSI6
COM
CANL STOP +24V
PSI2
PSI1
FC
PSI4
PSI3
FB
R1A
R1C
R1B
+24V PSO1 PSO3 COM
PSI5
COM PSO2 PSO4
TX
R2A
RX
R2C
PB
COM
R2B
PA
PBN
NC
6
+5V
PAN
COM
7
Fig. 5-1-1
Table 5-1-1
SYMBOL
+24V
NAME
+24V source
COM
8
USE
This source is used for the Programmable Sequence Inputs. The
logic for the Programmable Sequence Inputs can be changed to sink
or source with the help of JP1 on the control board. The unit is
shipped with sink logic.
Programmable
Sequence Input
RUN
These are programmable sequence inputs and can be configured for
different 24 functions using C114.
STOP
Programmable
Sequence Input
STOP
These are programmable sequence inputs and can be configured for
different 24 functions using C115.
PSI1-6
Programmable
These are programmable sequence inputs and can be configured for
Sequence Inputs 1 different 24 functions using C101 ~ C106.
~6
PSO1-4
These are programmable sequence outputs and can be configured
Programmable
Sequence Outputs for different 20 functions using C107 ~ C110.
1~4
RUN
P15
+15V source
This is a 10V source used when a reference setter is connected to
the FSV input circuit. The reference setter to be used should be a
variable resistor of 2k and 2W.
0V
Common
This is a common terminal for analog input signals.
9
10
11
12
13
A
Axpert-Opti torque Electronic Soft Starter
5.1
FSV
Reference Setting This is mainly used for setting the reference source input. A
Voltage input
maximum reference setting is available at 10V input. This setting is
valid when FSV 0-10V is selected as PID Reference input (C303) or
PID Feedback input (C304).
FSI
Reference Setting This is mainly used for setting the reference input. A maximum
Current input
reference setting is available at 20mA input. This setting is valid
when FSI 4-20mA is selected as PID Reference input (C303) or PID
Feedback input (C304).
VIN
Voltage input
This is analog voltage input 0-10V and can be used for the PID
Reference input (C303) or PID Feedback input (C304).
IIN
Current Input
This is analog current input 4-20mA and can be used for the PID
Reference input (C303) or PID Feedback input (C304).
VO1
Vout-1
VO2
Vout-2
These are programmable analog voltage outputs 0-10V. In default
condition, output voltage signal is assigned to VO1 and output
current signal is assigned to VO2. Different seven internal signals
can be assigned to these outputs using C201 & C202.
IO1
Iout-1
IO2
Iout-2
TX
DATA+
RX
DATA-
FA
Programmable
Fault Relay
contacts
This is programmable relay and its function is assigned to “FAULT”
condition in default. When a programmed condition occurs, the
section FA-FC is closed and the section FB-FC is open. Other
internal signals can also be output with the help of C113.
Programmable
Relay 1 contacts
This is programmable relay and its function is assigned to “Run”
condition in default. When a programmed condition occurs, the
section R1A-R1C is closed and the section R1B-R1C is open. Other
internal signals can also be output with the help of C111.
Programmable
Relay 2 contacts
This is programmable relay and its function is assigned to “Top of
Ramp” condition in default. When a programmed condition occurs,
the section R2A-R2C is closed and the section R2B-R2C is open.
Other internal signals can also be output with the help of C112.
1
2
3
4
5
6
FC
7
FB
R1A
R1C
8
R1B
R2A
R2C
9
10
R2B
These are programmable analog current outputs 4-20mA. In default
condition, active power is assigned to IO1 and power factor signal is
assigned to IO2. Different seven internal signals can be assigned to
these outputs using C203 & C204.
These two signals are for the two-wire RS-485 serial link. The
protocol used is Modbus-RTU
The control circuit wiring is shown as under. The described precautions must be observed during
wiring. Changing the jumper position JP1 in PCA-2005B between “SINK” and “SOURCE” position can
change the sequence input between sink logic and source logic. The unit is shipped with sink logic.
11
12
13
A
Amtech
5.2
5.2 Programmable sequence input (PSI) wiring
SINK LOGIC
1
SOURCE LOGIC
+24V
+24V
+24V
2
PSI
PSI
5.6k
5.6k
3
L<50m
(164')
COM
L<50m
(164')
4
JP1
SINK
JP1
SINK
5
Fig. 5-2-1
SOURCE
6
SOURCE
Precautions
7
1. Wiring must not be longer than 50m (164’).
2. Use minute current contact.
3. Do not connect to the analog input / output.
4. The sink / source logic can be changed with JP1 as shown in the above figure.
8
5.3 Programmable analog input (PAI) wiring
P15
FSI
940R
+15V
9
20mA
270R
FSV
2k/2W
0V
33k
10
10k
0V
IIN
20mA
270R
VIN
0V
33k
11
+10V
10k
L<30m (98.4')
0V
L<30m (98.4')
12
Fig. 5-3-1
Precautions
1. Use 2kΩ / 2W rating potentiometer for the external variable resistor.
2. The maximum input rating of FSV /VIN is 0 to 10.5V
3. Use a shielded wire shorter than 30m (98.4’) for the wiring.
4. For the shield connections, open the mate side, and connect to 0V terminal on TB1.
5. The maximum input rating for FSI / IIN is 0 to +21mA or 5.67V.
6. Do not connect to the sequence input.
13
A
Axpert-Opti torque Electronic Soft Starter
5.3
5.4 Programmable analog output (PAO) wiring
1
VO1
270R
VO2
270R
Output Voltage
(0-10V)
2
Output Current
(0-10V)
0V
Ground
3
IO1
50R
IO2
50R
Active Power
(4-20mA)
4
Power Factor
(4-20mA)
L<30m (98.4')
5
Fig. 5-4-1
Precautions
6
7
1. Use 10V full-scale meter (impedance 10k or higher).
2. The maximum output current is 1mA for voltage output.
3. Use a shielded wire shorter than 30m (98.4’) for the wiring.
4. For the shield connections, open the mate side, and connect to 0V terminal on TB1.
5.5 Programmable sequence output (PSO) wiring
Open collector type wiring
8
PSO
9
Max 30Vdc/
50mA
COIL
COM
L<50m (164')
10
Fig. 5-5-1
Precautions
11
1. To drive an L load, such as a coil, insert the flywheel diode shown in the drawing.
2. Keep the wiring length to 50m (164’) or less.
3. Use within the 30VDC, 50mA ratings range.
12
13
A
Amtech
5.4
Relay type wiring
1
FA
R1A
R2A
FC
R1C
R2C
FB
R1B
R2B
2
3
L<50m (164')
L<50m (164')
L<50m (164')
PROGRAMMABLE FAULT
RELAY
PROGRAMMABLE RELAY1
PROGRAMMABLE RELAY2
4
Fig. 5-5-2
Precautions
1. Use within the rated range shown below.
5
Rated capacity (resistance load): 250VAC, 1A or 30VDC, 1A
Maximum Voltage: 250VAC
Max. Current: 1A
Switching capacity: 100VA / 100W
6
2. The wire must be shorter than 50m (164’).
7
8
9
10
11
12
13
A
Axpert-Opti torque Electronic Soft Starter
5.5
This page is intentionally left blank
1
2
3
4
5
6
7
8
9
10
11
12
13
A
Amtech
5.6
CHAPTER- 6: PARAMETER SETTINGS & FUNCTIONS
1
6.1 MODE-M: Monitor Parameters
The monitor mode sequentially displays the current, voltage, etc., parameters.
No.
Parameter Name
2
Unit
Res.
Description
%
0.1
Displays the average value of three-phase output current as a % of the
motor rated current.
M102 R-Phase Current
Amp
0.1
It displays the current of R-Phase in ampere.
M103 Y-Phase Current
Amp
0.1
It displays the current of Y-Phase in ampere.
M104 B -Phase Current
Amp
0.1
It displays the current of B -Phase in ampere.
M105 Output Voltage
Vac
1
It displays the Output Voltage. The display may differ from the actual
output voltage.
M106 Input Voltage Vry
Vac
1
It displays the Input Voltage between R & Y phase.
M107 Input Voltage Vyb
Vac
1
M108 Line Frequency
Hz
0.1
It displays the line frequency.
M109 Active Power
kW
0.1
It displays the active power in kW.
M110 Reactive Power
kVR
0.1
It displays the reactive power in kVAR.
GROUP-1
M101 Output Current
M111 Power Factor
3
It displays the Input Voltage between Y & B phase.
0.01
It displays power factor of the motor.
M112 Energy Meter
kWH
0.1
It displays energy consumed by the system in kWH.
M113 Energy Meter
MWH
1
It displays energy consumed by the system in MWH.
1
Displays actual heat sink temperature of the starter.
5
6
GROUP-2
M201 Heat sink Temperature
o
C
7
M202 PSI-12345678 Status
The ON/OFF state of programmable sequence input will display.
M203 PSO-1234567 Status
The ON/OFF state of programmable sequence output will display.
M204 No Of Start
1
Display the number of start in last one hour.
M205 Total Start
1
Total number of starts after product shipment will be counted and
displayed.
M206 Total Conductive Time
Hrs
1
The cumulative power on time after the product shipment will be counted
and displayed in hours.
M207 Total Run Time
Hrs
1
The cumulative run time after product shipment will be counted and
displayed in Hours.
M208 Motor Torque
N-m
0.1
It displays the motor torque in N-m.
0.1
It displays the value of currently selected PID reference in C303.
M209 PID Reference
M210 PID Feedback
0.1
It displays the value of currently selected PID feedback in C304.
%
0.1
It displays the value of analog input in % proportional to 0-10V.
M212 FSI Reference
%
0.1
It displays the value of analog input in % proportional to 4-20mA.
M213 Vin Reference
%
0.1
It displays the value of analog input in % proportional to 0-10V.
M214 Iin Reference
%
0.1
It displays the value of analog input in % proportional to 4-20mA.
M215 Peak Current
Amp
0.1
It displays the peak current drawn by the unit.
M216 Heat sink Temperature
F
1
8
9
10
M211 FSV Reference
o
4
11
12
It displays actual heat sink temperature of the starter in degree
Fahrenheit.
13
A
Axpert-Opti torque Electronic Soft Starter
6.1
No.
1
Parameter Name
Unit
Res.
M301 Rated Current
Amp
0.1
M302 Rated Capacity
kW
1
Description
GROUP-3
2
M303 Control Version
3
5
6
7
It displays the selected Control version.
M304 Unit Serial Number
1
It displays the Serial Number of the unit.
M305 Ship Month
1
It displays the Month of the unit shipment.
M306 Ship Year
1
It displays the year of the unit shipment.
0.01
It displays the selected Display version.
M308 PLC Display 1
1
M309 PLC Display 2
1
M310 PLC Display 3
1
M311 PLC Display 4
1
M312 PLC Display 5
1
M313 PLC Display 6
1
M314 PLC Display 7
1
M315 PLC Display 8
1
M316 PLC Display 9
1
M317 PLC Display 10
1
M318 PLC FLG STS 0-7
1
It displays the signed 16-bit register value from the in built PLC.
It displays the status of the PLC FLG.
GROUP-4: FAULT HISTORY
FLT-1 Fault 1
FLT-2 Fault 2
FLT-3 Fault 3
8
This indicates the rated capacity of the unit in kW.
0.01
M307 Display Version
4
This indicates the rated current of the unit.
Most recent ten faults with the Input Voltage (Vry), Output Current (%),
Total Conductive Time (Hrs) and Heat Sink Temperature (°C) at the time
of the fault will be displayed. Fault 1 indicates latest fault while
successive faults give past faults in descending order.
FLT-4 Fault 4
FLT-5 Fault 5
FLT-6 Fault 6
9
FLT-7 Fault 7
FLT-8 Fault 8
FLT-9 Fault 9
FLT10 Fault 10
10
GROUP-5
This provides the manufacturers contact information.
11
12
Amtech Electronics (India) Limited.
E-6, Electronics Zone
GIDC, Gandhinagar
Gujarat, INDIA Pin: 382028
Ph: ++9179 23289101
Fax: ++9179 2389111
Info@amtechelectronics.com
www.amtechelectronics.com
13
A
Amtech
6.2
Amtech Drives, Inc
3852, Oakcliff Industrial Court
Doraville,
Georgia - 30340,
USA
Ph: 770 469 5240
Fax: 678 894 4043
www.amtechdrives.com
WP: Indicates that this parameter is Write Protected during RUN condition.
6.2 MODE-A Parameters
No.
Parameter Name
Unit
Def
Min
Max
Res.
1
Description
WP
GROUP-1: START/STOP PARAMETERS
A101 Start Control
1
1
3
1
This parameter is used to select start location.
=1: Local
=2: Terminal
=3: Serial
A102 Maintained
Start/Stop
0
0
1
0
When using terminal start/ stop facility, this
parameter gives the choice of having
maintained or momentary contacts for start or
stop.
=0: The start control maintained type
=1: The start/ stop control momentary type.
0.0
0.0
10.0
0.1
The motor start will be delayed from the run
command by the set time. This is used for
synchronization with peripheral machines such
as mechanical brakes.
A104 Start Mode
Selection
1
1
3
1
Select the starting mode.
=1: V-Ramp Start
=2: I-Ramp Start
=3: T-Ramp Start
A105 Stop Mode
Selection
4
1
4
1
Select the stop mode.
=1: V-Ramp Stop
=2: T-Ramp Stop
=3: Brake Stop
=4: Coast to Stop
A103 Start Delay
Sec
2
3
4
5
6
7
A106 V-Ramp Up Time1
Sec
30
1
240
1
Sets the ramp up time for V-Ramp Start and
Jogging.
A107 V-Ramp Down
Time1
Sec
30
1
240
1
Sets the ramp down time for V-Ramp Stop.
%
70
A202+
1
90
1
Sets the voltage level for the kick-start function,
if V-Ramp Start or Jogging is selected.
Sec
0.0
0.0
2.0
0.1
%
41
A202+
1
90
1
Set the jog voltage as a % of the rated input
voltage for the jog I/p.
0
0
1
1
Enable or Disabled the thermal overload during
ramp up.
=0: Disable.
=1: Enable.
10
11
A108 Kick Voltage
A109 Kick Time
A110 Jog Reference
A111 O/L During Ramp
Sets the duration of time the kick-start voltage
applied to the motor.
8
9
GROUP-2: V-RAMP START/STOP PARAMETERS
A201 Dual Ramp
Selection
A202 Pedestal-1
A203 Target
A204 V-Ramp Up Time2
%
0
0
1
1
Select the dual ramp in V-Ramp mode.
=0: Disable
=1: Enable
40
25
70
1
Sets the starting voltage for Ramp-1 for VRamp start. Cannot be set higher than
Pedestal-2 (A205) if dual ramp is enabled
(A201=1).
%
90
25
100
1
This variable item adjusts the destination
voltage after ramp up.
Sec
30
1
240
1
This parameter sets the ramp up time from
pedestal-2 to target for V-Ramp start. Set this
parameter if dual ramp is enabled (A201=1).
12
13
A
Axpert-Opti torque Electronic Soft Starter
6.3
No.
Unit
Def
Min
Max
Res.
A205 Pedestal-2
%
70
A202
90
1
Sets the starting voltage for Ramp-2 for VRamp Start, when dual damp start is enabled
(A201=1). It is adjustable from Pedestal-1
(A202) to Target (A203).
A206 Initial Voltage-1
%
90
25
100
1
Sets the initial voltage for Ramp-1 for the VRamp stop. Cannot be set lower than Initial
Voltage-2 (A209) if dual ramp is enabled
(A201=1).
3
A207 Final Voltage
%
40
25
70
1
This parameter adjusts the destination voltage
during V-Ramp stop. Cannot be set higher than
Initial Voltage-2 (A209) if dual ramp is enabled
(A201=1).
4
A208 Ramp Down Time2
Sec
30
1
240
1
This parameter sets the ramp down time from
Initial Voltge-2 (A209) to Final Voltage (A207).
Set this parameter, if dual ramp is enabled
(A201=1).
5
A209 Initial Voltage-2
%
70
25
A206
1
Sets the initial voltage for Ramp-2 for V-Ramp
stop, when dual ramp is enabled (A201=1). It is
adjustable from Initial Voltage-1 (A206) to Final
Voltage (A207).
1
2
6
Parameter Name
GROUP-3: I-RAMP START PARAMETERS
A301 I-Ramp Up Time
A302 Initial Current
7
10
1
60
1
Sets the ramp up time for I-Ramp Start.
%
100
100
300
1
Sets the initial current level for I-Ramp Start.
0.10
0.01
2.00
0.01
This parameter adjusts the proportional gain for
the PI controller, which controls the current
during I-Ramp Start.
0.10
0.01
100.00
0.01
This parameter adjusts the integral time for the
PI controller, which controls the current during IRamp Start.
Sec
GROUP-4: T-RAMP START/STOP PARAMETERS
A401 T-Ramp Up Time
9
Sec
A303 I-Proportional Gain
A304 I-Integral Time
8
Sec
30
1
240
1
Sets the ramp up time for T-Ramp Start.
A402 Initial Torque
%
20
1
250
1
Sets the initial torque level for T-Ramp Start.
A403 Torque Limit
%
100
1
250
1
Sets the torque limit for T-Ramp Start.
0.5
0.1
2.0
0.1
This parameter adjusts the proportional gain for
the PI controller, which controls the torque
during T-Ramp Start.
This parameter adjusts the integral time for the
PI controller, which controls the current during
T-Ramp Start.
A404 T-Proportional Gain
10
11
A405 T-Integral Time
Sec
0.10
0.01
100.00
0.01
A406 T-Ramp Down
Time
Sec
30
1
240
1
Sets the ramp down time for T-Ramp Stop.
%
20
1
100
1
Sets the end torque level at stop as a % of
motor nominal torque.
A407 End Torque
12
GROUP-5: BRAKE STOP PARAMETERS
A501 Brake Ramp Up
Time
A502 Brake Voltage
13
Description
A503 Brake Time
A
Amtech
6.4
Sec
5.0
0.1
20.0
0.1
Set the ramp time for the voltage to reach to
Brake Volt (A502) during Brake Stop.
%
25
25
100
1
Set the Brake Voltage for Brake Stop.
Sec
5
1
240
1
This parameter sets the time for the Brake
Voltage (A502) to be applied to the motor
during Brake Stop.
WP
No.
Parameter Name
Unit
Def
Min
Max
Res.
Description
1
WP
GROUP-6: PARAMETER SELECTION FOR NORMAL DISPLAY SCREEN
A601 Norm Parameter 1
1
1
23
1
Select from this to display on normal screen.
A602 Norm Parameter 2
2
1
23
1
=1: M101 %L
=2: M102 Ir
=3: M103 Iy
A603 Norm Parameter 3
6
1
23
1
=4: M104 Ib
=5: M105 Vo
=6: M106 Vry
A604 Norm Parameter 4
5
1
23
1
=7: M107 Vyb
=8: M108 Hz
=9: M109 KW
A605 Norm Parameter 5
8
1
23
1
=10: M110 kVR =11: M111 PF
=12: M112 KWH
A606 Norm Parameter 6
9
1
23
1
=13: M113MWH =14: M201 ºC
=15: M208 N-m
A607 Norm Parameter 7
14
1
23
1
=16: M209 PR
=17: M210 Fb
=18:M211 FSV
A608 Norm Parameter 8
12
1
23
1
=19: M212 FSI
=20: M213 VIN
=21: M214 IIN
2
3
4
=22: M215 APk =23: M216 ºF
5
6
7
8
9
10
11
12
13
A
Axpert-Opti torque Electronic Soft Starter
6.5
6.3 MODE-B: Parameters
1
No.
Parameter Name
Unit
Def
Min
Max
Res.
Description
WP
1
1
1
1
Select suitable rated input voltage from the
below selections for 200, 400V, 500V & 600V
Series.
=1:230V
3
1
6
1
=1: 380V
=4: 440 V
=2: 400V
=5: 460V
=3: 415V
=6:480V
3
1
4
1
=1: 500V
=4: 575 V
=2: 525V
=3: 550V
3
1
3
1
=1: 600V
=2: 660V
=3: 690V
230
230
230
1
415
380
480
1
550
500
575
1
This is the Motor rated Voltage. Set the voltage
mentioned on the motor nameplate. The setting
value depends on the 200V, 400V, 500V or
600V Series model.
690
600
690
1
Amp
M301
0.3*
M301
M301*
1.73
0.1
B104 Motor Frequency
Hz
1
1
2
1
Set the motor rated frequency from the motor
nameplate.
=1: 50Hz
=2: 60Hz
B105 Motor Speed
rpm
1500
750
3600
1
Set the motor rated rpm from the motor
nameplate.
B106 Motor Capacity
kW
M302
30.0
M302
0.1
B107 Motor Poles
4
2
8
2
Insert the motor poles.
B108 SS Connection
Type
1
1
2
1
Select the soft starter connection type.
=1: Inline
=2: Inside delta
GROUP-1: MOTOR PARAMETER
B101 Rated Input
Voltage
2
Vac
3
4
B102 Motor Voltage
Vac
5
B103 Motor Current
6
7
8
9
10
13
Set the motor’s rated capacity.
GROUP-2: PROTECTION PARAMETERS – 1
B201 Under Frequency
Protection Delay
Sec
5
0
60
1
Delays tripping on detection of a low supply
frequency, when the motor is running. Set to 60
to disable the Under Frequency Fault.
B202 Over Frequency
Protection Delay
Sec
5
0
60
1
Delays tripping on detection of a high supply
frequency, when the motor is running. Set to 60
to disable the Over Frequency Fault.
B203 Low Current Alarm
Set Point
%
50
1
100
1
Sets the level at which the low current alarm
operates as a percentage of motor current.
Programmable Relay output can be used to
indicate the state of low current alarm using
C111 ~ C113.
B204 High Current
Alarm Set Point
%
350
100
800
1
Sets the level at which the high current alarm
operates as the percentage of motor current.
Programmable Relay output can be used to
indicate the state of high current alarm using
C111 ~ C113.
B205 I-Unbalance Level
%
30
10
100
1
Sets the I-unbalance level as a % of the motor
rated current. Set to 100% to disable the
function.
B206 I-Unbalance Delay
Sec
10
10
120
1
Delays tripping on detection of I-unbalance fault.
11
12
Set the motor rated current from the motor
nameplate. It can be set to 30% of the unit rated
current M301.
A
Amtech
6.6
No. Parameter Name
Unit
B207 Emergency Stop
Mode
B208 Number Of Restart
Def
Min
Max
Res.
1
1
3
1
Set the stopping method for the emergency
stop.
=1: Coast to Stop
=2: Coast to Stop with fault output
=3: Stop as per A105
2
0
5
1
Sets maximum numbers of restart attempts for
11 faults.
Sets the wait time between two starts during
auto restart operation.
Sec
10
1
60
1
B210 Bypass Contactor
Delay Time
Sec
1.0
0.0
30.0
0.1
0
0
1
1
1
WP
0
B209 Restart Wait Time
B211 Test Mode
Selection
Description
3
This parameter sets the delay time for the
bypass contactor to operate, if the load current
has not decreased below 115% after completion
of Ramp Up Time & I-Limit Time.
4
Enable or Disabled the Test Mode. Test Mode is
only for factory test purpose.
=0: Disable.
=1: Enable.
5
GROUP-3: PROTECTION PARAMETERS – 2
B301 I-Limit Level
%
300
A302+
1
600
1
Sets the current limit as a % of motor rated
current. Applicable for all modes.
B302 I-Limit Time
Sec
30
10
60
1
Sets the time limit for which the current limit can
be active. Unit will trip if the total time of current
limit operation exceeds the set time.
B303 I-Low Level
%
0
0
100
1
This parameter sets the threshold of the under
current trip as % of motor rated current. Active
only during the running condition.
B304 I-Low Time
min
0
0
20
1
This parameter allows the time that the current
must remain below the set threshold level for
the undercurrent before the trip will occur.
B305 Overload Setting
%
105
50
105
1
Setting of this parameter will decide the service
factor for thermal overload curves.
3
1
4
1
Choose the curves for the motor ‘Thermal
Overload Protection’.
=1: Class 30
=2: Class 20
=3: Class 10
=4: Class 2
500
100
800
1
This parameter sets the threshold of the
instantaneous over current trip as % of motor
rated current.
B308 I-Limit Kick
1
0
1
1
This parameter controls the current in the kickstart region.
=0: Disable
=1: Enable
B309 Parameter Lock
0
0
9999
1
Set to prevent unintentional parameter changes
from the digital operational panel.
B310 Change Password
0
0
9999
1
User can change the 4-digit password for
parameter Lock.
B306 Overload Curve
Selection
B307 I-Trip Level
%
6
7
8
9
10
11
12
13
A
Axpert-Opti torque Electronic Soft Starter
6.7
1
No. Parameter Name
Unit
B311 Default Value Load
Def
Min
Max
Res.
0
0
111
1
2
The saved parameter will be fetched from
memory and now the unit will respond to these
parameters.
333
All the user parameters will be set to default (US
standard) excluding C205 to C219 & PLC
parameters.
444
All the user parameters will be set to default
excluding C205 to C219 & PLC parameters.
555
When set to 555, the fault history buffer is
cleared. No previous fault code and parameter
will be available.
666
All the user parameters will be set to default
including C205 to C219 & PLC parameters.
777
All PLC parameters set to default value.
4
WP
The current active parameters will be saved to
non-volatile memory.
222
3
5
Description
Note that the value entered in this parameter will not be memorized. If correct value is entered, appropriate action will be
taken and “00” will be displayed. If incorrect value is entered, no action will be taken and “00” will be displayed.
6
B312 Over Voltage Limit
%
120
100
120
1
Sets the level at which the Over Voltage Fault is
detected as a percentage of Rated Input
Voltage (B101).
B401 Phase Direction
Fault
0
0
1
0
When enabled, the unit will trip if the input
phase rotation is reversed.
=0: Disable.
=1: Enable.
B402 Firing Fault
0
0
1
0
When enabled, the unit will trip whenever the
firing fault occurs.
=0: Disable.
=1: Enable.
70
0
100
1
Sets ground fault level as a % of motor rated
current. Set to 0% to disable the fault. It will be
automatically disabled when using for inside
delta type.
B404 Ground Fault
Selection
1
0
1
1
This parameter provides selection of ground
fault. It will be automatically disabled when
using for inside delta type.
=0: Disable during ramp up
=1: Enable during ramp up
B405 Pick Up Function
1
0
1
1
When enabled, the unit will auto-restart during
the voltage drop conditions (25% or more of
rated input voltage B101 drop for more than
20msec).
82
0
95
1
This is temperature alarm level set point.
Whenever the heat sink temperature exceeds
the set value, the Temp Alarm output will be set.
Hysteresis of 2°C hysteresis will occur with
temperature alarm.
0
0
1
1
By Using this parameter In-Built PLC function
can Enable or Disable.
=0: Disable
=1: Enable
GROUP-4: FAULT SETTING
7
8
B403 Ground Fault Level
%
9
10
11
12
13
B406 Temperature
Alarm Level
B407 In-Built PLC
Selection
A
Amtech
6.8
°C
No. Parameter Name Unit
B408 Copy Para set
B409 Paste Para set
Def
Min
Max
Res.
0
0
8
1
0
0
8
1
Description
WP
1
Copy all user and PLC parameters from control
side to the Display EEPROM. User can copy up
to 8 sets of all parameters.
=0:Ent Copy Set
=5:Copy Set 5
=1:Copy Set 1
=6:Copy Set 6
=2:Copy Set 2
=7:Copy Set 7
=3:Copy Set 3
=8:Copy Set 8
=4:Copy Set 4
2
Paste all user and PLC parameters from Display
EEPROM to the control side. User can paste 8
sets of all parameters.
=0:Ent Copy Set
=5:Paste Set 5
=1:Paste Set 1
=6:Paste Set 6
=2:Paste Set 2
=7:Paste Set 7
=3:Paste Set 3
=8:Paste Set 8
=4:Paste Set 4
3
4
5
6
7
8
9
10
11
12
13
A
Axpert-Opti torque Electronic Soft Starter
6.9
6.4 MODE –C: Parameters
1
No.
Parameter Name
Unit
Def
Min
Max
Res.
Description
GROUP-1: PROGRAMMABLE INPUT/OUTPUT
2
3
C101 PSI-1
2
1
24
1
The different options are as under.
C102 PSI-2
3
1
24
1
C103 PSI-3
4
1
24
1
C104 PSI-4
5
1
24
1
C105 PSI-5
8
1
24
1
C106 PSI-6
9
1
24
1
=1: Not Used
=3: Jogging
=5: Fault Reset
=7: Main Cont Flt
=9: Ramp Hold
=11: PID Bypass
=13: Emergency Stop(NC)
=15: RUN
=17: PLC input 1
=19: PLC input 3
=21: PLC input 5
=23: PLC input 7
C107 PSO-1
2
1
20
1
The different options are as under.
C108 PSO-2
7
1
20
1
C109 PSO-3
8
1
20
1
C110 PSO-4
9
1
20
1
C111 Programmable
Relay1
3
1
20
1
C112 Programmable
Relay2
4
1
20
1
=1: Not Used
=3: Run
=5: Terminal
=7: I-Limit Alarm
=9: High Current Alarm
=11: Rev Cont
=13: PID Low Limit
=15: PLC Output 2
=17: PLC Output 4
=19: PLC Output 6
C113 Programmable
Fault Relay
6
1
20
1
C114 PSI-RUN
15
1
24
1
C115 PSI-STOP
16
1
24
1
4
5
6
7
8
9
10
11
13
A
=2: Ready
=4: Top Of Ramp
=6: Fault Alarm
=8: Low Current Alarm
=10: Temp Alarm
=12: PID Up Limit
=14: PLC Output 1
=16: PLC Output 3
=18: PLC Output 5
=20: PLC Output 7
The different options are same as PSI option.
GROUP-2: ANALOG OUTPUT SELECTION
C201 VO-1
1
1
12
1
This configures the function of analog output
C202 VO-2
2
1
12
1
C203 IO-1
3
1
12
1
C204 IO-2
5
1
12
1
=1: Output Voltage
=3: Active Power
=5: Power Factor
=7: Motor Torque
=9: PLC A-O/P 1
=11: PLC A-O/P 3
C205 Vout-1 Gain
0.865
0.500
1.500
0.001 This is gain setting for the VO1 analog output.
C206 Vout-2 Gain
0.865
0.500
1.500
0.001 This is gain setting for the VO2 analog output.
C207 Iout-1 Gain
0.850
0.500
1.500
0.001 This is gain setting for the IO1 analog output.
705
500
1000
C209 Iout-2 Gain
0.850
0.500
1.500
C210 Iout-2 Bias
705
500
1000
1
This is bias setting for the IO2 analog output.
200
50
500
1
This parameter scales the Analog Output
Current from 0-10V as a set 50 – 500% of motor
rated current.
1.260
0.500
1.500
C212 FSV Gain
%
C213 FSV Bias
0
0
500
C214 FSI Gain
1.350
0
1.500
C215 FSI Bias
760
0
1000
C216 Vin Gain
1.060
0.500
1.500
C217 Vin Bias
0
0
500
C218 Iin Gain
1.100
0.500
1.500
C219 Iin Bias
760
0
1000
Amtech
6.10
1
=2: Output Current
=4: Reactive Power
=6: PID Output
=8: Heat Sink Temp
=10: PLC A-O/P 2
=12: PLC A-O/P 4
C208 Iout-1 Bias
C211 Scaling Current
12
=2: Terminal
=4: External Flt (NO)
=6: Bypass Cont Flt
=8: Emergency Stop (NO)
=10: Rev cont Flt
=12: PID Disable
=14:External Flt (NC)
=16: STOP
=18: PLC input 2
=20: PLC input 4
=22: PLC input 6
=24: PLC input 8
This is bias setting for the IO1 analog output.
0.001 This is gain setting for the IO2 analog output.
0.001 This is gain setting for the FSV Reference.
1
This is bias setting for the FSV Reference.
0.001 This is gain setting for the FSI Reference.
1
This is bias setting for the FSI Reference.
0.001 This is gain setting for the Vin Reference.
1
This is bias setting for the Vin Reference.
0.001 This is gain setting for the Iin Reference.
1
This is bias setting for the Iin Reference.
WP
No.
Parameter
Description
1
Unit
Def
Min
Max
Res.
WP
C220 FSV/FSI Time
Constant
msec
50
0
1000
1
This parameter set the filter time constant for
the FSV and FSI analog inputs.
C221 VIN/IIN Time
Constant
msec
50
0
1000
1
This parameter set the filter time constant for
the VIN and IIN analog inputs.
2
3
GROUP-3: PID CONTROL SELECTION
C301 PID Control
Selection
0
0
1
1
Enable or disable the PID control action.
=0: Disable.
=1: Enable.
C302 PID Polarity
1
0
1
1
This can be used to invert the PID output.
=0: Negative
=1: positive
C303 PID Reference
Input
5
1
10
1
Decides the set input point for the PID.
=1: FSV 0-10V
=3: Vin 0-10V
=5: Local
=7: PLC A-O/P 1
=9: PLC A-O/P 3
C304 PID Feedback
Input Selection
3
8
1
Sec
C307 Derivative Gain
=2: FSI 4-20mA
=4: Iin 4-20mA
=6: Serial
=8: PLC A-O/P 2
=10: PLC A-O/P 4
5
Decides the feedback input point for the PID.
=1: FSV 0-10V
=3: Vin 0-10V
=5: PLC A-O/P 1
=7: PLC A-O/P 3
C305 Proportional Gain
C306 Integral Time
1
4
=2: FSI 4-20mA
=4: Iin 4-20mA
=6: PLC A-O/P 2
=8: PLC A-O/P 4
1.0
0.1
10.0
0.1
Sets the proportional gain for PID controller.
1.0
0.1
100.0
0.1
Sets the integral time for PID controller.
0.00
0.00
1.00
0.01
Sets the derivative gain for PID controller.
6
7
C308 PID deviation
Upper Limit
%
100.0
50.0
100.0
0.1
Sets the PID deviation upper limit.
C309 PID deviation
Lower Limit
%
0.0
0.0
50.0
0.1
Sets the PID deviation lower limit.
C310 PID Offset
Adjustment
%
0.0
-100.0
100.0
0.1
Sets the offset for output after PID control.
C311 PID Reference
Setting
%
50.0
1.0
100.0
0.1
Sets the reference value in % if operation panel
option is selected as input in C303.
C312 PID Display Scale
- Max
100.0
1.0
6553.5
0.1
This parameter assigns the full-scale value for
the PID input/output.
C313 PID Display Scale
- Min
0.0
0.0
6553.0
0.1
This parameter assigns the min value for the
PID input/output.
1
1
8
1
C314 PID Display Unit
Selection
8
This parameter gives a choice to user to display
the unit for the PID parameters.
=1: %
=2: PSI (Pressure per Square Inch)
=3: kg/cm2
=4: °C
=5: °F
=6: CFM (Cubic Feet per Minute)
=7: m3/h (Cubic Meter per Hour)
=8: LPM (Liter per Minute)
9
10
11
12
GROUP-4: SERIAL COMMUNICATION
C401 Baud Rate
bps
4
1
5
1
Sets the baud rate for the serial communication.
=1: 1200
=2: 2400
=3: 4800
=4: 9600
=5: 19200
13
A
Axpert-Opti torque Electronic Soft Starter
6.11
No.
1
Def
Min
Max
Res.
C402 Station Number
Parameter
Unit
1
1
247
1
Sets the station number (address).
C403 Parity
1
1
3
1
Setting the parity requirement for the
communication.
=1: No Parity
=2: Odd Parity
=3: Even Parity
0.01
0.00
2.00
0.01
0
0
1
1
Enable or disable the operation panel
communication loss fault. If enabled, The Unit
will generate fault if it does not receive any
response from the operation panel within 5sec.
=0: Disable
=1: Enable
Plc panel parameter 1 & 2 are used in-built PLC
for Timer 1 application or also used in PLC
application.
2
C404 Response Time
3
C405 Operation Panel
Communication
Loss Selection
Sec
4
Description
Sets the minimum time from receiving the
command to returning an answer.
GROUP-5: PLC PANEL PARAMETER
5
6
7
8
9
C501 PLC Panel Par1
0
0
32767
1
C502 PLC Panel Par2
0
0
32767
1
C503 PLC Panel Par3
0
0
32767
1
C504 PLC Panel Par4
0
0
32767
1
C505 PLC Panel Par5
0
0
32767
1
C506 PLC Panel Par6
0
0
32767
1
C507 PLC Panel Par7
0
0
32767
1
C508 PLC Panel Par8
0
0
32767
1
C509 PLC Panel Par9
0
0
32767
1
C510 PLC Panel Par10
0
0
32767
1
C511 PLC Panel Par11
0
0
32767
1
C512 PLC Panel Par12
0
0
32767
1
10
11
12
13
A
Amtech
6.12
Plc panel parameter 3 & 4 are used in-built PLC
for Timer 2 application or also used in PLC
application.
Plc panel parameter 5 & 6 are used in-built PLC
for Timer 3 application or also used in PLC
application.
Plc panel parameter 7 & 8 are used in-built PLC
for Timer 4 application or also used in PLC
application.
Plc panel parameter 9 to12 can be used in-built
PLC application.
WP
1
6.5 MODE-P: IN-BUILT PLC FUNCTIONS
No.
Parameter
Unit
Def
Min
Max
Res
Description
WP
GROUP-1: IN-BUILT PLC COMMAND PARAMETERS
P101 PLC Inst 1 ~ PLC
~ Inst 10
P110
0
0
-
1
IN-BUILT PLC Command 1 to 10.
2
1
IN-BUILT PLC Command 11 ~ 20.
3
1
IN-BUILT PLC Command 21 ~ 30.
4
1
IN-BUILT PLC Command 31 ~ 40.
5
1
IN-BUILT PLC Command 41 ~ 50.
1
IN-BUILT PLC Command 51 ~ 60.
7
1
IN-BUILT PLC Command 61 ~ 70.
8
1
IN-BUILT PLC Command 71 ~ 80.
9
1
IN-BUILT PLC Command 81 ~ 90.
10
1
IN-BUILT PLC Command 91 ~ 100.
11
GROUP-2: IN-BUILT PLC COMMAND PARAMETERS
P201 PLC Inst 11 ~ PLC
~ Inst 20
P210
0
0
-
GROUP-3: IN-BUILT PLC COMMAND PARAMETERS
P301 PLC Inst 21 ~ PLC
~ Inst 30
P310
0
0
-
GROUP-4: IN-BUILT PLC COMMAND PARAMETERS
P401 PLC Inst 31 ~ PLC
~ Inst 40
P410
0
0
-
GROUP-5: IN-BUILT PLC COMMAND PARAMETERS
P501 PLC Inst 41 ~ PLC
~ Inst 50
P510
0
0
-
6
GROUP-6: IN-BUILT PLC COMMAND PARAMETERS
P601 PLC Inst 51 ~ PLC
~ Inst 60
P610
0
0
-
GROUP-7: IN-BUILT PLC COMMAND PARAMETERS
P701 PLC Inst 61 ~ PLC
~ Inst 70
P710
0
0
-
GROUP-8: IN-BUILT PLC COMMAND PARAMETERS
P801 PLC Inst 71 ~ PLC
~ Inst 80
P810
0
0
-
GROUP-9: IN-BUILT PLC COMMAND PARAMETERS
P901 PLC Inst 81 ~ PLC
~ Inst 90
P910
0
0
-
GROUP-A: IN-BUILT PLC COMMAND PARAMETERS
PA01 PLC Inst 91 ~ PLC
~ Inst 100
PA10
0
0
-
12
13
A
Axpert-Opti torque Electronic Soft Starter
6.13
6.6 Function explanation
1
GROUP-1
M101: Output Current (%)
2
It displays the average value of three-phase output current as a percentage of the rated motor current
B103.
Output Current (%) = Output Current (M101) × 100/ Motor Current (B103)
When the unit is stop, it will display zero. When selected for the normal parameter display in
A601~A608, the value will be displayed with “%L” unit.
3
M102: R-Phase Current (Amp)
4
This parameter displays the value of current in R-phase (L1) of the unit in Ampere. When selected for
the normal parameter display in A601~A608, the value will be displayed with “Ir” unit.
5
M103: Y-Phase Current (Amp)
This parameter displays the value of current in Y-phase (L2) of the unit in Ampere. When selected for
the normal parameter display in A601~A608, the value will be displayed with “Iy” unit.
6
M104: B-Phase Current (Amp)
7
This parameter displays the value of current in B-phase (L3) of the unit in Ampere. When selected for
the normal parameter display in A601~A608, the value will be displayed with “Ib” unit.
Note: When soft starter is used for inside delta type connection (B108=2), parameters M102, M103
and M104 show the currents in delta branch.
8
M105: Output Voltage (Vac)
9
10
This parameter displays the output line-to-line voltage. This is calculated voltage based on voltage
command. This may differ from actual output voltage. The actual output voltage depends on input
supply voltage. When the unit is stop, it will display zero.
When selected for the normal parameter display in A601~A608, the value will be displayed with “Vo”
unit.
M106: Input Voltage Vry (Vac)
This parameter displays the actual input line-to-line voltage between R (L1) & Y (L2) phase. When
selected for the normal parameter display in A601~A608, the value will be displayed with “Vry” unit.
11
M107: Input Voltage Vyb (Vac)
12
This parameter displays the actual input line-to-line voltage between Y (L2) & B (L3) phase. When
selected for the normal parameter display in A601~A608, the value will be displayed with “Vyb” unit.
M108: Line Frequency (Hz)
13
This parameter displays the input supply frequency of the system. When selected for the normal
parameter display in A601~A608, the value will be displayed with “Hz” unit.
A
Amtech
6.14
1
M109: Active Power (kW)
This parameter displays the active power drawn by the unit. This may differ from the actual active
power. When the unit is stop, it will display zero. When selected for the normal parameter display in
A601~A608, the value will be displayed with “kW” unit.
2
M110: Reactive Power (kVAR)
This parameter displays the reactive power drawn by the unit. This may differ from the actual output
power. When the unit is stop, it will display zero. When selected for the normal parameter display in
A601~A608, the value will be displayed with “kVR” unit.
3
M111: Power Factor
4
This parameter displays the power factor of the load. This value may differ from actual power factor.
When the unit is stop, it will display zero. When selected for the normal parameter display in
A601~A608, the value will be displayed with “PF” unit.
5
M112: Energy Meter (kWh)
6
M113: Energy Meter (MWH)
This parameter displays the total output power consumption per hour basis. This may differ from
actually consumed output energy. This is stored in the non-volatile memory.
When selected for the normal parameter display screen in A601-A608, it will appear as “kWH” and
“MWH” unit respectively on display screen.
7
8
9
10
11
12
13
A
Axpert-Opti torque Electronic Soft Starter
6.15
GROUP-2
1
M201: Heat Sink Temperature (°C)
This parameter displays the actual heat sink temperature in °C. When selected for the normal
parameter display in A601~A608, the value will be displayed with “°C” unit.
2
M202: Programmable Sequence Inputs (PSI) Status
This parameter displays the status of various programmable sequence inputs i.e. whether they are
OFF (0) or ON (1) for each PSI from 1-8.
3
4
M
o
d
e
M
2
0
2
V
R
a
m
-
M
P
p
,
S
L
I
c
5
-
l
G
r
o
u
1
2
3
4
5
6
7
8
0
1
0
0
0
0
0
0
,
N
o
r
m
a
l
p
-
2
R
u
n
Fig. 6-6-1
6
As shown above in fig. 6-6-1, line-2 shows the programmable sequence input and line-3 shows the
status of respective input. The “0” value indicates that the programmable sequence input is OFF and
“1” indicates ON. In the above screen, only PSI-2 is ON and the others are OFF.
M203: Programmable Sequence Outputs (PSO) Status
7
8
This parameter displays the status of various programmable sequence outputs. PSO-5 indicates the
status of programmable fault relay, PSO-6 & 7 indicates the status of programmable relay 1 and relay
2 respectively.
M
o
d
e
M
2
0
3
V
R
a
m
-
M
P
p
,
S
L
O
c
-
l
G
r
o
1
2
3
4
5
6
7
0
1
0
0
0
1
0
,
N
o
r
m
a
l
u
p
-
2
R
u
n
Fig. 6-6-2
9
As shown above in fig. 6-6-2, line-2 shows the programmable sequence output and line-3 shows the
status of respective output. The “0” value indicates that the programmable sequence output is OFF
and “1” indicates ON. In the above screen, only PSO-2 and PSO-6 are ON and the others are OFF.
10
M204: Number of starts
This parameter displays the number of starts in last one hour.
11
M205: Total starts
This parameter displays the total number of starts after product shipment.
12
M206: Total Conductive Time (Hrs)
13
The total (cumulative) power on time after product shipment is counted and displayed in this
parameter.
M207: Total Run Time (Hrs)
A
The total (cumulative) unit run time after product shipment is counted and displayed in this parameter.
Amtech
6.16
M208: Motor Torque (N-m)
1
This parameter displays the motor torque in N-m. When selected for the normal parameter display in
A601~A608, the value will be displayed with “N-m” unit.
M209: PID Reference
2
This parameter displays the value of currently selected PID reference input source in percentage.
When local (Digital Operation Panel) option is selected as PID reference input source, it will display
the value of C311. When selected for the normal parameter display in A601~A608, the value will be
displayed with “PR” unit. Different units can be assigned to this quantity using C312.
3
M210: PID Feedback
4
This parameter displays the value of currently selected PID feedback input source in percentage.
When selected for the normal parameter display in A601~A608, the value will be displayed with “Fb”
unit.
5
M211: FSV Reference (%)
It displays the full-scale voltage in 0-100% proportional to 0-10V at FSV terminal. When selected for
the normal parameter display in A601~A608, the value will be displayed with “FSV” unit.
6
M212: FSI Reference (%)
It displays the full-scale current in 0-100% proportional to 4-20mA at FSI terminal. When selected for
the normal parameter display in A601~A608, the value will be displayed with “FSI” unit.
7
M213: VIN Reference (%)
It displays the full-scale voltage in 0-100% proportional to 0-10V at VIN terminal. When selected for
the normal parameter display in A601~A608, the value will be displayed with “VIN” unit.
8
M214: IIN Reference (%)
It displays the full-scale current in 0-100% proportional to 4-20mA at IIN terminal. When selected for
the normal parameter display in A601~A608, the value will be displayed with “IIN” unit.
M215: Peak Current (Amp)
9
10
This parameter displays the peak current drawn by the unit in Amp. When selected for the normal
parameter display in A601~A608, the value will be displayed with “APk” unit.
11
0
M216: Heat sink Temperature ( F)
This parameter displays the actual heat sink temperature in 0F. When selected for the normal
parameter display in A601~A608, the value will be displayed with “°F” unit.
12
13
A
Axpert-Opti torque Electronic Soft Starter
6.17
GROUP-3
1
M301: Rated Current (Amp)
This parameter displays the rated current capacity of unit.
2
M302: Rated Capacity (kW)
This parameter displays the rated kW capacity of unit.
3
M303: Control Version
This parameter displays the software version of control board of the unit.
4
M304: Unit Serial Number
This parameter displays the serial number of the unit.
5
M305: Ship Month
This parameter displays the month of unit shipment.
6
M306: Ship Year
This parameter displays the year of unit shipment.
7
M307: Display Version
This parameter displays the software version of display board of the unit.
8
9
M308 to M317: PLC Display 1 ~ 10
For IN-BUILT PLC programming, there are 115 16-bit registers, 10 values of these registers can be
displayed in parameter M308 to M317 and that all values will be save in EEPROM during power
down. (Related PLC command is DISPLAY_REG (061)).
M318: PLC FLAG Status 0~7
10
For IN-BUILT PLC programming, there are 100 1-bit flags, 8 of these flag status can be display in
parameter M323. (Related PLC command is DISPLAY_FLG (062)).
11
12
13
A
Amtech
6.18
GROUP-4: FAULT HISTORY
1
FLT-1~FLT10: Fault 1~10
This parameter displays the most recent ten faults with the values of Input Voltage (Vry), Output
o
Current (%), Total Conductive Time (Hrs) and Heat Sink Temperature ( C) at the time of fault
occurrence. Fault-1 indicates latest fault while successive faults gives past faults in descending order.
M
o
1
d
e
-
M
F
L
T
-
E
x
t
e
r
n
a
l
4
1
5
V
r
y
2
7
5
H
r
s
1
1
G
r
o
u
p
-
F
a
u
l
t
5
0
.
0
%
L
5
0
°
C
2
4
3
4
Fig. 6-6-3
As shown in fig. 6-6-3, line-2 shows the fault code, line-3 shows the Input Voltage & Output current
and line-4 shows the Total Conductive Time & heat sink temperature. If no fault is detected since
shipment, line-2 displays “No previous fault” and the value of different parameters will be read as
zero.
Same way FLT-2 ~ FLT10 shows the previous fault codes and parameters at the time of fault
occurrence.
5
6
7
8
9
10
11
12
13
A
Axpert-Opti torque Electronic Soft Starter
6.19
MODE-A
1
GROUP - 1: START/STOP PARAMETERS
A101: Start Control
2
Select start location.
1: Local
2: Terminal
3: Serial
3
The unit can be started from Local (Digital Operation Panel), Terminal or Serial.
If in running condition, start control is changed from Local to Terminal, the operation will continue as
per the status of the new selection. For example, present selection is Local. Now if in running
condition, the selection is changed to Terminal. If RUN signal is present in terminal mode, the unit will
continue running. If RUN signal is absent, the unit will stop. When the selection is changed from
Terminal to any other mode (Local or Serial), unit will continue its operation as per the status of
Terminal and not as per the new selection (Local or Serial).
4
5
A102: Maintained Start/Stop
6
When using Terminal as start control (A101=2), this parameter gives the choice of having maintained
or momentary contacts for start or stop. Here user has to select “15:RUN” option in one of PSI(C101 ~
C106, C114 and C115) for maintained and for momentary, user has to select “15:RUN” option and
“16:STOP” in another PSI.
If A102=0: The start / stop control is maintained type as shown in below fig. 6-6-4.
7
RUN
Output Voltage
COM
8
RUN
Fig. 6-6-4
9
If A102=1: The start / stop control is momentary type as shown in below fig. 6-6-5
10
RUN
Output Voltage
STOP
RUN
11
COM
STOP
Fig. 6-6-5
12
13
A103: Start Delay (Sec)
The motor will be delayed start from the run command by the set time. This is used for
synchronization with peripheral machines such as mechanical brakes. The start command can be
from Digital Operation Panel (keypad), Terminal or Serial.
The start delay time is also applicable to Jog Select input.
A
Amtech
6.20
1
A104: Start Mode Selection
Select the required start mode.
A104=1: The starting mode is V-Ramp Start.
A104=2: The starting mode is I-Ramp Start.
A104=3: The starting mode is T-Ramp Start.
2
A105: Stop Mode Selection
3
Select the required stop mode.
A105=1: V-Ramp Stop
A105=2: T-Ramp Stop
A105=3: Brake Stop
A105=4: Coast to Stop
4
5
A106: V-Ramp Up Time1 (Sec)
This is applicable for V-Ramp Start and Jogging and should be adjusted as per the desired ramp up
time.
It controls the ramp up time from Pedestal-1 to Target, when dual ramp (A201=0) is not selected.
When A201=1, it controls the time from Pedestal-1 to Pedestal-2.
Note: Ramp up time is affected by the following condition.
1. Current limit will extend the ramp up time if motor does not reach full speed while in Current
Limit mode.
2. Ramp up time will extend if Ramp Hold function is active.
not adjustable
7
8
100%
Kick Voltage
(A108)
6
Target
(A203)
9
MOTOR
VOLTAGE
Pedestal-1
(A202)
10
Kick Time
(A109)
Ramp up
(A106)
TIME
11
Fig. 6-6-6
A107: V-Ramp Down Time1 (Sec)
12
This is applicable for V-Ramp Stop or Jogging and should be adjusted as per the desired ramp down
time.
This parameter controls the ramp down time from Initial Voltage-1(A206) to Final Voltage (A207),
when dual ramp (A201=0) is not selected. When (A201=1), it controls the time from Initial Voltage-1
(A206) to Initial Voltage-2 (A209).
13
A
Axpert-Opti torque Electronic Soft Starter
6.21
1
A108: Kick Voltage (%)
This is applicable only in V-Ramp Start or Jogging and sets the kick voltage level for the kick-start
function.
The setting of this parameter should be higher than the pedestal voltage setting to provide the benefit
in the worst starting condition. A kick-start is sometime useful when the load has a high break away
torque.
2
3
A109: Kick Time (Sec)
4
This parameter adjusts the duration of kick voltage applied to the motor. When set to ‘0’, disables the
kick-start function.
If current feedback is available in the unit, it is possible to limit the current during the kick-start, if ILimit kick (B308) is enabled.
A110: Jog Reference (%)
5
6
7
Set this if Jogging is selected as a programmable sequence input command. This is set as a
percentage of the rated motor voltage.
This feature is typically used to check rotation, alignment or slowly move load into a position.
The starting profile under Jogging will be same as that of a V-Ramp Start. The set ramp up time and
kick-start feature will be applicable to Jogging function. Dual Ramp start will not functional in Jogging.
If the current transformers are connected to the control card, current limit protection is available when
motor voltage is ramping up to the jog reference value. The applicable stop mode in Jogging is cost to
stop.
However, RUN command has the higher priority than Jogging, if both the signals are input together.
8
100%
Jog reference (A110)
MOTOR
VOLTAGE
9
Pedestal (A202)
Ramp up
10
Jogging applied
TIME
Fig. 6-6-7
11
12
A111: O/L during Ramp
Using this facility thermal overload protection can be disabled during ramp up. There are some
applications where overload, even with the slowest trip setting, will still trip the unit during ramp up. By
disabling this feature, one can eliminate the unnecessary tripping during ramp up.
13
A
Amtech
6.22
1
GROUP-2: V-RAMP START/STOP PARAMETERS
When V-Ramp Start is selected in Start Mode Selection (A104), motor voltage ramps up over a
predefined time interval. When the unit is run with a V-Ramp profile, the connected motor will probably
not start turning until the voltage ramps up a little past the standard 40% pedestal value, and will
probably reach full speed long before the ramp is finished. Similarly, when the V-Ramp Stop is
selected in stop mode selection (A105), motor voltage is to be ramped down over a predefined time
interval. When V-Ramp Stop is selected; the motor will slow down less rapidly than it would if power
had been removed.
2
3
100%
Coast stop
Target (A203)
4
Initial Voltage (A206)
Ramp-1
MOTOR
VOLTAGE
Ramp-1
5
Final Voltage
(A207)
Pedestal-1
(A202)
Ramp up
(A106)
* not adjustable
6
*
*
Running
*
Ramp down
(A107)
TIME
7
Fig. 6-6-8
A201: Dual Ramp Selection
This parameter helps to enable the dual ramp setting in V-Ramp mode. Generally dual ramp can be
used to get even smoother ramps at starting.
A202: Pedestal-1 (%)
This parameter controls the starting voltage of Ramp-1 during a V-Ramp Start.
The pedestal should be adjusted so that when the motor is started, the motor just has sufficient torque
to start turning the shaft. If the motor doesn’t start turning, increase the pedestal in step of 5%.
Similarly if motor turns to fast, reduce the pedestal in step of 5%.
If a kick-start is used, set the Kick Voltage (A108) and Kick Time (A109) prior to setting the pedestal
level.
8
9
10
11
A203: Target (%)
This parameter adjusts the destination voltage after ramp up during V-Ramp Start.
The purpose of this adjustment is to control the starting time more accurately. Once the target voltage
has been reached, the unit will rapidly increase the motor voltage to 100%. For this reason, it is
possible that motor reaches full speed before the target voltage is reached. By shaping the voltage
ramp, it is possible to obtain closer approximation to a liner acceleration curve.
12
13
A
Axpert-Opti torque Electronic Soft Starter
6.23
100%
1
Target (A203)
MOTOR
VOLTAGE
Pedestal-1(A202)
2
Ramp up
(A106)
3
TIME
Fig. 6-6-9
As shown in fig. a motor accelerates too rapidly towards the top end of its speed range. To obtain
closer to liner acceleration profile, extend the ramp up time to check the acceleration and reduced the
target voltage as shown in fig. b. If acceleration profile is unacceptable, again readjust the target
voltage until an acceptable acceleration profile is reached as shown in fig. c. But still in fig. c, motor
reaches full speed before the target voltage is reached. Now as shown in fig. d, adjust the ramp up
time down, so that motor voltage is increased to 100% just after the motor reaches full speed.
4
5
a
b
100%
Motor
voltage
6
TIME
TIME
7
Motor
Speed
8
TIME
c
TIME
d
100%
9
Motor
voltage
TIME
TIME
TIME
TIME
10
Motor
Speed
11
Fig. 6-6-10
12
13
A204: V-Ramp Up Time2 (Sec)
This parameter controls the ramp up time from Pedastal-2 to Target. It comes into picture when Dual
Ramp Selection (A201) is enabled.
A205: Pedestal-2 (%)
This parameter adjusts the starting voltage of Ramp-2. It comes into picture when Dual Ramp
Selection (A201) is enabled.
A
Amtech
6.24
MOTOR
VOLTAGE
1
100%
Target (A203)
2
Ramp -2
Pedestal-2
(A205)
Ramp -1
Pedestal-1
(A202)
3
Ramp up time1
(A106)
Fig. 6-6-11
Ramp up
time2
(A204)
TIME
4
5
A206: Initial Voltage-1 (%)
This parameter adjusts the initial voltage of Ramp-1, which is applied to the motor terminals during a
V-Ramp Stop.
The purpose of this adjustment is to control the stopping time more accurately. The initial voltage
should be adjusted so that when stop button pressed motor starts to decelerate.
If the load speed does not instantly begin to decrease, reduce the value of the initial voltage-1 in step
of 5%. Similarly, if the load speed starts to fall off too quickly, increase the initial voltage-1 in step of
5%.
6
7
A207: Final Voltage (%)
This parameter adjusts the final voltage that is placed on stator terminal before the power is removed.
If Dual ramp Selection (A201) is enabled its value is adjustable between Initial Voltage-2 (A209) and
25%. Once the initial value has been adjusted, this value is used to control the way that the motor
torque will vary as the motor shaft decelerates.
If the final voltage value is too high, it may happen that the motor shaft is still decelerating when
power is removed from the motor. In that case, readjust (reduce) the final voltage value such that the
load is stationary at the point power is removed from the motor.
A208: V-Ramp Down Time2 (Sec)
8
9
10
This parameter controls the ramp down time from Initial Voltage-2 (A209) to Final Voltage (A207). It
comes into picture when Dual Ramp Selection (A201) is enabled.
11
A209: Initial Voltage-2 (%)
This parameter adjusts the initial voltage of Ramp-2, and is adjustable between Initial Voltage-1 and
25% of rated input voltage. It comes into picture when Dual Ramp Selection (A201) is enabled.
12
13
A
Axpert-Opti torque Electronic Soft Starter
6.25
1
100%
Target (A203)
2
3
Pedestal-2
(A205)
4
Pedestal-1
(A202)
Initial Voltage-2
(A209)
Ramp-1
Ramp-2
Final
Voltage
(A207)
V-Ramp Up
Time1 (A106)
5
Initial- Voltage-1 (A206)
Ramp-1
Ramp-2
MOTOR
VOLTAGE
V-Ramp
Up
Time-2
(A204)
Running
Fig. 6-6-12
6
7
8
9
10
11
12
13
A
Amtech
6.26
V-Ramp Down
Time1 (A107)
VRamp
Down
Time2
(A208)
TIME
GROUP-3: I-RAMP START/STOP PARAMETERS
1
These parameters will be set if I-Ramp Start is selected in Start Mode Selection (A104). It is only
possible to have an I-Ramp Start if current transformers are properly connected to the control card.
Under I-Ramp Start, the motor will accelerate at the value set under I-limit (B301) and the starting
time is not allowed to exceed the time set by I-limit time (B302). An I-Ramp Start is used to accelerate
the load as rapidly as possible, but with due respect to the rated motor current. The sort of torques
relationship exists between a voltage ramp start and a current ramp start is shown in below fig. 6-613.
2
3
3
Per unit
Torque
DOL Starting
4
2
1
I-Ramp Starting
5
V-Ramp Starting
Speed
100%
6
Fig. 6-6-13
The shape of the torque profile under current ramp start has a higher peak than a voltage ramp start,
which reinforces the fact that a current ramp start is not an effective torque limiting start mode. The
speed profile under such s start, will probably exhibit increasing acceleration as the motor speed
increases.
7
A PI Controller actively controls the motor current during the I-Ramp Start.
8
I- Limit (B301)
AVERAGE
MOTOR
CURRENT
Running
intial current
(A302)
I-Ramp
up Time
(A301)
9
TIME
10
Fig. 6-6-14
11
A301: I-Ramp Up Time (sec)
This parameter controls the ramp up time during I-Ramp Start.
12
A302: Initial Current (%)
This parameter sets the initial current level for the I-Ramp Start mode.
If I-Ramp Start is required, set this such that the motor begins to accelerate immediately a start is
initiated.
13
A303: I-Proportional Gain
This parameter adjusts the value of the proportional gain in the PI Controller, which controls the
current during an I-Ramp Start.
Gc = kp + ki/s
Axpert-Opti torque Electronic Soft Starter
6.27
A
The above equation shows the standard PI Controller equation, where
Gc = Controller gain;
kp = proportional gain;
ki = integral gain = kp*Ti;
s = laplacian complex frequency variable.
The value entered under I-Proportional Gain (A303) is same as kp in the above equation.
1
2
A304: I-Integral Time (Sec)
This parameter adjusts the value of the integral time in the PI Controller, which controls the current
during an I-Ramp Start.
3
The value entered under I-Integral Time (A304) is same as the Ti in the above equation.
4
5
6
7
8
9
10
11
12
13
A
Amtech
6.28
GROUP-4: T-RAMP START/STOP PARAMETERS
1
Set these parameters if T-Ramp (Torque Ramp) Start and T-Ramp Stop are selected in A104 and
A105 respectively. No external motor speed feedback devices are required for T-Ramp Start mode.
Under a T-Ramp Start the motor speed is ramped up linearly over a predefined time frame.
This type of mode is useful in pump application and in high inertia load application.
2
Runnig speed
SPEED
3
TIME
4
Torque limit
(A403)
Nominal torque
5
TORQUE
End torque
(A407)
Initial torque
(A402)
T-Ramp Up
Time (A401)
Running
T-Ramp Down
Time (A406)
6
TIME
7
Fig. 6-6-15
A401: T-Ramp Up Time (Sec)
8
This ramp up time is applicable to torque control mode and is the time taken by the motor speed to
ramp up from Initial Torque (A402) to Torque Limit (A403).
9
A402: Initial Torque (%)
Set the initial torque level at start as a percentage of the nominal torque.
Set this value such that when the motor is started, the motor just has sufficient torque to start turning
the shaft.
10
A403: Torque Limit (%)
Set the torque limit for linear acceleration. The torque limit is increased mainly if the application has a
high inertia load, like centrifuges, planer and saw. By increasing this level to 150-250%, the current
will be more linear and low as shown in below fig.
CURRENT
11
12
FLC
Fig. 6-6-16
13
TIME
A
Axpert-Opti torque Electronic Soft Starter
6.29
1
A404: T-Proportional Gain
This parameter adjusts the value of the proportional gain in the PI Controller, which controls the speed
during a T-Ramp Start
Gc = kp + ki/s
2
The above equation shows the standard PI Controller equation, where
Gc = Controller gain;
kp = proportional gain;
ki = integral gain = kp*Ti;
s = laplacian complex frequency variable.
The value entered under T-Proportional Gain is same as Kp in the above equation.
3
4
A405: T-Integral Time (Sec)
This parameter adjusts the value of the integral time in the PI Controller, which controls the speed
during a T-Ramp Start.
The value entered under T-Integral Time is same as Ti in the above equation.
5
A406: T-Ramp Down Time (Sec)
6
7
This ramp down time is applicable to torque control mode and is the time taken by the unit to reduce
the nominal torque to end torque. This feature is useful in pump application to prevent hydraulic
shock, which may be occurred if the motor decelerates too quickly.
A407: End Torque (%)
Set the end torque level at stop as a percentage of the nominal torque.
This is the threshold at which the controlled stops and the motor freewheel to stop.
8
9
10
11
12
13
A
Amtech
6.30
GROUP-5: BRAKE STOP PARAMETERS
1
Set these parameters if Brake Stop is selected in Stop Mode Selection (A105). Brake Stop is used in
applications where the fast braking of high inertia machines is required, i.e. flywheel applications. The
brake stop option is of the ‘reversing plug’ type and requires phase reversing contactor at front end of
the unit. Phase reversal must be confirmed via the auxiliary contacts on the phase reversal
contactors.
2
A501: Brake Ramp Up Time (Sec)
3
This is the brake ramp time for the motor voltage to reach to the Brake Voltage (A502) during brake
stop.
A502: Brake Voltage (%)
4
This is the voltage, which is applied during the brake stop. It is set as % of rated input voltage.
A503: Brake Time (Sec)
5
This parameter decides the length of time for which brake voltage is applied.
Brake Time and Brake Voltage should be set so that the braking stops when the motor has reached
standstill but not allow it to go into reverse.
6
100%
Brake Volt
(A502)
7
Reverse
Voltage
8
Brake Ramp Up
Time (A501)
Brake Time
(A503)
TIME
9
Fig. 6-6-17
10
11
12
13
A
Axpert-Opti torque Electronic Soft Starter
6.31
GROUP-6: PARAMETER SELECTION FOR NORMAL DISPLAY SCREEN
1
A601 ~ A608: Normal parameter 1 ~ 8
A601: It selects parameter wishing to display on normal screen position Norm-1 out of M101~M113,
M201and M208~M216, of monitor mode during normal run operation of unit.
Similarly A602~A608 selects parameters for Norm-2 to Norm-8 positions.
2
The default setting will be as under.
3
User selectable four parameters
N
4
r
m
Norm 1
0
.
0
%
L
Norm 2
0
.
0
I
r
a
m
p
L
c
V
5
R
,
4
l
,
S
t
o
1
5
V
r
0
0
V
o
y
Norm 3
Norm 4
p
Fig. 6-6-18
6
7
o
To display the Output Current M101 (%L) parameter at Norm 1 position as shown in the above
screen, select option-1 (M101) in parameter A601 Norm parameter1.
M
o
d
e
A
6
0
1
V
R
a
m
-
p
A
N
o
r
m
P
1
:
M
1
0
1
,
L
c
l
,
S
a
r
G
r
o
u
p
-
6
a
m
e
t
e
r
1
% L
t
o
p
Fig. 6-6-19
8
Similarly to display the desired parameters at positions Norm 2, Norm 3, and Norm 4, selects the
appropriate option in A602, A603 and A604 respectively.
9
Parameters A605~A608 selects parameters for Norm-5 to Norm-8 positions for the meter screen and
is not applicable for the normal screen. Below is the meter screen with eight parameters.
10
11
User selectable eight parameters
Norm 5
4
9
.
9
H
z
Norm 1
4
0
.
0
% L
Norm 2
5
2
.
2
I
Norm 6
2
2
.
8
k W
3
r
3
Fig. 6-6-20
12
13
A
Amtech
6.32
5
.
0
°
C
4
1
5
V
r
4
1
4
V
o
0
.
5
k
W H
Norm 7
y
Norm 3
Norm 4
Norm 8
MODE-B
1
GROUP-1: MOTOR PARAMETER
B101: Rated Input Voltage (Vac)
2
Select suitable rated input voltage for the unit. When the rated input voltage is changed, the motor
voltage may change accordingly.
3
B102: Motor Voltage (Vac)
Enter motor nameplate voltage. This is used as reference voltage for many parameters. This is the
motor terminal voltage during full load at the line frequency.
4
B103: Motor Current (Amp)
Enter motor rated current from the motor nameplate. This is full load motor current at line frequency.
The over current and other current related protections are based on this value. This value cannot be
set higher than unit rated current M301 in case of Inline configuration. However, it can be set to 1.73
times the unit rated current for Inside delta configuration.
B104: Motor Frequency (Hz)
5
6
Enter motor frequency from the motor nameplate.
B105: Motor Speed (rpm)
7
Enter motor speed from the motor nameplate.
B106: Motor Capacity (kW)
8
Enter motor rated capacity from the motor nameplate.
B107: Motor Poles
9
Enter number of poles from the motor nameplate.
B108: SS Connection Type
Select the soft starter connection type. The unit can be used inline. In this case, only three wires (if
bypass option not used) will be coming to the unit.
When the connection is inside delta type, six wires will be coming to the unit. Refer Fig. 10-1-2 for the
connection method for inside delta. In this case, the unit can be used to start the motor of the higher
current rating (1.73 times) than the unit.
10
11
12
13
A
Axpert-Opti torque Electronic Soft Starter
6.33
GROUP-2: PROTECTION PARAMETERS – 1
1
B201: Under Frequency Protection Delay (Sec)
This parameter delays the tripping on detection of a low supply frequency when the motor is running,
less than 45Hz for 50Hz supply and less than 55Hz for 60Hz supply.
Set to 60 to disable this function.
2
B202: Over Frequency Protection Delay (Sec)
3
This parameter delays the tripping on detection of a high supply frequency when the motor is running,
greater than 55Hz for 50Hz supply and greater than 65Hz for 60Hz supply.
Set to 60 to disable this function.
4
B203: Low Current Alarm Set Point (%)
5
6
This parameter sets the current at which the low current alarm operates. Set as a percentage of Motor
Current (B103).
Relay output can be programmed in PSO to indicate the state of low current alarm. The relay output
change state when motor current is below the set point.
It sets when the Low Current Alarm is selected in PSO (Programmable Sequence Output).
Set this parameter higher than the value set in I-low Level (B303).
B204: High Current Alarm Set Point (%)
7
8
9
10
This parameter sets the current at which the high current alarm operates. Set as a percentage of
Motor Current (B103).
Relay output can be programmed in PSO to indicate the state of high current alarm. The relay output
change state when motor current is above the set point.
It sets when the High Current Alarm is selected in PSO (Programmable Sequence Output).
Set this parameter less than the value set in I-Trip Level (B307).
B205: I-Unbalance Level (%)
The maximum current imbalance tolerated will be the value set under the I-Unbalance Level from one
line to another.
B206: I-Unbalance Delay (Sec)
This parameter delays the tripping on detection of the imbalance current for the set time.
Set 100% to disable this function.
11
12
13
B207: Emergency Stop Mode
Set the stopping method for the emergency stop from the following options.
1: Coast to Stop
2: Coast to Stop with fault output
3: Stop as per A105
B208: Number of Restart
This parameter decides the maximum number of attempts to restart during the fault condition.
A
Amtech
6.34
1
B209: Restart Wait Time (Sec)
Restart is function to reset the fault in the unit and start automatically to continue operation if a fault
occurs. User can select these parameters to automatically restart the unit in fault condition to provide
reliability and continuity of process during fault conditions.
2
Set to ‘0’ to disables the restart function.
When a fault is detected, the unit output is shut off for the Restart Wait Time (B209). The operation
panel displays the fault while the unit output is OFF.
3
When the restart wait time elapses, a fault is reset automatically and restarts to continue the
operation.
4
When the number of such attempts exceeds the Number of Restart (B208), the faults are not reset
automatically and the unit output remains OFF. At this time a fault relay is activated and the fault data
will be stored in fault history. The RUN relay will also be deactivated.
5
The number of restart times is cleared to 0 in the following cases.
1. A fault does not occur for more than 10 minutes.
2. A fault reset signal is applied from the operation panel or terminal.
3. The power supply is turned off and turned ON again.
6
This function is applicable to the following eleven faults.
1. Over Current Fault.
2. Under Current Fault
3. I-unbalance Fault
4. Over voltage Fault
5. Firing Fault
6. Phase Fault
7. External Fault
8. Ground Fault
9. Over Frequency Fault
10. Under Frequency Fault
11. Temperature Fault
7
8
9
B210: Bypass Contactor Delay Time (Sec)
This parameter sets the delay time for the bypass contactor to operate, if the load current has not
decreased below 115% after completion of Ramp Up Time & I-Limit Time.
10
B211: Test Mode Selection
Enable or Disabled the Test Mode. Test Mode is only for factory test purpose.
11
=0: Disable.
=1: Enable.
12
13
A
Axpert-Opti torque Electronic Soft Starter
6.35
GROUP-3: PROTECTION PARAMETERS – 2
1
B301: I-Limit Level (%)
B302: I-Limit Time (sec)
2
I-Limit Level sets the value of the current limit as a percentage of Motor Current (B103), and I-Limit
Time (B302) sets the time in seconds, in which the I-Limit condition can exist before a trip will occur.
The current limit feature is active only during the ramp up.
Whenever the motor current exceeds the I-Limit, motor voltage held constant until the current falls to
an acceptable level. The current remains higher than the value set under I-Limit (B301) for a time set
under I-Limit Time, the unit will trip in an overload fault. If time frame a + b exceeded the value set by
I-Limit Time (B302), the unit will trip.
This feature provides adequate protection for the thyristor stack and sufficient current limiting to the
motor.
3
4
5
100%
MOTOR
VOLTAGE
6
TIME
7
I-Limit (B301)
AVERAGE
MOTOR
CURRENT
8
a
9
10
b
TIME
Fig. 6-6-21
B303: I-Low Level (%)
B304: I-Low Time (Sec)
I-Low Level sets the threshold of the under current trip as percentage of the Motor Current (B103),
and the time for which an under current situation must exist is set by I-Low Time (B304) before
tripping. By setting I-Low Level to zero will disable this function.
11
12
13
The under current trip facility offers an easy way of shutting the device down, when it operates for an
extended period without a load. The under current trip is not active during ramp up and ramp down.
To set the under current trip, start the motor with no load, and record the current displayed by the unit.
Starts it again with normal load, and set the trip point half way between these values. The unit
calculates the displayed current, by averaging the current in all three phases and scaling this to an
RMS value. There is no guarantee that meter used to measure the current, will operate in the same
way, and therefore no guarantee that the value measured will be exactly the same as the displayed
value.
Here graph shows the operating characteristics with the I-Low Level set to 50% and I-Low Time set to
3 min.
A
Amtech
6.36
1
100
Average Current
as a Percentage
of motor I
75
2
50
25
3
4
6
8
9
TIME(Minutes)
12
15
Trip Point
4
Fig. 6-6-22
B305: Overload Setting (%)
Set this parameter as % of the rated motor current. Changing of this parameter will change the
tripping time of the thermal overload curves. For example, at overload setting of 105% - Class 30
curve will trip the unit in 30sec @600% of FLC where as at 52% of overload setting – Class 30 curve
will trip the unit in 30sec @300% of FLC.
5
6
B306: Overload Curve Selection
Choose the Overload curves for the motor ‘Thermal Overload Protection’.
1. Class 30
2. Class 20
3. Class 10
4. Class 2
7
Program the appropriate class according to the characteristics of the motor and load. These trip
curves are based on a common tripping point of 600% of rated motor current. For example Class20 curve is 20-sec trip at @600% of FLC with overload setting 0f 105%.
Note: These are the cold start curve and every ‘start’ will reduced the tripping times. Curves are
shown at the overload setting of 105% in Fig. 6-6-23.
8
9
10
11
12
13
A
Axpert-Opti torque Electronic Soft Starter
6.37
1
2
3
4
5
6
7
8
Fig. 6-6-23
9
B307: I-Trip Level (%)
This parameter sets to give an instantaneous over current trip as a percentage of the Motor Current
(B103).
10
Whenever the output current exceeds the value set by I-Trip Level, the unit will trip indicating over
current fault. Always set higher side to prevent the unnecessary tripping of the unit during normal
operation.
11
I-Trip Level is entered as a percentage of the motor current, which the RMS value and the processor,
which scales the I-Trip value to a peak current and it is the peak current at which the unit will trip. For
example, if I-Trip level set to 500% and Motor Current is 40A, unit will trip the instant the current
exceeds 282A, i.e. 282 = 40 * 5 * √ 2.
12
B308: I-Limit Kick (%)
This parameter limits the current in the kick-start region. In some applications it is necessary to limit
current in kick-start region. The two main reasons for introducing current limit during the kick-start are:
to protect the electrical system, and to limit the torque during the kick-start region.
13
A
Amtech
6.38
Kick start with
I-Limit Kick - Y
1
100%
2
MOTOR
VOLTAGE
Ramp up
(A106)
Running
Ramp
down
(A107)
3
TIME
i limit
(B301)
4
AVERAGE
MOTOR
CURRENT
5
TIME
Fig. 6-6-24
B309: Parameter Lock
6
This is user programmable 4-digit password to prevent unintentional parameter change from the
digital operation panel. When programmed, it will not allow the user to change any parameter from
digital operation panel or serial link except PID Reference Setting C311. The unit will be shipped
without any password protection. To lock the parameters, first enter your selected 4-digit password
in B310 and then enter any value other than your selected password to B309. The parameters will be
locked and cannot be changed. Now, to open the lock, enter the password to B309. If you have
entered correct password, you will have the access of all parameters. Now you can change the
parameters, even the password. To lock the parameters again follow the same thing.
7
8
B310: Change Password
This parameter is used to change the 4-digit user password for parameter locking.
9
B311: Default Value Load
When set to 111, the current active parameters will be saved to non-volatile memory as customer
default setting.
10
When set to 222, the customer default setting parameters will be fetched from memory and now the
unit will respond to these parameters.
When set to 333, all the user parameters will be set to default (US standard) excluding C205 to C219
& PLC parameters.
When set to 444, default value will be loaded in all the parameters excluding C205 to C219 & PLC
parameters.
11
12
When set to 666, all the user parameters will be set to default including C205 to C219 & PLC
parameters.
When set to 777, all PLC related parameters (B407, C501~C512, P101~PA110) set to default value.
13
However, above settings will not change any factory setting parameters and user password.
A
Axpert-Opti torque Electronic Soft Starter
6.39
1
Fault History Clear
When set to 555, the fault history buffer is cleared. No previous fault code and parameter will be
available.
2
Note that the value entered in B311 will not be memorized. If correct value is entered, appropriate
action will be taken and “00” will be displayed. If incorrect value is entered, no action will be taken and
“00” will be displayed.
3
B312: Over Voltage Limit (%)
Sets the level at which the Over Voltage Fault is detected as a percentage of Rated Input Voltage
(B101).
4
5
6
7
8
9
10
11
12
13
A
Amtech
6.40
GROUP-4: FAULT SETTING
1
B401: Phase Direction Fault
This Fault displayed when Phase Direction Fault is active. The unit will trip when phase rotation at the
input to the unit is reversed. Whenever this fault is disabled, the unit is not phase rotation sensitive. If
the fault is activated, the phase rotation to the unit thyristor stack must be positive when the unit is
operating in the forward direction.
2
B402: Firing Fault
3
This Fault displayed when Firing Fault is active. This fault would normally occur when the firing pulses
are sent to the thyristor and thyristor is not conducting.
In bypass mode this fault is not active during the running condition.
4
B403: Ground Fault Level (%)
This parameter sets as a percentage of the motor rated current (B103). The unit will trip if the Ground
Level exceeds the set value. It will be automatically disabled when using for inside delta type.
5
B404: Ground Fault Selection
This parameter provides selection of ground fault during ramp up. Sometimes, the unit may be
tripping in ground fault during the ramp up due to the unbalance current. In such condition, disable the
ground fault condition during the ramp up. It will be automatically disabled when using for inside delta
type.
6
7
B405: Pick up Function
This parameter provides flying start of soft starter during the voltage dip. When enabled, if the line
voltage drops below 25% of the rated input voltage B101 for more than 20msec, this function will
restart the soft starter automatically with controlled ramp up.
8
B406: Temperature Alarm Level (°C)
This is temperature alarm level set point. Whenever the heat sink temperature exceeds the set value,
the Temp Alarm output will be set. Hysteresis of 2°C hysteresis will occur with temperature alarm.
9
Temp
2°C
10
C310
M208
11
t
12
Temp Alarm
13
Fig.6-6-25
A
Axpert-Opti torque Electronic Soft Starter
6.41
1
B407: In-Built PLC Selection
In Built PLC function can be Enable or Disable by using this parameter.
2
B408: Copy Para set
Copy all user and PLC parameters from control side to the Display EEPROM. User can copy up to 8
sets of all parameters.
=1:Copy Set 1
=5:Copy Set 5
=2:Copy Set 2
=6:Copy Set 6
=3:Copy Set 3
=7:Copy Set 7
=4:Copy Set 4
=8:Copy Set 8
3
4
B409: Paste Para set
5
Paste all user and PLC parameters from Display EEPROM to the control side. User can paste 8 sets
of all parameters.
=1:Paste Set 1
=5:Paste Set 5
=2:Paste Set 2
=6:Paste Set 6
=3:Paste Set 3
=7:Paste Set 7
=4:Paste Set 4
=8:Paste Set 8
6
7
8
9
10
11
12
13
A
Amtech
6.42
MODE – C
1
GROUP-1: PROGRAMMABLE INPUT/OUTPUT SELECTION
C101~ C106: PSI-1 ~ PSI-6
2
C114 ~ C115: PSI-RUN ~ PSI-STOP
3
User can configure eight Programmable Sequence Inputs for different functions using parameters
C101 ~ C106 and C114 ~ C115. The status of the Programmable Sequence Input can be monitored
in M202. The various options are explained as under.
4
Table 6-6-1
OPTION
NAME
FUNCTION
1
Not Used
Indicates that no function is selected on the PSI.
2
Terminal
When this input is selected, the operation control will be switched over
to terminal.
3
Jogging
This is a jog command. If this signal is ON while RUN is OFF,
operation then conforms to the setting of jog reference. The applicable
stop mode in Jogging is cost to stop.
5
6
4
External Flt (NO)
This is used for the external fault function. This is Normally Open type.
When the digital input (connected to COM in case of sink logic and to
+24V in case of source logic) is close, external fault occurs.
5
Fault Reset
This is used for the fault reset. If RUN input is present at the time of
fault reset, the unit will not start after fault reset. Issue fresh RUN
command to start the unit after fault reset.
6
Bypass Cont Flt
This input is used for the bypass contactor interlock. The bypass
contactor closes once the thyristors are supplying full voltage to the
motor.
7
Main Cont Flt
This is used when main contactor is fitted to the unit. This input is used
for the main contactor interlock.
8
Emergency Stop
(NO)
This is used as emergency stop. This is Normally Open type. When
the digital input (connected to COM in case of sink logic or to +24V in
case of source logic) is close, Emergency stop occurs as per the
selection in B207.
9
Ramp Hold
This input allows to halt the ramp up.
10
Rev Cont Flt
This input is used for reverse phase rotation contactor interlock. Select
this input if brake stop is selected in A105.
11
PID Bypass
This is used to bypass the PID controller. When this input is selected,
the PID Reference input will be PID Output and there will not be any
effect of PID controller.
12
PID Disable
This is used to disable the PID controller. When this input is selected,
the PID Output will remain to the last value and there will not be any
effect of PID Reference or PID Feedback on the PID Output.
13
Emergency stop
(NC)
This is used for emergency stop. This is Normally Close type. When
the digital input (connected to COM in case of sink logic or to +24V in
case of source logic) is open, Emergency stop occurs as per the
selection in B207.
13
External Flt (NC)
This is used for the external fault function. This is Normally Close type.
When the digital input (connected to COM in case of sink logic and to
+24V in case of source logic) is open, external fault occurs.
A
14
Axpert-Opti torque Electronic Soft Starter
6.43
7
8
9
10
11
12
1
2
3
4
15
RUN
This is used to give RUN command from terminal.
16
STOP
This is used to give STOP command from terminal.
17
PLC input 1
18
PLC input 2
Option 17 ~ 24 are PLC input are use to read PSI status from soft
starter to In-Built PLC.
19
PLC input 3
20
PLC input 4
21
PLC input 5
22
PLC input 6
23
PLC input 7
24
PLC input 8
The default selection is as under.
Table 6-6-2
5
6
7
Parameter
Terminal
Option
Name
C101
PSI1
2
Terminal
C102
PSI2
3
Jogging
C103
PSI3
4
External Flt (NO)
C104
PSI4
5
Fault Reset
C105
PSI5
8
Emergency Stop (NO)
C106
PSI6
9
Ramp Hold
C114
PSI-RUN
15
RUN
C115
PSI-STOP
16
STOP
8
C107~ C110: PSO-1 ~ PSO-4
9
User can configure four Programmable Sequence Outputs for different functions using parameters
C107 ~ C110. The status of the Programmable Sequence Output can be monitored in M203. The
various options are explained as under.
Table 6-6-3
10
OPTION
No function is selected.
Ready
This turns ON when supply is given to card, and it indicates unit is ready
to start.
3
Run
This turns ON during running, jogging or Braking.
4
Top of Ramp
This turns ON when the unit is in Top of Ramp condition. Top of ramp
implies full voltage is on the motor. This terminal is used for many
applications. Most commonly this terminal is used to energies bypass
contactor.
5
Terminal
This turns ON when the operation mode is Terminal.
6
Fault Alarm
This turns ON when Fault is generate
7
I- Limit Alarm
This turns ON when motor current exceeds set point (B301).
8
Low Current
Alarm
This turns ON when motor current is below the set point (B203).
2
12
13
FUNCTION
Not Used
1
11
NAME
A
Amtech
6.44
High Current
Alarm
This turns ON when motor current is above the set point (B204).
10
Temperature
Alarm
This turns ON when the heat sink temperature has rise above the set
value.
11
Rev Cont
This turns ON to energies a reverse contactor fitted to the unit for a
Brake Stop application.
12
PID Up Limit
The output will be activated when the PID output reaches to the
programmed upper limit value.
13
PID Lo Limit
The output will be activated when the PID output reaches to the
programmed lower limit value.
14
PLC Output 1
15
PLC Output 2
Option 14~20 are use to write PSO status from In-Built PLC to soft
starter. This is mention in the In-Built PLC Function Explanation.
16
PLC Output 3
17
PLC Output 4
18
PLC Output 5
19
PLC Output 6
20
PLC Output 7
9
1
2
3
4
5
The default setting of the programmable sequence outputs are as in Table 6-6-4.
6
Table 6-6-4
Parameter
Terminal
Option
Name
C107
PSO1
2
Ready
C108
PSO2
7
I- Limit Alarm
C109
PSO3
8
Low Current Alarm
C110
PSO4
9
High Current Alarm
C111
Programmable
Relay1
3
Run
C112
Programmable
Relay1
4
Top of Ramp
C113
Programmable
Fault Relay
6
Fault Alarm
7
8
9
10
C111~ C113: Programmable Relay-1~2, Programmable Fault Relay
User can configure three programmable relays for different functions using these parameters. The
status of the Programmable Relay can be monitored in M203. The options are same as PSO.
The default settings are shown in Table 6-6-4.
11
12
13
A
Axpert-Opti torque Electronic Soft Starter
6.45
GROUP-2: ANALOG OUTPUT SELECTION
1
C201~ C202: VO1~VO2
User can configure two programmable analog outputs (0~10V) for different functions using
parameters C201 ~ C202.
2
Table 6-6-5
OPTION
3
NAME
FUNCTION
1
Output Voltage
The analog output will correspond to the output voltage (0~100%).
2
Output Current
The analog output will correspond to the output current (0~500%).
3
Active Power
The analog output will correspond to the active power (0~B106).
4
Reactive Power
The analog output will correspond to the reactive power (0~B106).
5
Power Factor
The analog output will correspond to the power factor (0.00~1.00).
6
PID Output
The analog output will correspond to the PID Output (0~100%).
7
Motor Torque
The analog output will correspond to the motor torque (0~250%).
8
Heat sink
Temperature
The analog output will correspond to the heat sink temperature (0~100
°C)
9
PLC A-O/P 1
The analog output will correspond to the PLC A-O/P 1 (0~100d).
10
PLC A-O/P 2
The analog output will correspond to the PLC A-O/P 2 (0~100d).
11
PLC A-O/P 3
The analog output will correspond to the PLC A-O/P 3 (0~100d).
12
PLC A-O/P 4
The analog output will correspond to the PLC A-O/P 4 (0~100d).
4
5
6
7
8
The default setting of the programmable analog outputs are as in Table 6-6-6.
Table 6-6-6
9
10
11
12
Parameter
Terminal
Option
Name
C201
VO1
1
Output Voltage
C202
VO2
2
Output Current
C203
IO1
3
Active Power
C204
IO2
5
Power Factor
C203~ C204: IO1~IO2
User can configure two programmable analog outputs (4~20mA) for different functions using these
parameters. The options are same as above.
The default setting of the programmable sequence outputs are as in Table 6-6-6.
C205: Vout-1 Gain
13
This is gain setting for the VO1 analog output.
C206: Vout-2 Gain
This is gain setting for the VO2 analog output.
A
Amtech
6.46
C207: Iout-1 Gain
1
This is gain setting for the IO1 analog output.
C208: Iout-1 Bias
2
This is bias setting for the IO1 analog output.
C209: Iout-2 Gain
This is gain setting for the IO2 analog output.
3
C210: Iout-2 Bias
This is bias setting for the IO2 analog output.
4
C211: Scaling Current (%)
This parameter is allow to scales the Analog Output Current as a set value of 50 - 500% of rated
motor current.
5
C212: FSV Gain
This is gain setting for the FSV reference.
6
C213: FSV Bias
This is bias setting for the FSV reference.
7
C214: FSI Gain
This is gain setting for the FSI reference.
8
C215: FSI Bias
This is bias setting for the FSI reference.
9
C216: Vin Gain
This is gain setting for the Vin reference.
10
C217: Vin Bias
This is bias setting for the Vin reference.
C218: Iin Gain
11
This is gain setting for the Iin reference.
C219: Iin Bias
12
This is bias setting for the Iin reference.
C220: FSV / FSI Time Constant (mSec)
13
This parameter sets the filter time constant for the FSV and FSI analog inputs.
C221: VIN / IIN Time Constant (mSec)
A
This parameter sets the filter time constant for the VIN and IIN analog inputs.
Axpert-Opti torque Electronic Soft Starter
6.47
GROUP-3: PID CONTROL SELECTION
1
C301: PID Control Selection
This parameter is used to enable or disable the PID control action.
2
C302: PID Polarity
This parameter can be used to invert the output of PID as per the system requirement.
3
C303: PID Reference Input
4
The PID Reference Input can be selected from any of the six options. The various options include
FSV 0-10V, FSI 4-20mA, Vin 0-10V, Iin 4-20mA, Local , Serial, PLC A-O/P 1, PLC A-O/P 2, PLC AO/P 3 and PLC A-O/P 4.
The value of selected PID reference input is displayed in M209.
C304: PID Feedback Input Selection
5
6
The PID Feedback Input can be selected from any of the four options. The various options include
FSV 0-10V, FSI 4-20mA, Vin 0-10V and Iin 4-20mA, PLC A-O/P 1, PLC A-O/P 2, PLC A-O/P 3 and
PLC A-O/P 4. The option selected for the PID reference input cannot be selected for the PID
Feedback Input.
The value of selected PID feedback input is displayed in M210.
C305: Proportional Gain
7
This parameter is used to set the proportional gain for the P-Control.
C306: Integral Time (Sec)
8
This parameter is used to set the integral time for the I-Control. Setting to maximum value does not
perform I-Control.
C307: Derivative Gain
9
10
11
This parameter is used to set the derivative gain for the D-Control. Setting to zero does not perform DControl.
C308: PID Deviation Upper Limit (%)
This is the upper limit for the PID output deviation.
C309: PID Deviation Lower Limit (%)
This is the lower limit for the PID output deviation.
C310: PID Offset Adjustment (%)
12
Sets offset for the output after PID Control.
C311: PID Reference Setting
13
A
When Local is selected as PID reference, this parameter is used to set the PID reference using digital
operation panel. This parameter will not have any effect if other options are selected as reference.
C312: PID Display Scale - Max
This parameter assigns the full-scale value for the PID input/output.
Amtech
6.48
1
C313: PID Display Scale - Min
This parameter assigns the min value for the PID input/output.
C314: PID Display Unit Selection
2
This parameter gives a choice to user to display the unit for the PID parameters. This can be
displayed in %, PSI (Pressure per Square Inch), kg/cm2, °C, °F, LPM (Liter per Minute), CFM (Cubic
Feet per Minute) and m3/h (Cubic Meter per Hour)
3
C303: PID M209
Reference
Input
(PSIX = 11)
PID Bypass
C308: PID deviation
Upper Limit
C310: PID Offset
Adjustment
4
PID Output
C302
=1
+
=0
C304: PID
Feedback
Input
+
PID
-
C201
Vout1
+
C202
Vout2
=0
C203
=1
C204
M210
5
Iout1
C307: Derivative Gain
C301: PID Selection
C309: PID deviation
Lower Limit
Iout2
C306: Integral Time
6
C305: Proportional Gain
PID Controller
7
Fig. 6-6-26
8
9
10
11
12
13
A
Axpert-Opti torque Electronic Soft Starter
6.49
1
GROUP-4: SERIAL COMMUNICATION
C401: Baud Rate
The unit is facilitating with serial communication between the unit and computer terminal. To control or
monitor single/ multiple units from single computer terminal, serial link can be used. This parameter
defines Baud rate (number of signal transition per second, it can be number of bits per second). The
available options are as under. Option-4 is set as default baud rate.
2
3
1: 1200
4: 9600
2: 2400
5: 19200
3: 4800
4
Refer the detail manual for the ModBus protocol and other information.
C402: Station Number
5
This parameter defines the address of the unit when connected to the serial network. It supports the
ModBus protocol. The station number can be assigned to 1 ~ 247.
6
C403: Parity
This parameter is used to set the parity. Parity is error-checking code to prevent from erroneous data
transformation between the unit and terminal.
7
C404: Response Time (Sec)
Set the minimum time from receiving the command to returning an answer.
8
9
10
C405: Operation Panel Communication Loss Selection
Enable or disable the operation panel communication loss fault. The unit will trip if it does not receive
any response from the operation panel within 5sec. Disable the fault, if operation panel is to be
removed.
For detail information on the ModBus protocol and register assignment, please refer “Serial
Communication Guide, Version 1.0”.
Note: Put jumper JP3 to “LD” position to use terminating resistors. Remove the cover
designated as “Control Unit” to access this jumper on PCA-2005B.
11
12
13
A
Amtech
6.50
GROUP – 5: PLC PANEL PARAMETER
1
C501 ~ C502: PLC Panel Par 1 ~ 2
This PLC panel parameter 1 & 2 are used In-built PLC for Timer 1 application or can be used in Built
in PLC application. Related memory location of this parameter is from 101 to 102.
2
C503 ~ C504: PLC Panel Par 3 ~ 4
This PLC panel parameter 3 & 4 are used In-built PLC for Timer 2 application or can be used in Built
in PLC application. Related memory location from of this parameter is 103 to 104.
3
C505 ~ C506: PLC Panel Par 5 ~ 6
4
This PLC panel parameter 5 & 6 are used In-built PLC for Timer 3 application or can be used in Built
in PLC application. Related memory location from of this parameter is 105 to 106.
C507 ~ C508: PLC Panel Par 7 ~ 8
5
This PLC panel parameter 7 & 8 are used In-built PLC for Timer 4 application or can be used in Built
in PLC application. Related memory location from of this parameter is 107 to 108.
C509 ~ C512: PLC Panel Par 9 ~ 12
6
PLC panel parameter 9 to 12 can be input and used In-built PLC application. Related memory location
of this parameter is from 109 to 112.
7
8
9
10
11
12
13
A
Axpert-Opti torque Electronic Soft Starter
6.51
MODE – P: IN-BUILT PLC COMMAND PARAMETERS
1
GROUP-1: IN-BUILT PLC COMMAND
P101 ~ P110: PLC Inst 1 ~ PLC Inst 10
2
Input the In-built PLC Commands as per PLC application.
GROUP-2: IN-BUILT PLC COMMAND
3
P201 ~ P210: PLC Inst 11 ~ PLC Inst 20
Input the In-built PLC Commands as per PLC application.
GROUP-3: IN-BUILT PLC COMMAND
4
P301 ~ P310: PLC Inst 21 ~ PLC Inst 30
Input the In-built PLC Commands as per PLC application.
5
GROUP-4: IN-BUILT PLC COMMAND
P401 ~ P410: PLC Inst 31 ~ PLC Inst 40
6
Input the In-built PLC Commands as per PLC application.
GROUP-5: IN-BUILT PLC COMMAND
P501 ~ P510: PLC Inst 41 ~ PLC Inst 50
7
Input the In-built PLC Commands as per PLC application.
GROUP-6: IN-BUILT PLC COMMAND
8
P601 ~ P610: PLC Inst 51 ~ PLC Inst 60
Input the In-built PLC Commands as per PLC application.
GROUP-7: IN-BUILT PLC COMMAND
9
P701 ~ P710: PLC Inst 61 ~ PLC Inst 70
Input the In-built PLC Commands as per PLC application.
10
GROUP-8: IN-BUILT PLC COMMAND
P801 ~ P810: PLC Inst 71 ~ PLC Inst 80
Input the In-built PLC Commands as per PLC application.
11
GROUP-9: IN-BUILT PLC COMMAND
P901 ~ P910: PLC Inst 81 ~ PLC Inst 90
12
Input the In-built PLC Commands as per PLC application.
GROUP-A: IN-BUILT PLC COMMAND
13
PA01 ~ PA10: PLC Inst 91 ~ PLC Inst 100
Input the In-built PLC Commands as per PLC application.
A
Amtech
6.52
6.7 In-built PLC function explanation:
1
In-built PLC Function is one of the important features of this product, by using which, user can make
PLC related application without additional hardware. The In-built PLC function has the following
features.
2
Features:
•
•
•
•
•
•
•
•
•
•
•
•
The In-built PLC can be used to get the same functionality of Programmable Sequence Inputs
(PSI).
It is possible to assign the signals from the In-built PLC to the Programmable Sequences Output
(PSO).
The In-built PLC can be used to get the same functionality as of programmable analog inputs.
It is possible to assign the signals from the In-built PLC to the analog outputs.
Bit status of PSI, PSO, Fault codes, Status codes and Control word can be read into the PLC bit
memory location.
Monitor Parameters can be read in to PLC registers (16-bit memory location).
User can develop program by using PLC Commands based on the required application.
PLC Commands can be input from the LCD Display. This allows changes to be made easily at the
site.
PLC Commands can be input with the standard serial interface.
115 registers (16-bit memory locations) and 100 Flags (1-bit memory location) for PLC operation.
PLC program’s length up to 100 PLC Commands.
4 Timer Command can be set from display.
The In-built PLC function-processing chart is shown in fig. 6.7.1. PLC commands are separate in each
parameter and all command (P101 to PA10) execute within 20-millisecond interval.
Mode P, Group-1
Mode P, Group-2~ 9
Mode P, Group-A
Command P101
Command P201
Command PA01
Command P102
Command P202
Command PA02
Command P103
Command P203
Command PA03
Command P104
Command P204
Command PA04
.
.
.
.
.
.
.
.
.
Command P108
Command P908
Command PA08
Command P109
Command P909
Command PA09
Command P110
Command P910
Command PA10
3
4
5
6
7
8
9
10
11
Fig. 6-7-1 In-built PLC processing Chart
12
The In-built PLC function starts to read command from the Mode P Group-1 parameter (P101) and
executes it one-by-one. END (000) Command indicates end of program and after this command; PLC
function again executes from 1st command (P101).
13
A
Axpert-Opti torque Electronic Soft Starter
6.53
IN-BUILT PLC BLOCK
1
PSI
2
PSO
Analog I/P
& O/P
Monitor
Parameter
In-Built PLC
Function
3
Main Control (Soft Starter)
In-Built PLC
Fig. 6-7-2 Block Diagram Of In-built PLC function with Main Control
4
Fig. 6.7.2 is a block diagram of main control and In-built PLC function. All Digital Input and Output,
Analog Input and output are connected with main control.
5
Now user can program In-built PLC for his application. User can also take output of the soft starter as
PLC Input and output from PLC to the soft starter as an Input.
6
7
8
In-built PLC Function Related Parameters and Command.
The In-Built PLC function related parameters are listed below.
1
In-built PLC (B407):
Use this parameter to enable the In-built PLC Function.
2
In-built PLC Command (P101 to PA10):
Input the PLC commands to be executed with the In-built PLC Function in parameters P101 to
PA10.
3
PLC Display Parameter (M308 to M318): In-built PLC Display
For PLC programming, there are 115 numbers of 16-bit register and 100 numbers of 1-bit flag.
10 values of signed 16-bit register can be displayed in parameter M308 to M317 and these values
will be saved in EEPROM at the time of power off. (Related PLC command is DISPLAY_REG
(061)) and during power of these parameters values will come in register 76 to 85, 8 different flag
bit status can be display in parameter M318. (Related PLC command is DISPLAY_FLG (062)).
4
Digital Input From Soft Starter (PSI Status) to In-built PLC:
Parameters C101 to C106 and C114 to C115 have 24 selectable options. In these, 17 to 24 are
for PLC input options. Now to take PSI status as a PLC input, select one of the PLC input option
from these parameter. Use READ_PSI (047) command in PLC program for this operation.
5
Digital Output From In-built PLC to Soft Starter (PSO Status):
Parameters C107 to C113 have 20 Selectable options. In these, 14 to 20 options are for In-Built
PLC output. Now to take In-built PLC’s output as Soft Starter’s PSO output, select one of the PLC
option from these parameters. Use WRITE_PSO (049) command in PLC program for this
operation.
6
Digital Input From In-built PLC to Soft Starter (PSI Status):
Parameters C101 to C106 and C114 to C115 have 24 selectable options.
User can activate one of 1 to 16 options of these parameters, without any external digital signal
on PSI by using In-built PLC. Use WRITE_PSI (048) command in PLC program for this operation.
9
10
11
12
13
7 Digital Output From Soft Starter (PSO Status) to In-built PLC:
A
User can read and use status of PSO from Soft Starter for In-built PLC application.
To read the PSO status In-built in PLC, use READ_PSO (046) command in PLC program.
Amtech
6.54
8
9
Analog Input From In-built PLC to Soft Starter:
The signals from In-built PLC can be given as Analog Input.
Parameters C303 & C304 have four PLC A-O/P options.
User has to select one of these options for this operation. Use WRITE_AN_O/P (054) command
in PLC program for this operation.
1
2
Analog Output From In-built PLC to Soft Starter:
Analog output can be given from In-built PLC.
Parameters C201 to C204 have four PLC A-O/P options. User has to select one of these options
for this operation. Use WRITE_AN_O/P (054) command in PLC program.
3
10 Analog Input From Soft Starter to In-built PLC:
The Soft Starter’s Analog input signals (FSV, FSI, Iin, Vin) can be read to In-built PLC. These
Inputs are stored in Register No. 94 to 97.
4
11 Analog Output From Soft Starter to In-built PLC
The Soft Starter’s Analog output signal (C201 to C204‘s 1 to 7 option) can be read to the In-built
PLC. These outputs are stored in Register No. 86 to 93.
5
12 In-built PLC PANEL Parameter (C501 to C512): Parameter In-built PLC
Twelve parameters can be input. Related memory location from 101 to 112.
Note: To get proper output from PLC program, make sure to select correct option in PLC parameters state
above. It is advisable to set unused PLC parameters to default conditions.
6
Memory Description:
There are 115 numbers of 16-bit register or memory locations, 100 numbers of 1-bit flag and one 32bit register.
16-bit register description has shown below table.
16-bit
Register
No.
Name
Access
Type
Details
Value
0-75
User Memory
Read/Write
User can Read and Write
76
77
78
User Memory
User Memory
User Memory
Read/Write
Read/Write
Read/Write
User can Read and Write
User can Read and Write
User can Read and Write
79
80
User Memory
User Memory
Read/Write
Read/Write
User can Read and Write
User can Read and Write
81
User Memory
Read/Write
User can Read and Write
82
83
User Memory
User Memory
Read/Write
Read/Write
User can Read and Write
User can Read and Write
84
85
User Memory
User Memory
Read/Write
Read/Write
User can Read and Write
User can Read and Write
86
Output Voltage
Read
Read Output Voltage value
M105
87
88
Output Current
Active Power
Read
Read
Read Output Current value
Read Output Power value
M101
M109
89
90
91
Reactive Power
Power Factor
PID output
Read
Read
Read
Read Output Reactive value
Read Power Factor value
Read PID output value
M110
M111
100d = 100%
92
93
Motor Torque
Heat sink temperature
Read
Read
Read Motor Torque value
Read Heat sink temperature
value
M208
M201
7
8
-32768 to 32767
9
M308 – M317
(during power on
condition) or
-32768 to 32767
10
11
Axpert-Opti torque Electronic Soft Starter
6.55
12
13
A
16-bit
Register
No.
1
Access
Type
Name
Details
Value
94
95
FSV Input
FSI Input
Read
Read
Read input value from FSV
Read input value from FSI
100d = 100%
100d = 100%
2
96
Vin Input
Read
Read input value from Vin
100d = 100%
Iin Input
Reserved
Panel Parameter 1
Read
Read input value from Iin
100d = 100%
3
97
98-100
101
Read
Read value set with C501
-
102
103
Panel Parameter 2
Panel Parameter 3
Read
Read
Read value set with C502
Read value set with C503
-
104
105
Panel Parameter 4
Panel Parameter 5
Read
Read
Read value set with C504
Read value set with C505
-
106
Panel Parameter 6
Read
Read value set with C506
-
107
108
Panel Parameter 7
Panel Parameter 8
Read
Read
Read value set with C507
Read value set with C508
-
109
110
111
Panel Parameter 9
Panel Parameter 10
Panel Parameter 11
Read
Read
Read
Read value set with C509
Read value set with C510
Read value set with C511
-
112
113-114
Panel Parameter 12
Reserved
Read
Read value set with C512
-
4
5
6
7
All 100 numbers of 1-bit flags are read/Write and one 32-bit register is Read/Write.
In-built PLC Command Format:
8
The PLC commands used with the In-built PLC are 12- digit value shown in below table. These
commands can be input from the P101 to PA10 parameter.
0
9
0
OPCODE
2
0
0
DATA1
1
0
2
DATA2
5
0
0
DATA3
0
12-digit In-built PLC Command format
10
11
Where, OPCODE
DATA1
DATA2
DATA3
Note: Range of DATA1, DATA2 and DATA3 are different and it depends on command type. See list of
PLC Commands for detail. It is necessary to terminate program with END (000) Command.
12
13
A
Amtech
6.56
= Command no.
= Data format 1
= Data format 2
= Data format 3
Sr.
Command
No.
Name
1 END
OpDATA1
Code
000 000
Description
1
000
End of the Program.
Load the 16-bit value in Register (n).
Register (n) as a High 16-bit and Register (n+1) as a
Low 16-bit are loaded in Register 32 as 32 bits.
2
DATA2
DATA3
000
2
3
REG_LD
REG32_LD
001 Register (n)
002 Register (n)
000
Value
000
4
REG32_ST
003 Register (n)
000
000
5
REGDEC
005 Register (n)
000
000
Register 32 is store in Register (n) as a High 16-bit
and Register (n+1) as a Low 16-bit as 32 bit.
Decrement the value of Register (n) by 1.
6
7
REGINC
COPY_REG
000
000
Increment the value of Register (n) by 1.
Copy Register (m) in Register (n).
8
9
COPY_FLG
SET_FLG
006 Register (n)
000
007 Register (n) Register
(m)
008 Flag (n)
Flag (m)
009 Flag (n)
000
000
000
Copy Flag (m) in Flag (n).
Set the Flag (n).
10 CLEAR_FLG
010 Flag (n)
000
Clear the Flag (n).
11 ADI
011 Register (n)
12 ADD
012 Register (n) Register
(n1)
13 ADD32
013 Register (n)
000
Value
000
4
Add immediate value. (Register (n) = Register (n) +
Immediate Value (0 to 32767)
5
Register Add operation. (Register (n) = Register (n1) +
(n2)
Register (n2)).
000
Register (n) as a High 16-bit and Register (n+1) as a
Low 16-bit are added to Register 32 as 32 bits.
Register 32 = Register 32 + Register (n).
Register Subtraction operator (Register (n) = Register (n1) (n2)
Register (n2)).
14 SUB
014 Register (n) Register
(n1)
15 SUB32
015 Register (n)
16 MUL32
016 Register (n) Register
(m)
17 DIV
18 DIV32
017 Register (n) Register
(n1)
018 Register (n)
000
19 AND
019 Flag (n)
Flag (n1)
20 NAND
020 Flag (n)
Flag (n1)
21 NOR
021 Flag (n)
Flag (n1)
22 XOR
022 Flag (n)
Flag (n1)
23 XNOR
023 Flag (n)
Flag (n1)
24 OR
024 Flag (n)
Flag (n1)
25 NOT_FLG
025 Flag (n)
Flag (m)
26 NOT_REG
026 Register (n) Register
(m)
27 WAND
027 Register (n) Register
(n1)
Register Logical Word (16-bit) AND operation between
(n2)
registers (Register (n) = Register (n1) & Register
(n2))
28 WOR
028 Register (n) Register
(n1)
Register Logical Word (16-bit) OR operation between registers
(n2)
(Register (n) = Register (n1) | Register (n-2))
29 WXOR
029 Register (n) Register
(n1)
Register Logical Word (16-bit) XOR operation between
(n2)
registers (Register (n) = Register (n1) ^ Register
(n2))
000
3
000
000
Register (n) as a High 16-bit and Register (n+1) as a
Low 16-bit are subtracted from Register32 as 32 bits.
Register 32 = Register 32 - Register (n).
Multiplication operator (Register 32 = Register (n) *
Register (m)).
Register Division operator (Register (n) = Register (n1) /
(n2)
Register (n2)).
000
Division operator (Register 32 = Register 32 /
Register (n)).
Flag (n2) Logical AND operation between Flags (Flag (n) =
Flag (n1) & Flag (n2))
6
7
8
9
Flag (n2) Logical NAND operation between Flags (Flag (n) =
~(Flag (n1) & Flag (n2)))
Flag (n2) Logical NOR operation between Flags (Flag (n) = ~
(Flag (n1) | Flag (n2)).
10
Flag (n2) Logical XOR operation between Flags (Flag (n) =
Flag (n1) ^ Flag (n2)).
Flag (n2) Logical XNOR operation between Flags (Flag (n) = ~
(Flag (n1) ^ Flag (n2))).
11
Flag (n2) Logical OR operation between Flags (Flag (n) = Flag
(n1) | Flag (n2)).
000
Invert the specified Flag (Flag (n) = ~Flag (m)).
000
Invert the specified register (Register (n) = ~Register
(m))
Axpert-Opti torque Electronic Soft Starter
6.57
12
13
A
Sr.
No.
1
2
3
4
5
6
7
Command
Name
OpCode
DATA1
DATA2
DATA3
Description
30 NEG
030 Register (n)
000
000
Negative. Register (n) = - Register (n)
31 ABS
031 Register (n)
000
000
Absolute the value of Register (n). Register (n) =
ABS (Register (n))
32 CMP_GT
035 Flag (n)
Register
(n)
Register If Register (n) is greater than Register (m) then given
(m)
Flag (n) is set.
33 CMP_LT
036 Flag (n)
34 CMP_GE
037 Flag (n)
35 CMP_LE
038 Flag (n)
36 CMP_EQ
039 Flag (n)
37 CMP_NE
040 Flag (n)
38 IF
041 Flag (n)
Register
(n)
Register
(n)
Register
(n)
Register
(n)
Register
(n)
000
Register
(m)
Register
(m)
Register
(m)
Register
(m)
Register
(m)
000
39 ELSE
042 000
000
000
40 END_IF
41 JUMP
42 READ_PSO
043 000
044 X (1-100)
046 Flag (n)
000
000
1-7
000
000
000
43 READ_PSI
047 Flag (n)
1-8
000
If Register (n) is less than Register (m) then given
Flag (n) is set.
If Register (n) is greater than or equal to Register (m)
then given Flag (n) is set.
If Register (n) is less than or equal to Register (m)
then given Flag (n) is set.
If Register (n) is equal to Register (m) then given
Flag (n) is set.
If Register (n) is not equal to Register (m) then given
Flag (n) is set.
If given Flag (n) is set then condition is true and
execute IF routine until ELSE or END_IF.
If IF condition is false then ELSE loop will execute
until END_IF.
Specify the end of IF and ELSE Loop.
JUMP to X command no.
Read the status of selected PSO (1-7) in selected
Flag (n).
Read the status of selected PSI (1-8) in selected
Flag (n).
Assign value of Flag (n) in PSI function (1-16).
44 WRITE_PSI
048 1-16
Flag (n)
000
45 WRITE_PSO
46 READ_MON_PA
RA
049 1-7
050 Register (n)
Flag (n)
0-115
000
000
Assign value of Flag (n) in PSO (1-7).
Read the value of monitor parameter (0-115) in
Register (n).
47 READ_STA_BIT
051 Flag (n)
1-2
0-15
Read the value of status bit (0-15) of status register
(1-2) in Flag (n).
48 READ_FLT_BIT
052 Flag (n)
1-2
0-15
Read the value of fault bit (0-15) of fault register (1-2)
in Flag (n).
49 READ_CWORD
_BIT
053 Flag (n)
1-2
0-15
Read the value of control bit (0-15) of control word
(1-2) in Flag (n).
50 WRITE_AN_O/P
054 1-4
Register
(n)
000
Assign the value of Register (n) to selected Analog
O/P (1-4). i.e 100D = 10V.
51 TIMER1
057 000
000
000
Input = Flag no 92
Output = Flag no 93
Count = C501 * C502 ms
Count in multiple of 1ms. Maximum Timer 298 Hour.
52 TIMER2
058 000
000
000
12
Input = Flag no 94
Output = Flag no 95
Count = C503 * C504 ms
Count in multiple of 1ms. Maximum Timer 298 Hour.
53 TIMER3
059 000
000
000
Input = Flag no 96
Output = Flag no 97
Count = C505 * C506 ms
Count in multiple of 1ms. Maximum Timer 298 Hour.
13
54 TIMER4
060 000
000
000
Input = Flag no 98
Output = Flag no 99
Count = C507 * C508 ms
Count in multiple of 1ms. Maximum Timer 298 Hour.
55 DISPLAY_REG
061 X1 (1-10)
Register
(n)
000
It will display the value of Register (n) to selected
display number. It will be stored in EEPROM on
Power off mode.
8
9
10
11
A
Amtech
6.58
Sr.
No.
•
•
•
•
•
•
Command
Name
OpCode
DATA1
DATA2
DATA3
Flag (n)
000
Description
56 DISPLAY_FLG
062 X1 (0-7)
57 LPF1
063 Register (n) Register Tc (0-100) Inputs = Register (m) and Tc (in mS)
(m)
LPF Output = Register (n)
58 LPF2
064 Register (n) Register Tc (0-100)
(m)
59 LPF3
065 Register (n) Register Tc (0-100)
(m)
60 LPF4
066 Register (n) Register Tc (0-100)
(m)
61 JMPC
067 X (1-100)
Flag (n)
000
If Flag (n) = 1, then JUMP to X Command no.
62 JMPNC
068 X (1-100)
Flag (n)
000
If Flag (n)! = 1, then JUMP to X Command no.
1
It will display value of selected Flag (n) on X1 bit
location.
2
3
4
Range of n, n1, n2 and m are 0 to 114 for register and 0 to 99 for flag.
Register 0 to 85 have Read and Write access. Registers 86 to 114 are Read Only.
Flag status is single bit locations, which is 0 to 99.
Memory Locations for Registers and Flag status are different.
X1 indicate Display parameter (M308 to M318)
X indicates Command No.
5
6
7
8
9
10
11
12
13
A
Axpert-Opti torque Electronic Soft Starter
6.59
In-built PLC Command Detail Description:
1
1. END (OPCODE 000)
This command indicates End of PLC program. Any command after this command (END) will not be
executed.
Input Command
000000000000
2
2. REG_LD (OPCODE 001)
This command is used to Load 16-bit signed value into selected register.
3
Example,
REG_LD Rn 32000
Where,
Rn = Register Number (0 to 85)
Input Command
001001032000
001 indicates Command OPCODE
001 indicates Register Number 1
032000 indicate 16-bit value (32000).
4
5
6
7
8
9
10
11
12
13
A
3. REG32_LD (OPCODE 002)
This command is used to load 32-bit value into 32-bit Register.
Example,
REG32_LD Rn
Where,
Rn = Register Number (0 to 113)
32-bit register = value of Register (n) as a high byte and the value of Register (n+1) as a low byte.
Input Command
002001000000
002 Indicate Command OPCODE
001 Indicates Register Number 1
000 Not used
000 Not used
4. REG32_ST (OPCODE 003)
This command is used to store 32-bit value into Register.
Example,
REG32_ ST Rn
Where,
Rn = Register Number (0 to 84)
High byte of 32-bit value will be store into selected Rn and Low byte of 32-bit value will be stored into
selected R (n+1).
Input Command
003001000000
003 Indicate Command OPCODE
001 Indicates Register Number 1
000 Not used
000 Not used
5. REGDEC (OPCODE 005)
This command is used to Decrement the value of selected register by one.
Example,
REGDEC Rn
Where,
Rn = Register Number (0 to 85)
Amtech
6.60
6. REGINC (OPCODE 006)
This command is used to increment the value of selected register by one.
1
Example,
REGINC Rn
Where,
Rn = Register Number (0 to 85)
2
7. COPY_REG (OPCODE 007)
This command is used to copy the content of one register (Rm) to another register (Rn).
3
Example,
COPY_REG Rn Rm
Where,
Rn = Register Number (0 to 85)
Rm = Register Number (0 to 114)
4
8. COPY_FLG (OPCODE 008)
This command is used to copy the bit status of one Flag (Fm) to another Flag (Fn).
5
Example,
COPY_ FLG Fn Fm
Where,
Fn and Fm = Flag Number (0 to 99)
6
9. SET_FLG (OPCODE 009)
This command is used to set the bit status of selected Flag (Fn).
7
Example,
SET_FLG Fn
Where,
Fn = Flag Number (0 to 99)
8
10. CLEAR_FLG (OPCODE 010)
This command is used to clear the bit status of selected Flag (Fn).
Example,
CLEAR_FLG_FLG Fn
Where,
Fn = Flag Number (0 to 99)
9
10
11. ADI (OPCODE 011)
This command is used for summation of immediate signed 16-bit value and Register.
Example,
ADI Rn 32000
Where,
Rn = Register Number (0 to 85)
Result will be stored in Rn. (Rn = Rn + 32000).
11
12
12. ADD (OPCODE 012)
This command is used for 16-bit summation operation of two registers.
Example,
ADD Rn Rn1 Rn2
Where,
Rn = Register Number (0 to 85)
Rn1, Rn2 = Register Number (0 to 114)
Result will be stored in Rn. (Rn = Rn1 + Rn2)
13
A
Axpert-Opti torque Electronic Soft Starter
6.61
13. ADD32 (OPCODE 013)
This command is used for 32-bit summation.
1
2
Example,
ADD32 Rn
Where,
Rn = Register Number (0 to 113)
Register Rn as high byte and Rn+1 as low byte and it will be added to 32-bit register. Result
will be stored into 32-bit Register.
3
14. SUB (OPCODE 014)
This command is used for 16-bit subtraction of two registers.
Example,
SUB Rn Rn1 Rn2
Where,
Rn = Register Number (0 to 85)
Rn1, Rn2 = Register Number (0 to 114)
Result will be stored in Rn. (Rn = Rn1 – Rn2)
4
5
15. SUB32 (OPCODE 015)
This command is used for 32-bit Subtraction.
6
7
8
9
10
Example,
SUB32 Rn
Where,
Rn = Register Number (0 to 113)
32bit Register = 32bit Register - Rn
Register Rn as high byte and Rn+1 as low byte and it will be subtracted from 32-bit register.
Result will be Stored into 32-bit Register.
16. MUL32 (OPCODE 016)
This command is used for multiplication operation of two registers.
Example,
MUL32 Rn Rm
Where,
Rn and Rm = Register Number (0 to 114)
32bit Register = Rn * Rm.
Result will be stored in 32-bit Register.
Result should not be exceeding more then 32-bit value.
17. DIV (OPCODE 017)
This command is used for division of two registers.
11
12
13
A
Example,
DIV Rn Rn1 Rn2
Where,
Rn = Register Number (0 to 85)
Rn1, Rn2 = Register Number (0 to 114)
Result will be stored in Rn. (Rn = Rn1 / Rn2).
18. DIV32 (OPCODE 018)
This command is used for division of 32-bit value.
Example,
DIV32 Rn
Where,
Rn = Register Number (0 to 114)
Result will be stored in 32-bit Register. (32bit Register = 32bit Register / Rn.)
Amtech
6.62
19. AND (OPCODE 019)
This command is used for logical AND operation between two bits of Flags.
1
Example,
AND Fn Fn1 Fn2
Where,
Fn, Fn1 and Fn2 = Flag Number (0 to 99)
Result will be stored in Fn. (Fn = Fn1 & Fn2)
2
20. NAND (OPCODE 020)
This command is used for logical NAND operation between two bits of Flags.
3
Example,
NAND Fn Fn1 Fn2
Where,
Fn, Fn1 and Fn2 = Flag Number (0 to 99)
Result will be stored in Fn. (Fn = ~(Fn1 & Fn2))
4
21. NOR (OPCODE 021)
This command is used for logical NOR operation between two bit Flags.
5
Example,
NOR Fn Fn1 Fn2
Where,
Fn, Fn1 and Fn2 = Flag Number (0 to 99)
Result will be stored in Fn. (Fn = ~(Fn1 | Fn2))
6
22. XOR (OPCODE 022)
This command is used for logical XOR operation between two bit Flags.
7
Example,
XOR Fn Fn1 Fn2
Where,
Fn, Fn1 and Fn2 = Flag Number (0 to 99)
Result will be stored in Fn. (Fn = Fn1 ^ Fn2)
8
23. XNOR (OPCODE 023)
This command is used for logical XNOR operation between two bit Flags.
9
Example,
XNOR Fn Fn1 Fn2
Where,
Fn, Fn1 and Fn2 = Flag Number (0 to 99)
Result will be stored in Fn. (Fn = ~(Fn1 ^ Fn2))
10
24. OR (OPCODE 024)
This command is used for logical OR operation between two bit Flags.
11
Example,
OR Fn Fn1 Fn2
Where,
Fn, Fn1 and Fn2 = Flag Number (0 to 99)
Result will be stored in Fn. (Fn = Fn1 | Fn2)
12
13
25. NOT_FLG (OPCODE 025)
This command is used for logical NOT operation of selected bit Flag.
Example,
NOT_FLG Fn Fm
Where,
A
Axpert-Opti torque Electronic Soft Starter
6.63
Fn and Fm = Flag Number (0 to 99)
Result will be stored in Fn. (Fn = ~Fm)
1
26. NOT_REG (OPCODE 026)
This command is used for logical NOT operation of selected Register.
2
Example,
NOT_REG Rn Rm
Where,
Rn = Register Number (0 to 85)
Rm = Register Number (0 to 114)
Result will be stored in Rn. (Rn = ~Rm)
3
27. WAND (OPCODE 027)
This command is used for 16-bit logical AND operation of selected two Registers.
4
Example,
WAND Rn Rn1 Rn2
Where,
Rn = Register Number (0 to 85)
Rn1, Rn2 = Register Number (0 to 114)
Result will be stored in Rn (Rn = Rn1 & Rn2).
5
6
7
8
9
10
28. WOR (OPCODE 028)
This command is used for 16-bit logical OR operation of selected two Registers.
Example,
WOR Rn Rn1 Rn2
Where,
Rn = Register Number (0 to 85)
Rn1, Rn2 = Register Number (0 to 114)
Result will be stored in Rn. (Rn = Rn1 | Rn2)
29. WXOR (OPCODE 029)
This command is used for 16-bit logical XOR operation of selected two Registers.
Example,
WXOR Rn Rn1 Rn2
Where,
Rn = Register Number (0 to 85)
Rn1, Rn2 = Register Number (0 to 114)
Result will be stored in Rn. (Rn = Rn1 ^ Rn2)
30. NEG (OPCODE 030)
This command is used for negative operation of selected Register.
11
12
13
A
Example,
NEG Rn
Where,
Rn = Register Number (0 to 85)
Result will be stored in Rn. (Rn = -Rn)
31. ABS (OPCODE 031)
This command is used for absolute operation of selected Register.
Example,
ABS Rn
Where,
Rn = Register Number (0 to 85)
Result will be stored in Rn. (Rn = ABS (Rn))
Amtech
6.64
Note: OPCODE no. 032 to 034 Reserved.
1
32. CMP_GT (OPCODE 035)
This command is used for compare application.
Example,
CMP_GT Fn Rn Rm
Where,
Rn and Rm = Register Number (0 to 114)
Fn = Flag number (0 to 99)
It will compare Rn and Rm, and if Rn is greater than Rm then it will set Fn (bit status) to 1.
2
3
33. CMP_LT (OPCODE 036)
This command is used for compare application.
4
Example,
CMP_LT Fn Rn Rm
Where,
Rn and Rm = Register Number (0 to 114)
Fn = Flag number (0 to 99)
It will compare Rn and Rm, and if Rn is less than Rm then it will set Fn (bit status) to 1.
5
34. CMP_GE (OPCODE 037)
This command is used for compare application.
6
Example,
CMP_GE Fn Rn Rm
Where,
Rn and Rm = Register Number (0 to 114)
Fn = Flag number (0 to 99)
It will compare Rn and Rm, and if Rn is greater than and equal to Rm then it will set Fn (bit
status) to 1.
7
8
35. CMP_LE (OPCODE 038)
This command is used for compare application.
Example,
CMP_LE Fn Rn Rm
Where,
Rn and Rm = Register Number (0 to 114)
Fn = Flag number (0 to 99)
It will compare Rn and Rm, and if Rn is less than and equal to Rm then it will set Fn (bit
status) to 1.
36. CMP_EQ (OPCODE 039)
This command is used for compare application.
9
10
11
Example,
CMP_EQ Fn Rn Rm
Where,
Rn and Rm = Register Number (0 to 114)
Fn = Flag number (0 to 99)
It will compare Rn and Rm, and if Rn is equal to Rm then it will set Fn (bit status) to 1.
12
13
37. CMP_NE (OPCODE 040)
This command is used for compare application.
Example,
CMP_NE Fn Rn Rm
Where,
A
Axpert-Opti torque Electronic Soft Starter
6.65
Rn and Rm = Register Number (0 to 114)
Fn = Flag number (0 to 99)
It will compare Rn and Rm, and if Rn is not equal to Rm then it will set Fn (bit status) to 1.
1
38. IF (OPCODE 041)
This command is used for condition application.
2
Example,
IF Fn
Where,
Fn = Flag number (0 to 99)
If Fn is 1 then it will go into the If loop otherwise it will execute the PLC code written after
ELSE command.
3
4
39. ELSE (OPCODE 042)
This command is used for condition application.
5
Example,
ELSE
If IF command condition is false then it will go into the ELSE loop. Otherwise it will execute
the PLC code written after END_IF command.
6
7
40. END_IF (OPCODE 043)
This command indicates end of IF and ELSE condition loop.
NOTE: END_IF command must be used after IF, ELSE command.
Example,
IF Fn
…….
END_IF
OR
IF Fn
………
ELSE
………
END_IF
8
9
10
Note: Nested IF….ELSE…..END_IF statement is not supported.
41. JUMP (OPCODE 044)
This command is used for branch application.
Example,
JUMP Xn
Where,
Xn = Command Number (1 to 100)
It will JUMP to selected Xn Command number and start executing from there.
Note: OPCODE no. 045 Reserved.
11
12
13
A
42. READ_PSO (OPCODE 046)
This command is used to read PSO status in selected Flag Number.
Example,
READ_PSO Fn PSOm
Where,
Fn = Flag number (0 to 99)
PSOm = PSO number (1 to 7)
43. READ_PSI (OPCODE 047)
This command is used to read PSI status from Inverter to In-built PLC.
For this, user must have to select below PLC option in Inverter parameters C101 to C106 and C114 to
C115.
Amtech
6.66
Example,
READ_ PSI Fn PSIm
Where,
Fn = Flag number (0 to 99)
PSIm = PSI number (1 to 8)
1
2
FLAG NO
PSI SELECTABLE OPTIONS
(C101 to C106 and C114 to C115)
17: PLC I/P 1
18: PLC I/P 2
19: PLC I/P 3
READ PSI
BIT STATUS OF FLAG
3
20: PLC I/P 4
21: PLC I/P 5
4
22: PLC I/P 6
23: PLC I/P 7
24: PLC I/P 8
5
44. WRITE_PSI (OPCODE 048)
This command is use to Activate PSI terminal function from In-built PLC.
PSI terminal have 16 selectable options.
6
Example,
WRITE_PSI PSIFunction (m) Fn
Where,
Fn = Flag number (0 to 99)
PSI Function (m) = PSI Selectable option (1 to 16)
It will load bit result of selected flag into PSI selected option.
7
Note: User should take care; below selectable options should be use either in In-built PLC or in PSI parameters
(C101 to C106 and C114, C115) at one time.
Select one of the Options
WRITE_PSI
1: Not Used
2: Terminal
3: Jogging
4: External Flt (NO)
5: Fault Reset
6: Bypass Cont Flt
7: Main Cont Flt
8: Emergency Stop (NO)
9: Ramp Hold
10: Rev cont Flt
11: PID Bypass
12: PID Disable
Flag No
9
10
Bit Status of
Flag
11
13: Emergency Stop (NC) 14:External Flt (NC)
15: RUN
8
16:STOP
45. WRITE_PSO (OPCODE 049)
This command is used to write PSO status from In-built PLC to Inverter.
For this, user must have to select below PLC option in inverter parameters C107 to C113.
12
Example,
WRITE_PSO PSO (m) Fn
Where,
PSO (m) = PSO no. (1 to 7)
Fn = Flag no. (0 to 99)
13
A
Axpert-Opti torque Electronic Soft Starter
6.67
1
PSI SELECTABLE OPTIONS
(C107 to C113)
FLAG NO
26:PLC O/P 1
2
WRITE_PSO
27:PLC O/P 2
28:PLC O/P 3
29:PLC O/P 4
3
BIT STATUS OF FLAG
30:PLC O/P 5
31:PLC O/P 6
32:PLC O/P 7
4
46. READ_MON_PARA (OPCODE 050)
This command is used to read the monitor parameter value into the selected Register Number.
5
6
7
8
9
Example,
READ_MON_PARA Rn ModId
Where,
Rn = Register Number (0 to 85)
ModId = Modbus Id of Monitor Parameter (0 to 115)
Reference: Serial guide Manual
Example,
to read parameter M104: B-Phase Current’s Modbus id is 40004. So
ModId = 40004 – 40001 = 3
47. READ_STA_BIT (OPCODE 051)
This command is used to read bit status of Status Register in selected Flag Number.
Example,
READ_STA_BIT Fn StsRegNo BitNo
Where,
Fn = Flag number (0 to 99)
StsRegNo. = Status Register Number (1 to 2)
BitNo. = Bit Number (0 to 15)
Bit description of Status Code 1:
10
Bit No
11
12
13
0
1
Emergency Stop
Stop
2
Ramp Up
3
4
Ramp Down
Braking
5
6
7
Current Limit
Power Off
Ramp Hold
8-15
A
Amtech
6.68
Status
Reserved
Bit description of Status Code 2:
Bit No
1
Status
0
1
Normal Run
Jogging
2
Fault
2
3
4
5
Auto Restart
Bypass
Main Allow
3
6
7
Factory Allow
Start Delay
8-15
Reserved
4
48. READ_FLT_BIT (OPCODE 052)
This command is used to read bit status of Fault Code Register in selected Flag Number.
5
Example,
READ_FLT_BIT Fn FltRegNo BitNo
Where,
Fn = Flag number (0 to 99)
FltRegNo. = Fault code Register Number (1 to 2)
BitNo. = Bit Number from (0 to 15)
6
Bit description of Fault Code 1:
7
Bit No. Fault Type
0
1
2
Over Current Fault
Under Current Fault
I-Unbalance Fault
3
4
Overload Fault
Over Voltage Fault
5
6
Rev Contactor Flt
Firing Fault
7
Phase Loss Fault
8
9
10-15
External Fault
Emergency Stop
Reserved
8
9
10
Bit description of Fault Code 2:
11
Bit No. Fault Type
0
Eeprom Error
1
2
Ground Fault
Communication Loss
3
Phase Direction Fault
4
5
6
Reserved
Over Frequency Fault
Under Frequency Fault
7
8
Bypass Contactor Fault
Main Contactor Fault
12
13
A
Axpert-Opti torque Electronic Soft Starter
6.69
9
10-15
1
Temperature Fault
Reserved
49. READ_CWORD_BIT (OPCODE 053)
This command is used to read bit status of Control Word Register in selected Flag Number.
2
Example,
READ_CWORD_BIT Fn CwordRegNo BitNo
Where,
Fn = Flag number (0 to 99)
CwordRegNo = Control Word Register Number (1 to 2)
BitNo. = Bit Number from (0 to 15)
3
Bit description of Control word:
4
Bit No
Status
Description
0
Phase Direction Fault
1
Firing Fault
2
Pick up function
Enable or disable the phase direction fault.
= 0: Disable
= 1: Enable
Enable or disable the firing fault.
= 0: Disable
= 1: Enable
Enable or disable the pick up function.
= 0: Disable
= 1: Enable
3
4
Reserved
Reserved
5
PID Control selection
5
6
7
8
9
10
6
7
Enable or disable the PID control action.
= 0: Disable
= 1: Enable
PID Polarity
This can be used to invert the PID output.
= 0: Negative
= 1: positive
Operation Panel Communication If enabled, SOFT STARTER will generate fault if it
Loss selection
does not receive any response from the operation
panel within 5sec.
=0: Disable
=1: Enable
8
Maintained/Momentary Start
When using terminal start/ stop facility, this
parameter gives the choice of having maintained or
momentary contacts for start or stop.
= 0: The start control maintained type
= 1: The start/ stop control momentary type.
9
O/L During Ramp
Enable or Disabled the thermal overload during ramp
up.
= 0: Disable.
= 1: Enable.
11
12
10-15 Reserved
13
50. WRITE_AN_O/P (OPCODE 054)
This command is used to set Analog Output or Analog Input by the use of selected Register value.
Register value should be in the range of 0 to 100d. Where 0d will give 0Volt and 100d will give 10Volt.
A
Amtech
6.70
Example,
WRITE_AN_O/P PLCAOPn Rn
Where,
PLCAOPn = PLC analog output number (PLCAOP1 to PLCAOP4).
Rn = Register Number (0 to 114).
1
2
FOR ANALOG OPUTPUT:
Analog output will come according to selection of C201 to C204.
To get PLC analog output at VO1 terminal, one of the selectable options from 9:PLC A-O/P 1 to
12:PLC A-O/P 4 should be set at C201.
3
FOR ANALOG INTPUT:
Analog Input can be given to parameters C303 & C304 from In-built PLC by setting one of four PLC
A-O/P options and using this command.
4
51. TIMER1 (OPCODE 057)
This command is used to set fix timing event for required application.
Example,
TIMER1
1 count = 1 ms
Final count = C501 * C502. (Parameter)
Flag Number 92 is Input Flag and Flag Number 93 is Output Flag for Timer1.
TIMER1 is down counter. It will start after Flag number 92 is set to 1. It will only work if 92 Flag
number is set otherwise it will stop counting.
When TIMER1 will become zero, Flag number 93 will be set. Maximum Timer is 298 hour.
52. TIMER2 (OPCODE 058)
Final count = C503 * C504. (Parameter)
Flag Number 94 is Input Flag and Flag Number 95 is Output Flag for Timer2.
Same as TIMER1.
5
6
7
8
53. TIMER3 (OPCODE 059)
Final count = C505 * C506. (Parameter)
Flag Number 96 is Input Flag and Flag Number 97 is Output Flag for Timer3.
Same as TIMER1.
9
54. TIMER4 (OPCODE 060)
Final count = C507 * C508. (Parameter)
Flag Number 98 is Input Flag and Flag Number 99 is Output Flag for Timer4.
Same as TIMER1.
10
55. DISPLAY_REG (OPCODE 061)
This command is used to display the Register value on Display Panel and save it to EEPROM on
Power OFF mode.
11
Example,
DISPLAY_REG X1 Rn
Where,
X1 is the Display Number of Display Panel, which are 1 to 10. (M308 to M317)
Rn = Register Number (0 to 114)
User can also display the value of Read only Register.
12
56. DISPLAY_FLG (OPCODE 062)
This command is used to display the bit status of Flag Number on Display Panel and save it to
EEPROM on Power OFF mode. Total 8 number of flag bit status can be shown.
13
Example,
DISPLAY_FLG Bitloc Fn
Where,
A
Axpert-Opti torque Electronic Soft Starter
6.71
Bitloc = bit location (0 to 7) of shown parameter on Display Panel (M318)
Fn = Flag Number (0 to 99)
1
57. LPF1 (OPCODE 063)
This command is used for the low pass filter.
2
Example,
LPF1 Rn Rm Tc
Where,
Rn = Register number (0 to 85)
Rm = Register number (0 to 114)
Tc = Time constant. (0 to 100)
Result will be stored in Rn.
3
4
58. LPF2 (OPCODE 064)
59. LPF3 (OPCODE 065)
60. LPF4 (OPCODE 066)
Same as LPF1.
5
61. JMPC (OPCODE 067)
This command is used for conditional Branch application.
6
7
Example,
JMPC Xn Fn
Where,
Xn = Command Number (0 to 100)
Fn = Flag Number (0 to 99)
If Fn (flag no) in equal to 1, then It will JUMP to selected Xn Command number and start
executing from there.
62. JMPNC (OPCODE 068)
This command is used for conditional Branch application.
8
9
Example,
JMPC Xn Fn
Where,
Xn = Command Number (0 to 100)
Fn = Flag Number (0 to 99)
If Fn (flag no) in not equal to 1, then It will JUMP to selected Xn Command
number and start executing from there.
10
11
12
13
A
Amtech
6.72
In-built PLC Applications
1
Example 1
This example is used to control three signals by the use of two PSI.
As shown here if PSI1 will become Active and PSI2 is Inactive then RUN status will become
Active.
If PSI2 will become Active and PSI1 is Inactive then JOGGING status will become Active.
If both are Active at the same time then Fault will generate.
XOR
2
3
PLC1
(RUN)
PSI1
PSI2
AND
PLC3
(FLT)
XOR
4
PLC2
Jogging
5
Program Code:
To write PLC program from Display Panel, few things should be known to PLC programmer.
6
1. There is a PLC Program mode in Display Panel, which is Mode-P.
In Mode-P there are total 10 groups from P101 to PA01. So user can write up to 100
commands.
2. User has to start PLC programming from P101, and then continue to the P110.
After reaching there if user still want to enter commands then he should go to another group
P201 and start writing commands from there, likewise he can write 100 commands.
3. Now before start PLC programming, user should have knowledge of the PLC commands and
op-code.
4. If you will come to the P101 you will find 12-digit value. Here first 3-digit from left
is for OPCODE of commands you want to use. Second, third and fourth 3-digit depends upon
which Command you are using.
7
8
9
Example,
047001001000
047 is opcode of READ_PSI command.
001 is for memory location of Bit number (Flag no.1), which is user memory.
001 is for PSI1 status.
000 is not used.
10
11
12
13
A
Axpert-Opti torque Electronic Soft Starter
6.73
Input from Display Panel into P101 to PA01
1
Parameter No.
PLC Command
Description
P101
P102
047001001000
047002002000
Copy the PSI1 status into flag no. 1.
Copy the PSI2 status into flag no. 2.
P103
008003001000
Copy the bit status flag no. 1 into flag no. 3.
P104
P105
008004002000
019001001002
P106
022003003001
Copy the bit status flag no. 2 into flag no. 4.
AND operation between flag 1 and flag 2 and result will be stored in
flag no. 1.
XOR operation between flag no. 1 and flag no. 3 and result will be
stored in flag no. 3.
P107
022004004001
XOR operation between flag no. 1 and flag no. 4 and result will be
stored in flag no. 4.
P108
048012001000
Write the Flag no.1’s status into the PSI's selectable option no. 12
which is Ext Flt (NO).
P109
048015003000
Write the Flag no. 3’s status into the PSI's selectable option no. 15
which is RUN.
P110
048003004000
Write the Flag no. 4’s status into the PSI's selectable option no. 3
which is Jog Select.
P201
000000000000
End of Program.
2
3
4
5
6
7
8
9
Note:
User can use 0 to 99 single bit locations for general application.
User has to set following parameter.
1. Enable PLC function from B407.
2. Select option 17 in C101.
3. Select option 18 in C102.
4. Select option 1 in C114
Example 2
This application can be used when RUN is required after certain delay.
In this example when Digital input will be applied to PSI1, RUN will be activated after 5
seconds of delay. To keep RUN status active PSI1 should be applied permanently otherwise
RUN will become Inactive.
PSI1
RUN
RUN
Timer of
5
Seconds
10
11
Program Code:
Input from Display Panel into P101 to PA01
Parameter No. PLC Command
12
13
A
Note:
P101
047001001000
Copy the PSI1 status into Flag no. 1.
P102
P103
008092001000
057000000000
Copy the bit status of Flag no. 1 into Flag no. 92.
Here 5000 count (C501*C502) has been loaded to the TIMER1.
P104
048015093000
Write the bit status of Flag to the PSI's selectable option number 15,
which is RUN.
P105
000000000000
End of Program.
User should consider fix format for TIMER COMMAND. There are 4 Timer commands. All are used as
same format.
Amtech
6.74
Description
Example,
057000000000
057 is opcode for TIMER1 command.
Parameter C501 = 1
Parameter C502 = 5000
So, 1 * 5000 = 5000 count will be loaded in to timer1 (1 count = 1ms)
User has to set following parameter.
1. Enable PLC function from B407.
2 Select 15 no. Selectable option in C101.
3. C501 = 1 and C502 = 5000.
1) 4. Select option 1 (Not Used) in C114.
1
2
3
Example 3
This example demonstrate how to use memory location (Register 0 to 114) for 16-bit value.
4
Program Code:
Input from Display Panel into P101 to PA01
Parameter No.
PLC Command
Description
P101
001002000050
Load 16-bit Immediate value (50) into Register no.2
P102
054001002000
P103
001003000010
Content of Register no. 2 is copied to PLC A-O/P 1. Here 0d = 0
volt and 100d = 10 volt
Load 16-bit Immediate value into Register no.3
P104
035001003002
It will compare two Registers. If Register 3 is greater then 2,than
flag no. 1 will be SET (1) otherwise it will reset (0).
P105
049014001000
Write the bit status of Flag no.1 into PLCPSO1.
P106
000000000000
End of Program.
Note:
5
7
User should consider fix format for REG_LD COMMAND.
Example,
001002000050
001 is opcode for REG_LD command.
002 Register number 2(Memory location for 16-bit value.)
000050 indicate one signed 16-bit value. (Maximum value is 32767.)
1) User has to set following parameter.
1. Enable PLC function from C312.
2. Select 8 no. Selectable option in C201. Output will come on Vo-1 terminal.
3. Selects 14 no. Selectable option in C107. Output will come on PSO1 terminal.
Note:
6
8
9
User can use 0 to 85 16-bit memory locations for general application. These are read and write memory
locations. From 86 to 114 memory location contains analog values of internal parameters, which are
given in In-built PLC Function’s manual. These memory locations are read only.0 to 114 16-bit memory
locations and 0 to 99 bit memory locations both are different.
10
11
12
13
A
Axpert-Opti torque Electronic Soft Starter
6.75
Example 4
This example is given to just demonstrate how to use 16-bit memory locations (Register 0 to
114) and 32-bit memory location.
1
Program Code:
Input from Display Panel into P101 to PA01
2
Parameter No.
PLC Command
Description
P101
001001001000
Copy 16-bit Immediate value (1000) into Register no.1
P102
P103
001002032000
001003001000
Copy 16-bit Immediate value (32000) into Register no.2
Copy 16-bit Immediate value (1000) into Register no.3
P104
001004030000
Copy 16-bit Immediate value (30000) into Register no.4
P105
002003000000
It will take Register no 3 as high 16-bit and Register no 4 as low 16bit and save it to 32-bit memory location as 32-bit value.
P106
013001000000
It will take Register no 1 as high 16-bit and Register no 2 as low 16bit and form 32-bit value, which will be added to the content of 32bit memory location. Result will be saved to 32-bit memory location.
P107
003005000000
It will take high 16-bit of the content of 32-bit memory location and
store it to Register no 5 and low 16 -bit to the Register no 6.
P108
P109
061001005000
061002006000
It will display the content of Register no 5 on Display Panel. (M308)
It will display the content of Register no 6 on Display Panel. (M309)
P110
000000000000
End of Program.
3
4
5
6
7
8
9
User has to set following parameter.
1. Enable PLC functions from B407.
Note:
There is only one 32-bit memory location is given.
During 32-bit load and store commands user should use only 0 to 84 16-bit memory locations.
Example 5
This application can be used to monitor feedback of analog voltage input 0-10Vdc by the use
of PLC on Display Panel.
Program Code:
Input from Display Panel into P101 to PA01
Parameter No.
PLC Command
Description
P101
016094108000
Multiplication between Register 94 and 108 and result will be stored
in 32-bit memory location.
P102
001001000100
Copy 16-bit Immediate value (100) into Register no.1
P104
003010000000
The value of 32-bit memory location is stored in Register 10 as high
and register 11 as low 16-bit value.
P105
028012010011
Word OR logic between Register 10 and 11 and result will be store
in Register 12.
P106
061001012000
Display Register 12 in PLC Display Number 1.
P107
000000000000
End of Program.
10
11
12
13
A
User has to set following parameter.
1. Enable PLC function from B407.
2. Register 94 contains FSV input, which is read only memory location.
3. Register 108 contains value of Panel Para8 (C508) which is used for multiplication factor,
and that should be change as per input quantity range.
Note:
There is only one 32-bit memory location is given.
During 32-bit load and store commands user should use only 0 to 84 16-bit memory locations.
Amtech
6.76
Example 6
This application can be used to monitor feedback on FSV and convert it to other quantity by
the use of PLC and display on Display Panel to monitor up to certain limit and give trip
(External Fault).
1
Program Code:
Input from Display Panel into P101 to PA01
2
Parameter No.
PLC Command
Description
P101
016094108000
P102
001001000100
Multiplication between Register 94 and 108 and result will be stored
in 32-bit memory location.
Copy 16-bit Immediate value (100) into Register no.1
P103
018001000000
Division between 32-bit memory location and register 1 and result
will be stored in 32-bit memory location
P104
003010000000
The value of 32-bit memory location is stored in Register 10 as high
and register 11 as low 16-bit value.
P105
028012010011
Word OR logic between Register 10 and 11 and result will be store
in Register 12.
P106
P107
061001012000
035001012102
P108
048004001000
P109
000000000000
Display Register 12 in PLC Display Number 1.
If Register 12 is greater than Register 102 then Flag number 1 will
be set
Status of flag 1 will be written to 4:EXT_FLT option of PSI's
selectable options.
End of Program.
User has to set following parameter.
1. Enable PLC function from B407.
2. Register 94 contains FSV input, which is read only memory location.
3. Register 108 contains value of Panel Para8 (C508) which is used for multiplication factor,
and that should be change as per input quantity range.
Note:
3
4
5
6
7
8
There is only one 32-bit memory location is given.
During 32-bit load and store commands user should use only 0 to 84 16-bit memory locations.
9
10
11
12
13
A
Axpert-Opti torque Electronic Soft Starter
6.77
Example 7
This application can be used to monitor feedback on FSV and convert it to other quantity. And
to take sample after every 1-second, 1-minute and 1-hour and display them on separate
Display Parameters.
Samples of 1-second and 1-minute will be reset but samples of 1-hour will be continuously
Increased to measure total input quantity.
1
2
Program Code:
Input from Display Panel into P101 to PA01
3
Parameter No.
PLC Command
Description
P101
016094108000
To find feedback.
P102
P103
001001000100
018001000000
P104
P105
003010000000
028012010011
P106
061001012000
P107
P108
P109
057000000000
009092000000
041093000000
P110
P201
010093000000
012005005012
P202
006020000000
P203
P204
043000000000
001021000060
P205
P206
037010020021
041010000000
8
P207
P208
P209
010010000000
017006005021
012007007006
9
P210
P301
P302
001005000000
001020000000
006030000000
P303
P304
043000000000
001060000060
P305
037030030060
P306
P307
041030000000
010030000000
P308
P309
P310
001030000000
012009009007
061003009000
P401
043000000000
P402
P403
001051010000
037055009051
P404
P405
041055000000
006056000000
P406
P407
P408
001009000000
010055000000
043000000000
4
5
6
7
10
11
12
13
A
Amtech
6.78
Set Timer1 of 1 second
Start Timer1
1 second routineFind summation of 60 samples and store it into register 5
To check if 60 samples are taken
1 minute routine –
If 60 samples are taken then find the average value of feedback
register 5 and store it to register 6.
And again take other 60 samples from register 6 and add it to
register 7.
To check if 60 samples are taken
1 hour routineIf 60 samples are taken then add value of register 7 to register 9.
And display register 9 on Display Para3 which indicate total input
quantity.
Whenever register 9 will be greater 10000 it will reset to 0 and
register 56 will be increased by one, which indicates that 10000 of
total quantity input. (If it is increased to 2 that will indicate 20000 of
total quantity input)
P409
P410
047025001000
041025000000
P501
001005000000
P502
P503
001020000000
001007000000
P504
P505
001006000000
001009000000
P506
001056000000
P507
P508
00103000000
061003009000
P509
P510
P601
061005056000
043000000000
061002007000
P602
P603
061004009000
061005056000
P604
061006020000
P605
P606
061007030000
000000000000
If PSI is given then it will reset all Registers and total quantity input.
1
2
3
4
To Display values of registers.
5
End of program
6
User has to set following parameter.
1. Enable PLC function from B407.
2. Register 94 contains FSV input, which is read only memory location.
3. Register 108 contains value of Panel Para8 (C508) which is used for multiplication factor,
and that should be change as per input quantity range.
4. Select 17 no. Selectable option in C101.
5. C501 = 10 and C502 = 100. (10*100 = 1000 count for Timer1)
7
Note:
8
There is only one 32-bit memory location is given.
During 32-bit load and store commands user should use only 0 to 84 16-bit memory locations.
Example 8
This application is to demonstrate Low Pass filter command.
9
Program Code:
Input from Display Panel into P101 to PA01
10
Parameter No.
PLC Command
Description
P101
063001094030
Input is Register 94(FSV) and Time constant is 030. LPF output will
be in Register 1.
P102
P103
061001001000
000000000000
Output is displayed on Display Para1.
End of program
11
User has to set following parameter.
1. Enable PLC function from B407.
2. Register 94 contains FSV input, which is read only memory location.
12
13
A
Axpert-Opti torque Electronic Soft Starter
6.79
This page is intentionally left blank.
1
2
3
4
5
6
7
8
9
10
11
12
13
A
Amtech
6.80
CHAPTER- 7: ELECTRONICS CIRCUIT BOARDS
1
Axpert-Opti torque Electronics Soft Starter has following electronics circuit boards.
7.1 Main control board PCA-2005B
The Control Board PCA-2005B is a multipurpose board and specifically designed to meet the highend performance of the power electronics products like Soft Starter, AC Power Controller, and
Controlled Rectifier etc…
2
It uses 32-bit High-Performance Digital Signal Processor TMS320F2811. The control board
generates the necessary Gate pulses for Soft Starter operation. It accepts various inputs from
different circuits and Digital Operation Panel (LCD Keypad Module) to generate the necessary control
and gate signals.
3
The TMS320F2811 (U1) is the heart of this board. It handles the user interfaces, core algorithm and
generates Thyristor gate signals. The PCA-2005B is connected to PCA-2012, 80 - Character, 4- Line
LCD Display Card with RS-485 link. PCA-2012 displays various parameters of the Soft Starter.
4
7.2 Digital operation panel
5
The unit is equipped with Digital Operation Panel (LCD Keypad Module) for the user interface. All
parameters of Soft Starter can be accessed from Digital Operation Panel. The Digital Operation Panel
consists of Display Board and 8-keys keypad. The display board uses 80 - Character, 4- Line Liquid
Crystal Display (LCD).
It has 32-bit LPC2368 ARM controller. It interfaced with main control board PCA-2005B, this becomes
master and the main control boards works as slave. The master and slave communication is based on
RS-485 (Modbus-RTU Protocol).
6
7
7.3 Power supply unit
This unit provides the power to all boards in the Soft Starter. The input to the power supply board is
115/230Vac. The different outputs of the power supply board are +15V/2.2A, -15V/0.5A, +5V/1A and
+24V/0.5A.
8
7.4 RC snubber board PCA-82
This is Snubber board for the thyristor. It is a combination of R and C connected across each thyristor
to protect the thyristor against the voltage transients.
9
7.5 MOV board PCA-77
This is connected at the input of the unit. It protects the unit against the surge / voltage transients
coming in the power lines.
10
11
12
13
A
Axpert-Opti torque Electronic Soft Starter
7.1
This page is intentionally left blank
1
2
3
4
5
6
7
8
9
10
11
12
13
A
Amtech
7.2
CHAPTER- 8: MAINTENANCE, INSPECTION AND PART REPLACEMENT
1
DANGER
Maintenance, inspections and part replacement must be done by a designated person.
(Remove all metal accessories such as watches, bracelets, etc., before starting the work.)
(Always use an insulation measure tool.)
Failure to observe this could lead to electric shocks and injuries.
Always turn the power OFF before inspecting the motor or machine. A potential is applied on the
motor terminal even when the motor is stopped.
Failure to do so could lead to electric shocks and injuries.
Do not use parts other than those designated for the replacement parts.
Contact your dealer for replacement parts.
Failure to observe this could lead to fires.
Never modify the product.
Failure to observe this could lead to electric shocks or injuries or product failure.
2
3
4
5
CAUTION
6
Vacuum the unit with a vacuum cleaner to clean it. Do not use water or organic solvents.
Failure to observe this could lead to fires or damage.
Do not megger the unit.
Failure to observe this could lead to damage to semiconductor devices.
7
8.1 Inspection items
The inspections must be carried out periodically according to the working environment and frequency
of use. If there are any abnormalities, the cause must be inspected immediately and countermeasures
taken.
Daily inspections
8
9
Table 8-1-1
Inspection item
Inspection details and work
Temperature/humidity
Confirm that the ambient temperature is –10 to 50°C, and that the humidity
is 95% or less with no dew condensation.
Oil mist and dust
Confirm that there is no oil mist or dust in the unit.
Abnormal noise and
vibration
Confirm that there is no abnormal noise or vibration from the installation site
or unit.
Input power source
Confirm that the input voltage and frequency are within the specifications
range.
Cooling fan
Confirm that the cooling fan rotates normally and that no lint, etc. is stuck on
it.
Indicator
Confirm that all lamps on the operation panel light properly.
10
11
12
13
A
Axpert-Opti torque Electronic Soft Starter
8.1
1
Periodic Inspections
Table 8-1-2
2
3
4
Inspection item
Inspection details and work
Appearance
Check the state of dirt and dust on the vent or heat sink, and clean if
necessary.
Interior
Check the state of dirt and dust on the PCB and inside the equipment, and
clean if necessary.
Terminal block
Tighten the terminal block screws if loose.
Cooling fan
Replace the fan every three years.
Insulation resistance
inspection
Do not perform a megger test on the unit. When doing a megger test on the
external circuit, disconnect all wires connected to the unit.
Inspection of spares
The inspection shown in above table must also be performed for spare unit that are left connected but
are not used in normal operation. The operation of the unit must be checked every six months by
turning the power on.
5
8.2 Measuring devices
6
As the voltage and current on the input and output sides include high harmonics, the measured value
will differ according to the measuring device. When measuring with a device for commercial
frequencies, measure with the following circuits and noted measuring devices.
Input voltage: Moving iron type voltmeter
Output voltage: Rectifying voltmeter
Input / output power: Electrodynamometer type wattmeter.
7
8
9
10
11
12
13
A
Amtech
8.2
CHAPTER- 9: OPTIONS
1
Besides the standard features available in the Axpert-Opti torque Electronic Soft Starter, which
satisfies most of the industrial applications, AMTECH offers its users a spectrum of optional products
designed to match their requirement.
The list of optional products offered by AMTECH herewith is all developed, field tested and
commissioned at various locations in India. A brief description of the option is given. Contact
AMTECH with relevant data to design one for you.
2
9.1 Metering
3
At times there may be need of monitoring the internal unit data. Optional analog or digital metering of
unit operating data like various voltages, currents etc can be provided in the panel. For the unit data,
which can be monitored, and the extra hardware, contacts AMTECH for details.
4
9.2 Enclosure
Some applications may demand enclosures, which suit the environment where the unit is to be
installed. Protection against water or ingress or against some harmful ambient gas can be provided
within the scope of the manufacturer. The enclosure can be modified for required degree of protection
like IP54/ 55. Occasionally the shape and size of the enclosure can also be discussed for
incorporating the unit in some other predefined structure. Contact AMTECH for details on Enclosure
options.
5
6
9.3 Remote operator box
Remote box for operation from near the actual driven motor site can be provided for the user with
optional controls and displays. We remind you here that our standard keypad control box can be
taken up to 1000 feet without any problem. Contact AMTECH for details on Remote Operator Box.
7
9.4 Bypass operation
Some applications demand the soft starter with bypass option. All the protective feature and current
monitoring functions are provided in Bypass mode. Wiring connection for the Bypass contactor is
shown in Fig. 10.1.1, chapter 10. Programmable sequence output, Top of Ramp output is used to
control the bypass operation. Contacts AMTECH for details.
8
9
10
11
12
13
A
Axpert-Opti torque Electronic Soft Starter
9.1
This page is intentionally left blank
1
2
3
4
5
6
7
8
9
10
11
12
13
A
Amtech
9.2
CHAPTER- 10: TYPICAL CONNECTION DIAGRAM
1
10.1 Bypass contactor connection
It is recommended to use bypass contactor, as after reaching to the full speed, you do not require
control of thyristor. The losses in the contactor is very less compare to the thyristor, so you save
energy. The connection details are shown in fig. 10-1-1.
Choose contactor having rating equal to 1.15 times the rated motor current. Then choose an AC1
rating closest to, but above that rating.
For example, rated motor current =100A, so required contactor current is 1.15 x 100 = 115A. Then
choose the nearest AC1 duty contactor. Suppose, the nearest AC1 contactor rating is 125A, then use
125A AC1 duty contactor.
Here we are selecting AC1 rating of contactor because, the bypass contactor can’t energize until the
current has dropped to full load current or less.
Although, the bypass contactor is energized and effectively shorting out the thyristor, all protective
features such as overload, under load etc are still fully functional.
2
3
4
BPC
5
U'
V'
W'
3-Phase,
380~480Vac,
50/60Hz
Input
L1
CT
L2
CT
L3
CT
U
6
IM
3-Phase
V
7
W
PE
PSO1
L
SEQUENCE
OUTPUT
1-Phase, 115/
230Vac, 50/60Hz
control supply
N
E
+24V
STOP
Fault Reset
PSI1
B/P Cont Flt
PSI2
Emergency
Stop
External Flt
PSI3
PSO4
READY
8
I-LIMIT ALARM
LOW CUR ALARM
HIGH CUR ALARM
9
GROUND
FA
SEQUENCE
INPUT
STOP
PSO3
COM
RUN
RUN
PSO2
FAULT
RELAY
FC
FB
PROG
RELAY A
R1C
R1B
RUN
R2A
TOP OF RAMP
PROG
RELAY B
R2C
R2B
BPC
PSI4
PSI5
PSI6
10
R1A
11
A1
A2
*
(Source logic operation is considered in this diagram)
BYPASS CONT FAULT (BPC FLT) CAN BE ASSIGNED TO ANY PROG.
SEQUENCE INPUT
12
L
N
CONTROL
SUPPLY
* COIL
SUPPRESSOR
13
OPTI torque: BASIC SYSTEM - EXTERNAL BYPASS CONTACTOR, FUSE AND START/STOP PUSH BUTTONS
Fig. 10-1-1
The above diagram shows the soft starter with bypass contactor option. If the bypass contactor is
fitted to the soft starter, interlock must be used otherwise unit will trip in “Bypass Cont Flt”.
Axpert-Opti torque Electronic Soft Starter
10.1
A
1
Programmable sequence output (Top of Ramp) is used to control the bypass contactor and can be
assigned to any programmable relay ‘A’ or ‘B’.
10.2 Inside delta connection
2
U'
V'
W'
3
4
3-Phase,
380~480Vac,
50/60Hz
Input
L1
CT
L2
CT
L3
CT
U
V
C2 A2 B2
A1
IM
B1
3-Phase
C1
W
PE
5
AXPERT-OPTI torque
6
7
Fig. 10-2-1
The above diagram shows the soft starter power terminal connections when used in inside delta
application. The control logic will be same as Inline configuration.
8
9
10
11
12
13
A
Amtech
10.2
CHAPTER- 11: SERIAL COMMUNICATION SET-UP
The Axpert-Opti torque Electronics Soft Starter is equipped with a serial communication function
using RS485 as a standard. It acts as a ModBus slave in the network. The unit can be controlled with
a host computer (master) using this function.
1
2
11.1 Connection method
This network is configured of one host computer (master) and 1 to 247 max Axpert-Opti torque units
(slaves). TB1 on main control board is used for the connection.
Refer to Chapter-2 Installation and Wiring for wiring the control signal and for the wiring methods.
3
The total length of the connected cable must be within 300mt (1000ft).
By using a commercially available RS485-RS232C converter or USB converter unit, the Soft Starter
can be connected to a host computer equipped with a serial port or USB, such as a commercially
available personal computer.
4
The details of the TB1 terminal section are shown below.
TB1
P15
0V
VIN
IIN VO2 IO1 CANH RUN PSI6 COM PSI2 PSI4 +24V PSO1 PSO3 COM
FSV FSI
0V VO1 0V
IO2 CANL STOP +24V PSI1 PSI3 PSI5 COM PSO2 PSO4
TX
5
RX
PB
PA +5V
COM PBN PAN COM
'RX' and 'TX' are used for serial
communication
6
RS232
RS232
RS485
VCC
GND
7
RS232/RS485
Converter
DATA+ DATA-
8
RX
PSO3 COM
PSO4
TX
PB
COM PBN
TB1
9
Fig. 11-1-1
10
11.2 Connecting the host computer and Axpert-Opti torque (1-to-1)
HOST
COMPUTER
(Master)
HOST
COMPUTER
(Master)
RS485
Axpert-Opti
torque
TB1
RS232
Cable
HOST
COMPUTER
(Master)
RS232
Axpert-Opti
torque
RS232
RS485
RS232/RS485
Converter
TB1
11
USB
Axpert-Opti
torque
12
USB
RS485
USB/RS485
Converter
TB1
13
Shielded twisted cable
Fig. 11-2-1
A
Axpert-Opti torque Electronic Soft Starter
11.1
CAUTION
1
2
Separates the communication cable from the main circuit cable and other power cables.
A shielded twisted pair cable should be used for connecting TB1 and the host computer. Connect
the shielded twisted pair cable's shield to the COM terminal of TB1.
3
When connecting the TB1 and shielded twisted pair cable, do not solder the wires, which are
exposed after the sheath is peeled off.
If the communication is distorted and not carried out properly because of noise, etc., connect a
ferrite core, etc., to the cable, and increase the noise resistance.
4
When connecting several Axpert-Opti torque units, connect two wires to each TB1 terminal, and
couple the Axpert-Opti torque units. An example of the connection is shown below.
11-3 Connecting the host computer and Axpert-Opti torque (1-to-many units)
5
6
HOST
COMPUTER
(Master)
RS485
7
1
2
3
Axpert-Opti
torque
Axpert-Opti
torque
Axpert-Opti
torque
JP3
8
JP3
TB1
JP3
TB1
TB1
Shielded twisted cable
9
10
Fig. 11-3-1
The details of the TB1 terminal section are shown below.
TX
COM
RX
11
TB1
Shield
12
To host computer
or unit
To next unit
Shielded twisted cable
13
Fig. 11-3-2
A
Amtech
11.2
Shielded twisted cable
n
Axpert-Opti
torque
JP3
TB1
CAUTION
1
Separates the communication cable from the main circuit cable and other power cables.
A shielded twisted pair wire should be used for connecting TB1 and the host computer. Connect
the twisted pair cable's shield to the COM terminal of TB1.
2
When using several slave units, set JP3 of last unit to ‘LD’ position to connect the terminating
resistors as shown in the above fig.
When connecting the TB1 and shielded twisted pair cable, do not solder the wires, which are
3
exposed after the sheath is peeled off.
If the communication is distorted and not carried out properly because of noise, etc., connect a
ferrite core, etc., to the cable, and increase the noise resistance.
4
11.4 Communication specifications
Table 11-4-1
Connection method
Transmission distance
Baud rate
: RS485, 2-wire type
: Total extension distance less then 300mt (1000ft)
: Select from 1200, 2400, 4800, 9600, 14400, 19200bps
Transmission method
Frame configuration
: Start-stop synchronization, half-duplex communication
: Start - 1 bit
Data - 8 bits
Stop: 1 bit (with parity) or 2 bits (if no parity)
Parity: Select from none, odd or even
Error detection
Communication protocol
: Sum check, parity, framing
: Modbus-RTU communication
Number of stations
: Set between 1 and 247
5
6
7
8
The default factory settings are shown below.
C401 Baud Rate
C402 Station Number
C403 Parity
C404 Response Time
bps
Sec
9
=4: 9600
1
=1: No Parity
0.01
10
11
12
13
A
Axpert-Opti torque Electronic Soft Starter
11.3
This page is intentionally left blank
1
2
3
4
5
6
7
8
9
10
11
12
13
A
Amtech
11.4
CHAPTER- 12: UL INSTRUCTIONS
1
The Axpert-Opti torque Series Electronics Soft-Starter AMT-OT-037-4-1 to AMT-OT-630-4-1
complies with UL508 and CSA C22.2 No.14.
The UL and cUL marks are indicated on the rating nameplate for UL compliant parts.
2
3
4
5
Observe the following matters when using the soft-starter as an UL/cUL Standard compatible product.
6
(1) Use the soft-starter in an installation environment, where maximum surrounding air temperature
does not exceed 50 Degree C.
(2) For the main circuit connected to the soft-starter, use a "75°C CU" "voltage rating 600V or higher"
copper wire.
(3) Use the wire sizes given in Table 2-3-1 for the main circuit wiring. Use a UL/CSA Listed round
crimp terminal, which matches the wire diameter for the terminal connection. Crimp the crimp
terminal with a crimping tool recommended by the maker.
7
8
(4) When wiring the circuit, tighten with the torque given in Table 2-3-1.
(5) Always provide a UL Certified fuse on the input side of the soft-starter. When protected by Class
fuse as indicated below, these devices have the following short circuit rating.
Table 12-1
Model
Fuse Rating (A rms)
Fuse Class
Short circuit current (A)
AMT-OTxxx-4-1
037
100A, 600VAC
Class RK5
5000
045
055
075
100A, 600VAC
150A, 600VAC
150A, 600VAC
Class RK5
Class RK5
Class RK5
10000
10000
10000
090
110
132
200A, 600VAC
300A, 600VAC
300A, 600VAC
Class RK5
Class RK5
Class RK5
10000
10000
10000
160
200
400A, 600VAC
400A, 600VAC
Class RK5
Class RK5
18000
18000
250
600A, 600VAC
Class RK5
18000
315
400
600A, 600VAC
800A, 600VAC
Class RK5
Class L
30000
30000
450
1000A, 600VAC
Class L
30000
9
10
11
12
13
A
Axpert-Opti torque Electronic Soft Starter
12.1
1
2
500
585
1200A, 600VAC
1200A, 600VAC
Class L
Class L
42000
42000
630
1200A, 600VAC
Class L
42000
(6) Install the soft-starter as “open type equipment".
(7) The installation environment must satisfy "pollution degree 2".
3
4
(8) The soft-starter has a motor overload protection function. Refer to Chapter 6, and set parameters
B301 to B307 correctly.
(9) Integral solid-state short circuit protection does not provide branch circuit protection. Branch circuit
protection must be provided in accordance with the National Electric Code and any additional local
codes or equivalent.
5
6
7
8
9
10
11
12
13
A
Amtech
12.2
CHAPTER- 13: CE Marking
The Axpert-Opti torque Series Electronics Soft Starter complies with the EMC directives and Low
Voltage directives. Observe the following matters when using the soft starter as an EMC directive
compliant product.
This Instruction details how to meet the EMC directives (89/336/EEC) with Opti-Torque and it is
important to understand before installation and operation of soft starter. The soft starter is designed to
meet the EMC directives and is suitable for use in the Industrial Environments. These soft starters
have been tested with the power cables and control leads connected as shown in fig. 13-3-1. If these
soft starters are connected with fewer control leads than those specified in fig 13-3-1, it may be
possible to reduce installation costs by using ordinary cables rather than screened cables which are
recommend in this manual. It is strongly advised however that a compliance test should be performed
under the actual operating conditions to certify that the system complies with the relevant EMC
requirements. If the soft starters are used with any of the optional cards, in such cases suitable extra
measures must be provided and must certify through a test that the product, system or installation
complies with the relevant EMC requirements.
WARNING
This manual represents Amtech's recommendations based on its understanding of the EMC
regulations only and Amtech cannot accept responsibility for any legal problems arising from or in
connection with the use of its products.
Amtech have made every effort to ensure that their products comply with the directives laid out in
the certificate of conformity, which is supplied with each soft starter.
The EMC directives set out immunity requirements for the electrical soft starter (ability to work
properly without being affected by external electromagnetic disturbance), in addition to the previously
enforced emission requirements (electromagnetic disturbance generated by the electrical soft starter).
In addition to the radiated noise directly generated from the soft starter and its connected cables, the
emission requirement includes the conducted noise, which is conducted outside the soft starter
through the input cables.
Immunity is the ability of a soft starter to operate properly without being affected by an external
disturbance.
The EMC compliance is only achieved when the immunity level of soft starter exceeds its emission
level under its operating environment.
In addition to the immunity against a radiated and conducted disturbance, the EMC directives also
require of the soft starter the immunity against static electricity discharges and fast transients.
CAUTION
A human body can easily be charged with static electricity by
merely walking on carpet and with a mere touch on the soft
starter, this static electricity will be discharged through it. A
discharging spark can be at such a magnitude that it can
damage the soft starter.
13
A soft starter which is installed near cables connected to a switching inductive load can often operate
incorrectly due to a fast transient induced on its control leads at a switching of the inductive load.
Axpert-Opti torque Electronic Soft Starter
13.1
1
These are just a few examples of disturbance to which the soft starter is exposed and the soft starter
is now required to operate correctly without being affected by such disturbance.
13-1 Installation environments
2
3
4
The Axpert-Opti torque conforms to the EN 60947-4-2: 2000 + A2:2006 With stand-alone installation
of Axpert-Opti torque, it is recommended to ensure that no device or equipment is installed adjacent
to the soft starter that is intended for the Residential, Commercial and Light Industrial Environments
only, as interference with such equipment may occur.
13-2 Wiring & Earthing
Select the input cables from those specified in the manual.
The output cable from the soft starter must be screened or armored and the screen or armor must
5
6
7
8
9
10
be connected to the earth as shown in fig. 13-3-1.
Ensure that the input and output cable are not installed in parallel to each other. Keep them apart
from each other by at least 0.5 meter (20”).
Ensure that the screen of the output cable is earthed at both ends with one end connected to the
earth terminal of soft starter and the other end to the motor earth.
Arrange the termination at the soft starter end inside the enclosure. If it is not possible to
terminate the cables inside the enclosure then terminate them as closely to the conduit hole of
soft starter as possible (preferably within 0.1 meter (4”)).
Use a 0.13mm2 (AWG 26) to 0.8mm² (AWG 18) wire for wiring to the control circuit and should be
screened if they are used for a speed setting circuitry, analogue signal circuitry for metering, or
relay signal circuitry. The screen should be connected to the earth terminal of soft starter or COM
terminal only (refer to Fig. 13-3-1).
Control cables should be selected in accordance with the instructions in the manual of soft starter.
The control leads should be wired away from the power cables. If it is not possible, cross them at
the right angle, and if they are laid down alongside each other, ensure to separate them by at
least 0.5 meter (20”).
When the section, which runs along the power cables, exceeds 10 meter (33.3’), separate them
further more. The control cables should not share the same conduit hole of the soft starter with
the power cables. Separate analogue control leads from relay control leads.
To reduce emission and to increase immunity, ensure that no control cables are connected that is
not used. Also, wire them in such manner that they are as short as possible.
Put the relay signal controller and analog speed-setting controller, analog signal meters in a metal
box.
Keep the earthing cable of soft starter and motor as short as possible and is installed in
accordance with the local requirements. Use low impedance earthing cables.
If the motor does not share the same earth post with the soft starter, do not connect the screen /
earth cable of the soft starter’s output cable to the motor.
11
12
13
A
Amtech
13.2
AC Supply
L1
L2
L3
E
U
V
W
Screened or armored motor
cable
E
Motor
Soft Starter
RUN
+24V
COM
Screened cable
FSV or VIN
COM
Screened cable
FSI or IIN
COM
Screened cable
VO1 or VO2
COM
Screened cable
IO1 or IO2
COM
Screened cable
Metal box
Fig. 13-3-1 Installation (Stand-alone)
13-3 Considerations to measuring devices
All the cables and leads connected to the soft starter should be regarded as active sources of
electrical noise. For inspection or service, use measuring devices or equipment that are CE marked. If
they require an external power supply, use one, which is separate or well insulated from that of the
soft starter.
Even for a system that comprises CE marked equipment and devices only, an EMC compliance test
may be required if the whole system is exported from one country to another. Ask the local
government for details.
13
Axpert-Opti torque Electronic Soft Starter
13.3
1
/GVCN%CDKPGV
PGV
/GVCN%CDK
AC Supply
L1
2
L2
L3
3
Screened or armored
Power Cable
Earth
E
U
V
W
4
Screened or armored
motor cable
E
5
Motor
Soft Starter
6
7
RUN
+24V
COM
Screened cable
FSV or VIN
COM
Screened cable
FSI or IIN
COM
Screened cable
VO1 or
VO2
COM
IO1 or IO2
COM
8
Screened cable
Screened cable
9
E
10
Fig. 13-3-2 (Installation in metal box)
11
13-4 Insulation test
CAUTION
12
Perform the test at the maximum voltage of 1960 VAC.
13
A
Amtech
13.4
Metal box
Appendix-A: Standard Specifications for 200V, 400V, 500V and 600V Series
200V series
Power Source
Tolerance
Inline
Rating
AMT-OT-XXX-2-X
076
090
091
110
015
018
022
30
37
45
55
75
75
90
90
110
Max applicable motor
line current (A)
60
72
87
110
147
175
215
245
245
320
320
360
22
30
37
45
55
75
90
132
132
132
132
200
104
124
150
190
254
303
372
424
424
554
554
623
111
132
133
160
161
200
250
315
400
450
500
Max applicable motor
(kW)
110
132
132
160
160
200
250
315
400
450
500
Max applicable motor
line current (A)
360
470
470
590
590
720
800
880
950 1065 1200
Max applicable motor
(kW)
200
200
200
250
250
315
450
585
710
Max applicable motor
line current (A)
623
814
814
1021 1021 1247 1385
1524
1645 1844 2078
Inside
Delta
Inline
Rating
Voltage tolerance: ±10%, Frequency tolerance: ±5%
015
018 022 030 037 045 055
075
Max applicable motor
(kW)
Max applicable motor
(kW)
Max applicable motor
line current (A)
AMT-OT-XXX-2-X
Inside
Delta
200 ~ 240 VAC, 3-Phase, 3-Wire, 50/ 60 Hz
800
875
400V series
Power Source
Tolerance
AMT-OT-XXX-4-X
160
161
200
30
37
45
55
75
90
110
132
132
160
160
200
60
72
87
110
147
175
215
245
245
320
320
360
45
55
75
90
132
132
200
200
200
250
250
315
104
124
150
190
254
303
372
424
424
554
554
653
201
250
251
315
316
400
450
500
585
630
710
Max applicable motor
(kW)
200
250
250
315
315
400
450
500
585
630
710
Max applicable motor
line current (A)
360
470
470
590
590
720
800
880
950 1065 1200
315
450
450
585
585
710
800
875
940 1060 1190
653
814
814
1021 1021 1247 1385
1524
1645 1844 2078
Inside
Delta
Inline
Rating
Inline
Rating
133
Inside
Delta
Max applicable motor
(kW)
Max applicable motor
line current (A)
Max applicable motor
(kW)
Max applicable motor
line current (A)
AMT-OT-XXX-4-X
380 ~ 480 VAC, 3-Phase, 3-Wire, 50/ 60 Hz
Voltage tolerance: ±10%, Frequency tolerance: ±5%
030
037 045 055 075 090 110
132
Max applicable motor
(kW)
Max applicable motor
line current (A)
A
Axpert-Opti torque Electronic Soft Starter
A.1
500V series
1
500 ~ 575 VAC, 3-Phase, 3-Wire, 50/ 60 Hz
Tolerance
AMT-OT-XXX-5-X
Voltage tolerance: ±10%, Frequency tolerance: ±5%
037
045 055 075 090 110 132
160
Inline
Rating
2
Power Source
Inside
Delta
3
Max applicable motor
(kW)
Max applicable motor
line current (A)
Max applicable motor
(kW)
Max applicable motor
line current (A)
AMT-OT-XXX-5-X
Inline
Rating
4
Inside
Delta
5
6
Max applicable motor
(kW)
Max applicable motor
line current (A)
Max applicable motor
(kW)
Max applicable motor
line current (A)
161
200
201
250
37
45
55
75
90
110
132
160
160
200
200
250
60
72
87
110
147
175
215
245
245
320
320
360
55
75
90
132
132
200
200
250
250
315
315
450
104
124
150
190
254
303
372
424
424
554
554
623
251
315
316
400
401
450
500
585
630
710
800
250
315
315
400
400
450
500
585
630
710
800
360
470
470
590
590
720
800
880
950 1065 1200
450
585
585
710
710
800
875
940
1060 1190 1400
623
814
814
1021 1021 1247 1385
1524
1645 1844 2078
600V series
Power Source
Tolerance
7
Inline
Rating
AMT-OT-XXX-6-X
8
Inside
Delta
11
12
201
250
251
315
45
55
75
90
110
132
160
200
200
250
250
315
Max applicable motor
line current (A)
60
72
87
110
147
175
215
245
245
320
320
360
75
90
132
132
200
200
250
315
315
450
450
585
104
124
150
190
254
303
372
424
424
554
554
623
316
400
401
450
451
500
585
630
710
800
900
Max applicable motor
(kW)
315
400
400
450
450
500
585
630
710
800
900
Max applicable motor
line current (A)
360
470
470
590
590
720
800
880
950
1065
1200
Max applicable motor
(kW)
585
710
710
800
800
875
940
1060
1190
1400
1700
Max applicable motor
line current (A)
623
814
814
1021
1021
1247
1385
1524
1645
1844
2078
Inside
Delta
Inline
Rating
10
Voltage tolerance: ±10%, Frequency tolerance: ±5%
045
055 075 090 110 132 160
200
Max applicable motor
(kW)
Max applicable motor
(kW)
Max applicable motor
line current (A)
AMT-OT-XXX-6-X
9
600 ~ 690 VAC, 3-Phase, 3-Wire, 50/ 60 Hz
13
A
Amtech
A.2
Control
Control system
Digital 32-bit Digital Signal Processor
+24V supply
Max. Total current drain from terminal = 100 mA
Serial port
Supports RS 485
External supply for
External 230/115 VAC, 1-phase supplies to be provided by the user. Capacity varies
control & cooling fan as per the rating. Refer Instruction Manual Chapter-2 for more detail.
Current feed back & Motor current: Adjustable up to 0.3 x Unit Current Rating
Thermal OLR
I-Low Level: 0 ~ 100% of full load motor current
I-Limit Level: 100 ~ 500% of full load motor current
I-Trip Level: 100 ~ 550% of full load motor current
I-Low Time: 0 ~ 20 minutes
Operation Specifications
I-Limit Time: 10 ~ 60 seconds
Digital Inputs
8-Programmable Sequence Inputs, Sink / Source changeable, max 5 mA each
Programmable between 24 different options: Not Used, Terminal, Jogging, External
Flt (NO), Fault Reset, Bypass Cont Flt, Main Cont Flt, Emergency Stop (NO), Ramp
Hold, Rev cont Flt, PID Bypass, PID Disable, Emergency Stop (NC), External Flt
(NC), RUN, STOP, PLC input 1 ~ 8
Digital Outputs
4 Programmable digital outputs, Open collector type, max 30V, 50mA
Programmable between 20 different options:
Not Used, Ready, Run, Top Of Ramp, Terminal, Fault Alarm, I-Limit Alarm, Low
Current Alarm, High Current Alarm, Temp Alarm, Rev Cont, PID Up Limit, PID Low
Limit, PLC Output 1 ~ 7
Potential Free
Contacts
3-Programmable relays:
1-NO, 1-NC for 2A @ 240 VAC
Programmable between 20 different options same as digital outputs
Programmable
Analog Outputs
2-Programmable analog voltage outputs VO1 & VO2: 0~10 VDC, 12-bit
2-Programmable analog current outputs IO1 & IO2: 4~20 mA, 12-bit
Programmable between 12 different options: Output Voltage, Output Current, Active
Power, Reactive Power, Power factor, PID Output, Motor torque, Heat sink
temperature, PLC Analog output 1 ~ 4
Dual Ramp Selection
V-Ramp Up Time1: 1 ~ 240 sec
V-Ramp Start
Pedestal-1: 25 ~ 90%
Kick Time: 0 ~ 2.0 sec
Kick Voltage: 0 ~ 90%
Target: 25 ~ 100%
I-Ramp Up Time: 1 ~ 60 sec
Start Mode
I-Ramp Start
Initial Current: 100 ~ 300%
I-Proportional Gain: 0.01 ~ 2.00
I-Integral Time: 0.01 ~ 100.00
T-Ramp Up Time: 1 ~ 240 sec
Initial Torque: 1 ~ 250%
T-Ramp Start
Torque Limit: 1 ~ 250%
T-Proportional Gain: 0.1 ~ 2.0
T-Integral Time: 0.01 ~ 100.00
A
Axpert-Opti torque Electronic Soft Starter
A.3
V-Ramp Down Time: 1 ~ 240 sec
1
Operation Specifications
V-Ramp Stop
2
3
Final voltage: 70 ~ 25%
Brake Ramp Time: 0.1 ~ 20.0 sec
Stop Mode
Display
Start
Duty
6
7
Protection
9
Environment
10
11
12
Brake Voltage: 25 ~ 100%
Brake Time: 1 ~ 240 sec
T- Ramp Down Time: 1 ~ 240 sec
End Torque: 1 ~ 100%
Coast to stop
Control Mode
Local (Digital Operation Panel)
Terminal
Serial
PID Controller
Inbuilt PID can be used as stand alone PID Controller
Display and Keypad
module
80-Character, 4-Line LCD panel, 8-Key keypad, 3-Status indicating LED for Run,
Stop and Fault
Ten equally spaced starts per hour at 300% current, each of 30 seconds duration, separated by periods of
100% current, or one start at 300% current of 60 seconds duration, followed by 100% current indefinitely
(In 200V series for models 200~500 kW, 6 equal starts, in 400V series for models 400~710 kW, 6 equal
starts, in 500V series for models 450~800 kW, 6 equal starts, in 600V for series models 500~900 kW, 6
equal starts )
Transient Protection
8
Brake Stop
T-Ramp stop
4
5
Initial Voltage: 100 ~ 25%
RC Snubber across thyristor
MOV across input power supply
Last ten faults with status and four operational parameters like Input voltage (Vry), Output current (%),
Total conductive time (Hrs) and Heat sink temperature (oC).
* Over current fault
* Temperature fault
* Over load fault
* Ground fault
* Phase direction fault
* I-Unbalance fault
* Phase Loss fault
* Over voltage fault
* Firing fault
* Over frequency fault
* Under voltage fault * Under frequency fault
Installation Location Indoor
Ambient
0°C (32°F) ~ 50°C (122°F)
Temperature
Storage
Temperature
-20°C (-4°F) ~70°C (158°F)
Altitude (above sea
level)
1000m (3300 ft) without derating, above this derate 5% per 305m (1000 ft)
Humidity
0~95% max non condensing
Enclosure
IP00
13
A
Amtech
A.4
Appendix-B: Outline Dimensions
B
C
10mm (0.4" )
D
10mm (0.4") Dia holes (04 PLS)
F
H
127mm
(5")
G
72mm
(2.8")
KEYPAD
A
E
SIDE VIEW
10mm (0.4")
10mm (0.4")
TOP VIEW
Model
Dimensions in mm (inch)
A
B
C
D
E
F
G
H
Weight in
kg (lb)
AMT-OT-015-2-X , AMT-OT-018-2-X , AMT-OT-022-2-X , AMT-OT-030-2-X
AMT-OT-030-4-X , AMT-OT-037-4-X , AMT-OT-045-4-X , AMT-OT-055-4-X
AMT-OT-037-5-X , AMT-OT-045-5-X , AMT-OT-055-5-X , AMT-OT-075-5-X
AMT-OT-045-6-X , AMT-OT-055-6-X , AMT-OT-075-6-X , AMT-OT-090-6-X
445
213
260
170
423
(17.5)
(8.4)
(10.2)
(6.7)
(16.7)
AMT-OT-037-2-X , AMT-OT-045-2-X , AMT-OT-055-2-X
AMT-OT-075-4-X , AMT-OT-090-4-X , AMT-OT-110-4-X
AMT-OT-090-5-X , AMT-OT-110-5-X , AMT-OT-132-5-X
AMT-OT-110-6-X , AMT-OT-132-6-X , AMT-OT-160-6-X
43
(1.7)
43
(1.7)
77
3.0
13
(28.7)
460
213
277
(18.1)
(8.4)
(10.9)
AMT-OT-075-2-X , AMT-OT-090-2-X
AMT-OT-132-4-X , AMT-OT-160-4-X
AMT-OT-160-5-X , AMT-OT-200-5-X
AMT-OT-250-6-X , AMT-OT-315-6-X
420
(16.5)
328
(12.9)
315
(12.4)
170
(6.7)
438
(17.2)
43
(1.7)
43
(1.7)
92
(3.6)
20
(44.1)
224
(8.8)
400
(15.8)
102
(4.0)
98
(3.9)
227
(8.9)
29
(64)
A
Axpert-Opti torque Electronic Soft Starter
A.5
Model
1
Dimensions in mm (inch)
A
B
C
D
E
F
G
H
Weight in
kg (lb)
AMT-OT-110-2-X, AMT-OT-132-2-X, AMT-OT-160-2-X
AMT-OT-200-4-X, AMT-OT-250-4-X, AMT-OT-315-4-X
AMT-OT-250-5-X, AMT-OT-315-5-X, AMT-OT-400-5-X
AMT-OT-315-6-X, AMT-OT-400-6-X, AMT-OT-450-6-X
2
3
4
5
6
7
600
547
326
442
570
210
210
385
(23.6)
(21.5)
(12.8)
(17.4)
(22.4)
(8.27)
(8.27)
(15.2)
AMT-OT-200-2-X, AMT-OT-250-2-X, AMT-OT-315-2-X, AMT-OT-400-2-X, AMT-OT-450-2-X
AMT-OT-400-4-X, AMT-OT-450-4-X, AMT-OT-500-4-X, AMT-OT-585-4-X, AMT-OT-630-4-X
AMT-OT-450-5-X, AMT-OT-500-5-X, AMT-OT-585-5-X, AMT-OT-630-5-X, AMT-OT-710-5-X
AMT-OT-500-6-X, AMT-OT-585-6-X, AMT-OT-630-6-X, AMT-OT-710-6-X, AMT-OT-800-6-X
60
(132.3)
740
597
326
492
710
235
235
525
(29.1)
(23.5)
(12.8)
(19.4)
(28)
(9.3)
(9.3)
(20.7)
AMT-OT-076-2-X, AMT-OT-091-2-X, AMT-OT-111-2-X, AMT-OT-133-2-X, AMT-OT-161-2-X
AMT-OT-133-4-X, AMT-OT-161-4-X, AMT-OT-201-4-X, AMT-OT-251-4-X, AMT-OT-316-4-X
AMT-OT-161-5-X, AMT-OT-201-5-X, AMT-OT-251-5-X, AMT-OT-316-5-X, AMT-OT-401-5-X
AMT-OT-201-6-X, AMT-OT-251-6-X, AMT-OT-316-6-X, AMT-OT-401-6-X, AMT-OT-451-6-X
78
(172)
600
453
326
398
(23.6)
(17.8)
(12.8)
(15.7)
AMT-OT-500-2-X
AMT-OT-710-4-X
AMT-OT-800-5-X
AMT-OT-900-6-X
Consult factory for the dimensions
49
(108)
8
9
10
11
12
13
A
Amtech
A.6
570
(22.4)
163
(6.4)
163
(6.4)
385
(15.2)
Appendix-C: Fault Codes
No.
Fault Name
Fault Description
1
Over Current Fault
This fault indicates that the unit has tripped due to excessive over
current. (550% of the rated current). This fault occurs when the load
current exceed the value set under I-Trip Level (B307). This fault
gives the instantaneous Over Current trip. A short circuit condition on
the output will also cause the unit to display this fault.
2
Under Current Fault
This fault occurs when the load current falls below the set value
under I-Low Level (B303) for a set time in I-Low Time (B304). This
active only during the running condition.
3
I-Unbalance Fault
This fault occurs when the current between any two phases differ by
the value set under the I-Unbalance Level (B205) for a set time in I
Unbalance Delay (B206).
4
Overload Fault
The fault active whenever motor current exceeds the value set under
the Over Load Setting (B305) and the unit will trip as per the selected
overload curve. This fault also occurs whenever the load current
exceeds the value set under I- Limit (B301) for a set time in I-Limit
Time (B302).
5
Firing Fault
A firing fault means that after the firing pulses are sent to the thyristor
is not conducting. This would normally occur only if the thyristor has a
faulty gate or if the thyristor is open circuit or, one or more thyristors
are short-circuited or if the thyristor firing circuit is faulty, or one or
more motor windings are open circuited.
6
Over Voltage Fault
This fault occurs whenever the input voltage to the unit exceeds
+20% of the value set under the Rated Input Voltage (B101). If this
fault occurs, this fault is instantaneous in order to protect the unit.
7
Phase Loss Fault
This fault will occur when one or more input phases are lost or the
input voltage falls below the 30% of the value set under the Rated
Input Voltage (B101).
8
External Fault
This fault occurs if the external fault input selected at the terminal is
missing. This comes from the user.
9
Emergency Stop
This fault indicates that the unit has shut down due to the emergency
stop command. This also comes from the user.
10
EEPROM Fault
This fault indicates that the data received from the EEPROM is
incorrect. After reset, it will store default values in the EEPROM
memory.
11
Ground Fault
This fault indicates that the unit has shut down due to ground fault.
Before reset, check that any output is not shorted with the ground.
12
Communication Loss
If the slave (main control unit) is not responding to the master (Digital
Operation Panel), this fault will occur. It is auto reset type. If the
communication resumes, this will be cleared.
13
Phase Direction Fault
This fault indicates that the phase sequence at the input to the Soft
Starter is reversed.
14
Over Frequency Fault
This fault occurs when the line frequency exceeds the +10% of the
motor frequency.
15
Under Frequency Fault
This fault occurs when the line frequency below the -10% of the
motor frequency.
16
Bypass Cont Fault
This fault indicates that bypass contactor unable to energies when
power is applied, or fails to drop out when power is removed.
A
Axpert-Opti torque Electronic Soft Starter
A.7
17
Main Cont Fault
This fault indicates that main contactor unable to energies when
power is applied, or fails to drop out when power is removed.
(Note: If the main contactor fault is not selected in PSI and main
contactor is fitted then card will display the phase fault).
18
Reverse cont Fault
This fault indicates that reverse contactor unable to energies when
power is applied, or fails to drop out when power is removed.
19
Temperature Fault
This fault indicates that the heatsink temperature has rise above the
set value (87˚C).
1
2
3
4
5
6
7
8
9
10
11
12
13
A
Amtech
A.8
Appendix-D: Trouble Shooting Guidelines
In case of fault condition, first ensure that the mains voltage applied at L1, L2 and L3 are ok.
Then check the control supply voltage in PCA-2005B.
Measure @
Sr. No.
Expected Voltage
1
1,J6
4,J6
+20V ~ 25.5V
2
2,J6
4,J6
+14.9 ~ 15.1VDC
3
3,J6
4,J6
+4.5 ~ 5.5VDC
4
5,J6
4,J6
-13.5 ~ 16.5VDC
5
3.3VD
DGND
+3 ~ 3.6VDC
6
1.9VD
DGND
+1.86 ~ 1.94
If the above voltages are correct, check the following jumper positions.
Jumper Position
1. The equipment is shipped with sink logic (JP1 is kept on Sink position) for the programmable
sequence inputs. To change the sink logic to source, change the jumper JP1 position to Source.
2. The equipment is shipped with JP3 in NLD position. This means the terminating resistors are not in
picture. To insert the terminating resistors, keep the jumper to LD position.
If the above jumper positions are correct, check the following as per the fault displayed on the
Operation Panel (LCD Display)
No.
Fault Name
Causes & Countermeasures
1
Over Current Fault
1. Current transformer may have loose connection.
Switch off the power supply and repair the loose connection.
Check again.
2. The value set under I-Trip Level (B306) is too close to the value
set in I-Limit Level (B301).
Increase the value set in I-Trip Level. The setting should be at
least 100% above the I-Limit Level (B301) setting.
3. The bypass contactor has jammed in.
If the bypass contactor has jammed in, the starter attempts direct
on line start when the start commend is given.
Switch off the power supply and change or repair the bypass
contactor.
4. If the motor is stalling, causing the current to reach the I-Trip
Level.
Check the load and free if necessary.
5. If over current comes during ramp up, set it high enough to avoid
problems during ramp up or increase the ramp up time.
6. If fault comes during stop, The power module in the main circuit
may be damaged.
Switch off the power supply and check the power module(s).
7. Starter has a genuine over current fault.
Disconnect the motor from the soft starter and megger the motor
to ensure there is no ground fault. Otherwise contact your supplier.
2
Under Current Fault
1. I-Low Level (B303) is set too high. Decrease the set value.
2. Motor is overhauling, Short duration overhauls can be filtered by
adjusting I-Low Time in (B304).
3. Disable the feature by setting 0% in B303.
A
Axpert-Opti torque Electronic Soft Starter
A.9
No.
1
Fault Name
3
I Unbalance Fault
1. The current transformer may have incorrect polarity.
Reconnect the current transformer correctly
2. If one of the current transformers is open circuit.
Replace the current transformer.
3. If the current is truly unbalanced, check it with a current meter.
Rectify this problem with the motor.
Otherwise contact your supplier.
4. One or more load conductors are open (without shorting) or have
a high resistance connection. Check wiring and connections for
breaks, corrosion or loose devices.
4
Overload Fault
1. The value entered under Motor Current (B103) in the set menu
has not been correct.
Enter the correct value under Motor Current (B103) in the set
up menu.
2. The motor current value measured with meter is close to the rated
current of the unit.
Reduce motor load.
3. The current transformer polarity is not correct.
Reconnect the current transformer correctly.
4. Overload setting has not been correct.
Enter the correct value in Overload setting (B305).
5. Overload curve has not been chosen correctly.
Select the appropriate curve.
6. The motor is drawing more than 105% of the value entered under
motor current in the set up menu.
Rectify the problem with the motor or load.
7. The value entered under the I-Limit Level (B301) has not been
correct.
Enter the correct value
8. Inadequate ramp up time setting.
Increase the I-Limit value or shorten ramp up time.
9. The start duty cycle is too high. Result in an overload fault.
Check the No. Of starts per hour.
Otherwise contact your supplier
5
Firing Fault
1. If any of the thyristor gate terminals has loose connection or
broken.
Repair the loose connection
2. The impedance between RG & R, UG & U, YG & Y, VG & V, BG &
B and WG & W should be lie between 4 ohms & 100 ohms.
If any of the gate impedance is wrong, Replace the thyristor with
faulty gate.
3. One or more of the thyristor in the unit is short circuit.
Impedance between the R & U, Y & V and B & W should not be
below 1kohms.
Replace faulty thyristor.
4. One or more motor windings is open circuit.
Repair the motor.
5. If the one or more cables connecting the motor to the unit are
open circuit.
Repair the cables.
6. There are any loose power connections on the input or output of
the unit main control card.
Repair the loose connection.
7. If the motor is undersized for the unit, the motor impedance could
be so large that the thyristor never come into conduction.
Sized the unit and motor properly.
Otherwise contact your supplier.
2
3
4
5
6
7
8
9
Causes & Countermeasures
10
11
12
13
A
Amtech
A.10
No.
Fault Name
Causes & Countermeasures
6
Over Voltage Fault
1. The input supply voltage may have risen above 20% of rated input
voltage.
Check mains supply voltage.
7
Phase Loss Fault
1. The unit has lost one or more input phases.
Restore the power to the input of the unit.
2. There is a loose connection on the input side of the unit.
Repair the loose connection.
Otherwise contact your supplier.
3. The rated input voltage may have falls below the 30% of Rated
Input Voltage (B101).
Check mains supply voltage.
8
External Fault
1. The signal for the external fault is present at the PSI.
Check and correct it.
2. If the signal is not present, remove the selection of the external
fault with the help of Mode-C parameters.
3. There may be a problem in PCA-2005B.
Remove the main control board PCA-2005B.
9
Emergency Stop
1. The signal for the emergency stop input is present at the PSI.
Check and correct it.
2. If the signal is not present, remove the selection for emergency
stop with the help of Mode-C parameters.
3. There may be a problem in PCA-2005B.
Remove the control board PCA-2005B.
10
EEPROM Fault
1. Data received from the EEPROM is incorrect or out of range.
On fault reset, default values will be stored in the EEPROM.
2. If again fault occurs after power recycling, replace PCA-2005B.
11
Ground Fault
1. A ground fault may have occurred in the output line or motor.
Check that any output is not shorted with the ground.
2. One or more current transformer may have problem.
Remove the current transformer feedback and check.
3. If still fault persists, replace PCA-2005B; otherwise replace the
problematic current transformer.
12
Communication Loss
1. Check the communication cable between master (LCD Display
unit) and slave (Main control unit).
2. Disable the fault using C405.
3. There may be problem in display board PCA-2012.
Replace the display board PCA-2012 and check again.
4. There may be problem in control board PCA-2005B.
Replace the display board PCA-2005B and check again.
13
Phase Dirn Fault
1. Check the phase sequence of the mains power supply, if the
phase sequence is reverse, change any two phases.
Disable the fault using B401.
14
Under Freq Fault
1. If this fault occurs, it will cause the fluctuation in speed.
Switch off the main supply.
15
Over Freq Fault
1. If this fault occurs, it will cause the fluctuation in speed.
Switch off the main supply.
16
Bypass cont Fault
1. The bypass contactor does not energies when power is applied or
fails to drop out after the power is removed.
Replace the faulty bypass contactor.
2. Bypass contactor may have loose connection.
Repair the loose connection.
A
Axpert-Opti torque Electronic Soft Starter
A.11
No.
1
2
Fault Name
Causes & Countermeasures
17
Main cont Fault
1. This fault is enabled and main contactor is not energies it will
display main cont fault.
Replace the faulty contactor.
2. Main contactor may have loose connection.
Repair the loose connection.
18
Reverse cont Fault
1. This fault is enabled and reverse contactor is not energies it will
display Reverse cont fault.
Replace the faulty contactor.
2. Reverse contactor may have loose connection.
Repair the loose connection.
19
Temperature Fault
1. A trouble may have occurred in the cooling blower.
Replace it if necessary.
2. The ambient temperature may have risen.
Lower the ambient temperature (less than 50 °C).
3. The thermostat is not connected or may have problem.
4. The start duty cycle is too high. Result in an overload fault.
Check the No. Of starts per hour.
3
4
5
6
7
8
9
10
11
12
13
A
Amtech
A.12
Appendix-E: Software Revision history
Sr.
No.
Control
Version
Changes
1
6.01
- The soft starter was not working ok with reverse phase
sequence of the input power supply in inside delta
configuration. The same is corrected in the new version.
- The “RUN” digital output does not turn off in case of
emergency stop condition; if the control mode is TERMINAL
and start command is maintained type. The same is
corrected in the new version.
6.01
10/05/2009
2
6.03
- Add PSI option like External Fault (NC) and Emergency Fault
(NC)
6.03
03/02/2010
3
6.04
-
Add In-Built PLC Function
Make RUN and STOP PSI as programmable PSI
Make Fault Relay as programmable Relay
Add PSI option like External Fault (NC), Emergency Stop
(NC)
Add 200V, 500V, 600V series option
Add option in rated kW Rating
Add parameter for set level of Over Voltage Fault (B312)
Add Test Mode parameter (B211), which is use only for
factory test purpose.
Increased maximum limit of B204 to 800%, B301 to 600% &
B307 to 800%.
6.04
28/05/2010
6.05
02/02/2012
4
6.05
-
Compatible Effective
Display
Date
Version (dd/mm/yyyy)
A
Axpert-Opti torque Electronic Soft Starter
A.13
Notes:
Notes:
Notes:
Notes:
Notes:
AMTECH