1
Chapter 5 : Reports
Reports Overview
Once the estimate is complete and the markups have been applied, you are ready to print
your reports using these steps:
1. If you would like your logo to print on the reports in the top right corner instead of the
CostLink/AE logo, save a copy of your logo in the CostLink AE\System\Reports folder
with the name logo.bmp, logo.gif, or logo.jpg.
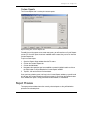
2. When you are ready to run reports, select the reports to run and the level for your
Summary report in the Reports dialog box, Select Reports tab.
3. Choose options for the reports on the Preferences tab.
NOTE: Once you have established the report formats for an estimate, CostLink/AE
remembers the last settings you used so that you can use the same formats
repeatedly. You can make adjustments at any time.
4. Click the Preview button to look over your selections and click the Print button to print
the reports.
The options, reports, and methods of producing paper and electronic copies of reports are
described in this chapter.
Reports Dialog box
Use the Reports dialog box to choose the reports you want to print and to define settings for
those reports.
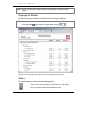
To open the Reports dialog box:
•
With a project open, from the File menu choose Reports Setup, or click the Select and
format reports
toolbar button.
Buttons on the Reports Dialog Box
These buttons and controls appear at the bottom of dialog box. Their actions apply
regardless of the tab you have selected.
72
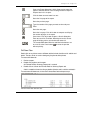
Print
Prints the reports as currently selected and configured (not
available on Preferences tab).
Preview
Opens a print preview window showing how the currently
selected reports will look when printed on the default Windows
printer (not available on Preferences tab).
Setup
Opens the Print Setup dialog box, which you can use to choose
a different default printer or change printer settings.
BSD CostLink/AE User Manual