1
Installing an External 5.25-inch or 3.5-inch Drive
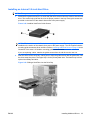
NOTE: The system does not support Parallel ATA (PATA) optical drives.
1.
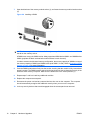
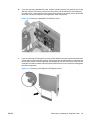
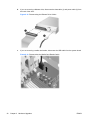
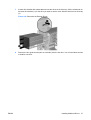
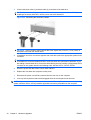
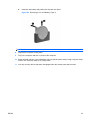
Install the four guide screws (two on each side) that were removed from the old drive into the new
drive. The screws help guide the drive into its proper position in the bay. Extra guide screws are
provided on the interior of the chassis frame next to the power supply.
Figure 2-21 Installing Guide Screws (Optical Drive Shown)
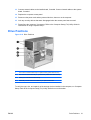
NOTE: Optical drives, diskette drives, and media card readers use M3 metric guide screws. Four
extra metric guide screws are provided on the interior of the chassis frame next to the power supply.
The HP-supplied metric screws are black. Refer to Installing Additional Drives on page 22 for an
illustration of the extra M3 metric guide screws location.
If you are replacing a drive, transfer the guides screws from the old drive to the new one.
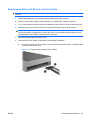
2.
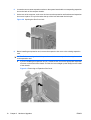
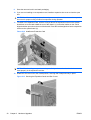
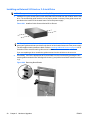
If necessary, remove the appropriate drive bezel blank from the front bezel by pressing the two
retaining tabs towards the outer left edge of the bezel (1) and pull the bezel blank inwards to remove
it (2).
Figure 2-22 Removing Bezel Blanks
28
Chapter 2 Hardware Upgrades
ENWW