1
Using Computerized Telescope to Facilitate learning and teaching of “Astronomy And Space Science" in the New Senior Secondary Physics Curriculum
3
Session2
Astrophotography with a DSLR
A DSLR has a larger sensor than an ordinary web cam and is therefore suitable for wide field photography.
A Tools
1
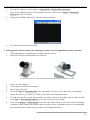
An astronomical telescope (preferably on an equatorial mount) with tracking ability;
2
An optional second telescope, with reticle illumination eyepiece, for guiding purpose;
3
A fully charged DSLR with an optional charged backup battery;
4
Camera lenses that suit your purpose;
5
A camera shutter release for your camera type. Always use a shutter release to minimize vibration;
6
A heavy duty tripod with tripod head;
7
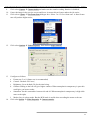
A camera adaptor with T-ring (M42 ring) for mounting your camera to the telescope;
8
A fully charged laptop with a long USB cable for connecting to the camera;
9
Other options include: a barlow lens, a wide-field converter lens, eyepieces, chairs and tables, etc.
B No-tracking photography (constellations, star trails, meteors, artificial satellite tracks)
1
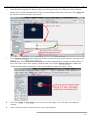
Equipment: A DSLR with a standard to wide lens, a tripod, a shutter release, a camera viewfinder
magnifier, a stop watch;
2
Screw the camera onto the tripod;
3
Attach all accessories (saving the image to the memory card is faster than saving to the computer);
4
Decide the best zoom ratio for your final target if you are using a zoom lens. Aim at the brightest
object in the sky (moon, planet or star) and focus manually. You may find the viewfinder magnifier
helpful but a camera with live-view mode is even better;
5
Switch the camera to manual mode and use the maximum lens aperture;
6
Select the highest ISO with acceptable noise. It is good to begin testing with 800, 1000, 1600 to find
the best compromise;
7
Centre the focused object and begin a series of exposures, starting with 5 seconds, 10 seconds..,
etc.(the moon requires much faster shutter speed). Find the exposure that gives an image that is clear
and not over exposed;
8
After you have found the exposure, begin fine-tuning your focus. Turn the focus ring a very minute
among and expose. Magnify it and compare the image with the one you took in step 7. If the second
image is sharper, turn the focusing ring in the same direction further little bit and snap another shot. If
the second image is not as sharp, turn the ring the other way and shoot. Compare and shoot until you
get the sharpest focus;
9
Use blu-tack to fix the zoom ring and the focus ring;
10 Now turn the camera and aim it at your target constellation. Choose an exposure of 15 seconds and
trigger the shutter release;
11 Usually a wide open camera lens has lower resolution because of lens design. You can experiment
taking pictures with stop down aperture. Find the best compromise between bright and sharp star
points;
14