1
2 Installation cont.
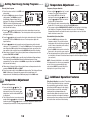
3 Programming Installer Settings
Installing New Thermostat
Default Thermostat Settings
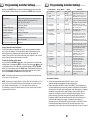
NOTE: When installing this thermostat in a new location, following a few simple
guidelines and the applicable building codes will give the best results. Install the
thermostat in a location that provides good airflow by avoiding areas behind doors,
near corners, air vents, direct sunlight or heat generating devices. The wiring must
conform to all building codes and ordinances as required by local and national code
authorities having jurisdiction for this installation.
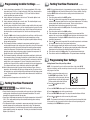
At initial power up or after Installer CLEAR is pressed, the thermostat is
reset to factory defaults. Installer CLEAR is located on the circuit board.
1. Always turn off the power to the air conditioning and heating system prior to
installing this thermostat.
2. Locate the release latch on the bottom (not the back) of the thermostat. Press
the release latch in and separate the body from the sub-base of the thermostat.
3. Set the thermostat electronics and cover down on a clean surface. Place the
sub-base on the wall in the desired location.
4. Using the slotted mounting holes in the sub-base, mark the placement of the
mounting holes through the slots and onto the wall. Ensure the wires come out
of the wall into the center hole of the sub-base.
5. After verifying the drill will not damage items in the wall, use a 3/16 drill to
create the mounting holes. Gently tap the supplied plastic anchors into the
holes in the wall.
6. Place the thermostat sub-base against the wall in the desired location. Ensure
the thermostat is level, the wires are inserted in the opening, and the mounting
holes are aligned with the slots on the sub-base.
7. Fasten sub-base to wall using the supplied screws into the plastic wall anchors.
8. Connect wires to the quick wiring terminal blocks. Use the wiring diagram chart
to ensure the old and new connections are correct.
9. To prevent electrical shorts and potential damage to the thermostat, make sure
all wire connections are secure and not touching each other.
10. Ensure the cover is still installed on the body, and install them onto the
sub-base. To do so, use the mounting tabs on the top of the sub-base as a
guide hinge, and close up the thermostat case by pivoting the body and cover
closed. The latch on the bottom of the thermostat will click when the case is
properly closed.
11. Flip the front thermostat cover open and open the battery compartment door.
12. Locate the positive [+] ends of the batteries and match them with the positive
[+] terminals located in the battery compartment. Install the two new “AA”
alkaline batteries (supplied). Close battery compartment door.
13. Restore system power and proceed to Programming Installer Settings.
2
Function
Status After Clear
Temperature Hold
Permanent and Temporary Hold Cleared
Clock
12:00 p.m., Monday
Room Temperature
70˚ F (21.0˚ C), to be renewed within
5 seconds.
Set Point Temperature
According to System Switch
62˚ F (17.0˚ C) for Heat, Emergency Heat & Off
83˚ F (28.0˚ C) for Cool
Temperature Scale
˚F
Operating Program
DAY program, Monday
Low Battery Warning
Off, to be renewed within 5 seconds
AC Interrupted Warning
Off, to be renewed within 5 seconds
1st Stage Differential
0.5˚ F (0.25˚ C)
2nd Stage Differential
2˚ F (1.0˚ C)
Programming
7 Day, 4 Event
Residual Cooling Fan Delay
60 Seconds
Short Cycle Protection Timer
On, Reset
Adaptive Recovery Mode
Off
Output Relays
Off
Extended Hold
Indefinite
Filter Check Monitor
0 days-off, Time reset
Keypad Lock
Unlocked
System Type
Conventional, Single Stage
1st Stage Heat Fan Control
Gas
2nd Stage Heat Fan Control
Electric
Fossil Fuel Compressor Lock
Off
Outage Protection Timer
Off, reset
AC Interrupt Warning Mode
OFF
3