1
Please be sure to read through the safety notes in the Appendix to these operating instructions. If you ever dispose of the model, it is important to pass on the complete operating
instructions to the new owner.
Introduction
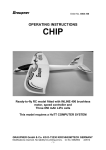
The CHIP is an ideal first hot-liner. The model is very highly pre-fabricated, but it is
still important to complete the procedures described in these instructions with the
greatest care to ensure that the model flies well and safely. Please start by reading
right through these operating instructions - before you attempt to operate the model and make yourself familiar with the method of operating your HoTT transmitter. Keep
the manual for your HoTT COMPUTER SYSTEM to hand when preparing the model.
Pack contents
1. Fuselage with factory-installed INLINE 400 brushless motor including assembled
CAM FOLDING PROP. Pre-fitted DES 231 rudder and elevator servos, Graupner
GR-12S HoTT receiver, speed controller, carbon-look canopy with Velcro closure.
2. Wing with CFRP spar, decals applied
3. Tailplane with elevator horn
4. 3/850 LiPo battery, 11.1 V / 0.85 Ah, Order No.7621.3BEC, with safety notes
5. 4564.HOTT operating instructions in German, English and French
6. Box and operating instructions for GR-12S, operating instructions for BRUSHLESS CONTROL 18 speed controller, various promotional brochures
Essential accessories (not included)
GRAUPNER HoTT COMPUTER SYSTEM transmitter
Transmitter battery charge lead
Charge lead with BEC connector
ULTRA TRIO PLUS 14 battery charger
min.
MX 12 to MC 32
Order No. 3022
Order No. 3037
Order No. 6466
Tool required to assemble the model (not included)
Cross-point screwdriver
Assembling the model
The model can very quickly be prepared for the air, but it is important to read and observe the following notes, as this will avoid problems, especially on the first flight.
Locate the horn, which is already glued in the elevator, connect it to the elevator
pushrod at the tail end of the fuselage, then fix the tailplane to the fuselage using the
M4 x 15 countersunk screw supplied; a suitable cross-point screwdriver is required.
The model is completed by fixing the wing to the fuselage using two M4 x 30 mm
screws. Fix the LiPo flight battery in the fuselage using the Velcro tape supplied.
Binding the GR-12S receiver in the model to your HoTT transmitter
The “BINDING” procedure varies according to the HoTT COMPUTER SYSTEM you
are using; please observe the following notes, and the section entitled “Binding the
receiver” in the manual supplied with your radio control system.
1. Give the LiPo flight battery and the transmitter battery a full charge.
2. Locate the right-hand stick on your transmitter, and move it back towards you to
the “motor stop” position.
3. Now connect the BEC plug and socket between the speed controller and the LiPo
battery.
GRAUPNER GmbH & Co. KG D-73230 KIRCHHEIM/TECK GERMANY
Modifications reserved. No liability for printing errors.
-2-
Id. No. 0062266
9/2011