1
http://www.rasistech.com
先明乐施
SAFETY NOTICE
To ensure safe and satisfactory operation of this equipment, it is essential that the
ground wire of the power cord is connected to a ground that complies with all national,
state, and local electrical codes.
Before using this equipment read the instructions carefully paying particular attention to
potential hazards arising from its use.
Even with the power switch turned off there is still voltage on the input side of the switch
and therefore the equipment must be unplugged before lifting the front cover.
This equipment contains a safety interlock switch for the lid. Closure screws must be
fully tightened for equipment to operate.
SAFETY GLASSES SHOULD ALWAYS BE WORN WHILE MACHINE IS IN
USE.
WARNING
DO NOT CUT TUBING NEAR ORGANIC VAPORS.
DESCRIPTION
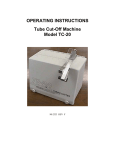
The Tube Cut-Off Machine has been designed for light or intermittent duty using a highspeed, dry abrasive cut-off wheel housed in a protective cabinet. The motor speed, wheel,
and cutting arm are carefully matched and aligned to provide safe, square cutting of 1/16, 1/8
and 1/4 inch (1.6, 3.2 and 6.4 mm) OD stainless steel tubing with ID down to 0.008 inches
(0.2 mm). The unique dressing tool deburrs by shaving the OD and ID with hard tool-steel
cutting edges. Properly maintained, the TC-20 should provide years of trouble free
operation.
INSTALLATION AND USE
1.
2.
3.
4.
5.
6.
Plug the Tube Cut-Off Machine into a properly grounded outlet. Be sure that the line voltage
matches the voltage rating on the left side of the unit.
For 115V operation use 93-5062: Fuse 5 amp SLO-BLO, 1 each
Install fuse opposite clip on fuse holder, insert fuse holder so 115V appears through window in
fuse door.
For 230Voperation use 93-5062: Fuse 5 amp SLO-BLO, 2 each
Remove clip on fuse holder to install both fuses, insert fuse holder so 230V appears through
window in fuse door.
Place the tubing to be cut into the vise-clamp on the end of the cutting arm and tighten. Be
certain the tubing is as straight as possible for best results.
Turn on the high-speed abrasive wheel and lower the arm to direct the tubing into the slot.
(Safety glasses should be worn while machine is in use.) Raise and lower the arm several
times to make certain the tube-end in the vise arm is square cut. Turn off the cutting wheel.
Discard the short piece that has been cut off, turn the tube around in the vise and square-cut
the other end. Measure carefully before cutting. * The tube in the vise is now ready for
deburring. The piece not held by the vise arm usually will not be square or suitable for
deburring, unless it is also firmly captured during the cutting operation.
Deburr by inserting the tube into the appropriate size dressing tool on the opposite end of the
cutting arm and turning the knurled nut clockwise. Always turn the dressing tool in the same
direction, like a pencil sharpener. Light pressure and several revolutions are sufficient in most
cases to remove burrs from the OD and ID of the tubing. Results will improve with practice.
*Scale on lid is for reference only.
RASIS Scientific Ltd
1
http://www.rasistech.com