1
Electrical connections
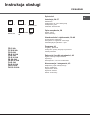
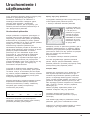
! Ovens equipped with a three-pole power supply
cable are designed to operate with alternating
current at the voltage and frequency indicated on
the data plate located on the appliance (see below).
Fitting the power supply cable
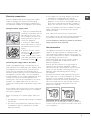
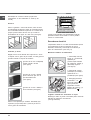
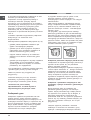
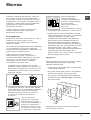
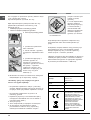
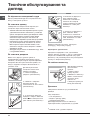
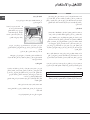
1. Open the terminal board by
inserting a screwdriver into the
side tabs of the cover. Use
the screwdriver as a lever by
pushing it down to open the
cover (see diagram).
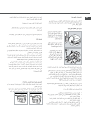
2. Loosen the cable clamp
screw and remove it, using a
screwdriver as a lever (see
figure).
3. Remove the wire contact
, then fasten
screws L-Nthe wires under the screw
heads, respecting the colour
code: Blue (N), Brown (L) and
Yellow-Green Verde ( ).
Connecting the supply cable to the mains
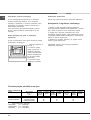
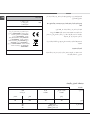
Install a standardised plug corresponding to the
load indicated on the data plate (see adjacent box).
The appliance must be directly connected to the
mains using an omnipolar circuit-breaker with a
minimum contact opening of 3 mm installed between
the appliance and the mains. The circuit-breaker
must be suitable for the charge indicated and must
comply with current electrical regulations (the
earthing wire must not be interrupted by the circuitbreaker). The supply cable must not come into
contact with surfaces with temperatures higher than
50°C.
! The installer must ensure that the correct electrical
connection has been made and that it is compliant
with safety regulations.
• the voltage is in the range between the values
indicated on the data plate (see below).
• the socket is compatible with the plug of the
appliance. If the socket is incompatible with the
plug, ask an authorised technician to replace it.
Do not use extension cords or multiple sockets.
GB
! Once the appliance has been installed, the power
supply cable and the electrical socket must be
easily accessible.
! The cable must not be bent or compressed.
! The cable must be checked regularly and replaced
by authorised technicians only (see Assistance).
! The manufacturer declines any liability should these
safety measures not be observed.
Gas connection
The appliance should be connected to the main gas
supply or to a gas cylinder in compliance with
current National regulations. Before carrying out the
connection, make sure the cooker is compatible with
the gas supply you wish to use.
When using liquid gas from a cylinder, install a
pressure regulator that complies with current
National regulations.
! Check that the pressure of the gas supply is
consistent with the values indicated in Table 1
(“Burner and nozzle specifications”) since this will
ensure the safe operation and longevity of your
appliance while maintaining efficient energy
consumption.
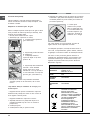
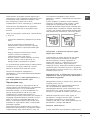
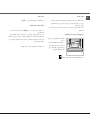
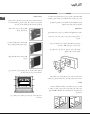
! Should you need to install a gas hob on top of a
built-in gas oven, it is strictly forbidden to connect
the two or to use a single cut-off tap. The two
appliances should be connected separately, and
each one should have its own stop tap in order to
make them completely independent from one
another (see figures).
NO
OK
Before connecting to the power supply, make sure
that:
• the appliance is earthed and the plug is compliant
with the law.
• the socket can withstand the maximum power of
the appliance, which is indicated on the data
plate (see below).
Connection with a rigid pipe (copper or steel)
! Connection to the gas system must be carried out
in such a way as not to place any strain of any kind
on the appliance.
3