1
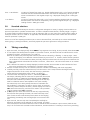
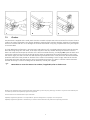
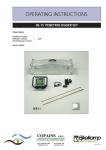
Nitrachek is supplied complete with: A padded, protective carrying wallet A plastic "checker" strip for testing the meter's calibration - see Section 7.2. A small brush for cleaning the meter's optical system - see Section 7.1. A diary/notebook for recording readings 2.Operating controls and battery 2.1The read-head and test-strip carrier The black section at one end of the meter is the read-head, incorporrating the hatch (see below) and into which fits the test-strip carrier, which is removable so that both it and the read-head can be cleaned occasionally, see section 7.1. 2.2The hatch The hinged door fitted to the read-head is the main operating control: as well as allowing insertion and removal of test-strips, opening the hatch switches the meter on at the start of a test, and subsequent opening and closing continues the measurement process. 2.3The push-buttons These function controls are only used for setting and adjusting lot numbers (see section 5.6), setting and adjusting the meters’ integral clock/calendar (see section 4), and reviewing the meters’ memory content (see section 3). In this manual, the circular push-button is shown as , the square push-button as , and the 'up'- and/or 'down - triangular push-buttons as . These latter two are used a. to increase or reduce a displayed number (holding either down for a second or two will cause the number concerned to 'roll' until the button is released. b.To 'search' through the meters' memory. 2.4The alarm switch The meters’ beeper can be switched off by sliding this switch (on the side of the meter, near the printed name) towards the battery compartment end of the meter (though, since the beepers’ warning is often useful, it should normally be left switched on). 2.5The battery Nitrachek operates from a single 9V (PP3) battery with a twin press-stud connector. Battery life depends very much on the type of battery being used and on the pattern of use. However, up to 500 or more readings can be expected when using a ‘standard’ battery, and substantially more when using a ‘high power’(MnAl) type. In the top right-hand corner of the display will indicate when the battery is near the end of its useful life. B The meter will still function properly (and will retain its memory content), but early replacement is advisable. EEE Shown in the main display area when the meter is switched on indicates that the battery is too flat to run the meter properly, and must be replaced. Testing cannot proceed.