1
MENTOR SUB INT Manual NB
27/05/08
15:11
Side 5
UK
OVERVIEW / SCHNELLÜBERSICHT / FUNKTIONSOVERSIGT
1
2
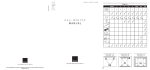
A M P L I F I E R B A C K P L AT E
R E M OTE
1 + 2 PHASE, FREQUENCY AND VOL.UME ADJUSTMENT
Press the relevant button and adjust to the desired value
using the ‘+’ and ‘-’ buttons.
A STAND-BY ON/OFF
Press to toggle between the two states (ON/OFF switch on
the rear panel must be set to ON).
NOTE: When the AUTO/MANUAL switch is set to AUTO, the
subwoofer cannot be turned off with signal on the inputs.
FREQUENCY RANGE: 40 - 120 Hz
VOLUME RANGE: 0 - 30 dB
PHASE RANGE: 0°, 90°, 180° or 270°
3 POWER LED
LED off: Mains power is Off
LED green: Subwoofer is On
LED red: Subwoofer is in Stand-by mode
3
4
4 AUTO / MANUAL
Flick the switch to the desired position.
AUTO: Switch up = The subwoofer will automatically power
up upon detection of an input signal on the LINE IN inputs.
MANUAL: Switch down = Stand-by only possible via the
Remote Control.
5
6
7
5 LEFT + RIGHT LINE INPUTS
Using these inputs activates the built-in crossover and makes
Crossover Frequency and Phase adjustment possible.
8
LEFT: Connect to the LEFT RCA line output on your
stereo/surround (pre-)amplifer.
RIGHT: Connect to the RIGHT RCA line output on your
stereo/surround (pre-)amplifer.
6 LFE LINE INPUT
Using this input disables the built-in crossover. All adjustments must be done from your surround (pre-)amplifer.
DISPLAY
A
LFE: Connect to the LFE RCA line output on your surround
(pre-)amplifer.
On the front of the subwoofer there is a
translucent logo badge/display. The settings
of the subwoofer can be seen on the display
when the subwoofer is operated by the
remote or the buttons on the amplifier.
B
C
D
E
F
G
7 ON/OFF SWITCH
Switch to turn the subwoofer On/Off from the mains supply.
8 MAINS FUSE - ATTENTION!
If the subwoofer does not power up in the ON position, the
fuse might be blown. To replace the fuse, unplug the mains
cable (7), open the fuse compartment (8) and replace the fuse
with one of the same type. If the fuse blows multiple times,
have the subwoofer serviced by qualified personel.
Please note that the voltage range written below the mains
fuse holder must match the voltage of your mains supply.
An der Vorderseite des Subwoofers sitzt ein
lichtdurchlässiges Logoschild/Display. Die
Einstellungen des Subwoofers sind auf dem
Display zu sehen, wenn der Subwoofer mit
der Fernbedienung oder mit den Tasten am
Verstärker bedient wird.
På subwooferens front findes et halvgennemsigtigt skilt/display. Indstillinger vises her når
subwooferen betjenes med fjernbetjening
eller direkte på subwooferens bagpanel.
3
120V version: Use/replace w. T5AL/250V fuse
220-240V version: Use/replace w. T2.5AL/250V fuse
4
B MUTE
Press to mute the subwoofer.
The display on the front of the subwoofer will show "---".
Press again to un-mute the subwoofer.
C + D + E PHASE, FREQ. AND VOLUME ADJUSTMENT
Press the relevant button and adjust to the desired value
using the ‘+’ and ‘-’ buttons.
The display on the front of the subwoofer will show the
selected value:
FREQUENCY RANGE: 40 - 120 Hz
VOLUME RANGE: 0 - 30 dB
PHASE RANGE: 0°, 90°, 180° or 270°
F MEMORIES 1, 2 & 3
When you have adjusted FREQ, VOL, PHASE to the desired
values, they can be stored in and recalled from the memory
positions 1, 2 and 3.
TO STORE A PRESET: Press and hold the desired memory
button (1, 2 or 3) on the remote for more than 3 seconds.
When the values are stored as a preset, the subwoofer
display will confirm by flashing "-1-", "-2-" or "-3-" three
times, according to the memory you have selected.
Please note, that existing presets in the memory will be
overwritten, if settings are re-stored in one of the memories.
TO RECALL A PRESET: Briefly press the desired memory
button (1, 2 or 3).
When a preset is recalled, the subwoofer display will
show "-1-", "-2-" or "-3-" for 2 seconds , according to the
memory you have recalled.
DK
CONTENTS
Overview and Functions
3
Backplate Amplifier
4
Remote
4
Introduction
6
Unpacking
7
Break-in
7
Positioning the Subwoofer
8
Connections
8
Surround Sound Connections
8
LFE Line Input
8
LEFT and RIGHT Line Inputs
8
Stereo Connections
9
Using Two Subwoofers
9
Adjustment of the Subwoofer
9
Level Adjustment
10
Crossover Frequency Adjustment
10
PHASE Adjustment
10
MEMORY Settings & Presets
10
AUTO/MANUAL Switch
11
POWER
11
Overloading of the Subwoofer
11
Cleaning and Maintenance
11
Avoid Direct Sunlight
G BATTERY
Open the battery compartment on the remote and insert the
battery as on the illustration. When the battery needs to be
replaced (depends on frequency of use), use ONLY a lithium
cell battery, type CR2025, 3V.
DE
11
Disposal
11
Technical Specifications
12
ATTENTION! Keep the remote out of reach of children as they
might be choked by eating the remote or parts of it including
the battery.
5