1
2008年8月29日 金曜日 午前11時13分
Install Manual/Manuel d’installation
安装手册 / インストールマニュアル
P2 Software/Logiciel P2
ENGLISH
P2Installer(VQT0L24-9)_E_F_C_J.book 1 ページ
FRANÇAIS
P2 软件 /P2 ソフトウェア
中
DEUTSCH
Für Erlauterungen in Deutsch, konsultieren
Sie bitte die mitgelieferte CD-ROM.
ITALIANO
Per le istruzioni in italiano, vedere il CDROM in dotazione.
ESPAÑOL
Para la explicación en español, consulte
el CD-ROM suministrado.
한국어
한국어 설명은 부속품 CD-ROM 을 참조하여 주
십시오 .
文
日
本
語
F0604TA088 -F D
Printed in Japan 在日本印制 发行:2008 年 8 月
VQT0L24-9
P2Installer(VQT0L24-9)_E_F_C_J.book 1 ページ
2008年8月29日 金曜日 午前11時13分
Contents
Operating Precautions
When Using Windows
1. Before Installing . . . . . . . . . . . . . . . . . . . . . . . . . . . . . . . . . . . . . . . . . . . . 2
2. Precautions in Handling the P2 Card in the Personal Computer . . . . . . . 3
3. Software to be Installed . . . . . . . . . . . . . . . . . . . . . . . . . . . . . . . . . . . . . . . 3
4. Installation of the P2 Software . . . . . . . . . . . . . . . . . . . . . . . . . . . . . . . . . 4
5. Adding a New P2 Device . . . . . . . . . . . . . . . . . . . . . . . . . . . . . . . . . . . . 10
6. Uninstallation of the P2 Software . . . . . . . . . . . . . . . . . . . . . . . . . . . . . . 10
7. Checking the Installed Devices . . . . . . . . . . . . . . . . . . . . . . . . . . . . . . . . 11
8. Setting the internal P2 drive . . . . . . . . . . . . . . . . . . . . . . . . . . . . . . . . . . 12
9. Checking the Installation Status of the P2 Driver . . . . . . . . . . . . . . . . . . 13
10. Checking the Version of the P2 Driver . . . . . . . . . . . . . . . . . . . . . . . . . . 17
11. P2 Card Manager . . . . . . . . . . . . . . . . . . . . . . . . . . . . . . . . . . . . . . . . . . 17
12. Software for each P2 device . . . . . . . . . . . . . . . . . . . . . . . . . . . . . . . . . . 18
When Using Macintosh
PC card slot driver for Macintosh PowerBook . . . . . . . . . . . . . . . . . . . . . 19
P2 card formatter for the Macintosh . . . . . . . . . . . . . . . . . . . . . . . . . . . . 20
Operating Precautions
It is prohibited to redistribute the software included with this supplied CD-ROM, regardless
of whether or not compensation is received. Use of the software stored on the supplied
CD-ROM without permission for the purposes of manufacturing and/or selling any kinds of
software and hardware shall be also prohibited. Furthermore, we will not be responsible
for any losses and/or damage that may arise from using or not being able to use this
system. This shall apply even if we have already been notified of the possibility of such
damage.
Windows, Windows 2000, Windows XP and Windows Vista are trademarks of Microsoft
Corporation of the United States.
Macnintosh and Mac OS X are trademarks of Apple Computer, Inc. of the United States.
Other names of companies and products are trademarks or registered trademarks of the
respective companies.
zIn these instructions, Microsoft® Windows®, Windows® 2000, Windows® XP
Professional and Windows® Vista Business are given as “Windows,” “Windows 2000,”
“Windows XP Professional,” and “Windows Vista Business,” respectively.
zSimilarly, in these instructions, Macintosh®, Mac OS® X and PowerBook® are given
as “Macintosh,” “Mac OS X” and “PowerBook,” respectively.
E-1
P2Installer(VQT0L24-9)_E_F_C_J.book 2 ページ
2008年8月29日 金曜日 午前11時13分
When Using Windows
This supplied CD-ROM installs the software
for P2, used to reference on a personal
computer the content of Panasonic P2
cards.
A personal computer on which this software
will be installed needs to meet the following
conditions:
z OS
Windows 2000 SP4 or later
Windows XP Professional
SP2 or later
Windows Vista Business or
higher
z RAM 512MB or greater recommended
1GB or greater recommended
for Windows Vista Business
z CPU Pentium® 4 1.5GHz or greater
recommended
z The personal computer is equipped with
a drive in which CD-ROM can be read.
z If the OS is Windows 2000 SP4, SP4
patches must be installed.
SP4 patches are included on the supplied
CD-ROM,
in
a
folder
named
\Win2000SP4Patch.
The personal computer further needs to
meet the following conditions when actually
using the software or when connecting the
personal computer to the P2 card or P2
devices (P2 drive, P2 deck etc.).
When connecting the P2 devices to the
personal computer via USB2.0:
z A USB2.0 port is provided, and the
USB2.0 driver used is that supplied by
Microsoft.
If said OS is preinstalled in the personal
computer, the driver is already present in
the computer, so you do not need to
check it.
When using the software with the P2
card directly inserted into the card bus
of the personal computer:
z A Type 2 card bus slot is installed.
<Notes>
z Depending on the condition of the
personal computer, phenomena such as
dropping
image
frames
and
disconnecting sound may occur when
playing back material.
z When connecting the P2 devices, be sure
to reserve more free drives than the
number of drives necessary for each P2
device which can be used by the
personal computer. (The number of
drives necessary for a P2 device should
include those necessary for the P2 card
slots and hard disks built into P2 device.)
z The following 3 types of cards only can
be used with the cardbus driver for
Windows 2000. Other types of cards
cannot be used.
AJ-P2C002SG
AJ-P2C004HG
AJ-P2C008HG
z If the OS is Windows Vista Business, the
“User Account Control” dialogue box may
appear when installing, formatting etc. In
this case, click “Continue” and continue
the operation.
z For versions of 64-bit Windows later than
64-bit Windows Vista, the installer is
stored in the folder \Win64 on the CDROM.
E-2
ENGLISH
1. Before Installing
P2Installer(VQT0L24-9)_E_F_C_J.book 3 ページ
2008年8月29日 金曜日 午前11時13分
2. Precautions in Handling the P2 Card in the
Personal Computer
When using the software with the P2 card or P2 devices connected to the
personal computer, be sure to install the P2 driver on the personal
computer from the supplied CD-ROM.
If these devices are connected to a personal computer on which the P2 driver is not
installed, these devices may not operate properly.
Do not remove the P2 card from the slot during reading from or writing to
the P2 card. Also, do not insert or remove the USB cable or change the
setting of USB connector.
Otherwise, abnormal operation of the personal computer may result.
Also, perform the following operation before removing the P2 card from the card slot:
z If the P2 card is inserted directly into the card bus in the personal computer, execute
“Safely Remove Hardware” from the system tray on the Windows taskbar.
z If the P2 devices are connected to the personal computer via USB2.0, open My
Computer, then right-click on the particular hardware item into which the P2 card is
inserted, and select “Take Out”.
z Ensure that the personal computer system is set up in such a way that it will not go
into standby mode or hibernation mode during use of the P2 card. If the system is set
up to go into standby mode or hibernation mode while a P2 card is being accessed,
destruction of the files and/or data being executed may result.
3. Software to be Installed
The supplied CD-ROM installs the following
programs:
z P2 driver
z P2 card manager
z Software for each P2 device
When the programs are installed using the
supplied CD-ROM, you are able to format
the P2 card. The P2 card can be formatted
in either of two ways:
E-3
z In Windows Explorer, right-click on the P2
card drive. Select “Format” from the
displayed menu.
z In Windows Explorer, select the P2 card
drive.
From the displayed menu, select “File”,
“Removable Disk” and “Format” in that
order.
The supplied CD-ROM also contains a set
of instruction manuals. Refer to the folder
named \Manuals.
To browse instruction manuals, you need
Adobe® Reader. If Adobe Reader is not
currently installed in the personal computer,
you will need to download this program
from the Adobe Web site.
P2Installer(VQT0L24-9)_E_F_C_J.book 4 ページ
2008年8月29日 金曜日 午前11時13分
4. Installation of the P2 Software
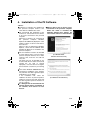
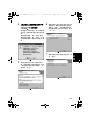
z When a device such as the P2 card is
connected to the personal computer
before the driver is installed, the
following dialogue box appears. Be
sure to click “Cancel” to close the box.
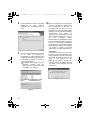
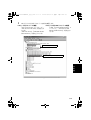
Figure 1
(For Windows 2000/
Windows XP Professional)
Figure 2
(For Windows Vista Business)
E-4
ENGLISH
<Notes>
z Install the P2 software after logging into
the personal computer under a user
name that has administrator status.
z We recommend that installation of the
software be started with the P2 devices
to be used, connected to the personal
computer.
When the P2 devices are connected to
the
personal
computer,
Windows
Explorer will additionally display the same
number of drives as device card slots for
these devices.
When no drive is displayed in Windows
Explorer, check that the USB2.0 driver
provided by Microsoft is installed in the
personal computer.
z The P2 card driver needs to be installed
for each card bus slots. If you are using a
personal computer that has two or more
card bus slots, insert the P2 card into
every slot.
The driver may not be installed for any
slot into which the P2 card is not inserted,
causing the P2 card to operate
improperly. If the PC does not recognize
the inserted P2 card, then try re-inserting
it.
z If the OS is Windows 2000/Windows XP
Professional, installation of the software
may fail when the driver signature option
in Windows is set to “Block”.
If the installation fails, select the
Hardware tab in the “System Properties”
window in Control Panel and check that
the driver signature option for the driver is
not set to “Block”.
z If a dialogue box not described in this
manual appears during installation of
the software, click “Cancel” to close
the box.
P2Installer(VQT0L24-9)_E_F_C_J.book 5 ページ
2008年8月29日 金曜日 午前11時13分
z Users with a P2 driver version prior to
1.07.0048 already installed in Windows
2000/Windows XP Professional
Refer to “10. Checking the Version of the
P2 Driver” for the procedure to check the
version.
To install the new driver, you need to
uninstall the currently installed driver. If
you uninstall this driver, all the
information installed until now will be
deleted. Refer to “6. Uninstallation of the
P2 Software” for the uninstallation
procedure and notes.
Also, you can uninstall the old version of
the P2 driver during the procedure to
upgrade the P2 driver. For both
procedures, you may need to restart
Windows.
z If the OS of the personal computer is
Windows Vista Business, the dialogue
box shown in Figure 3 may appear when
you upgrade the P2 driver. In this case,
click the “OK” button.
After checking each item in “1. Before
Installing”, use the following procedure to
install the P2 software in the personal
computer:
1
2
3
Close all applications, then connect
the P2 card or P2 devices to be used
to the personal computer.
When the devices are connected to
the personal computer, the Found
New Hardware Wizard box will
appear automatically, but click
“Cancel” to close the box.
Insert the supplied CD-ROM.
From “MY COMPUTER”, access the
drive containing the supplied CD-ROM
and execute setup.exe.
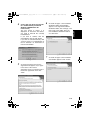
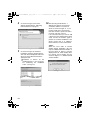
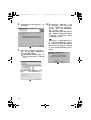
The window shown in Figure 4
appears, starting the setup process.
Click “Next”.
Figure 4
Figure 3
E-5
4
2008年8月29日 金曜日 午前11時13分
(Users with a P2 driver version prior
to 1.07.0048 already installed in
Windows 2000/Windows XP
Professional)
The box shown in Figure 5 is
displayed. To install the new driver,
you need to uninstall the currently
installed driver.
If you wish to continue with the
uninstallation, click the “OK” button.
If you wish to uninstall manually, click
“Cancel”. Refer to “6. Uninstallation of
the P2 Software” for information on
manual uninstallation.
6
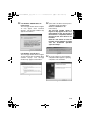
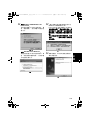
As shown in Figure 7, the installation
destination folder setting window
appears. To change the installation
destination folder, click “Change”, and
then create a new folder. Once the
new installation destination folder is
set, click “Next”.
Figure 7
7
Figure 5
5
As shown in Figure 8, the installation
start window appears. Click “Install”.
As shown in Figure 6, the License
Agreement box appears. If you agree
to the terms of the License
Agreement, click “I accept the terms of
the license agreement”, then click
“Next”.
Figure 8
Figure 6
E-6
ENGLISH
P2Installer(VQT0L24-9)_E_F_C_J.book 6 ページ
P2Installer(VQT0L24-9)_E_F_C_J.book 7 ページ
8
2008年8月29日 金曜日 午前11時13分
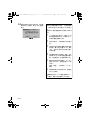
As shown in Figure 9, the status
display window appears, indicating
that installation is in progress.
Figure 9
9
As shown in Figure 10, the driver
installation selection window appears
with each device displayed. Select the
device to be installed and check the
appropriate box.
zInstallation of drivers for the
installed devices is not necessary.
For monitoring the installation
status, see Page 13.
10 After pressing the OK button, a
dialogue box appears to prompt for
connection with the P2 card or P2
device as shown in Figure 11. If you
need to install them, connect them,
then click “Install”. If you do not wish to
use them, just click “Cancel”.
If at some future time you want to add
a device that was skipped in the initial
setup, execute the installer again to
perform an overwrite installation of the
device. Please refer to “5. Adding a
New P2 Device” for more information.
<Note>
When the focus shifts to another
window during installation, this box
may be hidden behind that window. If
the box shown in Figure 9 remains
displayed and its status display does
not change, check whether the box
shown in Figure 11 is hidden behind
another window.
Figure 11
Figure 10
E-7
2008年8月29日 金曜日 午前11時13分
11 For Windows 2000/Windows XP
Professional,
The message window shown in Figure
12 may appear. Click “Continue
Anyway”. The message window may
appear several times.
12 (Users with a P2 driver version prior to
1.07.0048 already installed in
Windows 2000/Windows XP
Professional)
The message window shown in
Figure 14 may appear. In this case,
uninstallation of the old version of
the P2 driver is completed, however
the new version of the driver is not
installed.
Click the “OK” button to close the
installer, restart Windows and then
start the installation operation
again from Step 1.
Figure 12
For Windows Vista Business,
The message window shown in Figure
13 may appear. Click “Install this driver
software anyway”. The message
window may apppear several times.
Figure 14
13 As shown in Figure 15, the installation
completion window appears, signifying
completion of the installation.
Figure 13
Figure 15
E-8
ENGLISH
P2Installer(VQT0L24-9)_E_F_C_J.book 8 ページ
P2Installer(VQT0L24-9)_E_F_C_J.book 9 ページ
2008年8月29日 金曜日 午前11時13分
14 As shown in Figure 16, a dialogue box
appears, prompting you to restart the
personal computer. Click “Yes” to
restart.
When connecting two P2 drives to the
personal computer, install the P2 software
by following the steps below. (It is
assumed here that portA and portB are
used as the two USB2.0 ports.)
Use two USB2.0 ports exclusively for the
P2 drives.
1
Figure 16
2
3
4
5
6
With the personal computer running,
connect one of the P2 drives to portA
and then the other one to portB.
Install the P2 software. (See pages 4
to 8)
When the installation is completed
and the panel requesting that the
system be restarted (Figure 16 on
Page 9) has appeared, click “No”,
and disconnect each of the P2 drives
from the USB2.0 ports.
The P2 drives are now connected
again, but this time one of them is
connected to portB and then the
other one to portA.
After starting the installer again and
click the “Next” button (Page 5),
Figure 17 (on Page 10) appears.
Check the “Repair” check box, and
click the “Next” button.
After following the instructions
displayed on the screen, restart the
personal computer.
z Be sure to connect at least one P2
device to the personal computer. Up to
two P2 drives can be connected.
E-9
2008年8月29日 金曜日 午前11時13分
5. Adding a New P2
Device
6. Uninstallation of
the P2 Software
To connect a new P2 card or P2 device to a
personal computer in which P2 software is
already installed, use the procedure
described in “4. Installation of the P2
Software” to perform an overwrite
installation of the P2 software.
During the overwrite installation, the
window shown in Figure 17 appears, but
the License Agreement box shown in
Figure 6 does not reappear.
In this window, check “Repair”, then click
“Next”.
After following the instructions displayed on
the screen, restart the personal computer.
To uninstall the P2 software, use the
following procedure:
For Windows Vista Business,
in the “Programs and Features” window in
the “Programs” window in Control Panel,
select “Panasonic P2 Drivers”, then click
“Uninstall”.
For Windows XP Professional,
in the “Add or Remove Programs” window
in Control Panel, select “Panasonic P2
Drivers”, then click “Remove”.
For Windows 2000,
in the “Add/Delete Applications” window in
Control Panel, select “Panasonic P2
Drivers”, then click “Remove”.
After following the instructions displayed on
the screen to complete the uninstallation,
follow the on-screen instructions to restart
the personal computer.
Figure 17
<Note>
The above screen will be displayed when
the installed P2 software and the installer
have the same version.
E-10
ENGLISH
P2Installer(VQT0L24-9)_E_F_C_J.book 10 ページ
P2Installer(VQT0L24-9)_E_F_C_J.book 11 ページ
2008年8月29日 金曜日 午前11時13分
<Notes>
z If you uninstall the software, all the
information installed until now will be
deleted so, if you install the software
again, you will need to install the drivers
for all the devices that you will use. We
recommend
checking
the
current
information before uninstallation. Refer to
“7. Checking the Installed Devices” for
the procedure for checking.
z If the OS of the personal computer is
Windows Vista Business, the dialogue
box shown in Figure 18 may appear
when you uninstall the P2 driver. In this
case, click the “OK” button.
7. Checking the
Installed Devices
To check which devices have a driver
installed, use an installer that is the same
version as the P2 software currently
installed and follow the procedure
described in “4. Installation of the P2
Software” to perform an overwrite
installation.
If you start the installation, then click “Next”,
the window shown in Figure 17 (on Page
10) appears. In this window, check “Repair”,
then click “Next”. If you follow the
instructions displayed on the screen, the
window shown in Figure 19 appears.
In this window, you can check which
devices have a driver installed by checking
if “Installed” is displayed.
After checking, click “Cancel” to close the
window.
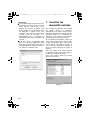
Figure 18
Figure 19
E-11
P2Installer(VQT0L24-9)_E_F_C_J.book 12 ページ
2008年8月29日 金曜日 午前11時13分
8. Setting the internal
P2 drive
1
ENGLISH
To use a personal computer in which the P2
drive is incorporated in the 5-inch bay,
install the P2 card software, connect the P2
drive to the personal computer, then
perform the following setting:
For Windows Vista Business/
Windows XP Professional,
select the following: “Start” > “All
Programs” > “Panasonic P2” > “Set
P2 Drive Settings” > “Enable Internal
Drive”.
For Windows 2000,
select the following: “Start” >
“Program” > “Panasonic P2” > “Set
P2 Drive Settings” > “Enable Internal
Drive”.
2
The box shown in Figure 20 appears.
Click “OK”.
Figure 20
E-12
P2Installer(VQT0L24-9)_E_F_C_J.book 13 ページ
2008年8月29日 金曜日 午前11時13分
9. Checking the Installation Status of the P2
Driver
When the standard driver is installed via the
Found New Hardware Wizard box (Figure
1), or when the P2 driver is uninstalled for
some reason, the P2 device does not
operate properly.
If any of the following events occurs, check
that the P2 driver is properly installed; if it is
not, reinstall it.
z P2 card or P2 device is not recognized.
z Reading from the P2 card or P2 device
cannot be performed.
z Writing to the P2 card or P2 device
cannot be performed.
z Image frame dropping occurs frequently
during playback from the P2 card or P2
device, indicating that there is a
performance problem.
How to check the P2 driver
<Note>
When checking that the P2 driver is
properly installed, be sure to connect the
appropriate device to the personal
computer. Devices not connected to the
personal computer cannot be checked
using the following method:
For Windows Vista Business,
select: “Start” > “Control Panel” >
“System and Maintenance”. Click on Device
Manager.
For Windows XP Professional,
select: “Start” > “Control Panel” >
“System”. The System Properties window
appears. Select the Hardware tab, then
click on Device Manager.
For Windows 2000,
select: “Start” > “Settings” > “Control
Panel” > “System”. The System Properties
window appears. Select the Hardware tab,
then click on Device Manager.
E-13
P2Installer(VQT0L24-9)_E_F_C_J.book 14 ページ
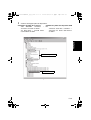
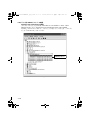
Check the P2 device driver display.
Checking the P2 card driver
“IDE ATA/ATAPI controllers” “Panasonic P2 Card” is set.
“P2 Disk Drive” - “P2Card Series
Cached Disk” is set.
Checking the P2 USB devices drivers
“Universal Serial Bus controllers” “Panasonic P2 Series USB Device” is
set.
ENGLISH
1
2008年8月29日 金曜日 午前11時13分
P2 card driver
P2 devices drivers
Figure 21
E-14
P2Installer(VQT0L24-9)_E_F_C_J.book 15 ページ
2008年8月29日 金曜日 午前11時13分
Checking the P2 card 1394b driver
For Windows XP Professional,
Click “MATSHITA AJ-PCD20 #1 IEEE 1394 SBP2 Device” listed under “Disk drives,”
then click on the “Driver” tab in the “MATSHITA AJ-PCD20 #5 IEEE 1394 SBP2
Device” property panel. “Provider” - “Panasonic” is set.
P2 devices 1394b
drivers
Figure 22
E-15
P2Installer(VQT0L24-9)_E_F_C_J.book 16 ページ
2008年8月29日 金曜日 午前11時13分
ENGLISH
For Windows Vista Business,
Click “P2 SBP2 Device”. There are 5 items displayed from “MATSHITA AJ-PCD20 #1
IEEE 1394 SBP2 Device” to “MATSHITA AJ-PCD20 #5 IEEE 1394 SBP2 Device”.
P2 devices 1394b
drivers
Figure 23
E-16
P2Installer(VQT0L24-9)_E_F_C_J.book 17 ページ
2008年8月29日 金曜日 午前11時13分
10. Checking the
Version of the P2
Driver
For Windows Vista Business,
select: “Control Panel” > “Programs” >
“Programs and Features“ > “View” >
“Details”. Press the “Alt” key to display the
menu, select “Display settings“ in the “View”
menu, check the “Version” check box and
click the “OK” button to display the version.
For Windows XP Professional,
in the “Add or Remove Programs” window
in Control Panel, select “Panasonic P2
Drivers”, then refer to the support
information.
For Windows 2000,
in the “Add/Delete Applications” window in
Control Panel, select “Panasonic P2
Drivers”, then refer to the support
information.
11. P2 Card Manager
After P2 software installation, the “P2 Card
Manager” icon will be added to the control
panel and task bar.
Card names and passwords can be set for
the P2 cards by using the “P2 Card
Manager”.
Start the “P2 Card Manager” and select the
desired P2 card from the recognized P2
cards, the “Change Card Name” and
“Change Password” buttons will be
enabled. After clicking the “Refresh” button,
the latest information on the P2 card will be
determined and displayed.
(Card names and passwords for unused P2
cards are not set.)
<Note>
If the P2 card cannot be written to because
the write protect switch is set to
“PROTECT” etc, the card name and
password cannot be set.
<Change Card Name>
Card names can be changed from this
screen. A password is required for the
change.
No password is set when a new P2 card is
inserted. Be sure to use the required
password for P2 cards that are inserted and
use a password.
1) Click the “Change Card Name” button,
and enter the password and the card
name.
2) After clicking the “OK” button, the card
name can be changed. Pressing the
“Cancel” button returns the user to the
“P2 Card Manager” screen without
changing the card name.
E-17
2008年8月29日 金曜日 午前11時13分
<Change Password>
Passwords for protecting card names can
be controlled from this screen.
1) Click the “Change Password” button, and
enter the old and new passwords.
Enter the current password in the “Old
Password” column.
Enter a new password in the “New
Password” column, and enter the same
new password in the “New Password
Confirm” column.
12. Software for each
P2 device
After installation of the P2 software,
software for each P2 device will be installed
simultaneously. For software for each
device, refer to the instruction manual of the
respective software.
2) Click the “OK” button to confirm the
change. Click the “OK” button when the
“Successfully changed. When you eject,
..... information may be shown.” message
is displayed.
3) Pressing the “Cancel” button returns the
user to the “P2 Card Manager” screen.
4) After the password change, the P2 card
information whose password has been
changed will disappear from the “P2
Card Manager” screen. Remove the P2
card.
E-18
ENGLISH
P2Installer(VQT0L24-9)_E_F_C_J.book 18 ページ
P2Installer(VQT0L24-9)_E_F_C_J.book 19 ページ
2008年8月29日 金曜日 午前11時13分
When Using Macintosh
PC card slot driver for Macintosh PowerBook
This driver software is for referencing the
content of a P2 card on a Macintosh
PowerBook with a PC card slot.
This driver software has been verified to
work
in
the
following
Macintosh
environment.
<Notes>
z Only the card slot driver will be installed.
z When removing the P2 card, drag the P2
card to the “Trash” and wait until the icon
disappears.
z Compatible models
PowerBook G4 Series
z OS
Mac OS X 10.4.8
Mac OS X 10.5.1
<Installing the PC card slot driver for
Macintosh PowerBook>
1
2
3
4
Insert the supplied CD-ROM.
Double-click the Macintosh folder in
the CD-ROM.
Double-click P2PCCard Install.pkg.
The installation of the driver software
will begin. Follow the instructions on
the screen to complete the install.
E-19
The write-protect switch is not effective
when the P2 card is inserted in the PC
card slot.
Make sure you remove the P2 card from
the PC card slot, set the switch, then reinsert the card, in order to effect the
switch setting.
P2Installer(VQT0L24-9)_E_F_C_J.book 20 ページ
2008年8月29日 金曜日 午前11時13分
P2 card formatter for the Macintosh
<New installation
formatter>
1
2
3
4
5
of
the
P2
card
2
1
2
Insert the supplied CD-ROM.
3
Double-click the Macintosh folder on
the CD-ROM.
4
Double-click the P2Formatter folder.
Double-click P2Formatter.dmg to
open a new window.
Double-click P2Formatter.
Select the slot where the P2 card is
inserted, and click “Format”.
Click “Format” in the confirmation
window to format the card.
Click “Close” or select “Close
P2Formatter” in the P2Formatter
menu to close the P2 card formatter.
<Notes>
z Do not remove P2 cards while the
formatter is in operation.
Drag P2Formatter displayed in the
new window to an appropriate place
such as the Desktop.
<Uninstallation of the P2 card formatter>
1
<Formatting the P2 card>
z When using the AJ-PCD20, the status
indicator will continue to flash after
formatting as it will also access other P2
cards that were not formatted. Do not
remove P2 cards while the status
indicator is flashing.
Drag P2Formatter to the Trash and
then select “Empty Trash...” in “Finder”
menu.
Click “OK” in the confirmation window
to delete it.
E-20
ENGLISH
This is the software to format a P2 card
using the PC card slot of the Macintosh
PowerBook or P2 drive AJ-PCD20.
P2Installer(VQT0L24-9)_E_F_C_J.book 1 ページ
2008年8月29日 金曜日 午前11時13分
Table des matières
Précautions d’utilisation
Avec Windows
1. Avant l’installation . . . . . . . . . . . . . . . . . . . . . . . . . . . . . . . . . . . . . . . . . . . . 2
2. Précautions à prendre lors de la manipulation de la carte P2
dans l’ordinateur personnel. . . . . . . . . . . . . . . . . . . . . . . . . . . . . . . . . . . . . 3
3. Logiciel à installer . . . . . . . . . . . . . . . . . . . . . . . . . . . . . . . . . . . . . . . . . . . . 3
4. Installation du logiciel P2. . . . . . . . . . . . . . . . . . . . . . . . . . . . . . . . . . . . . . . 4
5. Ajouter un nouveau dispositif P2. . . . . . . . . . . . . . . . . . . . . . . . . . . . . . . . 10
6. Désinstallation du logiciel P2 . . . . . . . . . . . . . . . . . . . . . . . . . . . . . . . . . . 10
7. Contrôler les dispositifs installés . . . . . . . . . . . . . . . . . . . . . . . . . . . . . . . . 11
8. Configuration du lecteur P2 interne. . . . . . . . . . . . . . . . . . . . . . . . . . . . . . 12
9. Vérification de l’état de l’installation du Lecteur P2. . . . . . . . . . . . . . . . . . 13
10. Contrôler la version du pilote P2 . . . . . . . . . . . . . . . . . . . . . . . . . . . . . . . . 17
11. Gestionnaire de carte P2 . . . . . . . . . . . . . . . . . . . . . . . . . . . . . . . . . . . . . 17
12. Logiciel pour chaque dispositif P2. . . . . . . . . . . . . . . . . . . . . . . . . . . . . . . 18
Avec Macintosh
Pilote pour emplacement de carte PC pour PowerBook de Macintosh . . 19
Formateur de carte P2 pour Macintosh. . . . . . . . . . . . . . . . . . . . . . . . . . . 20
Précautions d’utilisation
Il est interdit de redistribuer le logiciel contenu dans ce CD-ROM fourni, que ce soit en
échange d’une contrepartie ou non. Il est interdit d’utiliser sans autorisation le logiciel
mémorisé sur le CD-ROM fourni, quel que soit le but, qu’il s’agisse de fabrication et/ou de
vente de logiciels et de matériels quels qu’ils soient. De plus, nous ne pourrons pas être
tenus pour responsables de la perte et/ou des dommages survenus lors de l’utilisation de
ce système ou du fait de la capacité à utiliser celui-ci. Ces dispositions s’appliqueront
même si nous avons déjà été informés de l’éventualité d’un tel dommage.
Windows, Windows 2000, Windows XP et Windows Vista sont des marques
commerciales de Microsoft Corporation aux États-Unis.
Macintosh et Mac OS X sont des marques commerciales de Apple Computer, Inc. des
États-Unis.
Les autres noms de sociétés et de produits sont des marques commerciales ou marques
déposées des sociétés respectives.
zDans le cadre de ce manuel d’installation, Microsoft® Windows®, Windows® 2000,
Windows® XP Professional et Windows® Vista Business sont appelés “Windows,” “Windows
2000”, “Windows XP Professional” et “Windows Vista Business,” respectivement.
zDe même, dans ce manuel d’installation, Macintosh®, Mac OS® X et PowerBook®
sont appelés “Macintosh,” “Mac OS X” et “PowerBook,” respectivement.
F-1
P2Installer(VQT0L24-9)_E_F_C_J.book 2 ページ
2008年8月29日 金曜日 午前11時13分
Avec Windows
1. Avant l’installation
Le CD-ROM fourni installe le logiciel
associé à P2, utilisé pour référencer sur un
ordinateur personnel le contenu des cartes
P2 Panasonic
L’ordinateur sur lequel ce logiciel sera
installé doit satisfaire aux conditions
suivantes :
Lors de l’utilisation du logiciel avec la
carte P2 directement insérée dans
l’emplacement card bus de l’ordinateur
personnel :
z OS
<Remarques>
z En fonction de l’état de l’ordinateur
personnel, des phénomènes tels que des
sauts d’images ou une interruption du
son peuvent survenir lors de la lecture
d’informations.
z Lors de la connexion des dispositifs P2 ,
veillez à réserver plus de lecteurs libres
que le nombre de lecteurs nécessaire
pour chaque dispositif P2 qui peut être
utilize par l’ordinateur. (Le nombre de
lecteurs nécessaire pour un dispositif P2
doit comprendre les lecteurs nécessaires
pour les logements pour carte P2 et les
disques durs intégrés au dispositif P2)
z Seuls les 3 types de carte suivants
peuvent être utilisés avec le pilote pour
CardBus pour Windows 2000. Les autres
types de carte ne peuvent pas être
utilisés.
AJ-P2C002SG
AJ-P2C004HG
AJ-P2C008HG
z Si le S.E. est Windows Vista Business, la
boîte de dialogue “Commande de compte
d’utilisateur” pourrait apparaître lors de
l’installation, du formatage etc. Dans ce
cas, cliquez sur “Continuer” et continuez
l’opération.
z Pour les versions Windows 64-bits
antérieures à Windows Vista 64-bits, le
logiciel d’installation est mémorisé dans
le dossier \Win64 du CD-ROM.
De plus, l’ordinateur personnel doit
satisfaire aux conditions suivantes lors de
l’utilisation réelle du logiciel ou lors de la
connexion de l’ordinateur à la carte P2 ou
aux dispositifs P2 (lecteur P2, l’enregistreur
P2 etc.
Lors de la connexion des dispositifs P2
à l’ordinateur via USB2.0 :
z Un port USB2.0 est fourni et le lecteur
USB2.0 utilisé est celui fourni par Microsoft.
Si les systèmes d’exploitation sus-cités
sont installés sur l’ordinateur, le pilote est
intégré, vous n’avez donc pas besoin de
vérifier sa présence.
installé.
F-2
FRANÇAIS
Windows 2000 SP4 ou supérieur
Windows XP Professional SP2
ou supérieur
Windows Vista Business ou plus
haut
z RAM 512 Mo ou supérieur recommandé
1Go ou plus recommandé pour
Windows Vista Business
z CPU Pentium® 4 1,5 GHz ou
supérieur recommandé
z L’ordinateur personnel doit être équipé d’un
lecteur permettant de lire le CD-ROM.
z Si le système d’exploitation est Windows
2000 SP4, les patches SP4 doivent être
installés.
Les patches SP4 sont inclus dans le CDROM fourni, dans un dossier nommé
\Win2000SP4Patch.
z Un emplacement card bus de type 2 est
P2Installer(VQT0L24-9)_E_F_C_J.book 3 ページ
2008年8月29日 金曜日 午前11時13分
2. Précautions à prendre lors de la manipulation
de la carte P2 dans l’ordinateur personnel
Lors de l’utilisation du logiciel avec la carte P2 ou les dispositifs P2
connectés à l’ordinateur personnel, assurez-vous que vous avez bien
installé, sur l’ordinateur, le pilote P2 à partir du CD-ROM fourni.
Si ces périphériques sont connectés à un ordinateur personnel sur lequel le pilote P2
n’est pas installé, ils risquent de ne pas fonctionner correctement.
Ne retirez pas la carte P2 de son emplacement en cours de lecture ou
d’écriture sur celle-ci. De plus, vous ne devez ni brancher ni débrancher
le câble USB, ni changer les paramètres de connecteur USB.
Sinon, l’ordinateur personnel risque de fonctionner de façon anormale.
De plus, exécutez l’opération suivante avant de retirer la carte P2 de son emplacement :
z Si la carte P2 est directement insérée dans le card bus de l’ordinateur personnel,
exécutez le programme “Safely Remove Hardware” dans la barre d’état système de la
barre des tâches Windows.
z Si les dispositifs P2 sont connectés à l’ordinateur personnel USB2.0, ouvrez le Poste
de travail, puis cliquez du bouton droit sur l’élément matériel dans lequel la carte P2
est insérée, puis sélectionnez “Take Out”.
z Veillez à ce que les paramètres de l’ordinateur personnel ne soient pas réglés de
façon à passer en mode Attente ou Hibernation pendant l’utilisation de la carte P2. Si
les paramètres sont réglés de façon à passer en mode Attente ou Hibernation lors de
l’accès à la carte P2, cela pourrait provoquer la destruction des fichiers et/ou des
données en exécution.
3. Logiciel à installer
Le CD-ROM fourni installe les programmes
suivants :
z Pilote P2
z Gestionnaire carte P2
z Logiciel pour chaque dispositif P2
Lorsque vous installez les programmes à
l’aide du CD-ROM fourni, vous pouvez
formater la carte P2. Pour cela, vous
disposez de deux méthodes :
z Dans l’Explorateur Windows, cliquez du
bouton droit sur le lecteur carte P2.
Sélectionnez “Formater…” dans le menu
affiché.
F-3
z Dans l’Explorateur Windows, cliquez du
bouton droit sur le lecteur carte P2.
Dans le menu affiché, sélectionnez
l’option “Fichier”, “Disque amovible” puis
“Formater…” dans cet ordre.
Le CD-ROM fourni contient également un
ensemble de manuels d’instructions.
Reportez-vous
au
dossier
nommé
\Manuals.
Pour lire les manuels d’instructions, vous
devez disposer d’Adobe® Reader. Si Adobe
Reader n’est pas installé sur votre
ordinateur personnel, vous devrez le
télécharger sur le site Web d’Adobe.
P2Installer(VQT0L24-9)_E_F_C_J.book 4 ページ
2008年8月29日 金曜日 午前11時13分
4. Installation du logiciel P2
z Si un dispositif tel qu’une carte P2 est
connecté au PC avant l’installation du
pilote, la boîte de dialogue suivante
apparaît. Veillez à cliquer sur
“Annuler/Cancel” pour fermer la boîte.
FRANÇAIS
<Remarques>
z Installez le logiciel P2 après vous être
connecté à votre ordinateur personnel en
tant qu’administrateur, à l’aide d’un nom
d’utilisateur.
z Il est conseillé de démarrer l’installation
du logiciel une fois que les dispositifs P2
à utiliser sont connectés à l’ordinateur
personnel.
Lorsque les dispositifs P2 sont connectés
à l’ordinateur, l’Explorateur Windows
affiche
le
nombre
de
lecteurs
correspondant aux emplacements de
cartes de ces périphériques.
Si aucun lecteur ne s’affiche dans
l’Explorateur Windows, vérifiez que le
pilote USB2.0 fourni par Microsoft est
bien installé sur votre ordinateur.
z Le pilote de carte P2 doit être installé
pour chaque emplacements de cartes. Si
votre ordinateur personnel est équipé de
deux emplacements de cartes ou plus,
insérez la carte P2 dans chaque
emplacement.
Il est possible que le pilote ne soit installé
sur aucun des emplacements dans
lesquels la carte P2 est installée, ce qui
entraîne un fonctionnement incorrect de
celle-ci. Si le PC ne reconnait pas la
carte P2 inseree, essayez de la reinserer.
z Si le S.E. est Windows 2000/Windows XP
Professional, l’installation du logiciel
pourrait échouer si l’option Signature du
pilote sous Windows est paramétrée sur
“Block”.
Si l’installation échoue, sélectionnez
l’onglet Matériel dans la fenêtre
“Propriétés Système” du Panneau de
configuration et assurez-vous que
l’option Signature du pilote n’est pas
paramétrée sur “Block”.
z Si une boîte de dialogue non décrite
dans ce manuel apparaît au cours de
l’installation du logiciel, cliquez sur
“Annuler” pour la fermer.
Figure 1
(Pour Windows 2000/
Windows XP Professional)
Figure 2
(Pour Windows Vista Business)
F-4
P2Installer(VQT0L24-9)_E_F_C_J.book 5 ページ
2008年8月29日 金曜日 午前11時13分
z Utilisateurs ayant une version de
pilote P2 antérieure à 1.07.0048 déjà
installée
sous
Windows
2000/
Windows XP Professional
Voir “10. Contrôler la version du pilote
P2” pour la procédure de contrôle de la
version.
Pour installer le nouveau pilote, vous
devez désinstaller le pilote actuellement
installé. Si vous désinstallez ce pilote,
toutes les informations installées jusqu’à
présent seront effacées. Voir “6.
Désinstallation du logiciel P2” pour la
procédure de désinstallation et les notes.
En outre, vous pouvez désinstaller
l’ancienne version du pilote P2 pendant
la procédure de mise à niveau du pilote
P2. Pour les deux procédures, il pourrait
être nécessaire de redémarrer Windows.
z Si le S.E. du PC est Windows Vista
Business, la boîte de dialogue présentée
dans figure 3 pourrait apparaître lors de
la mise à niveau du pilote P2. Dans ce
cas, cliquez sur le bouton “OK”.
Après avoir vérifié chaque élément de la
section “1. Avant l’installation”, utilisez la
procédure suivante pour installer le logiciel
P2 sur l’ordinateur personnel :
1
2
3
Fermez toutes les applications, puis
connectez la carte P2 ou les
dispositifs P2 à utiliser à l’ordinateur
personnel.
Lorsque les périphériques sont
connectés à l’ordinateur personnel,
l’assistant “Found New Hardware
Wizard” s’affiche automatiquement,
mais cliquez sur “Annuler” pour
fermer la boîte.
Insérez le CD-ROM fourni.
A partir de “Poste de travail”, accéder
au lecteur qui contient le CD-ROM
fourni et lancer setup.exe.
La fenêtre illustrée à la figure 4
s’affiche, permettant de démarrer le
processus d’installation. Cliquez sur
“Next”.
Figure 4
Figure 3
F-5
4
2008年8月29日 金曜日 午前11時13分
(Utilisateurs ayant une version de
pilote P2 antérieure à 1.07.0048 déjà
installée sous Windows 2000/
Windows XP Professional)
La boîte présentée en figure 5
s’affiche. Pour installer le nouveau
pilote, vous devez désinstaller le pilote
actuellement installé.
Si vous souhaitez continuer la
désinstallation, cliquez sur le bouton
“OK”.
Si vous souhaitez procéder à la
désinstallation manuellement, cliquez
sur “Cancel”. Voir “6. Désinstallation
du logiciel P2” pour plus d’informations
sur la désinstallation manuelle.
6
Comme illustré à la figure 7, la fenêtre
de configuration du dossier de
destination de l’installation apparaît.
Pour changer de dossier de
destination d’installation, cliquez sur
“Change” puis créez un nouveau
dossier. Une fois le dossier de
destination de l’installation défini,
cliquez sur “Next”.
FRANÇAIS
P2Installer(VQT0L24-9)_E_F_C_J.book 6 ページ
Figure 7
7
Figure 5
5
Comme illustré à la figure 8, la fenêtre
de
démarrage
de
l’installation
apparaît. Cliquez sur “Install”.
Comme illustré à la figure 6, la licence
d’utilisation apparaît. Si vous acceptez
les termes du Contrat de licence,
cliquez sur “I accept the terms in the
licence agreement”, puis cliquez sur
“Next”.
Figure 8
Figure 6
F-6
P2Installer(VQT0L24-9)_E_F_C_J.book 7 ページ
8
2008年8月29日 金曜日 午前11時13分
Comme illustré à la figure 9, la fenêtre
d’affichage
de
l’état
apparaît,
indiquant que l’installation est en
cours.
Figure 9
9
Comme cela est indiqué dans la figure
10, la fenêtre de sélection de
l’installation du pilote apparaît avec
chaque dispositif affiché. Sélectionnez
le dispositif à installer et cochez la
case correspondante.
zL’installation des pilotes pour les
dispositifs installés n’est pas
nécessaire. Pour contrôler l’état de
l’installation, voir Page 13.
10 Après avoir appuyé sur le bouton OK,
une boîte de dialogue apparaît pour
inviter l’utilisateur à effectuer la
connextion avec la carte P2 ou le
dispositif P2 de la façon indiquée dans
la figure 11. Si vous devez les installer,
connectez-les, puis cliquez sur
“Install”. Si vous ne souhaitez pas les
utiliser, il suffit de cliquer sur “Cancel”.
Si
vous
souhaitez
ajouter
ultérieurement un périphérique ignoré
lors de l’installation initiale, exécutez à
nouveau le programme d’installation
pour effectuer une nouvelle installation
du périphérique. Veuillez vous reporter
à la section “5. Ajouter un nouveau
dispositif P2” pour plus d’informations.
<Remarque>
Lorsque le focus passe sur une autre
fenêtre au cours de l’installation, cette
boîte de dialogue peut être masquée.
Si la boîte de dialogue illustrée à la
figure 9 reste affichée et que
l’affichage de l’état ne change pas,
vérifiez si la boîte de dialogue illustrée
à la figure 11 est masquée par une
autre fenêtre.
Figure 11
Figure 10
F-7
2008年8月29日 金曜日 午前11時13分
11 Pour
Windows 2000/Windows XP
Professional,
La fenêtre de message présentée en
figure 12 pourrait apparaître. Cliquez
sur “Continuer”. La fenêtre de
message pourrait apparaître plusieurs
fois.
Figure 12
Pour Windows Vista Business,
La fenêtre de message présentée en
figure 13 pourrait apparaître. Cliquez
sur “Install this driver software
anyway”. La fenêtre de message
pourrait apparaître plusieurs fois.
12 (Utilisateurs ayant une version de
pilote P2 antérieure à 1.07.0048 déjà
installée sous Windows 2000/
Windows XP Professional)
La fenêtre de message présentée
en figure 14 pourrait apparaître.
Dans ce cas, la désinstallation de
l’ancienne version du pilote P2 est
terminée, mais la nouvelle version
du pilote n’est pas installée.
Cliquez sur le bouton “OK” pour
quitter le programme d’installation,
redémarrez Windows puis reprenez
la procédure d’installation depuis
l’étape 1.
Figure 14
13 Comme
illustré à la figure 15, la
fenêtre de fin d’installation apparaît,
indiquant
que
l’installation
est
terminée.
Figure 13
Figure 15
F-8
FRANÇAIS
P2Installer(VQT0L24-9)_E_F_C_J.book 8 ページ
P2Installer(VQT0L24-9)_E_F_C_J.book 9 ページ
14 Comme
2008年8月29日 金曜日 午前11時13分
illustré à la figure 16, une
boîte de dialogue vous invitant à
redémarrer votre ordinateur apparaît.
Cliquez sur “Yes” pour redémarrer.
Lorsque deux lecteurs P2 sont raccordes a
l’ordinateur personnel, installez le logiciel
P2 en effectuant les operations suivantes.
(Nous supposons que les deux ports
USB2.0 sont le port (A) et le port (B).)
Utilisez deux ports USB2.0 exclusivement
pour les lecteurs P2.
1
Figure 16
2
3
4
5
6
Lorsque
l’ordinateur
personnel
fonctionne, raccordez l’un des deux
lecteurs P2 au port (A), puis l’autre
au port (B).
Installez le logiciel P2. (Voir pages 4
a 8.)
Lorsque l’installation est terminee et
que l’ecran demandant que vous
redemarriez le systeme (Figure 16
de la page 9) apparait, cliquez sur
“No”, puis debranchez chaque
lecteur P2 des ports USB2.0.
Reraccordez les lecteurs P2, mais
cette fois raccordez le premier au
port (B), puis l’autre au port (A).
Après avoir redémarré l’installateur,
cliquez sur le bouton “Next” (Page 5),
la figure 17 (de la Page 10) apparaît.
Cochez la case “Repair”, puis cliquez
sur le bouton “Next”.
Après avoir suivi les instructions
affichées à l’écran, redémarrez
l’ordinateur personnel.
z Veillez à connecter au moins un
dispositif P2 à l’ordinateur. Jusqu’à
deux lecteurs peuvent être connectés.
F-9
2008年8月29日 金曜日 午前11時13分
5. Ajouter un nouveau
dispositif P2
6. Désinstallation du
logiciel P2
Pour connecter une nouvelle carte P2 ou
un dispositif P2 à un ordinateur personnel
sur lequel le logiciel est déjà installé,
utilisez la procédure décrite à la section “4.
Installation du logiciel P2” pour effectuer
une installation d’écrasement du logiciel
P2.
Au cours de l’installation d’écrasement, la
fenêtre illustrée à la figure 17 apparaît,
mais la boîte de dialogue Licence
d’utilisation illustrée à la figure 6 n’apparaît
pas.
Dans cette fenêtre, cochez la case
“Repair”, puis cliquez sur “Next”.
Après avoir suivi les instructions affichées à
l’écran, redémarrez l’ordinateur personnel.
Pour désinstaller le logiciel P2, utilisez la
procédure suivante :
Pour Windows Vista Business,
dans
la
fenêtre
“Programmes
et
fonctionnalités” de la fenêtre “Programmes”
du Panneau de configuration, sélectionnez
“Panasonic P2 Drivers”, puis cliquez sur
“Désinstaller”.
Pour Windows XP Professional,
dans la fenêtre “Ajouter ou supprimer des
programmes” du Panneau de configuration,
sélectionnez “Panasonic P2 Drivers”, puis
cliquez sur “Remove”.
Pour Windows 2000,
dans la fenêtre “Ajouter/Supprimer des
applications” du Panneau de configuration,
sélectionnez “Panasonic P2 Drivers”, puis
cliquez sur “Remove”.
Après avoir suivi les instructions affichées à
l’écran pour terminer la désinstallation,suivez
les instructions à l’écran pour redémarrer le
PC.
Figure 17
<Remarque>
L’écran ci-dessus d’affiche quand le logiciel
P2 installé et l’installateur ont la même
version.
F-10
FRANÇAIS
P2Installer(VQT0L24-9)_E_F_C_J.book 10 ページ
P2Installer(VQT0L24-9)_E_F_C_J.book 11 ページ
2008年8月29日 金曜日 午前11時13分
<Remarques>
z Si vous désinstallez le logiciel, toutes les
informations installées jusqu’à présent
seront effacées, si bien que si vous
installez de nouveau le logiciel, vous
devrez installer tous les pilotes pour tous
les dispositifs à utiliser. Nous vous
conseillons de contrôler les informations
actuelles avant de procéder à la
désinstallation. Voir “7. Contrôler les
dispositifs installés” pour la procédure de
contrôle.
z Si le S.E. du PC est Windows Vista
Business, la boîte de dialogue présentée
dans figure 18 pourrait apparaître lors de
la désinstallation du pilote P2. Dans ce
cas, cliquez sur le bouton “OK”.
7. Contrôler les
dispositifs installés
Pour contrôler les dispositifs dont le pilote
est installé, utilisez un programme
d’installation de la même version que le
logiciel P2 actuellement installé et suivez la
procédure décrite en “4. Installation du
logiciel P2” pour effectuer une installation
qui remplacera la version précédente.
Si vous démarrez l’installation, cliquez sur
“Next”, la fenêtre présentée en figure 17 (de
la Page 10) apparaît. Dans cette fenêtre,
cochez “Repair”, puis cliquez sur “Next”. Si
vous suivez les instructions affichées à
l’écran, la fenêtre présentée en figure 19
apparaît.
Dans cette fenêtre, vous pouvez contrôler
les dispositifs dont le pilote est installé en
contrôlant si “Installed” est affiché.
Après avoir contrôlé, cliquez sur “Cancel”
pour fermer la fenêtre.
Figure 18
Figure 19
F-11
P2Installer(VQT0L24-9)_E_F_C_J.book 12 ページ
2008年8月29日 金曜日 午前11時13分
8. Configuration du
lecteur P2 interne
Pour utiliser un ordinateur personnel dans
lequel le lecteur P2 est inséré dans
l’emplacement 5 pouces, installez le logiciel
P2, connectez le lecteur P2 à l’ordinateur,
puis effectuez la configuration suivante :
Pour Windows Vista Business/
Windows XP Professional,
sélectionnez les options suivantes :
“Démarrer” > “Tous les programmes”
> “Panasonic P2” > “Set P2 Drive
Settings” > “Enable Internal Drive”.
FRANÇAIS
1
Pour Windows 2000,
sélectionnez les options suivantes :
“Démarrer” > “Programme” >
“Panasonic P2” > “Set P2 Drive
Settings” > “Enable Internal Drive”.
2
La boîte de dialogue illustrée à la
figure 20 apparaît. Cliquez sur “OK”.
Figure 20
F-12
P2Installer(VQT0L24-9)_E_F_C_J.book 13 ページ
2008年8月29日 金曜日 午前11時13分
9. Vérification de l’état de l’installation du
Lecteur P2
Lorsque le lecteur standard est installé via
la fenêtre de l’assistant “Found New
Hardware Wizard” (Figure 1) ou lorsque le
lecteur P2 est désinstallé pour une raison
quelconque, le périphérique P2 ne
fonctionne pas correctement.
Si l’un des événements suivants se produit,
vérifiez que le lecteur P2 est correctement
installé, sinon, réinstallez-le.
z La carte P2 ou le dispositif P2 ne sont
pas reconnus.
z Impossible de lire les données sur la
carte P2 ou le dispositif P2.
z Impossible d’écrire des données sur la
carte P2 ou le dispositif P2.
z Des sauts d’images se produisent
fréquemment au cours de la lecture à
partir de la carte P2 ou du dispositif P2,
ce qui indique qu’il existe un problème de
performances.
Comment vérifier le pilote P2
<Remarque>
Lorsque vous vérifiez si le lecteur de carte
P2 est correctement installé, assurez-vous
de connecter le périphérique approprié à
l’ordinateur personnel. Les périphériques
non connectés à l’ordinateur personnel ne
peuvent pas être vérifiés à l’aide de la
méthode suivante :
Pour Windows Vista Business,
sélectionnez: “Démarrer” > “Panneau de
configuration” > “Système et
maintenance”. Cliquez sur Gestionnaire de
pèriphèriques.
Pour Windows XP Professional,
sélectionnez : “Démarrer” > “Panneau de
configuration” > “Système”. La fenêtre
“Propriétés système” apparaît.
Sélectionnez l’onglet “Hardware”, puis
cliquez sur “Device Manager”.
Pour Windows 2000,
sélectionnez : “Démarrer” > “Paramètres”
> “Panneau de configuration” >
“Système”. La fenêtre “Propriétés système”
apparaît. Sélectionnez l’onglet “Hardware”,
puis cliquez sur “Device Manager”.
F-13
P2Installer(VQT0L24-9)_E_F_C_J.book 14 ページ
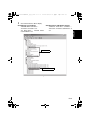
1
2008年8月29日 金曜日 午前11時13分
Vérifiez l’affichage du pilote du dispositif P2.
Contrôler les pilotes des dispositifs USB
P2
“Universal Serial Bus controllers” –
“Panasonic P2 Series USB Device”
est défini.
FRANÇAIS
Vérification du pilote de la carte P2
“IDE
ATA/ATAPI
controllers”
–
“Panasonic P2 Card” est défini.
“P2 Disk Drive” – “P2Card Series
Cached Disk” est défini.
Pilotes des dispositifs P2
Pilote de la carte P2
Figure 21
F-14
P2Installer(VQT0L24-9)_E_F_C_J.book 15 ページ
2008年8月29日 金曜日 午前11時13分
Contrôler le pilote 1394b de la carte P2
Pour Windows XP Professional,
Cliquez sur “MATSHITA AJ-PCD20 #1 IEEE 1394 SBP2 Device” énuméré sous “Disk
drives”, puis cliquez sur l’onglet “Pilote” dans le panneau des propriétés “MATSHITA
AJ-PCD20 #5 IEEE 1394 SBP2 Device”. “Provider” - “Panasonic” est paramétré.
Pilotes 1394b
pour dispositifs
Figure 22
F-15
P2Installer(VQT0L24-9)_E_F_C_J.book 16 ページ
2008年8月29日 金曜日 午前11時13分
FRANÇAIS
Pour Windows Vista Business,
Cliquez sur “P2 SBP2 Device”. Il y a 5 options affichées, de “MATSHITA AJ-PCD20
#1 IEEE 1394 SBP2 Device” à “MATSHITA AJ-PCD20 #5 IEEE 1394 SBP2 Device”.
Pilotes 1394b
pour dispositifs
Figure 23
F-16
P2Installer(VQT0L24-9)_E_F_C_J.book 17 ページ
2008年8月29日 金曜日 午前11時13分
10. Contrôler la version
du pilote P2
Pour Windows Vista Business,
sélectionnez: “Panneau de configuration”
> “Programmes” > “Programmes et
fonctionnalités” > “Affichage” > “Détails”.
Appuyez sur la touche “Alt” pour afficher le
menu, sélectionnez “Choisir les détails...”
dans le menu “Affichage”, cochez la case
“Version” et cliquez sur le bouton “OK” pour
afficher la version.
Pour Windows XP Professional,
dans la fenêtre “Ajouter ou supprimer des
programmes” du Panneau de configuration,
sélectionnez “Panasonic P2 Drivers”, puis
reportez-vous aux informations d’aide.
Pour Windows 2000,
dans la fenêtre “Ajouter/Supprimer des
applications” du Panneau de configuration,
sélectionnez “Panasonic P2 Drivers”, puis
reportez-vous aux informations d’aide.
11.Gestionnaire de
carte P2
Après l’installation du logiciel P2, l’icône
“P2 Card Manager” est ajoutée au panneau
de contrôle et à la barre des tâches.
Les noms de carte et les mots de passe
peuvent être paramétrés pour les cartes P2
en utilisant “P2 Card Manager”.
Démarrez
“P2
Card
Manager”
et
sélectionnez la carte P2 souhaitée parmi
les cartes P2 reconnues, les boutons
“Change Card Name” et “Change
Password” sont activés. Après avoir cliqué
sur le bouton “Refresh”, les dernières
informations concernant la carte P2 sont
déterminées et affichées.
(Les noms de carte et mots de passe pour
les cartes P2 inutilisées ne sont pas
paramétrés.)
<Remarque>
Si la carte P2 ne peut pas être écrite parce
que le bouton de protection en écriture est
paramétré sur “PROTECT” etc., le nom et
le mot de passe de la carte ne peuvent pas
être paramétrés.
<Change Card Name>
Les noms de carte peuvent être modifiés
dans cet écran. Un mot de passe est
nécessaire pour la modification.
Aucun mot de passe n’est paramétré quand
une nouvelle carte P2 est insérée. Veillez à
utiliser le mot de passe requis pour les
cartes P2 qui sont insérées et utilisez un
mot de passe.
1) Cliquez sur le bouton “Change Card
Name”, et saisissez le mot de passe et
le nom de la carte.
2) Après avoir cliqué sur le bouton “OK”, le
nom de la carte peut être modifié. En
appuyant sur le bouton “Cancel”
l’utilisateur revient à l’écran “P2 Card
Manager” sans modifier le nom de la
carte.
F-17
P2Installer(VQT0L24-9)_E_F_C_J.book 18 ページ
2008年8月29日 金曜日 午前11時13分
12.Logiciel pour
chaque dispositif P2
1) Cliquez sur le bouton “Change
Password”, et saisissez le vieux et le
nouveau mot de passe.
Saisissez le mot de passe actuel dans la
colonne “Old Password”.
Saisissez un nouveau mot de passe
dans la colonne “New Password” et
saisissez le même nouveau mot de
passe dans la colonne “New Password
Confirm”.
Après l’installation du logiciel P2, le logiciel
pour chaque dispositif P2 est installé
simultanément. Pour le logiciel pour chaque
dispositif, voir le manuel d’utilisation de
chaque logiciel.
FRANÇAIS
<Change Password>
Les mots de passe protégeant les noms de
carte peuvent être contrôlés depuis cet
écran.
2) Cliquez sur le bouton “OK” pour
confirmer la modification. Cliquez sur le
bouton “OK” quand le message
“Successfully changed. When you eject,
..... information may be shown.” apparaît.
3) En appuyant sur le bouton “Cancel”
l’utilisateur revient à l’écran “P2 Card
Manager”.
4) Après la modification du mot de passe,
les informations de la carte P2 dont le
mot de passe a été modifié
disparaissent de l’écran “P2 Card
Manager”. Enlevez la carte P2.
F-18
P2Installer(VQT0L24-9)_E_F_C_J.book 19 ページ
2008年8月29日 金曜日 午前11時13分
Avec Macintosh
Pilote pour emplacement de carte PC pour PowerBook
de Macintosh
Ce logiciel de pilote est utilisé pour
référencer le contenu d’une carte P2 sur un
ordinateur
portable
PowerBook
de
Macintosh avec emplacement de carte PC.
Ce logiciel de pilote fonctionne en
environnement Macintosh comme suit.
<Remarques>
z Uniquement le pilote pour emplacement
de carte est installé.
z Lors du retrait de la carte P2, déplacez la
carte P2 sur “Corbeille” et attendez que
l’icône disparaisse.
z Modèles compatibles
Séries PowerBook G4
z S.E.
Mac OS X 10.4.8
Mac OS X 10.5.1
<Installation du pilote pour emplacement
de carte PC pour PowerBook de
Macintosh>
1
2
3
4
Insérez le CD-ROM fourni.
Double-cliquez
sur
le
Macintosh du CD-ROM.
dossier
Double-cliquez sur
P2PCCard Install.pkg.
L’installation du logiciel de pilote
démarre. Suivez les instructions sur
l’écran pour l’installation.
F-19
Le commutateur de protection contre
l’écriture n’est pas active lorsque la
carte
P2
est
inserée
dans
l’emplacement de carte PC.
Assurez-vous de retirer la carte P2 de
l’emplacement de carte PC, d’activer le
commutateur, puis de réinsérer la carte
pour
que
la
configuration
du
commutateur soit effective.
P2Installer(VQT0L24-9)_E_F_C_J.book 20 ページ
2008年8月29日 金曜日 午前11時13分
Formateur de carte P2 pour Macintosh
<Formatage de carte P2>
1
2
<Nouvelle installation du formateur de
carte P2>
1
2
3
4
5
3
Insérez le CD-ROM fourni.
Double-cliquez
sur
le
Macintosh du CD-ROM.
dossier
Double-cliquez
P2Formatter.
dossier
sur
le
Double-cliquez sur P2Formatter.dmg
pour ouvrir une nouvelle fenêtre.
2
Sélectionnez
la
fente
pour
l’introduction de la carte P2 et cliquez
sur “Format”.
Cliquez sur “Format” dans la fenêtre
de confirmation pour formater la carte.
Cliquez sur “Close” ou sélectionnez
“Close P2Formatter” dans le menu
P2Formatter pour fermer le formateur
de carte P2.
<Remarques>
z N’enlevez pas les cartes P2 pendant que
le formateur est en fonction.
Glissez P2Formatter apparaissant
dans la nouvelle fenêtre sur un
emplacement approprié comme le
bureau.
<Désinstallation du formateur de carte
P2>
1
4
Double-cliquez sur P2Formatter.
z Pendant l’utilisation de l’AJ-PCD20, le
indicateur d’activité continue à clignoter
après le formatage s’il accède à d’autres
cartes P2 n’ayant pas été formatées.
N’enlevez pas les cartes P2 pendant que
le indicateur d’activité clignote.
Glissez
P2Formatter
dans
la
corbeille, puis sélectionnez “Vider la
Corbeille…” dans le menu “Finder”.
Cliquez sur “OK” dans la fenêtre de
confirmation pour le supprimer.
F-20
FRANÇAIS
Il s’agit du logiciel permettant de formater
une carte P2 en utilisant la fente pour carte
de
l’ordinateur
portable
Macintosh
PowerBook ou le lecteur P2 AJ-PCD20.
P2Installer(VQT0L24-9)_E_F_C_J.book 1 ページ
2008年8月29日 金曜日 午前11時13分
目 录
操作注意事项
使用 Windows 时
1. 安装前 . . . . . . . . . . . . . . . . . . . . . . . . . . . . . . . . . . . . . . . . . . . 2
2. 在个人计算机中操作 P2 卡的注意事项 . . . . . . . . . . . . . . . . . . 3
3. 要安装的软件. . . . . . . . . . . . . . . . . . . . . . . . . . . . . . . . . . . . . . 3
4. 安装 P2 软件 . . . . . . . . . . . . . . . . . . . . . . . . . . . . . . . . . . . . . . 4
5. 新增新的 P2 设备. . . . . . . . . . . . . . . . . . . . . . . . . . . . . . . . . . 10
6. 卸载 P2 软件 . . . . . . . . . . . . . . . . . . . . . . . . . . . . . . . . . . . . . 10
7. 检查已安装的设备 . . . . . . . . . . . . . . . . . . . . . . . . . . . . . . . . . 11
8. 设置内置 P2 驱动器. . . . . . . . . . . . . . . . . . . . . . . . . . . . . . . . 12
9. 检查 P2 驱动程序的安装状态 . . . . . . . . . . . . . . . . . . . . . . . . 13
10. 检查 P2 驱动程序的版本 . . . . . . . . . . . . . . . . . . . . . . . . . . . . 17
11. P2 卡管理器. . . . . . . . . . . . . . . . . . . . . . . . . . . . . . . . . . . . . . 17
12. 每个 P2 设备的软件 . . . . . . . . . . . . . . . . . . . . . . . . . . . . . . . . 18
使用 Macintosh 时
Macintosh PowerBook 的 PC 卡插槽驱动程序 . . . . . . . . . . . 19
Macintosh 的 P2 卡格式器. . . . . . . . . . . . . . . . . . . . . . . . . . . 20
操作注意事项
无论是有偿还是无偿,都禁止再分发提供的CD-ROM 中附带的软件。禁止以制造和 /或销
售各种软件和硬件为目的, 在未经许可的情况下使用提供的CD-ROM 中所保存的软件。此
外,对使用或无法使用本系统而造成的任何损失和/ 或损坏,我们概不负责。即使我们被告
知可能发生此类损坏时,也同样适用。
Windows、Windows 2000、Windows XP 和 Windows Vista 是 Microsoft Corporation 在美
国的商标。
Macnintosh 和 Mac OS X 是美国 Apple Computer, Inc. 的商标。
其它公司名称和产品是各自公司的商标或注册商标。
z本使用说明书中, Microsoft® Windows®、 Windows® 2000、 Windows® XP
Professional 和 Windows® Vista Business 相应以 “Windows”、“Windows 2000”、
“Windows XP Professional”和 “Windows Vista Business”表示。
z同样,在本使用说明书中, Macintosh®、 Mac OS® X 和 PowerBook® 相应以
“Macintosh”、“Mac OS X”和 “PowerBook”表示。
C-1
P2Installer(VQT0L24-9)_E_F_C_J.book 2 ページ
2008年8月29日 金曜日 午前11時13分
使用 Windows 时
1. 安装前
提供的CD-ROM 可以安装 P2软件,用于在
个人计算机上参阅有关Panasonic P2卡的
内容。
安装本软件的个人计算机必须满足以下条
件:
z OS
Windows 2000 SP4或更高版本
Windows XP Professional SP2或
更高版本
Windows Vista Business 或更高
版本
z RAM 建议使用 512MB或以上
对于 Windows Vista Business,
建议使用 1GB或以上
z CPU 建议使用 Pentium® 4 1.5GHz 或
以上
z 个人计算机配备可以读取CD-ROM的驱动
器。
z 如果OS 是Windows 2000 SP4,则必须安
装SP4补丁。
SP4补丁包含在提供的CD-ROM 中名称
为\Win2000SP4Patch 的文件夹中。
在实际使用本软件,或者将个人计算机连接
到 P2 卡或 P2 设备 (P2 驱动器、 P2 座机
等)时,个人计算机需要进一步配置以满足
以下条件。
通过 USB2.0 将 P2 设备连接到个人计算机
时:
z USB2.0 端口已提供,使用的USB2.0驱动
程序由 Microsoft提供。
如果个人计算机中已预装上述OS,则计算
机中已装有驱动程序,因此您无需检查
它。
在 P2 卡直接插入个人计算机卡总线的情况
下使用本软件时:
z 已安装类型 2卡总线插槽。
<注 >
z 根据个人计算机的情形,在回放时可能会
出现如丢失影像帧和声音断开的现象。
z 连接 P2 设备时,请务必为个人计算机要
中
使用的每个 P2 设备预留比所需驱动器数 文
量更多的闲置驱动器。(P2 设备所需的驱
动器数量应包括需要用于 P2 卡槽和组成
P2 设备的硬盘的驱动器。)
z 以下 3 种卡仅可用于 Windows 2000 的
cardbus 驱动程序。不可用其他类型的卡。
AJ-P2C002SG
AJ-P2C004HG
AJ-P2C008HG/MC
z 如果 OS是 Windows Vista Business,安
装、格式化等时,可能会出现 “用户账户
控制 ” 对话框。在这种情况下,单击 “继
续 ” ,继续下面的操作。
z 关于比 64位 Windows Vista 更新的64位
Windows的版本,安装程序被保存在 CDROM上的文件夹\Win64中。
C-2
P2Installer(VQT0L24-9)_E_F_C_J.book 3 ページ
2008年8月29日 金曜日 午前11時13分
2. 在个人计算机中操作 P2卡的注意事项
在将 P2 卡或 P2 设备连接到个人计算机的情况下使用本软件时,请务必从提供的
CD-ROM 中将P2驱动程序安装在个人计算机上。
如果这些设备连接到未安装 P2 驱动程序的个人计算机上,则这些设备可能无法正常运
行。
在读取或写入 P2 卡时,不要从插槽中取出 P2 卡。 同样,不要插入或取下 USB
电缆或更改 USB 接口的设置。
否则,可能导致个人计算机操作不正常。
同时,从卡插槽中取出 P2 卡之前,请执行以下操作:
z 如果 P2 卡直接插入个人计算机的 P2 存储卡总线中,请从 Windows 任务栏的系统盘
中执行 “安全删除硬件”。
z 如果通过 USB2.0 将 P2 设备连接到个人计算机,请打开我的电脑,右键单击 P2 卡要
插入的特殊硬件项目,然后选择 “取出”。
z 确保在使用 P2 卡的过程中,个人计算机系统设定为不进入待机模式或睡眠模式。正在
存取 P2 卡时,如果系统设定为进入待机模式或睡眠模式,则可能会破坏正在执行的文
件和 /或数据。
3. 要安装的软件
提供的CD-ROM 可以安装以下程序:
z P2 驱动程序
z P2 卡管理器
z 每个 P2 设备的软件
使用提供的CD-ROM 安装程序时,您可以格
式化P2卡。 P2 卡能以两种方式格式化:
z 在 Windows 资源管理器中,右键单击 P2
卡驱动器。从显示的菜单中选择 “格式
化”。
z 在 Windows 资源管理器中,选择 P2 卡驱
动器。
从显示的菜单中,按顺序选择 “文件” 、
“可移动磁盘”和 “格式化”。
C-3
提供的 CD-ROM 也包含一套使用说明书。请
参阅名称为 \Manuals 的文件夹。
要浏览说明手册,需要 Adobe® Reader。如
果个人计算机上未安装 Adobe Reader,则
需要从 Adobe 网站下载此程序。
P2Installer(VQT0L24-9)_E_F_C_J.book 4 ページ
2008年8月29日 金曜日 午前11時13分
4. 安装 P2 软件
< 注>
z 使用具有系统管理员身份的用户名登录到
个人计算机后,安装 P2 软件。
z 我们建议将要使用的 P2 设备连接到个人
计算机后,启动软件安装。
当 P2 设备连接到个人计算机时,
Windows 资源管理器另外将显示与 P2 设
备的卡插槽同一数目的驱动器。
如 果 Windows 资 源管 理器 未显 示驱 动
器,请 检 查 个 人 计 算 机 中 是 否 已 安 装
Microsoft 提供的 USB2.0 驱动程序。
z 每个卡总线插槽必须安装 P2 卡驱动程
序。如果您正在使用有两个或以上卡总线
插槽的个人计算机,请将 P2 卡插入每个
插槽。
驱动程序可能不会安装到未插入 P2 卡的
插槽上,这会导致 P2 卡无法正常操作。如
果 PC 不识别插入的 P2 卡,请重新插入。
z 如果OS 是Windows 2000/Windows XP
Professional,当 Windows系统下的驱动
程序签名选项设置为 “阻止”时,软件的
安装可能会失败。
如果安装失败,在控制面板的“系统属性”
窗口中选择硬件标签,并检查驱动程序的
驱动程序签名选项是否设置为 “阻止”。
z 如果在安装软件过程中出现本手册未提及
的对话框,请单击 “取消”关闭对话框。
z 当一个设备如P2卡在安装驱动程序之前连
接到个人计算机上时,会出现以下对话
框。请务必单击 “取消”关闭对话框。
图 1
(对于Windows 2000/
Windows XP Professional)
中
文
图 2
(对于 Windows Vista Business)
C-4
P2Installer(VQT0L24-9)_E_F_C_J.book 5 ページ
2008年8月29日 金曜日 午前11時13分
z 用户使用P2 驱动程序版本优先于在
Windows 2000/Windows XP
Professional中已经安装的 1.07.0048
有关检查版本的步骤,请参阅“10. 检查P2
驱动程序的版本” 。
为了安装新的驱动程序,需要卸载当前安
装的驱动程序。如果卸载此驱动程序,将
会删除到目前为止所有安装的信息。有关
卸载步骤和注意事项,请参阅 “6. 卸载 P2
软件” 。
此外,在P2 驱动程序升级的过程中,可以
卸载旧版本的P2驱动程序。为了使两个操
作都有效,可能需要重新启动Windows。
z 如果个人计算机的OS 是Windows Vista
Business,当升级 P2驱动程序时,可能
会出现图 3 所示的对话框。在这种情况
下,单击 “确定 ” 按钮。
检查 “1. 安装前”中的每个项目后,使用下
列步骤在个人计算机中安装 P2 软件:
1
2
3
关闭所有的应用程序,然后将要使用的
P2 卡或 P2 设备连接到个人计算机。
将设备连接到个人计算机后,屏幕自动
出现找到新硬件向导对话框,但请单击
“取消”关闭此对话框。
插入提供的CD-ROM。
从 “我的电脑”中访问装有提供的CDROM的驱动器,并执行 setup.exe。
屏幕出现图 4 所示的窗口,开始安装步
骤。单击 “下一步”。
图 4
图 3
C-5
P2Installer(VQT0L24-9)_E_F_C_J.book 6 ページ
4
2008年8月29日 金曜日 午前11時13分
(用户使用 P2 驱动程序版本优先于在
Windows 2000/Windows XP
Professional 中已经安装的
1.07.0048)
出现图 5 所示的对话框。为了安装新驱
动程序,需要卸载当前安装的驱动程
序。
如果想继续卸载,单击 “确定” 按钮。
如果想手动卸载,单击 “取消”。有关
手动卸载的信息,请参阅 “6. 卸载 P2 软
件” 。
6
屏幕出现图 7 所示的安装目的地文件夹
设置窗口。要更改安装目的地文件夹,
请单击 “更改”,然后创建新文件夹。
设置新的安装目的地文件夹后,单击
“下一步”。
图 7
7
屏幕出现图 8 所示的安装开始窗口。单
中
击 “安装”。
文
图 5
5
屏幕出现图 6所示的许可证协议对话
框。如果同意许可证协议的条款,单击
“我接受该许可证协议中的条款”,然
后单击 “下一步”。
图 8
图 6
C-6
P2Installer(VQT0L24-9)_E_F_C_J.book 7 ページ
8
2008年8月29日 金曜日 午前11時13分
屏幕出现图 9 所示的状态显示窗口,显
示安装进度。
图 9
9
如图 10 所示,驱动程序安装选择窗口
显示,每个设备也显示。选择要安装的
设备并核取相应的复选框。
z已安装设备的驱动程序无需安装。有
关监控安装状态的信息,请参阅第
13 页。
10 按下确定按钮后,屏幕将显示一个对话
框,提示连接 P2 卡或 P2 设备,如图
11 所示。如果需要安装,请进行连接,
然后单击 “安装”。如果不想使用这些
设备,只需单击 “取消”。
如果将来您想新增在初始设置中略过的
设备,请重新执行安装程序以对设备执
行覆盖安装。有关更多信息,请参阅
“5. 新增新的 P2 设备”。
<注>
在安装过程中,当焦点转移到其它窗口
时,此对话框可能隐藏在那个窗口的后
面。如果图 9 所示的对话框仍然保留并
且其状态显示没有发生更改,请检查图
11 所示的对话框是否隐藏在其它窗口
的后面。
图 11
图 10
C-7
P2Installer(VQT0L24-9)_E_F_C_J.book 8 ページ
2008年8月29日 金曜日 午前11時13分
11 对于 Windows 2000/Windows XP
Professional,
可能会出现图 12 所示的文本窗口。 单
击 “继续安装”。此文本窗口可能会出
现几次。
12(用户使用P2驱动程序版本优先于在
Windows 2000/Windows XP
Professional中已经安装的1.07.0048)
可能会出现 图 14 所示的文本窗口。在
这种情况下,旧版本的P2驱动程序的卸
载已完成,但是新版本的驱动程序未安
装。
单击 “确定”按钮关闭安装程序,重新
启动Windows,然后从步骤 1再次开始
安装操作。
图 12
对于 Windows Vista Business,
可能会出现 图 13 所示的文本窗口。单
击 “安装此驱动程序软件”。此文本窗
口可能会出现几次。
图 14
13 屏幕出现图
15 所示的安装完成窗口,
表示安装完成。
中
文
图 13
图 15
C-8
P2Installer(VQT0L24-9)_E_F_C_J.book 9 ページ
2008年8月29日 金曜日 午前11時13分
14 屏幕出现图 16所示的对话框,提示重
新启动个人计算机。单击 “是”重新
启动。
将两台 P2 驱动器连接到个人计算机时,请
按照下列步骤安装 P2 软件。(此处假设两
个 USB2.0 端口 分别 为端 口 (A) 和 端口
(B)。)
这两台 P2 驱动器需要两个独享的 USB2.0
端口。
1
图 16
2
3
4
5
6
个人计算机正在运行时,请将一个 P2
驱动器连接到端口 (A),然后将另一个
P2驱动器连接到端口 (B)。
安装 P2 软件。(请参阅第 4 页至第 8
页)
安装完成且出现要求重新启动系统的
对话框(第 9 页上的图 16)时,单击
“否”,然后从 USB2.0 端口拔下各个
P2驱动器。
此时重新连接 P2驱动器,但是,此次
先将其中一台 P2 驱动器连接到端口
(B),然后再将另一台连接到端口 (A)。
重新启动安装程序后单击 “下一步”
按钮(第 5 页),屏幕显示图 17 (第
10 页)。
核取 “修复” ,然后单击 “下一步”
按钮。
按照屏幕指示执行操作之后,重新启
动个人计算机。
z 请确保至少将一个 P2 设备连接到个人
计算机。最多可以连接两个 P2 设备。
C-9
P2Installer(VQT0L24-9)_E_F_C_J.book 10 ページ
2008年8月29日 金曜日 午前11時13分
5. 新增新的P2 设备
6. 卸载 P2 软件
要将新的 P2 卡或 P2 设备连接到已安装 P2 要卸载 P2 软件,请执行以下步骤:
软件的个人计算机,请使用 “4. 安装 P2 软
对于 Windows Vista Business,
件”中所述步骤对 P2 软件进行覆盖安装。
在覆盖安装过程中,屏幕出现图 17所示的窗 在控制面板的 “程序”窗口的 “程序和功
口,但不会再次出现图 6 所示的许可证协议 能”窗口中,选择 “Panasonic P2 驱动程
序”,然后单击 “卸载”。
对话框。
在此窗口中,核取 “修复”,然后单击 “下 对于 Windows XP Professional,
一步”。
在控制面板的 “添加或删除程序”窗口中,
按照屏幕指示执行操作之后,重新启动个人 选择 “Panasonic P2驱动程序”,然后单击
计算机。
“删除”。
对于 Windows 2000,
在控制面板的 “添加 /删除应用程序”窗口
中,选择 “Panasonic P2驱动程序”,然后
单击 “删除”。
按照屏幕指示完成卸载之后,根据屏幕指示
重新启动个人计算机。
中
文
图 17
<注>
当安装的 P2 软件和安装程序的版本相同
时,上述屏幕将会显示。
C-10
P2Installer(VQT0L24-9)_E_F_C_J.book 11 ページ
2008年8月29日 金曜日 午前11時13分
<注>
z 如果卸载此软件,将会删除到目前为止所
有安装的信息,因此,如果要再次安装此
软件,将需要安装将要使用的所有设备的
驱动程序。建议在卸载前检查当前的信
息。有关检查的步骤,请参阅 “7. 检查
已安装的设备”。
z 如果个人计算机的OS 是Windows Vista
Business,当卸载 P2驱动程序时,可能
会出现图 18所示的对话框。在这种情况
下,单击 “确定”按钮。
7. 检查已安装的设备
要检查哪个设备安装了驱动程序,使用与当
前已安装的 P2软件相同版本的安装程序,
并根据 “4. 安装 P2 软件 ” 中描述的步骤执行
覆盖安装。
如果您开始安装,然后单击 “下一步”,会
出现图 17 (第 10 页)中所示的窗口。在
此窗口中,核取 “修复”,然后单击 “下
一步”。如果您按照屏幕指示执行操作,会
出现图 19中所示的窗口。
在此窗口中,可以通过检查是否显示 “已
安装”来检查哪个设备安装了驱动程序。
检查完之后,单击 “取消”关闭此窗口。
图 18
图 19
C-11
P2Installer(VQT0L24-9)_E_F_C_J.book 12 ページ
2008年8月29日 金曜日 午前11時13分
8. 设置内置 P2 驱动器
要使用将 P2 驱动器并入到 5 英寸磁盘的个
人计算机时,安装 P2 卡软件,并将 P2 驱动
器连接到个人计算机,然后执行以下设置:
1
对于 Windows Vista Business/
Windows XP Professional,
请选择:“开始” > “所有程序” >
“Panasonic P2” > “设定 P2 驱动器
设置” > “启用内置驱动器”。
对于 Windows 2000,
请 选 择:“开 始” > “程 序” >
“Panasonic P2” > “设定 P2 驱动器
设置” > “启用内置驱动器”。
2
屏幕出现图 20 所示的对话框。单击“确
定”。
中
文
图 20
C-12
P2Installer(VQT0L24-9)_E_F_C_J.book 13 ページ
2008年8月29日 金曜日 午前11時13分
9. 检查 P2 驱动程序的安装状态
通过找到新硬件向导对话框 (图 1)安装标
准驱动程序时,或者由于某些原因卸载 P2
驱动程序时, P2 设备无法正常操作。
如果出现下列事件,请检查 P2 驱动程序是
否正确安装;如果没有,请重新安装。
z 无法识别 P2 卡或 P2 设备。
z 无法从 P2 卡或 P2 设备执行读取操作。
z 无法对 P2 卡或 P2 设备执行写入操作。
z 从 P2 卡或 P2 设备回放过程中频繁发生
影像帧丢失的现象,表示性能有问题。
如何检查 P2 驱动程序
<注 >
检查 P2 卡驱动程序是否正确安装时,请确
保将适当的设备连接到个人计算机。未连接
到个人计算机的设备无法使用下列方法检
查:
对于 Windows Vista Business,
请选择:“开始” > “控制面板” > “系
统与维护”。单击设备管理器。
对于 Windows XP Professional,
请选择:“开始” > “控制面板” > “系
统”。屏幕出现系统属性窗口。
选择硬件标签,然后单击设备管理器。
对于 Windows 2000,
请选择:“开始” > “设置” > “控制面
板” > “系统”。屏幕出现系统属性窗口。
选择硬件标签,然后单击设备管理器。
C-13
P2Installer(VQT0L24-9)_E_F_C_J.book 14 ページ
1
2008年8月29日 金曜日 午前11時13分
检查 P2 设备驱动程序显示。
检查 P2 卡驱动程序
设置 “IDE ATA/ATAPI控制器” “Panasonic P2 Card”。
设置 “P2 Disk Drive” - “P2Card
Series Cached Disk”。
检查 P2 USB 设备驱动程序
设置 “通用串行总线控制器” “Panasonic P2 Series USB
Device”。
P2 卡驱动程序
中
文
P2 设备驱动程序
图 21
C-14
P2Installer(VQT0L24-9)_E_F_C_J.book 15 ページ
2008年8月29日 金曜日 午前11時13分
检查P2卡 1394b 驱动程序
对于 Windows XP Professional,
单击磁盘驱动器下列出的 “MATSHITA AJ-PCD20 #1 IEEE 1394 SBP2 Device”,然
后单击“MATSHITA AJ-PCD20 #5 IEEE 1394 SBP2 Device”属性面板中的“驱动程
序”标签。设置 “供应商” - “Panasonic”。
P2 设备 1394b 驱
动程序
图 22
C-15
P2Installer(VQT0L24-9)_E_F_C_J.book 16 ページ
2008年8月29日 金曜日 午前11時13分
对于 Windows Vista Business,
单击“P2 SBP2 Device”。有 5个显示项目,从“MATSHITA AJ-PCD20 #1 IEEE 1394
SBP2 Device”到 “MATSHITA AJ-PCD20 #5 IEEE 1394 SBP2 Device”。
P2 设备 1394b 驱
动程序
中
文
图 23
C-16
P2Installer(VQT0L24-9)_E_F_C_J.book 17 ページ
2008年8月29日 金曜日 午前11時13分
10.检查 P2 驱动程序的
版本
对于 Windows Vista Business,
请选择:“控制面板”> “程序” > “程
序和功能” > “视图” > “详情”。按下
“Alt”键显示菜单,在 “视图”菜单中选择
“显示设置”,核取 “版本”复选框,然后
单击 “确定”按钮显示版本。
11.P2 卡管理器
在安装 P2 软件之后,“P2 卡管理器”图标
将添加至控制面板和任务栏。
使用 “P2 卡管理器”,可以设置 P2 卡的卡
名和密码。
启动“P2 卡管理器”并从已识别的 P2 卡中
选择所需的 P2 卡,“改变卡名”和 “改变
密码”按钮将启用。单击“刷新”按钮之后,
对于 Windows XP Professional,
有关 P2 卡的最新信息将确定并显示。
在控制面板的 “添加或删除程序”窗口中,
(未用过的 P2 卡的卡名和密码不能设置。)
选择 “Panasonic P2 驱动程序”,然后参阅
支持信息。
<注意 >
如果由于写保护开关设置到 “保护”位置
对于 Windows 2000,
等原因而无法向 P2卡写入,卡名和密码不
在控制面板的 “添加 /删除应用程序”窗口
能设置。
中,选择 “Panasonic P2 驱动程序”,然后
参阅支持信息。
<改变卡名 >
可以从该屏幕更改卡名。更改时需要密码。
插入新的 P2 卡时,密码尚未设置。请确保
对插入和使用了密码的 P2 卡应用所需的密
码。
1) 单击“改变卡名”按钮,然后输入密码和
卡名。
2) 单击 “确定”按钮之后,卡名更改。按下
“取消”按钮可使用户返回至 “P2 卡管
理器”屏幕,而不会更改卡名。
C-17
P2Installer(VQT0L24-9)_E_F_C_J.book 18 ページ
2008年8月29日 金曜日 午前11時13分
<改变密码 >
从该屏幕可以设置用于保护卡名的密码。
12.每个 P2 设备的软件
1) 单击 “改变密码”按钮,然后旧密码和新
密码。
在 “旧密码”栏中输入当前密码。
在 “新密码”栏中输入新密码,然后在
“确认新密码”栏中输入相同的新密码。
安装 P2 软件之后,每个 P2 设备的软件将同
时安装。有关每个设备的软件的信息,请参
阅相关软件的说明手册。
2) 单击 “确定”按钮确认更改。当屏幕显示
消息 “成功。将会在卡拔出后刷新显示 .
拔出前显示信息可能有误。 ”时,单击
“确定”按钮。
3) 按下 “取消”按钮可使用户返回至 “P2
卡管理器”屏幕。
4) 密码更改后,更改了密码的 P2 卡信息将
从 “P2 卡管理器”屏幕消失。请移除 P2
卡。
中
文
C-18
P2Installer(VQT0L24-9)_E_F_C_J.book 19 ページ
2008年8月29日 金曜日 午前11時13分
使用 Macintosh 时
Macintosh PowerBook 的 PC 卡插槽驱动程序
此驱动程序软件用于参照带 PC 卡插槽的
Macintosh PowerBook 上 P2 卡的内容。
此 驱 动 程 序 软 件 经 检 验,可 以 在 下 列
Macintosh 环境中使用。
<注 >
z 仅安装卡插槽驱动程序。
z 要移除 P2 卡,请将 P2 卡拖至“废纸篓”
并等待直至图标消失。
z 兼容机型
PowerBook G4 系列
z OS
Mac OS X 10.4.8
Mac OS X 10.5.1
<为 Macintosh PowerBook 安装 PC 卡插
槽驱动程序>
1
2
3
4
插入提供的 CD-ROM。
双击 CD-ROM 中的 Macintosh 文件
夹。
双击 P2PCCard Install.pkg。
开始安装驱动程序软件。根据屏幕指示
完成安装。
C-19
当 P2 卡插在 PC 卡插槽中时,写保护
开关无效。
要使开关设置生效,请确保从 PC 卡插
槽中取出 P2 卡,设置开关,然后重新
插入卡。
P2Installer(VQT0L24-9)_E_F_C_J.book 20 ページ
2008年8月29日 金曜日 午前11時13分
Macintosh 的 P2卡格式器
这是一个使用Macintosh PowerBook或P2驱
动器 AJ-PCD20 的 PC 卡插槽格式化 P2 卡的
软件。
<P2 卡格式器的新安装>
1
2
3
4
5
插入提供的 CD-ROM。
双击CD-ROM上的Macintosh文件夹。
双击 P2Formatter文件夹。
双击 P2Formatter.dmg 打开一个新窗
口。
将显示在新窗口中的P2Formatter拖到
适当的地方,如桌面。
<P2 卡格式器的卸载>
1
2
<格式化 P2卡 >
1
2
3
4
双击P2Formatter。
选择插入了
“Format”。
P2
卡的插槽,单击
在确认窗口上单击“Format”格式化此
卡。
在P2格式器菜单上单击“退出”或选择
“退出 P2Formatter”关闭 P2 卡 格式
器。
<注 >
z 格式器正在运行时,请不要取出 P2 卡。
z 使用 AJ-PCD20时,由于它还将存取其他
没有被格式化的 P2卡,因此存状态指示
灯在格式化后将继续闪烁。存状态指示灯
正在闪烁时,请不要取出 P2卡。
将P2Formatter拖到回收站,然后选择
“Finder”菜单中的 “清倒废纸篓...”。
在确认窗口上单击 “好”将其删除。
C-20
中
文
P2Installer(VQT0L24-9)_E_F_C_J.book 1 ページ
2008年8月29日 金曜日 午前11時13分
目 次
ご使用上の注意
Windows をお使いの場合
1. インストールの前に . . . . . . . . . . . . . . . . . . . . . . . . . . . . . . . . . .
2. パーソナルコンピューターにおける P2 カード取り扱い上の注意
3. インストールされるソフトウェア . . . . . . . . . . . . . . . . . . . . . . . .
4. P2 用ソフトウェアのインストール . . . . . . . . . . . . . . . . . . . . . . .
5. 新しい P2 デバイスの追加 . . . . . . . . . . . . . . . . . . . . . . . . . . . . .
6. P2 用ソフトウェアのアンインストール . . . . . . . . . . . . . . . . . . .
7. インストールされているデバイスの確認 . . . . . . . . . . . . . . . . . . .
8. 内蔵 P2 ドライブの設定 . . . . . . . . . . . . . . . . . . . . . . . . . . . . . . .
9. P2 用ドライバーのインストール状態確認 . . . . . . . . . . . . . . . . . .
10. P2 用ドライバーのバージョン確認 . . . . . . . . . . . . . . . . . . . . . . .
11. P2 カードマネージャー . . . . . . . . . . . . . . . . . . . . . . . . . . . . . . .
12. 各 P2 デバイス専用ソフトウェア . . . . . . . . . . . . . . . . . . . . . . . .
.
.
.
.
.
.
.
.
.
.
.
.
.
.
.
.
.
.
.
.
.
.
.
.
..2
..3
..3
..4
.10
.10
.11
.12
.13
.17
.17
.18
Macintosh をお使いの場合
Macintosh PowerBook 用 PC カードスロットドライバー . . . . . . .19
Macintosh 用 P2 カードフォーマッター . . . . . . . . . . . . . . . . . . . . .20
ご使用上の注意
付属の CD-ROM に収録されているソフトウェアを、有償、無償にかかわらず、再配布す
ることを禁止します。また、付属の CD-ROM に収録されているソフトウェアを、当社の
許可なくソフトウェアやハードウェアの製造および販売に利用することを禁止します。
また、弊社は、本システムの使用または使用不能から生じる一切の損失、損害に関して責
任を負いません。たとえ、弊社が、そのような損害の可能性について知らされていた場合
でも同様です。
Windows、Windows 2000、Windows XP、Windows Vista は米国 Microsoft
Corporation の登録商標です。
Macintosh、Mac OS X は米国 Apple Computer,Inc. の登録商標です。
その他会社名、商品名は各社の商標または登録商標です。
z本書では、Microsoft® Windows®、Windows® 2000、Windows® XP Professional、
Windows® Vista Business を「Windows」、「Windows 2000」、「Windows XP
Professional」または「Windows Vista Business」と表記します。
z本書では、Macintosh®、Mac OS® X、PowerBook® を「Macintosh」、
「Mac OS X」
または「PowerBook」と表記します。
J-1
P2Installer(VQT0L24-9)_E_F_C_J.book 2 ページ
2008年8月29日 金曜日 午前11時13分
Windows をお使いの場合
1. インストールの前に
付属の CD-ROM は、Panasonic P2 カー
ドの内容を、パーソナルコンピューター上
で参照するための、P2 用ソフトウェアをイ
ンストールします。
ソフトウェアをインストールするパーソナ
ルコンピューターは、下記の条件を満たし
ている必要があります。
パーソナルコンピューターのカードバス
に、直接P2カードを挿入して使用する場合
z Type Ⅱカードバススロットを搭載して
いる。
<ノート>
z パーソナルコンピューターの状況によっ
ては、素材を再生する際に、画像がコマ
落ちしたり、音声が途切れるなどの現象
z OS
Windows 2000 SP4以降
が発生することがあります。
Windows XP Professional
z
P2デバイスを接続する場合、パーソナル
SP2以降
コンピューターで使用できる空きドライ
Windows Vista Business
ブ数は、各 P2デバイスが必要とするドラ
以上
イブ数以上を確保してください。
z RAM 512MB 以上推奨
(P2
デバイスが必要とするドライブ数と
Windows Vista Business の
は、P2
カードスロット数および、P2 デ
場合は1GB 以上推奨
®
バイスに内蔵されているハードディスク
z CPU Pentium 4 1.5GHz以上推奨
が必要とするドライブ数です。)
z CD-ROMが読み込めるドライブを装備
z
Windows 2000のカードバスドライ
している。
バーは、以下の3 機種のみで使用でき、
z OSが、Windows 2000 SP4の場合、
それ以外の機種では使用できません。
SP4 用パッチをインストールしている。
AJ-P2C002SG
なお SP4 用パッチは、付属の CD-ROM
日
AJ-P2C004HG
内 の ¥Win2000SP4Patch と いう 名前 の
AJ-P2C008HG
本
フォルダーに入っています。
z Windows Vista Business の場合、イ 語
ンストールやフォーマットなどを行う際
実際にソフトウェアを使用する際や、P2
に「ユーザーアカウント制御」のパネル
カードまたは、P2デバイス(P2ドライブ、
が表示されることがあります。その場合
P2 デッキ等)と接続する際には、さらに以
は「許可」をクリックして操作を継続さ
下の条件が必要になります。
せてください。
パーソナルコンピューターに、USB2.0 で z 64bit 版 Windows Vista 以降の 64bit
P2 デバイスを接続する場合
版Windows の場合、インストーラーは
CD-ROM 内の¥Win64という名前の
z USB2.0 のポートがあり、USB2.0 ドラ
フォルダーに入っています。
イバーはマイクロソフト提供のものを使
用している。
パーソナルコンピューターに前記の OS
がプリインストールされている場合は、
すでにドライバーがインストールされて
いるので、ご確認の必要はありません。
J-2
P2Installer(VQT0L24-9)_E_F_C_J.book 3 ページ
2008年8月29日 金曜日 午前11時13分
2. パーソナルコンピューターにおける P2 カード取り
扱い上の注意
パーソナルコンピューターに P2 カードまたは、P2 デバイスを接続してご使用
される際には、必ず付属の CD-ROM で P2 用ドライバーをインストールして
ください!
P2 用ドライバーをインストールしていないパーソナルコンピューターでこれらのデバ
イスを接続すると、デバイスが正しく動作しないことがあります。
P2 カードを読み出しているとき、およびP2カードに書き込み中に、P2カー
ドをスロットから抜かないでください! また、USB ケーブルの抜き差しや、
USB 端子の設定変更を行わないでください!
パーソナルコンピューターの動作が、異常になることがあります。
また、P2カードをカードスロットから抜く前には、以下の操作を行ってください。
z パーソナルコンピューターのカードバスに、直接 P2 カードを挿入している場合は、
Windows のタスクトレイから、
「ハードウェアの安全な取り外し」を実行します。
z パーソナルコンピューターに、USB2.0 でP2デバイスを接続している場合は、マイ
コンピュータを開き、P2カードを挿入している各機器で、右クリックをして、「取
り出し」を選択します。
z P2カードを使用するときは、パーソナルコンピューターのシステムがスタンバイ状
態や休止状態にならないように設定してください。特に、P2カードへのアクセス中
にスタンバイ状態や休止状態になると、実行中のファイルやデータが壊れることが
あります。
3. インストールされるソフトウェア
付属のCD-ROM では、下記のプログラムが
インストールされます。
z Windows エクスプローラーで、P2カー
ドのドライブを選択します。
メニューから「ファイル」→「リムーバ
z P2 用ドライバー
ブルディスク」→「フォーマット」と選
z P2 カードマネージャー
択します。
z 各 P2デバイス専用ソフトウェア
また、付属のCD-ROMには各種取扱説明書
付属の CD-ROM でインストールを行うと、 も収められています。¥Manuals という名前
P2 カードのフォーマットが可能になりま のフォルダーを参照してください。
す。フォーマットの方法は以下の 2 通りで 各種取扱説明書を閲覧するためには、アド
す。
ビ社の Adobe® Readerが必要です。
z Windows エクスプローラーで、P2 カー Adobe Reader がパーソナルコンピュー
ターにインストールされていないときは、
ドのドライブを右クリックします。表示
アドビ社の Web サイトよりダウンロード
されたメニューから「フォーマット」を
してください。
選択します。
J-3
P2Installer(VQT0L24-9)_E_F_C_J.book 4 ページ
2008年8月29日 金曜日 午前11時13分
4. P2 用ソフトウェアのインストール
<ノート>
z インストールは、Administrator権限を
持つユーザー名でログインしたあとで、
行ってください。
z P2 デバイスを接続した状態でインス
トールを開始することを推奨します。
P2 デバイスを接続すると、エクスプロー
ラー上でデバイスのカードスロットの数
だけドライブが追加表示されます。
エクスプローラー上でドライブが表示さ
れない場合は、マイクロソフト提供の
USB2.0 のドライバーが、パーソナルコ
ンピューターにインストールされている
か、ご確認ください。
z P2 カードは、各カードバススロットに
対してドライバーをインストールする必
要があります。カードバススロットが複
数搭載されたパーソナルコンピューター
をご利用の場合は、すべてのスロットに
P2 カードを挿入してください。
インストール時に P2 カードが挿入され
ていないスロットには、ドライバーがイ
ンストールされず、P2 カードが正しく動
作しない場合があります。もしP2 カード
を挿入しても、パーソナルコンピュー
ターが認識しない場合は、P2 カードを挿
入しなおしてください。
z Windows 2000/Windows XP
Professional の場合、Windows のドラ
イバー署名オプションが「ブロック」に
なっていると、インストールが失敗する
ことがあります。
インストールに失敗した場合は、コント
ロールパネルのシステムプロパティで
ハードウェアタグを選択し、ドライバー
のドライバー署名オプションで「ブロッ
ク」になっていないことをご確認くださ
い。
z インストール中に、本マニュアルで記述
していないパネルが表示された場合は、
「キャンセル」ボタンを押して終了させ
てください。
z ドライバーのインストール前に、パーソ
ナルコンピューターにP2 カードなどの
デバイスを接続すると、下図のようなパ
ネルが表示されます。このパネルは必ず
「キャンセル」ボタンを押して終了させ
てください。
図1
(Windows 2000・
Windows XP Professional の場合)
日
本
語
図2
(Windows Vista Business の場合)
J-4
P2Installer(VQT0L24-9)_E_F_C_J.book 5 ページ
2008年8月29日 金曜日 午前11時13分
z Windows 2000/Windows XP
「1. インストールの前に」の各項目を確認
Professional で1.07.0048 以前の
後、以下の手順に従い、パーソナルコン
バージョンのP2用ドライバーをインス
ピューターに P2 用ソフトウェアをインス
トール済みの方へ
バージョンを確認する方法については トールしてください。
「10. P2 用ドライバーの バージョン確
認」を参照してください。
全てのアプリケーションを終了し、使
用する P2 カードまたは、P2 デバイ
新しいドライバーをインストールするに
スを接続してください。
は現在インストールされているドライ
デ バイ ス接続 時に、「新し いハ ード
バーを一度アンインストールする必要が
ウェアの検出ウィザード」が表示され
あります。アンインストールすると、こ
ますが、
「キャンセル」ボタンを押し
れまでにインストールされた情報はすべ
て、ウィザードは終了してください。
て削除されます。アンインストールの方
法や注意点については「6. P2 用ソフト
ウェアのアンインストール」を参照して
付属の CD-ROMを挿入します。
ください。
また、P2 用ドライバーをアップグレード
する手順中に、旧バージョンのP2 用ドラ
「マイコンピュータ」で付属のCDイバーをアンインストールすることもで
ROMを挿入したドライブを開き、
きます。いずれの場合も Windows の再
setup.exeを実行してください。
起動が必要になる場合があります。
図 4が表示され、セットアップが開始
z OSがWindows Vista Businessのパー
されます。「次へ」ボタンをクリック
してください。
ソナルコンピューターで、P2 用ドライ
バーをアップグレードする場合、図3の
ようなパネルが表示されることがありま
す。この場合は「OK」ボタンを押して
ください。
1
2
3
図4
図3
J-5
P2Installer(VQT0L24-9)_E_F_C_J.book 6 ページ
4
2008年8月29日 金曜日 午前11時13分
(Windows 2000/Windows XP
Professional で 1.07.0048 以前の
バージョンのP2用ドライバーをイン
ストール済みの方へ)
図 5 が表示されます。新しいドライ
バーをインストールするには現在イ
ンストールされているドライバーを
一度アンインストールする必要があ
ります。
このままアンインストールする場合
は「OK」ボタンを押してください。
手動でアンインストールする場合は
「キャンセル」ボタンを押してくださ
い。手動でアンインストールするには
「6. P2 用ソフトウェアのアンインス
トール」を参照してください。
6
図 7のように、インストール先フォル
ダー設定ウィンドウが表示されます。
インストール先のフォルダーを変更
する場合は「変更」ボタンを押してイ
ンストール先を設定してください。イ
ンストール先が設定できましたら、
「次へ」ボタンをクリックしてくださ
い。
図7
図5
5
7
図 8のように、インストール開始ウィ
ンドウが表示されますので、「インス
トール」ボタンを押してください。
図6のように、使用許諾契約の画面が
表示されます。内容に同意される場合
は、
「使用許諾契約の条項に同意しま
す」をクリックしてボックスにチェッ
クを入れ、
「次へ」ボタンをクリック
します。
日
本
語
図8
図6
J-6
P2Installer(VQT0L24-9)_E_F_C_J.book 7 ページ
8
2008年8月29日 金曜日 午前11時13分
図 9 のように、インストール中のス
テータス表示ウィンドウが表示され、
インストールを行ないます。
図9
9
図10のように、インストールする各
デバイス用のドライバーを選択する
ウィンドウが表示されます。インス
ト ー ル す る デ バ イ ス を 選 択 し て、
チェックマークを付けてください。
zすでにインストールされているデ
バイスのドライバーは、インストー
ルする必要がありません。インス
トール状態の確認は、13 ページを
参照してください。
10 OKボタンを押すことで、図11のよう
に、P2 カードまたは、P2 デバイス
の接続を促すパネルが表示されます。
インストールする必要があればデバ
イスを接続し、
「インストール」ボタ
ンを押してください。デバイスを使用
しない場合は、そのまま「キャンセ
ル」ボタンを押してください。
なお、インストールしなかったデバイ
スを後で追加する場合は、再度インス
トーラーを実行して、上書きインス
トールを行います。詳しくは「5. 新
しい P2 デバイスの 追加」を参照して
ください。
<ノート>
インストール中に他のウィンドウに
フォーカスを移すと、このパネルが他
のウィンドウの後ろに隠れてしまう
ことがあります。図 9のパネルが表示
されたまま、ステータス表示が変化し
ない場合は、図11のようなパネルが
他のウィンドウの後ろにないか確認
をしてください。
図 11
図 10
J-7
P2Installer(VQT0L24-9)_E_F_C_J.book 8 ページ
11
2008年8月29日 金曜日 午前11時13分
Windows 2000/Windows XP
Professional の場合
図12のような警告パネルが表示され
ることがありますが、
「続行」をクリッ
クしてください。警告パネルは複数
回、表示されることがあります。
12(Windows
2000/Windows XP
Professional で 1.07.0048 以前の
バージョンのP2用ドライバーをイン
ストール済みの方へ)
図14のような警告パネルが表示され
ることがあります。この場合、旧バー
ジョンのP2用ドライバーのアンイン
ストールは完了していますが、新しい
バージョンのドライバーはインス
トールされていません。
「OK」ボタンを押してインストーラー
を終了して Windowsを再起動し、再
度 1 からの操作を行ってインストール
を行ってください。
図 12
Windows Vista Businessの場合
図13のような警告パネルが表示され
ることがありますが、
「このドライバ
ソフトウェアをインストールします」
をクリックしてください。警告パネル
は複数回、表示されることがありま
す。
図 14
13 図 15 のように、インストール完了
ウィンドウが表示され、インストール
は完了します。
日
本
語
図 13
図 15
J-8
P2Installer(VQT0L24-9)_E_F_C_J.book 9 ページ
2008年8月29日 金曜日 午前11時13分
14 図16のように、再起動を促すパネル
が表示されます。「はい」ボタンをク
リックして、パーソナルコンピュー
ターを再起動してください。
パーソナルコンピューターにP2ドライブ
を 2台接続する場合は、次の手順で P2用
ソフトウェアをインストールを行ってく
ださい。
(仮に、使用する2 つのUSB2.0
ポートを、ポートA、ポートB とします。)
また、2つのUSB2.0 ポートは、P2ドラ
イブ専用にしてお使いください。
1
図 16
2
3
4
5
6
パーソナルコンピューターが起動し
ている状態で、ポート A に P2 ドラ
イブを接続して、次にポートBにP2
ドライブを接続します。
P2 用ソフトウェアのインストール
を行います。(4∼ 8 ページ)
インストールが完了して、再起動を
促すパネル(図16、9 ページ)が
表示したときに「いいえ」をクリッ
クして、それぞれの P2ドライブを
USB2.0 ポートから外します。
再度、P2 ドライブを接続しますが、
このときは、ポート B に P2 ドライ
ブを接続して、次にポート A に P2
ドライブを接続します。
再度、インストーラーを起動
(5 ペー
ジ)して「次へ」ボタンをクリック
すると、図17(10 ページ)が表示
されます。
「修復」のチェックボック
スにチェックを入れ、
「次へ」ボタン
をクリックします。
表示される画面の手順に従った後、
パーソナルコンピューターを再起動
してください。
z パーソナルコンピューターにP2デバイ
スを接続するときは、単独の接続で使
用してください。
ただし、P2ドライブは、2 台までの接
続が可能です。
J-9
P2Installer(VQT0L24-9)_E_F_C_J.book 10 ページ
2008年8月29日 金曜日 午前11時13分
5. 新しい P2 デバイスの
追加
6. P2 用ソフトウェアの
アンインストール
すでに P2 用ソフトウェアがインストール P2 用ソフトウェアをアンインストールす
されているパーソナルコンピューターで、 る場合は以下の手順で実施してください。
新しいP2カードまたは、P2 デバイスを接
Windows Vista Business の場合
続する場合には、
「4. P2 用ソフトウェアの
コントロールパネルの「プログラム」パネ
インストール」の手順に従って P2 用ソフ
ル 内 の「プ ロ グ ラ ム と 機 能」パ ネ ル で、
トウェアを上書きインストールしてくださ
「Panasonic P2 Drivers」を選択し、
「ア
い。
ンインストール」ボタンをクリックします。
上書きインストールの場合は、図 17 のよ
うなウィンドウが表示され、図 6 のような Windows XP Professional の場合
コントロールパネルの「プログラムの追加
使用許諾契約の画面は表示されません。
このウィンドウで「修復」のチェックボッ と削除」パネルで「Panasonic P2
クスにチェックを入れ、
「次へ」ボタンをク Drivers」を選択し、「削除」ボタンをク
リックします。
リックしてください。
表示される画面の手順に従った後、パーソ
ナルコンピューターを再起動してくださ
い。
Windows 2000の場合
コントロールパネルの「アプリケーション
の追加と削除」パネルで「Panasonic P2
Drivers」を選択し、
「削除」ボタンをクリッ
クします。
表示される画面の手順に従ってアンインス
トールの処理が終了したら、パネルの指示
に従って、パーソナルコンピューターを再
起動してください。
日
本
語
図 17
<ノート>
上記の画面は、すでにインストールされて
いる P2 用ソフトウェアとインストーラー
が同じバージョンのときに表示されます。
J-10
P2Installer(VQT0L24-9)_E_F_C_J.book 11 ページ
2008年8月29日 金曜日 午前11時13分
<ノート>
7. インストールされてい
z アンインストールするとこれまでにイン
るデバイスの確認
ストールされた情報はすべて削除されま
すので、再度インストールする場合はご
ドライバーがインストールされているデバ
使用になるすべてのデバイスのドライ
イスを確認するには、現在インストールさ
バーをインストールする必要がありま
れている P2 用ソフトウェアと同じバー
す。アンインストールする前に、現在の
ジョンのインストーラーを使用し、
「4. P2
情報を確認しておくことをおすすめしま
用ソフトウェアのインストール」の手順に
す。確認する方法については「7. イン
従って上書きインストールをしてくださ
ストールされているデバイスの確認」を
い。
参照してください
この場合、インストーラーを起動して「次
z OSがWindows Vista Businessのパー へ」ボタンをクリックすると図17(10 ペー
ソナルコンピューターで、P2 用ドライ
ジ ) のようなウィンドウが表示されます。
バーをアンインストールする場合、図
「修復」のチェックボックスにチェックを入
18 のようなパネルが表示されることが
れ、
「次へ」ボタンをクリックしてください。
あります。この場合は「OK」ボタンを
表示される画面の手順に従って操作すると
押してください。
図 19 のようなウィンドウが表示されます。
このウィンドウでドライバーがインストー
ルされているデバイスは「インストールさ
れています」という表示で確認することが
できます。
確認後は「キャンセル」ボタンを押してイ
ンストーラーを終了させてください。
図 18
図 19
J-11
P2Installer(VQT0L24-9)_E_F_C_J.book 12 ページ
2008年8月29日 金曜日 午前11時13分
8. 内蔵P2 ドライブの設定
P2 ドライブをパーソナルコンピューター
の 5 インチベイに内蔵してお使いになる場
合、P2 カード用ソフトウェアをインストー
ルし、P2 ドライブをパーソナルコンピュー
ターに接続した後、以下の設定を行なって
ください。
1
Windows Vista Business/
Windows XP Professional の場合
「スタート」メニューより「すべての
プログラム」→「Panasonic P2」→
「P2ドライブ設定」と選択し、さらに
そこから「P2 ドライブの内蔵設定」
を選びます。
Windows 2000 の場合
「スタート」メニューより「プログラ
ム」→「Panasonic P2」→「P2ド
ライブ設定」と選択し、さらにそこか
ら「P2 ドライブの内蔵設定」を選び
ます。
2
図20のようなパネルが表示されます
ので、
「OK」をクリックしてください。
日
本
語
図 20
J-12
P2Installer(VQT0L24-9)_E_F_C_J.book 13 ページ
2008年8月29日 金曜日 午前11時13分
9. P2 用ドライバーのインストール状態確認
「新しいハードウェアの検出ウィザード」 P2 用ドライバー確認方法
(図 1)で標準のドライバーがインストール
<ノート>
されたり、
何らかの原因で P2 用ドライバー P2 用ドライバーが正しくインストールさ
がアンインストールされたりすると、P2 デ れているか確認する際には、必ず確認対象
バイスが正しく動作しなくなります。
のデバイスをパーソナルコンピューターに
以下のような現象が生じた場合は、P2 用ド 接続してください。接続されていないデバ
ライバーが正しくインストールされている イスは下記の方法では確認できません。
か確認し、ドライバーが正しくインストー
ルされていない場合は、再度インストール Windows Vista Business の場合
を行ってください。
「スタート」メニューより「コントロールパ
z P2 カードまたは、P2デバイスが認識さ
ネル」を開き、さらに「システムとメンテ
ナンス」を開きます。
「デバイスマネージャ」
れない。
z P2 カードまたは、P2デバイスからの読 をクリックします。
み出しができない。
Windows XP Professional の場合
z P2 カードまたは、P2デバイスへの書き 「スタート」メニューより「コントロールパ
込みができない。
ネル」を開き、
「システム」を選択し、シス
z P2 カードまたは、P2デバイスからの再 テムのプロパティを表示します。「ハード
生でコマ落ちが多発するなど、パフォー
ウェア」タグを選択し、「デバイスマネー
マンスに問題がある。
ジャ」ボタンをクリックします。
Windows 2000の場合
「スタート」メニューより「設定」→「コン
トロールパネル」を開き、
「システム」を選
択し、システムのプロパティを表示します。
「ハードウェア」タグを選択し、「デバイス
マネージャ」ボタンをクリックします。
J-13
P2Installer(VQT0L24-9)_E_F_C_J.book 14 ページ
1
2008年8月29日 金曜日 午前11時13分
P2 デバイスに対するドライバーの表示を確認します。
P2 カード用ドライバーの確認
「IDE ATA/ATAPI コ ントロ ーラ」「Panasonic P2 Card」が設定され
ている。
「P2 Disk Drive」「
- P2Card Series
Cached Disk」が設定されている。
P2デバイス用 USBドライバーの確認
「USB(Universal Serial Bus)コ
ントローラ」-「Panasonic P2
Series USB Device」が設定され
ている。
P2 カード用のドライバー
P2 デバイス用の USB ドライバー
日
本
語
図 21
J-14
P2Installer(VQT0L24-9)_E_F_C_J.book 15 ページ
2008年8月29日 金曜日 午前11時13分
P2 デバイス用1394bドライバーの確認
Windows XP Professional の場合
「ディスクドライブ」の下にある「MATSHITA AJ-PCD20 #1 IEEE 1394
SBP2 Device」から「MATSHITA AJ-PCD20 #5 IEEE 1394 SBP2
Device」のプロパティパネルで「ドライバ」タブをクリックしたとき、「プロバイ
ダ」が「Panasonic」になっている。
P2 デバイス用の
1394b ドライバー
図 22
J-15
P2Installer(VQT0L24-9)_E_F_C_J.book 16 ページ
2008年8月29日 金曜日 午前11時13分
Windows Vista Businessの場合
「P2 SBP2 Device」の項目があり、その下に「MATSHITA AJ-PCD20 #1 IEEE
1394 SBP2 Device」から「MATSHITA AJ-PCD20 #5 IEEE 1394 SBP2
Device」の 5つが表示されている。
P2 デバイス用の
1394b ドライバー
日
本
語
図 23
J-16
P2Installer(VQT0L24-9)_E_F_C_J.book 17 ページ
10.P2 用ドライバーの
バージョン確認
2008年8月29日 金曜日 午前11時13分
11.P2 カードマネージャー
P2 ソフトウェアがインストールされると、
コントロールパネルとタスクバーに「P2
Windows Vista Businessの場合
コントロールパネルの「プログラム」パネ カードマネージャー」アイコンが追加され
ル内の「プログラムと機能」パネルを開き、 ます。
「表示」メニューで「詳細」を選択してくだ
さい。さらに「Alt」キーを押してメニュー P2カードマネージャーでは、P2カードに
を表示し、
「表示」メニューから「詳細表示 カード名の設定、パスワードの設定をする
の設定」を選択し、
「バージョン」のチェッ ことができます。
クボックスにチェックを入れて「OK」ボタ
ンをクリックするとバージョンが表示され P2カードマネージャーを起動し、認識され
たP2カードで変更したいP2カードを選択
るようになります。
すると、
「カード名変更」、「パスワード変
Windows XP Professional の場合
更」ボタンが操作可能になります。
コントロールパネルの「プログラムの追加 「最新情報に更新」ボタンをクリックする
と削除」パネルで「Panasonic P2
と、P2カードを検索して最新情報を表示し
Drivers」を選択し、サポート情報を参照
ます。
してください。
(未使用のP2 カードには、カード名やパス
ワードが設定されていません。)
Windows 2000 の場合
<ノート>
コントロールパネルの「アプリケーション
の追加と削除」パネルで「Panasonic P2 ライトプロテクトスイッチを有効にしてい
Drivers」を選択し、サポート情報を参照し るなどで P2 カードに書き込みができない
場合、カード名やパスワードの設定ができ
てください。
ません。
<カード名変更>
この画面では、カード名を変更することが
できますが、変更するにはパスワードが必
要です。
新しい P2 カードが挿入されたときはパス
ワードがありませんが、既にパスワードが
設定されている P2 カードの場合は、その
パスワードをご使用下さい。
1)「カード名変更」ボタンをクリックし、パ
スワード及びカード名を入力して下さ
い。
2)「OK」ボタンをクリックするとカード名
が変更され、「キャンセル」ボタンをク
リックすると変更されずに「P2 カード
マネージャー」画面に戻ります。
J-17
P2Installer(VQT0L24-9)_E_F_C_J.book 18 ページ
2008年8月29日 金曜日 午前11時13分
<パスワード変更>
この画面では、カード名を保護する為のパ
スワードを管理することができます。
12.各 P2 デバイス専用
ソフトウェア
1)「パスワード変更」ボタンをクリックし、
パスワードを入力して下さい。
「古いパスワード」には、現在カードに
設定されているパスワードを入力して
ください。
「新しいパスワード」には、新しいパス
ワードを入力し、
「新しいパスワード確
認」には新しいパスワードと同じパス
ワードを入力してください。
2)「OK」ボタンをクリックし、変更すると
「成功しました。カードを抜くと・・・表示
されないことがあります。」のメッセー
ジが表示されますので、
「OK」ボタンを
クリックして下さい。
3)「キャンセル」ボタンをクリックすると
元の「P2 カードマネージャー」画面に
戻ります。
4) パスワードが変更されると、
「P2 カード
マネージャー」画面から、パスワードが
変更された P2 カードの情報が消えます
ので、該当の P2 カードを取り出してく
ださい。
P2 用ソフトウェアがインストールされる
と、各 P2 デバイス専用ソフトが同時にイ
ンストールされます。
各デバイス専用ソフトウェアについては、
それぞれの取扱説明書を参照してくださ
い。
日
本
語
J-18
P2Installer(VQT0L24-9)_E_F_C_J.book 19 ページ
2008年8月29日 金曜日 午前11時13分
Macintoshをお使いの場合
Macintosh PowerBook用 PCカードスロットドライバー
ドライバーソフトは、P2 カードの内容を
Macintosh PowerBook の PC カードス
ロットで参照するためのソフトウェアで
す。
ドライバーソフトは、下記の Macintosh 環
境での動作を確認済みです。
< ノート>
z インストールされるのは、カードスロッ
トのドライバーだけです。
z P2カードを取り出すときは、P2カード
のアイコンを「ゴミ箱」にドラッグし、
P2カードのアイコンが消えたことを確
認してから取り出してください。
z 動作対象機種
PowerBook G4シリーズ
z 対象 OS
Mac OS X 10.4.8
Mac OS X 10.5.1
<Macintosh PowerBook用PCカードス
ロットドライバーのインストール>
1
2
3
4
J-19
付属のCD-ROM を挿入します。
CD-ROM 内の Macintosh フォル
ダーをダブルクリックします。
P2PCCard Install.pkg をダブルク
リックします。
ドライバーソフトのインストールが
開始しますので、インストール画面の
指示に従ってインストールを行って
ください。
ライトプロテクトスイッチは、PCカー
ドスロットに挿入した状態で切り替え
ても機能しません。
スイッチの切り替えを有効にするには、
一度P2 カードをPCカードスロットか
ら抜き、スイッチを切り替えた後、再度
挿入してください。
P2Installer(VQT0L24-9)_E_F_C_J.book 20 ページ
2008年8月29日 金曜日 午前11時13分
Macintosh用 P2 カードフォーマッター
フォーマッターソフトは、Macintosh
PowerBookのPC カードスロットまたは
P2 ドライブAJ-PCD20を使用してP2
カードのフォーマットを行うためのソフト
です。
< P2 カードのフォーマット>
1
2
<P2カードフォーマッターのインストール>
1
2
3
4
5
付属のCD-ROM を挿入します。
CD-ROM内の Macintosh フォル
ダーをダブルクリックします。
P2Formatter フォルダーをダブル
クリックします。
P2Formatter.dmg をダブルクリッ
クすると新しいウィンドウが開きま
す。
開いたウィンドウの中に表示されて
いるP2Formatter をデスクトップ
など適当な場所にコピーします。
<P2カードフォーマッターのアンインストール>
1
2
3
4
P2Formatter をダブルクリックし
ます。
フォーマットするP2カードが挿入さ
れているスロットを選択し、「フォー
マット」ボタンをクリックします。
確認ウィンドウの「フォーマット」
ボタンをクリックするとフォーマッ
トが実行されます。
「終了」ボタンをクリックするか、
「P2Formatter」メニューの
「P2Formatterを終了」を選択して
P2カードフォーマッターを終了しま
す。
< ノート>
z フォーマッター起動中はP2 カードの取
り出しを行わないでください。
z AJ-PCD20 でご使用の場合、P2 カード
のフォーマット後、フォーマット対象外
日
のP2 カードにもアクセスするため、ア
クセスインジケーターが点滅します。ア 本
クセスインジケーター点滅中は P2 カー 語
ドの取り出しは行わないでください。
P2Formatter をゴミ箱にドラッグ
し、
「Finder」メニューの「ゴミ箱を
空にする」を選択します。
確認ウィンドウの「OK」ボタンをク
リックすると削除されます。
J-20
P2Installer(VQT0L24-9)_E_F_C_J.book 21 ページ
MEMO
J-21
2008年8月29日 金曜日 午前11時13分
P2Installer(VQT0L24-9)_E_F_C_J.book 22 ページ
2008年8月29日 金曜日 午前11時13分
MEMO
J-22
P2Installer(VQT0L24-9)_E_F_C_J.book 24 ページ
2008年8月29日 金曜日 午前11時13分
Web Site: http://panasonic.net
Panasonic Broadcast & Television Systems Company
Unit Company of Panasonic Corporation of North America
Executive Office: One Panasonic Way 4E-7, Secaucus, NJ 07094 Tel: 201-348-7000
Eastern Zone: One Panasonic Way 4E-7, Secaucus, NJ 07094 Tel: 201-348-7196
Southeast Region: Tel: 201-392-6151
Western Zone: 3330 Cahuenga Blvd W., Los Angeles, CA 90068 Tel: 323-436-3608
Government Marketing Department:
One Panasonic Way 2E-10, Secaucus, NJ 07094 Tel: 201-348-7587
Broadcast PARTS INFORMATION & ORDERING:
9:00 a.m. – 5:00 p.m. (EST) Tel: 800-334-4881/24 Hr. Fax: 800-334-4880
Emergency after hour parts orders Tel: 800-334-4881
e-mail: PBTSparts@us.panasonic.com
TECHNICAL SUPPORT: Emergency 24 Hour Service Tel: 800-222-0741
e-mail: PBTSCservice@us.panasonic.com
Panasonic Canada Inc.
5770 Ambler Drive, Mississauga, Ontario L4W 2T3 Tel: 905-624-5010
Panasonic de México S.A. De C.V.
Casa Matriz: Moras No.313 Col. Tlacoquemecatl Del Valle Del.Benito Juárez México, D.F., C.P.03200
Tel: 55-5488-1000 Fax: 55-5575-6783
Panasonic Latin America, S.A.
P.O.Box 0816-03164 Panama, Republic of Panama Tel: +507-229-2955
Fax: 507-229-5352
Panasonic do Brasil Ltda.
Rua Cubatão, 320-6o andar-Paraíso CEP 04013-001- São Paulo -SP Tel: 11-3889-4000
Fax: 11-3889-4004
Professional & Broadcast IT Systems Business Unit Europe
Panasonic AVC Systems Europe a Division of Panasonic Marketing Europe GmbH
Hagenauer Str. 43, 65203 Wiesbaden-Biebrich Deutschland Tel: +49-611-235-481
Panasonic Systems Asia Pacific (Broadcast Regional Operation Center)
2 Jalan Kilang Barat, Panasonic Building, Singapore 159346 Tel: +65-6270-0110
制造商 : 松下电器产业株式会社
日本大阪府门真市大字门真 1006 番地
网站:http://panasonic.net
进口商 : 松下电器 ( 中国 ) 有限公司
北京市朝阳区光华路甲 8 号 和乔大厦 C 座
网站:http://panasonic.cn/
파나소닉 코리아 주식회사 (PKL)
서울특별시 서초구 서초동 1718-9 서현 BLDG
서비스 문의 : 02-533-8452
http://panasonic.kr
モヷヤɕɋɐɷʀȷɁ᰷ƷȿɁɎɨ̗Ꮱȸɳʀɟ
モヷヤ
ɕɋɐɷʀȷɁ᰷ƷȿɁɎɨ̗Ꮱȸɳʀɟ
〒 571-8503 大阪府門真市松葉町 2 番 15 号 i (06) 6901ー 1161
©
2004