1
Only the faithful observation of these installation, electrical and
maintenance guidelines will ensure the safe and efficient use of
this appliance.
CAUTION
1. The Exo Terra® Turtle Filter is for indoor, household use only, and
for use with water not exceeding 35°C / 95°F. This filter is not
recommended or designed for use with corrosive or flammable
compounds or liquids with different properties other than water.
2. Be sure that the voltage of the mains supply corresponds to the
voltage shown on the rating label of the unit.
3. Before connecting to the mains supply ensure that the cord and
the unit are undamaged.
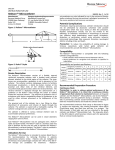
Installation (See illustrations on page 40)
Attention: always unplug all electrical equipment, installed both
inside or outside the tank, from the mains supply before putting your
hands in the water or conducting any equipment maintenance.
Maintenance
NOTE: Failure to maintain filter may result in failure of the unit
and will invalidate your warranty.
To avoid injury, always unplug all appliances from the outlet
when not in use; before putting on or taking off parts; and before
cleaning. The motor is hermetically sealed, requiring no lubrication
or maintenance. Pull the 4 cover locks outwards to unlock the filter
cover. Pull upwards on filter cover to remove it from the pump
section.
ENGLISH
FRANÇAIS
DEUTSCH
ESPAÑOL
ITALIANO
SAVE THESE INSTRUCTIONS.
1. The Exo Terra® Turtle Filter can either be placed next to terrarium
or else hung on the outside of the terrarium with the supplied
mounting bracket. When using the mounting bracket, use the
adjuster or adjust the height of the mounting bracket in order
to hang the unit in a vertical position. It is very important to the
proper operation of the filter that it be positioned vertically.
2. Pull the 4 cover locks outwards to unlock the filter cover. Pull
upwards on filter cover to remove it from the pump section.
Remove the filter baskets, and rinse the filtration media
thoroughly with clean and fresh water. After rinsing, replace the
filter baskets in position (see “Replacing Filtration Media” for
correct position).To clean the pump impeller: remove the pump
chamber (located on the underside of the filter cover). Remove
the impeller from the impeller well, and rinse under running
water. Check the impeller well for foreign matter, rinse if needed.
Replace the impeller, and reassemble the pump chamber.
3. Replace the filter cover on top of the pump section, ensure that
the 4 cover locks are in the“open” position (in outward position).
Press down firmly to ensure the filter cover is seated on the pump
section, and close the 4 covers locks until they click into position.
4. Check that the collet nuts on the inlet/outlet spigots (located on
top of the filter cover) are screwed all the way down to the bottom
of the spigot before attaching tubing. Attach tubing to spigot by
pushing tubing down on the spigot all the way to the topmost
thread. Then screw the collet nut upwards to compress and seal
the tubing onto the spigot.
5. Rotate the reservoir cap counter clock-wise to open (located on
top of the filter cover), and fill reservoir completely with water. To
close, replace and rotate cap clock-wise until it clicks.
6. Install filter in position. DO NOT plug it in.
7. Install Inlet Siphon Tube in a vertical position on the inside of the
tank, pressing firmly on the suction cups to ensure it will stick
to the glass. Install the Spray Bar in a horizontal position on the
inside of the tank, pressing firmly on the suction cups to ensure it
will stick to the glass. Attach the Inlet Siphon Tube and the Spray
Bar to the filter tubing by screwing the collet nut (located on
the end of the tubing) upwards to compress and seal the tubing
in place.
8. Before plugging in, ensure there are no bends or kinks in the
tubing. For best performance it is recommended to place the
filter in an upright vertical position at the same level as the tank.
Plug in filter.
NEDERLANDS
4
an electrical socket. The drip loop is
that part of the cord below the level
of the socket or the connector if an
extension cord is used, to prevent
water travelling along the cord and
coming in contact with the socket. If
the plug or socket does get wet, DO
NOT unplug the cord. Disconnect the
fuse or circuit breaker that supplies
power to the appliance. Then unplug
and examine for presence of water in the socket.
3. This appliance is not intended for use by persons (including
children) with reduced physical sensory or mental capabilities, or
lack of experience or knowledge, unless a person responsible for
their safety has given them supervision or instruction concerning
use of the appliance. Children should be supervised to ensure
that they do not play with the appliance.
4. Always unplug an appliance from a socket when not in use,
before putting on or taking off parts, and before cleaning.
Never yank cord to pull plug from socket. Grasp the plug and
pull to disconnect.
5. To avoid injury do not contact moving parts or hot parts such as
heaters, impellers, lamp bulbs and the like.
6. Do not use an appliance for other than its intended use (i.e. do
not use in swimming pools, garden ponds, bathrooms or any
situations where people are immersed). The use of attachments
not recommended or sold by the manufacturer of the appliance
may cause an unsafe condition.
7. Do not install or store the appliance where it will be exposed to
the weather or to temperatures below freezing.
8. Make sure an appliance mounted on a tank is securely installed
before operating it.
9. Read and observe all the important notices on the appliance.
10. If an extension cord is necessary, a cord with a proper rating
should be used. A cord rated for less amperes or watts than the
appliance rating may overheat. Care should be taken to arrange
the cord so that it will not be tripped over or pulled.