1
Operating Instructions and Replacement Parts List
Installation
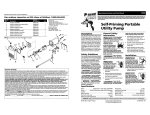
This pump is designed to be selfpriming when installed and operated
as specified below.
1. The pump should be placed as close
as possible to the liquid being
pumped. A pump with 20 foot
suction lift will not remove water as
quickly as a pump with 5 foot
suction lift (Figure 1).
Instructions d’Utilisation et Manuel de Pièces de Rechange
4. A suction strainer is required to
filter abrasive material.
5. The discharge hose and fitting
should be leak-tight. A leak in the
discharge hose will allow water to
spray around the work site, making
the site hazardous.
6. Keep all pipes and hose lines as
short and straight as possible. Long
lengths and curves in the pipes and
hose lines will reduce the pressure
the pump develops.
7. Fill the engine crankcase with oil.
Refer to the engine operating
manual for the specific grade of oil
and amount required.
20 Ft.
Suction Lift
5 Ft.
Suction
Lift
8. Fill the engine fuel tank with
gasoline. Refer to the engine
operating manual for specific
gasoline type that is most efficient
for this engine.
Figure 1
2. Suction hose and fitting must be
airtight.
An air
leak in
the suction line may prevent priming of
the pump. Use of thread sealant is
recommended.
9. Add water to the priming port on
the pump (See Figure 3). Continue
adding water until the water level is
approximately 3 inches from the
top. Install the priming plug. The
water in the pump will create the
suction that primes the pump.
Priming
Port
Suction lines must be reinforced
hose or rigid pipe. Non-reinforced
hose will collapse due to the suction
created by the pump and prevent
pump from operating.
3. A check valve must be used in the
suction line to maintain the selfpriming capability. If no check valve
is used the pump will need to be
primed at the start of each
operation. For best operation, the
check valve should be installed at
the intake of the suction
line.(Figure 2).
PIPING
Always place the pump as close as
possible to the liquid being pumped.
Keep all pipe and hose lines as short
and straight as possible.
Support
pump
and piping when assembling and after
installation. Failure to do so may cause
piping to break, pump to fail, etc; all of
which can result in property damage
and/or personal injury.
10. Turn fuel valve to ‘ON’ position.
11. Move choke lever to ‘CHOKE’
position.
12. Move throttle lever to ‘START’
position.
S’il vous plaît fournir l’information suivante:
- Numéro de modèle
- Numéro de série (si applicable)
- Description et numéro de la pièce
6
2
*
Always use a strainer at the end of the
suction pipe or hose. Position strainer
so it doesn’t become clogged with
stones or debris. A suction line check
valve is recommended.
Do not use this pump for suction lifts
over twenty-five feet.
Correspondance:
Blue Angel Pumps
101 Production Drive
Harrison, OH 45030 U.S.A.
1
All suction connections must be
airtight. If the pump won’t prime,
check for leaks in the suction piping or
fittings. If flexible suction hose is used
instead of pipe, use reinforced hose
with a two inch inner diameter. Nonreinforced flexible hose may collapse
from the vacuum created as the pump
primes.
5
Always shut off the engine, allow the
engine to cool, and remove the spark
plug before performing any
maintenance.
The Honda engine is equipped with a
low oil shut off sensor. The enigne will
shut down and will not restart if the oil
level becomes low.
3
7
* (TX2) ou (WKT2) est illustré ici. La plaque d’étanchéité est
particulière pour chaque numéro – voir les réf. 11 et 12.
8
10
6
9
No.
de Réf
Description
GPH400
GPH550
1
Moteur Honda
57813-001
57812-001
1
2
Trousse de joint d’étancheité
66048-BLA1
66047-BLA1
1
3
Bride à succion
42008-001
42007-001
1
4
Clapet anti-retour à battant
37307-001
37306-001
1
5
Trousse de bride à décharge
66050-BLA1
66049-BLA1
1
6
Bouchon de vidange/remplissage
28444-001
28444-001
2
7
Rotor
62032-001
62033-001
1
8
Plaque d’usure
72030-001
72031-001
1
9
Volute
72032-001
72033-001
1
10
Étanchéité de volute
19051-001
19052-001
1
*11
Plaque d’étanchéité (TX2)
72027-001
72029-001
1
*12
Plaque d’étanchéité (WKT2)
72028-001
72034-001
1
13. Pull engine crank until engine
starts. Once engine starts, move
choke lever to ‘RUN’ position.
14. The pump will take several minutes
to prime.
Check
valve
Figure 2
www.blueangelpumps.com
2
4
11, 12
Maintenance
During freezing weather, open the
drain port and allow all the water in
the pump to drain. This will prevent
damage to the pump when the water
freezes. If the pump will be stored for a
month or more, drain the water from
the pump and follow the engine
manufacturer’s recommendations for
long-term storage.
Figure 3
Pour pièces de rechange, composer 1-888-636-6628
11 Fr
Qty