1
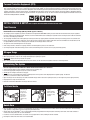
 Personal Protective Equipment (PPE)
Wear protective glasses with side shields or goggles, nitrile gloves, and clothing that protects against dermal exposure. Use only in a well ventilated area
with certified respiratory protection or a powered air purifying respirator (PAPR). For more information regarding a certified respiratory program please visit
http://www.cdc.gov/niosh/. Personal Protective Equipment can be obtained by purchasing the Handi-Foam® Contractor Safety Kit. The Contractor Safety Kit
includes: nitrile gloves, contractor safety glasses, and a NIOSH-approved negative pressure half mask respirator. Consult the product’s (M)SDS (included in
Shipping Packet attached to the A-tank) for specific information. For professional use only. For more Personal Protective Equipment information reference the
Product Stewardship Guidelines (A14009).
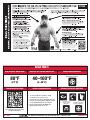
INITIAL SYSTEM 8 SETUP Refer to Quick Reference Guide attached to tank collar.
Tank Pressure
Refer to diagram on the Quick Reference Guide attached to tank collar for # references.
Refill Tank Pressure Test Gauge (time to perform: approx. 3 minutes)
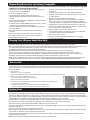
• The nitrogen pressure regulator (#1) that is attached to the nitrogen bottle DOES NOT read the pressure inside the refill chemical tank, only the regulated
pressure coming from the nitrogen bottle. Therefore, use of the Refill Tank Pressure Test Gauge is required to assure that the pressure inside the refill tanks
are correct, according to specifications.
• The test gauge should be used at the beginning of each day and after any spraying breaks to determine and verify the starting pressure in each refill tank.
• Before connecting the nitrogen to either tank, connect the pressure test gauge on the nitrogen intake valve on the A-tank. Make sure the ball valves on the
test gauge AND the tank are closed. Slowly open the ball valve for the nitrogen intake on the tank.
• The pressure in the tank will register on the test gauge.
• After closing all valves, remove the test gauge from the tank and repeat the process on the other tank.
• Set nitrogen regulator to desired starting pressure. Connect and fill nitrogen into one tank at a time (see pressurizing system).
Nitrogen Usage
• Nitrogen bottles are required for pressurizing the refill systems. They may be obtained for a nominal fee from a local welding supply house.
• When using a System 8, only one “G” nitrogen bottle (40 CF) is required per system.
• DO NOT USE compressed air to pressurize the system.
• When nitrogen drops below 500 PSIG (3447.38 kPa) in the bottle, turn off the bottle and regulator and attach a full nitrogen bottle.
Pressurizing The System
Refer to diagram on the Quick Reference Guide attached to tank collar for # references.
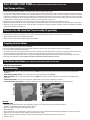
• Turn the regulator knobs counter-clockwise until they are free-spinning. (#1)
• Connect the appropriate nitrogen hose (#2 & 3) to the A or B-tank.
• Slowly open the nitrogen tank until it is fully open.
• Turn either the A or B-regulator knob until the required pressure for the specific tank is displayed on the regulator gauge. The desired
pressure for each tank is located on the tank label.
• Open the nitrogen on/off valve (#4) on the tank and fill with nitrogen until it reaches the required pressure (can no longer hear pressure going into tank).
• Repeat previous 3 steps for the other tank.
• Maintain a minimum of 500 PSIG in the nitrogen bottle at all times.
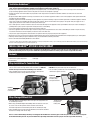
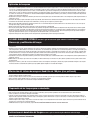
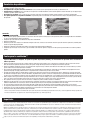
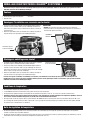
To Attach Nozzle
1. After applying
petroleum jelly
to the face of
the gun, insert
bottom tab
of nozzle into
bottom slot
of dispensing
unit.
2. Attach top latch by
pushing towards
back of unit, until
an audible “snap”
is heard.
3. To remove
used nozzle,
push top latch
up and forward
to unsnap.
Nozzle Care
• Once the trigger is released, it must be reactivated within 30 seconds or a new nozzle must be installed. Failure to do this could result in chemical leakage,
spills, splashes or clogs which can ruin the dispensing unit and/or hoses.
• Always make sure the Handi-Gun® face is covered with petroleum jelly (provided in nozzle pack) before attaching a new nozzle. This makes removal of
nozzles easier and protects the face of the Handi-Gun.
• If foam has not cured, Handi-Cleaner® or acetone can be sprayed into the nozzle, making the nozzles reusable.
• Cleaning the nozzles more than twice is not recommended.
2