1
FIGURE 3
FIGURE 4
FIGURE 5
FIGURE 6
Install circlips
and flanges
Slide header into heat shields
VANCE & HINES EXHAUST
SYSTEM INSTALLATION
1.
2.
3.
4.
5.
6.
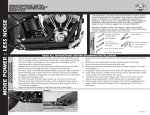
Remove header and heat shields from protective packaging. NOTE: Removal
of end cap may be required. Place each heat shield on a non-abrasive
surface such as a blanket or carpet. Using a felt tip pen, mark outside edge
of each heat shield to show location of mounting clips that hose clamps will
loop through (Figure 2).
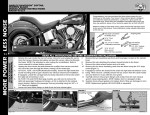
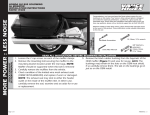
Slide header into heat shields tail end first, engaging end caps (Figure 3).
Install end caps (if removal was necessary) into tail end of each heat shield
engaging head pipe and heat shield. Align mounting hole with end cap
hole. Install and tighten 1/4”-20 button head screws. NOTE: Removable
thread locking compound is recommended.
Install each hose clamp (supplied) by feeding tail end of clamps into heat
shield clips. Take note of location of clamp screw head direction (Figure 2 &
4). Screw head must be accessible when system is installed on motorcycle for
adjustment purposes. Align end tips evenly and tighten hose clamps.
Apply a small amount of anti-seize compound to the threads of the O2
sensors removed from the stock head pipes and install them into the new
head pipes. NOTE: Install O2 sensor with gray connector (short) in the
front head pipe and the O2 sensor with black connector (long) into rear
head pipe. Be careful not to get anti-seize on sensor tip, it may affect sensor
function.
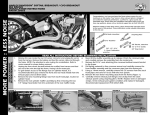
Install circlips and flanges from stock system onto the new head pipe
(Figure 5).
7.
8.
9.
10.
11.
12.
13.
14.
Install Bracket
Attach mounting bracket (Stamped 331-P)(supplied) using four 5/16“x5/8”
flange bolts and two nut plates (supplied). Slide nut plates inside brackets
that are welded to the backside of each muffler (Figure 6). Leave them loose
at this time. Use this procedure for both upper and lower muffler mounting
positions.
Install complete assembly into exhaust ports (rear port first). Use stock flange
nuts, do not tighten at this time. Install exhaust bracket to motorcycle frame
rail using two 3/8”x3/4” flange bolts (supplied). Do not tighten at this time.
Tighten cylinder port exhaust flange nuts on front and rear cylinders. Now
tighten the 5/16”x5/8” flange bolts (supplied) and the 3/8”x3/4” flange bolts
(supplied) attaching the bracket to the frame.
Feed connector for the rear O2 sensor (Black) through the frame and under
the seat. Re-install battery, plug the sensor into the stock wiring connector.
Feed connector for the front O2 (Gray) sensor through the frame and into
the holder on the frame behind the rectifier. Plug the sensor into the stock
wiring connector.
Re-tighten floor board mounting bolts on models so equipped.
Be sure to tighten all hardware before starting motorcycle.
After installation and before starting the motorcycle, completely clean pipes
and mufflers with warm soapy water and a clean soft cloth that will not
leave a residue. NOTE: Any residue, oil, or fingerprints will stain the chrome
when the metal heats up.
EXHAUST CARE - HELPFUL HINTS TO AVOID DISCOLORATION OF EXHAUST SYSTEM
1.
When installing a new set of chrome pipes, make sure your hands are clean and free of oil.
After installation, thoroughly clean pipes with warm soapy water and a soft cloth. Dry with
clean towel to remove any residue (chrome wax / polish, glass cleaner, alcohol, ammonia,
etc...) before starting the motorcycle.
2.
3.
4.
Avoid long periods of idling as this can cause discoloration.
Intake leaks can cause the engine to run lean and overheat, this could lead to discoloration.
Make sure there are no exhaust leaks at the junction of the exhaust pipes and cylinder head.
We recommend replacing gaskets if they are worn.
FUEL MANAGEMENT:
Take the guess work out of fuel injection with Fuelpak Fuel
Management. Contact your local dealer or call (562) 921-0071
to order. Visit fuelpakfi.com for more information.
Fuelpak is intended for racing or off-highway use only, and is
not legal for sale or use in California on pollution-controlled
vehicles.
QUIET
BAFFLE
VANCE & HINES OPTIONAL ACCESSORIES
FUELPAK
MOR POWER : LESS NOISE
Arrows indicate screw head direction
Quiet baffle P/N 21869 is available for this
system. The quiet baffle will lower the sound
level by 2-3db on average.Contact your local
dealer to order.
PLEASE NOTE: Every effort is made for Vance & Hines Exhaust Systems to provide improved cornering clearance. However, due to design and space limitations on some motorcycle models, ground and
cornering clearance may not be improved and in some cases may be reduced. Be sure to follow proper installation instructions.
Page 2 of 4
D602IN Rev. 1.1