1
PROCON PLUS SERIES • TECHNICAL SPECIFICATIONS
POWER SPECIFICATIONS
EIA output power
1kHz, THD maximum 1%
Both channels
8 ohm
4 ohm
8 ohm BRIDGED
ELECTRICAL SPECIFICATIONS
400P
750P
1000P
1250P
1500P
1800P
2200P
125+125
200+200
400
215+215
375+375
750
300+300
550+550
1100
375+375
625+625
1250
450+450
750+750
1500
550+550
900+900
1800
650+650
1100+1100
2200
400P
750P
1000P
1250P
1500P
1800P
2200P
37dB
39dB
0dB (0.775V)
10 kOhms (balanced)
10÷50000 Hz (-0.5dB)
INPUT SENSITIVITY
INPUT IMPEDANCE
FREQUENCY RESPONSE
VOLTAGE GAIN
32dB
33dB
35dB
SLEW RATE
37dB
-82 dB (1KHz)
-100 dB
<0.1% (ref 20Hz -20KHz)
<0.1% (SMPTE method, 60Hz & 7kHz, 4:1 ratio)
CROSSTALK
S/N ratio
Harmonic distortion THD
Intermodulation distortion SMPTE
400P
GENERAL SPECIFICATIONS
750P
1000P
1250P
1500P
CONTROLS
INDICATORS
IN
OUT
1800P
2200P
mm (WxHxD)
kg
483x88x366
13
15
• To prevent short circuit during any test, the oscilloscope must be
EARTH INSULATED, this occurs because some test require to connect
its probe to the amplifier output, non-compliance may cause damages
to oscilloscope inputs circuitry.
• Before removing or installing any modules and connectors, disconnect
the amplifier from AC MAINS and measure the DC supply voltages across
each of the power supply capacitors. If your measurement on any of
the caps is greater than 10Vdc, connect a 100E 60W resistor across
the applicable caps to discharge them for your safety. Remember to
remove the discharge resistor immediately after discharging caps. Do
not power up the amplifier with the discharge resistor connected.
• Do not check the amplifier with the speakers connected use the
appropriate load resistors only.
• BE CAREFUL increasing the Variac you must not exceed the nominal
mains voltage plus its tolerance (see specifications) any upper voltage can be cause of damage.
• Use compressed air to clear dust in the amplifier chassis.
• Before proceed to supply the amplifier check visually the internal
assembly, if appears an evident damage find the most possible reasons that cause it.
• Check the wiring cables for possible interruptions or shorts.
• If the damage has burnt a printed circuit board don’t try to repair
it, replace with a new one.
TESTING GEAR
•
•
•
•
•
•
Audio Generator
Dual Trace Oscilloscope
Digital Multimeter
4E 300W, 8E 450W, 100E 60W resistors
Variac
Digital Thermometer (not indispensable)
SETUP
1 XLR-F + 1 JACK in parallel for each channel
2 x BINDING POST + 1 SPEAKON for each channel (400-1500)
1 SPEAKON for each channel + 1 SPEAKON for BRIDGE output (1800-2200)
see label on the unit
483x88x428
18
19.5
21
PRECAUTION
VISUAL CHECK
Power transformer thermal protection
Short circuit protection
Sensor for current on outputs
CLIP Limiter on each channel
Soft-start circuit (1000P to 2200P)
ON/OFF switch
21-detect input level control for each channel
MODE selector
SHIELD selector
POWER ON: 1 red LED
BRIDGE: 1 red LED
PROTECT: 1 red LED
LEVEL: 2 x 5-LED meters
LIMIT: 1 red LED
PROTECTIONS
POWER SUPPLY
DIMENSIONS
WEIGHT
36dB
22 V/ms
>400:1 @ 1kHz, 8Ohms
DAMPING FACTOR
CONNECTORS
PROCON400p - Test procedures
483x88x456
23.5
25
• Connect the Variac between the Mains and the amplifier and set
it at zero voltage.
• Turn full counter-clockwise the LEVEL potentiometers.
• Connect the audio generator to the channel inputs and set it to
1KHz 775mVrms (0dBu) sinusoidal signal.
• Connect the two scope traces to the amplifier outputs, before the
relay, and set them in DC at 20V/div. 2mS/div.
SUPPLY CHECK
• Verify with the Multimeter the insulation between the heatsinks and
all transistor collectors mounted on them; placing the multimeter tips
between the screw heads and the collector pins you can exclude an
erroneus reading due to the insulation of the heatsink anodization.
• Verify with the Multimeter the NTC (RT1) and R1 paralleled resistor
value, it must be about 1080ohm (at 25°c).
• Disconnect the amplifier module supplies of each channel (red and
yellow wires).
• Set the Variac to the nominal mains voltage, turn on the Amplifier,
then check with the Multimeter the AC supply voltages:
F1-F2 = 29±2Vac.
RED secondary wires = 87±9Vac.
• Re-set the Variac at zero voltage, turn off the amplifier and reconnect the supplies at each amplifier module.
• Set up the Variac slowly monitoring the oscilloscope screen, it should
display no signal; if you notice a DC voltage or a protection trips check
the amplifier as suggested in the ADVICES.
• As soon as the +12VF supply circuit reaches its nominal value,
all cooling fans run at their minimum and the speaker output relais
(J201-202) switch.
• When the Variac ac voltage reaches the nominal voltage verify the
DC supplies as follow:
+VCC = +59±6Vdc
-VCC = -59±6Vdc
U101 pin 8 = +12±0.5Vdc
U101 pin 4 = -12±0.5Vdc
U403 pin 3 = +12±0.5Vdc
2
• If one or more voltages don’t correspond, check the rectifiers, capacitors and transformers disconnecting them from circuitry.
CHANNEL CHECK
• Be sure you have disconnected the load resistor.
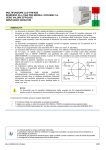
• Increasing the input signal also the output signal raise accordingly,
it must be symmetri cal without vis i ble
distortion or oscillation
as shown in figure
(note: the figure is
representative don`t
re fer to the levels
displayed). If there is
a distortion read the
section ADVICES.
• When the input signal exceeds -20dBu
(20Vpp on output)
the fans turn at their
maximum speed.
• Firstly you must
check the channel
without load, afterwards you must repeat
the check with the loads attached, the following table reports the
approx. maximum level obtainable with this amp:
no load
1CH 4E
2CH 4E
Bridge 8E
out level
113Vpp
91Vpp
82Vpp
161Vpp
in level
+1.5dBu
-0.2dBu
-2.0dBu
-2.3dBu
LEVEL METER ADJUSTMENT
• Check if the clip led lights at -2dBu on input (~80Vpp on output), if
necessary adjust the trimmers W301/2 on display board.
OFFSET ADJUSTMENT
• Set the input level at minimum (no signal), the output dc offset
voltage must be within range ±20mV, if necessary adjust the VR201
trimmer (for each channel) to be within this range.
BIAS ADJUSTMENT
• No bias adjustment is necessary for this amplifier circuitry.
ADVICES
• If you have determinate that the problem is a short on a rail, you
must check the output transistors.
• To determine which transistor devices are bad, use a soldering iron
to lift one leg of each emitter pin and measure the resistance across
emitter and collector of each device. Unsolder and lift one leg of each
base pin and check the base-collector resistance. Replace any device
that measure as a short.
• If all the transistors are OK, unsolder and lift one leg of each diode
and check them.
• Check the circuit board for open foil traces.
• Use the Multimeter to check the resistors, particularly the base and
emitter resistors of damaged transistor.
• If the input sinewave appears to be distorted during the negative
cycle, you can assume that the problem is located somewhere in the
circuitry of the positive rail.
• If the positive cycle appears distorted, you can assume that the
problem is in the circuitry of the negative rail.
• The dc voltages printed on the schematics are measured with the
amplifier in steady state without input signal and nominal mains voltage supply, it can be useful to localize a damage.