1
STEP 2
INSTALLATION INSTRUCTIONS (continued):
Remove the seat from your motorcycle following the instructions listed it your vehicle’s
owner’s manual or the service manual.
STEP 1
CAUTION: Place the seat on a clean work surface free of debris or other objects that
could damage the seat or its cover.
STEP 1: Use an awl and a pliers to carefully pry up and remove the staples holding the
cover to the plastic seat base. Keep the removed staples away from the seat so you won’t
damage the cover. Once all the staples are removed, move to STEP 2.
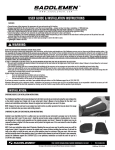
TIP: Before touring the staples, take note of the staple spacing and location 1.
Maybe take a photograph so you can mimic the pattern when you staple the seat
kit’s cover in place.
1
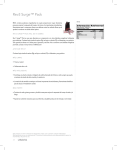
STEP 2: Carefully peel the stock cover 2 back off the seat’s foam 3. In some cases the
cover may be glued or bonded to the foam, so the foam may lift off the pan without having
to separate the cover from the foam. If this is the case, move on to STEP 4. Other wise,
once the cover is removed from the foam, move to STEP 3.
NOTE: If you have difficulty separating the cover or foam that could be glued to the
seat pan, use some heat from a device such as a hair dryer. The heat will soften the
adhesive allowing the parts to separate. Use extreme care when using a higher capacity heat gun as it is possible to damage the vinyl, foam or the plastic pan of the
seat.
2
3
STEP 2
STEP 3: Carefully peel the foam 3 from the plastic pan 4. The cover may be glued to the
pan so use caution to not force it off so it will not tear. Once the foam is removed from the
pan, move to STEP 4.
3
4
STEP 3
STEP 4: With the original foam removed, clean any residual foam or glue from the seat pan.
Making sure the pan 4 is clean will aid in the seat kit installation, even if you elect to not
glue the new foam to the pan. Once the seat pan is clean, move on to STEP 5.
4
NOTE: To aid in seat kit installation, unpack the kit components early in the installation process. Take the cover, unfold it and place it in a warm environment - like in
sunlight - so the heat will allow the cover to become pliable and wrinkle free.
STEP 4
Continued on next page...
www.saddlemen.com
17801 SOUTH
OUTH SUSANA
USANA ROAD
OAD, RANCHO
ANCHO DOMINGUEZ
OMINGUEZ, CA 90221
The images in this instruction set may be different than your accessory or motorcycle.
(310) 638-1222 2 / 5
11-400296 v2 11-06-2013