1
Replacement Top Hardware Installation Instructions
Windshield Channel Installation
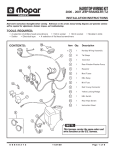
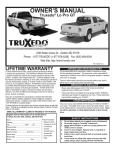
1. Position Windshield Channel onto vehicle as shown in Figure 1.
2. Once in position, secure Windshield Channel using the included (11) - #8 x ¼” Sheet Metal Screws (Figure 1).
NOTE: In some cases the holes on the Windshield Channel will line up with existing holes. In this case,
ensure holes are not too large to install the new screws included in the package. If holes are to big, you must
replace the included screws with larger screws, found at any local hardware store.
If you are replacing a hardtop, use the Windshield Channel as a template to drill 1/8” holes.
Figure 1
WARNING: Ensure Windshield Channel is properly secured prior to installing the Soft Top. Damage to the
vehicle or personal injury may occur if Windshield Channel is not securely mounted. Rampage Products is
not responsible for personal injury or damage to the vehicle if Windshield Channel is not secured properly.
Upper Door Windshield Upright Installation
3. Locate Driver Upper Door Windshield upright and position it on the side of the windshield. With Upper Door
Windshield upright in position mark the vehicle through the holes (Figure 2).
4. Remove Upper Door Windshield upright and place aside. Carefully drill 1/8” holes on the marked locations.
5. Re-position Upper Door Windshield upright and secure it by using the included (4) - #8 x 1/2” Sheet Metal
Screws (Figure 3).
6. Repeat steps 3-5 for opposite side.
Figure 2
681xx & 682xx
Figure 3
Page 2 of 9
01/05