1
TAP DIVIDE Button and LEDs – This button cycles through the six possible settings for TAP
DIVIDE. Each setting, except when all LEDS are off, will divide the tap tempo to create shorter
delay times in sync with your original tempo. It works like so: The DXMB always assumes that
the musician taps in a quarter note. That quarter note can then be divided down to five other
types of notes: dotted eighth note, quarter note triplet, eighth note, eighth note triplet and
sixteenth note. The sixth mode is quarter note or OFF, where the tap tempo is not divided down
and the delay time is set to your actual tap time. No LEDs are lit when Tap Divide is set to
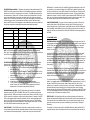
quarter note/OFF. Below is a chart displaying the six available modes and how they divide down
the tap tempo to produce the actual delay time plus an example delay time setting:
TAP DIVIDE MODE
Quarter Note / OFF
SYMBOL
DIVIDE RATIO
1/1
DELAY TIME (for a 600 mS TAP)
600 mS
Dotted 8th Note
3/4
450 mS
Quarter Note Triplet
2/3
400 mS
8th Note
1/2
300 mS
8th Note Triplet
1/3
200 mS
16th Note
1/4
150 mS
N.B. The TAP DIVIDE button has no effect on the delay time when the delay is set by the
DELAY knob. Cycling through the different TAP DIVIDE modes, when the delay time was last set
by the DELAY knob, will not change the delay time in any way.
The TAP DIVIDE button setting is saved and recalled when power cycling.
TAP DIVIDE SEQUENCE MODE – The DXMB contains a little easter egg called Tap Divide
Sequence mode. In this mode, the DXMB will automatically cycle through the six tap divide
modes at a rate set by the RATE knob. To use this mode, do the following:
1. Tap in a delay time. Tap Divide Sequence mode will not work if the delay time is
set by the DELAY knob.
2. Press and hold the TAP DIVIDE button for 2 seconds. After 2 seconds, all of the
TAP DIVIDE LEDs will light up briefly, now you are in sequencer mode. You can
release the button.
3. Turn the RATE knob to change the speed of the sequence. You should see the
tap divide LEDs light up in a sequential fashion.
4. You can tap in new delay times to change the delay time range.
5. To exit Tap Divide Sequence mode: hold down the TAP DIVIDE button for
another 2 seconds. All 5 LEDs will light briefly to indicate you have exited
sequence mode. You could also simply turn the DELAY knob.
EXP. MODE Button and LEDs – The EXP. Mode button cycles through the five available
expression modes: RATE, DEPTH, FEEDBACK, DELAY and OFF. An expression pedal must be
plugged into the EXP. PEDAL jack to make use of these modes. When one of the LEDs of any of
the four modes is lit, the expression pedal will control that parameter. For example, if the RATE
LED is lit, the expression pedal controls the modulation rate, from slowest (expression pedal =
toe up), to the RATE knob’s current setting (expression pedal = toe down). The OFF setting
allows you to disable the expression pedal while it remains plugged into the DXMB. The setting
for the EXP. MODE is saved and recalled when power cycling.
LOW CUT MODE – The EXP. MODE button is also used to enter and exit low cut mode. Low
cut mode places a high pass filter after the bucket brigades in the delay section to remove bass
or low frequencies from the delayed signal. To enter low cut mode, press and hold the EXP.
MODE button for 2 seconds. All four Exp. Mode LEDs will light up indicating that you are in low
cut mode. Now you can release the button. Use the RATE knob to adjust the amount of bass
roll-off in the wet signal; as you turn RATE clockwise you will hear less bass. Turning the RATE
knob to full counter-clockwise completely bypasses low cut mode. The factory default setting
bypasses low cut mode. To exit low cut mode, press and release the EXP. MODE button, it will
return you to the previous expression mode setting while saving the new low cut setting. The
low cut mode setting is also saved and recalled when power cycling the DXMB.
LOW CUT MODE BYPASS – There are two ways to bypass low cut mode: 1) Enter low cut
mode by holding down the EXP. MODE button, then turn the RATE knob down to the full
counter-clockwise position. 2) While powering up the DXMB, hold down the EXP. MODE button.
It will immediately set the DXMB to bypass the low cut filter and also save the new setting. To
bypass low cut mode, you must press and hold the EXP. MODE button before applying power to
the DXMB.
I/O & POWER JACKS
EXPRESSION PEDAL CONTROL – The Deluxe Memory Boy allows external control over four
of its parameters: modulation RATE, modulation DEPTH, FEEDBACK and DELAY time. Please see
the EXP. PEDAL Jack section on the following page for suggestions on the type of expression
pedals to use. The pedal will need to have a TRS plug. You may also use a control voltage
between 0 V and 5 V.
Use the EXP. MODE button to choose the knob you want to control with an expression pedal;
repeatedly press and release the EXP. MODE button until the proper LED lights up. After
selecting a parameter, its associated knob will now set the maximum sweep range, which is the
toe down position for the expression pedal. For example, if you want to sweep the full range of
the FEEDBACK knob, you will need to set the FEEDBACK knob to its full clockwise position. The
expression pedal will then sweep from 0% feedback (toe up position) to 100% feedback (toe
down position).
Some expression pedals allow you to dial in the toe up position using an extra knob on the
pedal itself. When using this type of pedal you can set the range for both toe up (using the knob
on the pedal) and toe down (using the selected knob on the DXMB). If you use an expression
pedal that does not allow you to dial in the toe up position, then toe up will always be that
particular knob’s minimum setting.
The minimum setting for the RATE, FEEDBACK and DELAY knobs is the full counter clockwise
position. The minimum setting for the DEPTH knob is the center detent position at 12 o’clock. In
the case of the DEPTH knob, the expression pedal will always sweep from the 12 o’clock
position (toe up = depth off) to wherever the knob is set (toe down = maximum depth). So the
expression pedal will not sweep through both the Triangle and Square waves, but sweeps
through whichever side you have the DEPTH knob pointed to. For example, set the DEPTH knob
to 3 o’clock, approximately 50% square wave depth, and the expression pedal will sweep from
no depth (toe up) to 50% square wave depth (toe down).
EFFECTS LOOP – The Deluxe Memory Boy has an effects loop feature which allows other
effects to be inserted into the feedback loop of the delay block, before the bucket brigade chips.
This means that you can put additional effects on your wet signal without changing your dry
signal and each time your notes go around the feedback loop, they will also go through the
effects loop.
For example, if you connect a Micro POG in the DXMB’s effects loop, setting the Micro POG to
output only the upper octave, the delayed note will be one octave above the dry note that you