1
INTEG Process Group, Inc
3 POWERING YOUR JNIOR
The JNIOR uses a 2-piece terminal connector system for all power and
I/O wiring connections allowing for easy installation and/or removal of
the JNIOR. The connection details are described in section 5 of this
manual. Additional installation information and drawings are provided
on our website.
The JNIOR can be powered with 9 to 24 volts AC or DC. An optional,
wall transformer (AC power converter) for North American outlets is
available from INTEG that can be used for converting 120 VAC to 12
VDC @ 1 amp.
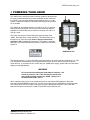
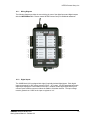
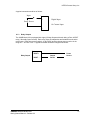
The Power Connector is located along the upper left edge of the
JNIOR. Note that this is a 4-pin connector. If numbered from one (1)
through four (4) from left to right power is always connected to
positions 2 and 3 (middle two connectors). The polarity is irrelevant
although it is recommended that the positive (+) lead be connected to
position 2.
JNIOR Model 310
The left two positions (1 & 2) are internally connected together, as are the right two positions (3 & 4). This
is to facilitate the interconnection of the supplied power to other devices and circuits such as input or
output devices. If you power the I/O circuits with your JNIOR power supply, please make sure the power
supply is sized appropriately.
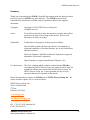
WARNING
Do not connect the transformer leads both to Positions 1 & 2
or both to positions 3 & 4. This will short the transformer
and possibly damage it and/or the JNIOR. Always use a
fused/protected power source.
When a proper power source is connected and turned on the leftmost LED adjacent to the power
connector will glow GREEN continuously. The LED to the right may glow ORANGE for several seconds.
This orange STATUS LED remains on through most of the JNIOR boot sequence. Later it will flash
whenever an external connection is made to the JNIOR via the Ethernet port.
JNIOR
A Network I/O Resource
Getting Started Manual – Release 3.3
4