1
NR710C
External 5-bay USB 3.0, eSATA, FireWire 800 interfaces to SATA RAID Subsystem
1. Overview
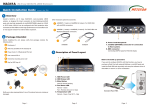
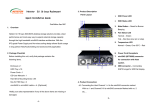
3. Panel Layout
2 34
The NR710C is an external 5-drive SATA disk array storage system,
which is fast and cost effective as well as providing high-capacity
RAID solution for SOHO, SMBs (small and medium businesses),
and professionals engaging in video editing, content creation and
various areas. The NR710C features built-in hardware RAID
protection, high transmission rate, and easy setup of the enclosure.
The connection between the NR710C and the host is simply made
by one data cable, compatible with Windows, Mac, and Linux
operating system.
6
7
10 11 12
13
14. Swappable fan
5
15. Power cord receptacle
8
9
4. Enclosure Setup
1. Remove the NR710C from its packaging, and place the
enclosure next to laptop, desktop PC, server, or workstation.
2. Package Checklist
Before the installation of the unit, verify the items below are
included in the package.
If you want to use volume larger than 2 TB, the switch on the
rear of the NR710C enclosure should be turned to number 0 or 1,
and the operating system and the hardware should also support
volume larger than 2 TB. If you want to use volume under 2 TB,
the switch should be turned to number 2.
1
15
14
1. Power switch button
2. Hold one of the drive trays from the enclosure and push its
button leftward for the release of the lever until the lever
emerges.
Note: to power on/off NR710C, press the power switch button for two seconds
2. Buzzer mute button
3. Enclosure power LED
。White – Power On
A
B
Enclosure x 1
HDD tray
(installed in the NR710C) x 5
4. Fan LED
。Green – Normal
。Red – Failure (low frequency of RPM or stop)
5. Temperature LED
3. Place a drive tray on a flat and level surface, and then attach
the hard disk drive into the drive tray.
。Green – Normal
。Red – Overheated (higher than 50°C)
6. LCD display
C
CD containing user manual
and GUI x 1
D
Hard disk drive mounting
screw x 20
7. LCD control keypad
8. Drive presence LED
。White – Power On
9. Activity indicator LED
。Blue – Hard disk drive ready
。Flash Blue – Access
。Flash Pink – Rebuilding
E
Key for HDD tray x 2
F
USB 3.0 data cable x 1
10. USB 3.0 connector
11. eSATA connector
12. FireWire 800 connectors
13. Switch turned to number 0 or 1 (default) –
volume larger than 2 TB
Switch turned to number 2 – volume under 2 TB
G
eSATA data cable x 1
H
FireWire 800 data cable x 1
If any of the items listed above is missing or damaged, please
contact the sales representative.
WARNING:
You must verify the heads of the four screws are level with the drive
tray while the trays are attached to the hard disk drives; otherwise,
a screw could take hold of the tray from the bottom side and prevent
you to pull the drive tray out of the array.
Volume larger than 2 TB
Volume under 2 TB
4. Adopt four of the screws provided, and fasten the tray on the
hard disk drive. Tighten each screw to fasten the drive tray
snugly to the hard disk drive. Do not tighten the screws overly.