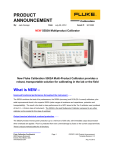
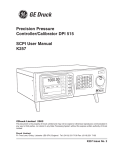
1
PROCAL CALIBRATION SOFTWARE: USER MANUAL ProCal Calibration Software User Guide Version 4.00 Procal Calibration Software: User Manual TABLE OF CONTENTS INTRODUCTION TO PROCAL ..................................................................................................................7 General Overview 7 ProSet ..................................................................................................................................................................7 ProEdit .................................................................................................................................................................7 ProCal ..................................................................................................................................................................7 ProCert .................................................................................................................................................................8 Crystal Reports [Optional] ....................................................................................................................................8 Setting up a System ............................................................................................................................................. 9 INSTALLING THE PROGRAMS ..............................................................................................................10 1: Install ProCal from the CD – 10 2: Install ProCal-Track from the CD 11 How to run the programs 12 First time users Guide to a Quick Evaluation 12 To evaluate the features of ProSet first set up some reference instruments: ................................................... 13 Book in an Instrument for Calibration with ProCal Track. .................................................................................. 13 Calibrate the Instrument.....................................................................................................................................13 Despatch an Instrument with ProCal Track ....................................................................................................... 14 SETTING UP THE SYSTEM USING PROSET ........................................................................................15 The ProSet File Menu 15 Quick overview of the menu options: ................................................................................................................. 15 In System Settings 15 In Instrument Traceability 15 Certificate Information 16 Program Options 16 ProCal Default Start-up Screen 17 USER ACCESS PERMISSIONS ..............................................................................................................17 Add a User ......................................................................................................................................................... 17 Edit a User’s Permissions ..................................................................................................................................17 Delete a User Button .......................................................................................................................................... 17 Close Button....................................................................................................................................................... 17 System Settings in detail 17 Drive & Directory Information 18 Drive & Directory Information continued 18 Sharing the ‘C’ drive on the Server 19 Setting up a Workstation 20 System Number 21 Marginal Pass Limit 21 GPIB Card Information 21 Auto Certificate Numbering Information 21 Language Setting 23 Traceability Information of Reference standards used. 24 Instrument Model Number and Description 25 Serial Number 25 Certificate Number 25 Calibration Date 25 Calibration Interval 25 COM Port (COM1 to COM8 or GPIB Address 0 to 30) 25 Measured Value (Including Unit) [Optional] 25 Uncertainty Template 26 Local / Server Storage 26 Setting up instrument Uncertainties 27 Adding / Editing Range information 28 Uncertainty Templates 29 Laboratory Information 30 ProCal User Manual V4.00 Page 2 Procal Calibration Software: User Manual Configuring the Label Printer 31 THE CALIBRATION PROGRAM PROCAL .............................................................................................32 ProCal Overview 32 Starting ProCal: 33 ProCal Menus: The File Menu 34 A new calibration may be started by selecting from the file menu either: ......................................................... 34 Calibrate an instrument: - use to start a new calibration. 34 Instrument Calibration Priority List: - select from a list of instruments in order of priority. 34 Search for a Procedure: - Select procedure before entering instrument details 34 An unfinished calibration can be completed by selecting: ................................................................................. 35 Add after adjustment results 35 Recall a certificate 35 Resume a calibration 35 Recover a calibration 35 Other options from the file menu: ...................................................................................................................... 35 Print Test Summary 35 Print Job Sheet 35 Save and Exit 35 Check Instrument Traceability 35 ProCal Menus: Edit Menu 36 Job Information Screen 36 Instrument Information Screen 37 Control Menu 38 Auto Step (Y) (only in menu when autostep set) 38 Ignore Fail (only in menu when autostep set) 38 Show Auto Safety Prompts 38 Set Current Test to Non Printing 39 Modify Print Type(s) 39 Run Calibration Tests 40 Finish Calibration (Review Results) 40 Abort Current Test 40 Abort Calibration Run 40 Help Menu 41 About 41 Settings .............................................................................................................................................................. 42 Uncertainties ...................................................................................................................................................... 42 Appearance ........................................................................................................................................................ 43 Advanced ........................................................................................................................................................... 43 Starting the Calibration 44 Selecting the Procedure .....................................................................................................................................45 Traceable Reference Instruments & Uncertainty Statements. 46 Address of Device under Calibration 46 Before or After Adjustment 47 ProCal Measurement Tests 48 The Prompt Screen in ProCal ............................................................................................................................ 49 BASIC TEST TYPES IN PROCAL ...........................................................................................................50 Running a Pass /Fail Test Running Meter type test: Using a calibrator Uncertainty Calculation Running a Measurement Test: using a DMM to take the reading Running a General Test Running other test types Job information Setting the Instrument status at the end of calibration Assigning the certificate number 50 51 52 54 54 55 56 57 58 PROEDIT: MANAGING PROCEDURES .................................................................................................60 Overview and Introduction .................................................................................................................................60 ProCal User Manual V4.00 Page 3 Procal Calibration Software: User Manual ProEdit Shortcuts 60 ProEdit Menus 61 The File Menu .................................................................................................................................................... 61 The Utility Menu ................................................................................................................................................. 61 Edit Uncertainty Statements .............................................................................................................................. 62 Export Procedures ............................................................................................................................................. 63 Import Procedures.............................................................................................................................................. 63 Import Web Procedures .....................................................................................................................................63 STEP 1 ............................................................................................................................................................... 64 STEP 2 ............................................................................................................................................................... 64 Edit Custom Lists ............................................................................................................................................... 65 View Edit procedure costing .............................................................................................................................. 65 Advanced ........................................................................................................................................................... 65 Writing and Editing procedures with ProEdit 65 Procedure Builder Wizard 66 Wizard for a Multi meter: 67 Create new Procedure 70 The Procedure Header Page: - .......................................................................................................................... 70 Instrument Description ....................................................................................................................................... 70 Manufacturer ...................................................................................................................................................... 70 Model Number.................................................................................................................................................... 70 Version Number ................................................................................................................................................. 71 Certificate Type .................................................................................................................................................. 71 Date Created 71 Date last Used 72 Notes (Technical File) 72 Report File Name 72 Comment Fields 72 Print Options 72 Column Headings 72 Price / Code 72 Procedure uncertainty statements and Traceable reference instruments used. 73 Test Control 73 <Back: 74 Show All 74 Undo 74 Delete 74 Insert 74 Paste and Copy 75 Previous 75 Next/ Add New Test 75 ProEdit Test Types 75 DESCRIPTION OF TEST TYPES ............................................................................................................76 Oscilloscope Meter Measurement General Pass / Fail Certificate Format Continuity / Insulation testers PAT RCD Testers Loop Testers Pressure Oscilloscope Test. Further options, setting and controls Test Value Instrument Range: Accuracy Boxes ProCal User Manual V4.00 76 76 76 76 77 77 77 77 78 78 78 78 78 80 80 80 Page 4 Procal Calibration Software: User Manual Test Value D.P (Decimal Points) 80 Reading D.P. (Decimal Points) 81 Result Input 81 Uncertainties 81 Auto Units 81 Tab Function’s in the test data screen in ProEdit 82 Tabs in the ProEdit test data screen 82 Prompt tab 82 1:Show Help Screen Before Test: 83 2:Before Test Prompt File: 83 3:Before Test Prompt Text: 83 4:Calibration Test Prompt file: 83 5: Calibration Prompt text: 84 The Instruments Tab 85 Ref Inst: 85 Uncert Temp (Uncertainty Template): 85 Uncert Line (Uncertainty Line): 85 Post-Test Commands: 86 Communicate with any instrument by directly using its address or COM port .................................................. 86 Set Baud Rate, Parity etc. for serial Commutations. 86 To Communicate with an instrument in the Instrument Traceability List ........................................................... 87 To Commutate with the instrument under test (UUT) ........................................................................................ 87 Terminators: ....................................................................................................................................................... 88 OTHER COMMANDS: ..............................................................................................................................88 Delays: 88 Reading a measurement back from a GPIB instrument 88 Formatting the string variable ‘Reading’ 88 Setting the Nominal or measured test values to the reading taken with FetchRead. 88 Post Test Commands 89 Example use of command Window 89 Example Reading from the UUT ........................................................................................................................ 89 The Advanced Tab 90 Formula Box 90 Dual Units 92 Number of turns: 92 Auto step: 92 Samples Before Auto step: 93 External UUT control Program 93 External UUT adjustment Program 93 The Print Tab 93 Always Print Test: 94 Print Only if Failed: 94 Do not Print test: 94 Print Only if Completed: 94 CERTIFICATE PRINTING USING PROCERT .........................................................................................95 Certificate Types & Styles 95 PROCERT MENUS ..................................................................................................................................96 File menu: Search for certificates 96 Search Results 97 Print Dialogue Box 97 Options Menu 97 Set Logo Positions ............................................................................................................................................. 98 Configure Label Printer: Configures Seiko type label printer. 98 Edit Certificate of Conformance 99 Data Paths 100 Certificates Database.......................................................................................................................................100 Contacts Database ..........................................................................................................................................100 ProCal User Manual V4.00 Page 5 Procal Calibration Software: User Manual Digital Photos ................................................................................................................................................... 100 Sales Database................................................................................................................................................100 Stock Database................................................................................................................................................100 PDF Scans ....................................................................................................................................................... 100 Advanced Edit 100 Certificate Number ...........................................................................................................................................102 Editing Signatories ...........................................................................................................................................102 Editing Traceable Instruments ......................................................................................................................... 103 Editing Drop Down Menus/ “…” 104 CONTACT US ........................................................................................................................................105 Telephone Fax Email ProCal User Manual V4.00 105 105 105 Page 6 Procal Calibration Software: User Manual Introduction to ProCal General Overview ProCal is a suite of programs designed to provide the tools to calibrate all types of instrumentation and equipment, with virtually no limitations on the types of measurements recorded. It provides the facilities to configure the basic system, to create and manage test procedures and also perform measurements or allow entry of measurements made independently which are stored within an organised database for producing printed or electronic certificates (i.e. viewable on screen). This Suite of programs consists of the following: ProSet ProSet provides the facility to configure the system, including the certificate numbering, setting the reference instruments to be used by the system, laboratory Information, user, program and database paths for use on a network etc. ProSet also provides the ability to customise user preferences, profiles can be set up for the system ,assign users login names and passwords, as well as individual user access permissions. Note: If the software is installed to be used on a network, ProSet MUST be used to set the COM ports and instruments up, BEFORE ProCal is used. If the software is only being used on a single workstation then ProCal can be used without first setting up ProSet. ProEdit ProEdit is the procedure management program and allows the creation of a list of tests to be performed for a specific instrument. The procedures can also contain specific instructions on how to test an instrument by using picture, text or video prompts. A procedure can provide information for remote control of instruments using either GPIB (General Purpose Instrument Bus) or RS232. There are complete tools for editing, copying and deleting the procedures; there is also a powerful, yet easy to use Procedure Builder Wizard for the automated writing of procedures for a range of different equipment. ProCal ProCal is the program which ties together all aspects of the system, allowing the user to select a procedure and perform measurements with automated control of equipment where configured. This program is designed to guide the user through the series of tests, and incorporates the facilities to display help and prompts throughout the test sequence. ProCal can also be configured to produce printed certificates and calibration / test labels at the end of a test procedure. ProCal can also allow integration with ProCal-Track, which incorporates job management from goods-inwards, to paperwork printing and final despatch. ProCal User Manual V4.00 Page 7 Procal Calibration Software: User Manual ProCert Provides the facility to print out certificates, which have been recorded and stored using ProCal. These certificates are easily searchable for by their certificate number, customer name and more. Crystal Reports [Optional] The Crystal Reports software is used to edit the templates for reports and certificates. This software is not needed to use the templates provided within the ProCal software. ProCal User Manual V4.00 Page 8 Procal Calibration Software: User Manual Setting up a System 1: Install the programs: Note that when you install the software, additional files containing procedures, reports, digital pictures, uncertainty templates and an example database containing a few instruments are also installed. Even paths and directories etc are set to the local drive allowing the program to be used directly for either evaluation or training without any further set up besides selecting a calibrator in Proset. 2: Configure the system with Proset. 3: Connect up calibrator & reference instruments: Use either the serial RS232 interface or the GPIB (IEEE488) interfaces. Note: To use either IEEE 488 and/or USB to serial converter, the necessary drivers and hardware must be installed on the computer first. 4: Run ProCal to calibrate an instrument. ProCal User Manual V4.00 Page 9 Procal Calibration Software: User Manual Installing the programs The CD provided has both ProCal and ProCal-Track, which have separate installation programs. Please follow the instructions below to install the programs and example files: This disk contains the full program versions together with many support files, uncertainty templates and tables for ISO17025, procedures, report/certificate files in crystal reports, etc. plus an example instrument database with 5 instruments, which can be used as examples to evaluate the software. Note: to use GPIB control of instruments a NI GPIB (IEEE488) interface will be needed. To control a Transmille calibrator, use the RS232 interface or a USB to serial converter. To evaluate without a system calibrator or DMM select Demo mode for instrument in ProSet. The software will work fully for 30 days after installation. After this period a USB ‘dongle’ will be required to run the ProCal program and also ProCal track. Transmille will supply the ‘dongle’ when the software is purchased. 1: Install ProCal from the CD – Put the Transmille CD in the drive, and allow to auto run Choose INSTALL next to the ProCal title. Should autorun fail to start then the programs can be manually installed. To do this navigate to My computer, right click the drive with the ProCal CD and choose Explore, then locate the Setup.exe file which can be found in the ProCal Directory and double click it to run the software. It is recommended that the CD browser be used for installing the software. Follow the on screen instructions for Installation ProCal User Manual V4.00 Page 10 Procal Calibration Software: User Manual Click on the lnstall button to proceed 2: Install ProCal-Track from the CD USE THE CD BROWSER AS ABOVE - CHOOSE INSTALL UNDER ProCal-Track To manually install use set-up.exe found in the ProCal-Track directory. It is recommended that the CD browser be used for installing the software. Click OK to install ProCal User Manual V4.00 Page 11 Procal Calibration Software: User Manual Click on the ProCal-Track button to proceed Complete the installation of ProCal track and ProCal. How to run the programs To start ProCal or ProCal-Track, click the Windows Start button, and then click Programs. Next select Transmille software menu and choose a program to run. From here select the program required. Note there can be more than one program open at a time. For example ProCal and ProEdit. First time users Guide to a Quick Evaluation The first program to run is ProSet. ProCal User Manual V4.00 Page 12 Procal Calibration Software: User Manual After installation there will be example data set in the fields. To evaluate the features of ProSet first set up some reference instruments: 1: Select File Instrument Traceability - For instrument 1 use the dropdown box to select the system calibrator, set 2041A and click the ‘Uncertainty’ button to view the uncertainty table for a 2041A, or leave as demo. Check instrument 2 in the list and set to DMM. 2: Use File Certificate information to Set the Laboratory address etc and enter the relevant name/s to be a signatory for the certificates Book in an Instrument for Calibration with ProCal Track. Step 1 Start ProCal Track. Step 2 Select Utilities Goods Inwards (Book in instrument). Type ‘1234’ in the serial number box at the top of the screen then press enter. (This instrument was installed in the database during installation and is known to ProCal). Simply click the green ‘Book in’ button - if set ProCal Track will either print booking in label or Job sheet. Calibrate the Instrument Step 1 Start ProCal Step 2 Select File Instrument Priority List List all active Jobs. Step 3 Click on the Fluke 187 (serial number 1234) you have just booked in. Step 4 Click ‘calibrate instrument’. Step 5 The calibration information screen is now displayed, Drop down the tested by box and select your name as entered in ProSet. Step 6 Click Next. Step 7 The list of procedures, which match the model number, is displayed. Two procedures will be displayed, one for closed loop calibration using the 187 infrared serial interface, the other for manual calibration. Select the correct procedure for the current system set-up you have. Step 8 The next window lists reference instruments and uncertainty information. Click yes. Step 9 The next window asks for either As Found Calibration or After Adjustment Calibration click As Found Calibration and then click next. Step 10 Prompt for first test, Click next. Step 11 Now into reading tests, follow instructions. Step 12 To finish at any time, Control Finish calibration. Step 13 Displays test list for review, Click Next. Step 14 Certificate comments, enter as required. Step 15 Job information screens, parts used, engineers report etc, Next>next>next. Step 16 Set instrument status, if unfinished ‘calibration complete’ will be greyed out. Use other to manually select ‘M-Cal complete awaiting paper work’. Step 17 Final screen, the next available certificate number is displayed in the box. Note this number can be typed over if a different number is required. ProCal User Manual V4.00 Page 13 Procal Calibration Software: User Manual Click ‘Finish’ to save. If set in ProSet Options can Print the certificate and label also at this point. Despatch an Instrument with ProCal Track Step 1 Utilities Process Paperwork displays a new menu that requires you to enter the job or picking number for the instrument. The system will load a new menu with three options ‘exit the current screen’, ‘cancel the process’ or ‘Process Items’. Click Process Items. A smaller menu will appear that allows you to print the paperwork and calibration sticker. After all items on an order have been processed a message box will ask if you wish to ‘proceed to despatch now’, click Yes. Step 2 Utilities Despatch will display a menu, which requires you to enter the job or picking number for the instrument. The system will load a new menu with the instruments available to despatch on that order, you will need to select who the items will be shipped by, but before the despatch note is printed the software will want to ‘see’ the accessories that were booked in with the job. If the system is running with a Bar code reader and scanner then a label could have been printed with a unique number to each accessory that had been booked in, this label would need to be scanned before the despatch paperwork could be printed. This important features stops instruments being despatched without the accessories they were booked in with. This completes the cycle of calibration and the instrument status is returned to ‘with Customer’ with the calibration date and certificate number all being updated automatically. ProCal User Manual V4.00 Page 14 Procal Calibration Software: User Manual Setting up the system using ProSet ProSet allows the user to configure the ProCal software suite to their specifications. The ProSet File Menu Quick overview of the menu options: In System Settings 1: To begin with set the starting number to use for certificates. Note there are 5 certificate/report types; each with its own counter which will be incremented each time a certificate of that type is saved. If required, characters can be added before the certificate number, e.g. ABC1234. This allows for a different numbering system to be used for example for accredited certificate’s verses standard certificates. 2: For Network systems it is necessary to set the paths for results, procedures etc. 3: If an IEEE488 card is installed click the type installed. 4: Select the relevant Language In Instrument Traceability Enter the information about the calibrator & references to be used. This information will be passed on to the certificate automatically when that reference is used in a calibration. The instruments on the traceability list will need to be calibrated periodically to ensure the integrity of the results produced by ProCal. ProCal User Manual V4.00 Page 15 Procal Calibration Software: User Manual Note: The traceable instruments are those that are kept in the laboratory and are used to calibrate all instruments that require calibration. These instruments will also need to be calibrated on an annual basis to ensure they output or receive the correct data. Note the first 10 locations are for the system reference instruments, which ProCal will use as default. Use the ‘add’ button in the menu bar to add more reference instruments as required. On a networked system, reference standards can be placed on the server, which will make it available to all workstations. Note: That for evaluation purposes a demo mode can be selected for the three main instruments e.g. calibrator, scope calibrator and DMM. This mode allows a procedure to be run without a calibrator connected. Certificate Information This section should contain the name and address of the laboratory, contact details and names of signatories for the laboratory etc. Program Options Allows the user to set the defaults modes & operations of ProCal. For example if a certificate is to be printed at the end of a calibration. Also for options like the menu function in ProCal to recall a certificate. The Program settings can via File->Program Options to tailor ProCal to the users specifications. ProCal User Manual V4.00 Page 16 Procal Calibration Software: User Manual ProCal Default Start-up Screen This allows the user to be presented with a default screen to minimise the menu selections required. For example if the job number were always used to begin a calibration, this screen would be selected as the default start-up screen. This helps to guide the operator through the program by automatically presenting the correct screen, which prompts the user to enter the required information – the job number in this example. User Access Permissions Administrators can modify the list of users by selecting the menu item Utilities->Advanced>User Access Permissions. A list of users and their user levels is shown: Add a User Click “Add a User”. The new user is now selected, Enter the user name, choose the user level from the drop-down list and choose a password if required. Edit a User’s Permissions Select a user in the list and select the new user level from the User Level drop-down list. Delete a User Button Select a user in the list and click “Delete a User”. Close Button Click “Close” when user update is finished. If the list is empty ProCal-Track will operate with an unnamed user with the level of Administrator and no password. System Settings in detail The system setting screen from File>System settings ProCal User Manual V4.00 Page 17 Procal Calibration Software: User Manual Drive & Directory Information This section can be used to set the location of data, although on installation of the ProCal software the directories and paths will automatically be set to the local drive which is usually the C: drive. Drive & Directory Information continued To enable use of the software with networked computers, the certificates and procedures paths should be used to link a workstation with a main storage server. To enable ProCal to share the Certificates database it is necessary to set the Certificates, procedures and also the digital photo paths. When initially installed on a single computer, these paths are set to point to the local ProCal installation as default i.e. C:\ProCal\xxx Using ProCal on a Windows network means that one of the computer will need to be used as the default location to store data (known as the server). This means that all the data is ProCal User Manual V4.00 Page 18 Procal Calibration Software: User Manual stored on this computer and shared by every other computer (known as a workstation) on the network. To allow each workstation to use the server for data storage, the paths to the server need to be set. Note: The location of the stored data (the server) should be backed up to a separate location on a daily basis to combat against any data loss that could occur if any problems arise. Sharing the ‘C’ drive on the Server To set the path across the network, the server computer must have its ‘C’ drive shared for access across the network. Windows can achieve sharing the ‘C’ Drive: 1. On your desktop, double click on My Computer. 2. Right click on your ‘C’ Drive and choose SHARING (note: this will only be available if your computer is set up on a network). ProCal User Manual V4.00 Page 19 Procal Calibration Software: User Manual 3) Select Security and Sharing, set Shared Name as ‘C:’ Do not enter a password. Click OK to set. Now the server ‘C’ drive is shared, this can be accessed across the network by the workstations. Setting up a Workstation All that is now required is to set up each workstation to ‘point’ at the server. To do this, the name of the computer must be known - contact your IT administrator if you do not know this computer name. This path will include the name of the computer on the network you will be using as the server. In this example the name of the computer being used as the server is LabServer. Note: this name does not need to indicate it is a server; it is simply the name of the computer you are going to use for the main data storage. ProCal User Manual V4.00 Page 20 Procal Calibration Software: User Manual For the certificates database, the path would be: \\LABSERVER\C\PROCAL\CERTIFICATES For the procedures, the path would be: \\LABSERVER\C\PROCAL\PROCEDURES For the digital photo’s database, the path would be: \\LABSERVER\C\PROCAL\CERTIFICATE System Number This is optional and will be recorded whenever this computer is used to perform a calibration. Marginal Pass Limit The marginal pass limit is 90% as default. This means that whenever a reading is made which is 90% or more of its specification (accuracy) then a certificate will display a marginal pass (where configured to show a Pass / Fail column). This value can be changed to any percentage required. GPIB Card Information This section allows a GPIB card to be configured for use by the ProCal software. This option should be set to ‘None’ unless your computer has a compatible GPIB card installed in the computer. Note: To use either the Brain Boxes® or National Instruments® GPIB cards, the relevant drivers MUST be installed on the computer. The latest National Instruments® drivers are available to download from www.ni.com Auto Certificate Numbering Information ProCal User Manual V4.00 Page 21 Procal Calibration Software: User Manual The auto numbering system allows the user to set a start point from which the computer will automatically ‘count on’ from, e.g. If the sequence XYZ0010 were to be entered as the starting number, then the computer would use this sequence and count up accordingly to XYZ0011, XYZ0012, and XYZ0013 etc. The different counters are available because a procedure can be set as a specific type of test, i.e. Standard Certificate, Accredited Certificate, etc. and each of these may want to have a different prefix. Note: The reason for these different types is to provide an easy way for users to select procedures. ProCal allows a user to search for a specific type of procedure, and then to find a specific model number. This way the user is not presented with a large number of procedures to choose from. Standard certificate: Categorises a traceable or commercial certificate. Accredited Certificate: For accredited laboratories. C of C Certificate: A Certificate of Conformance, or CertCon. Electrical Safety Test: For procedures which are concerned only with testing electrical safety (e.g. Portable Appliance Test results). Test Report Certificate: A test report, typically for new instrument testing on product lines or in ATE (automatic test equipment) systems where sub assembly testing is performed. In addition to the certificate numbering system, the System ID counter can also be customised. This unique reference is given to every instrument and is used by the computer to link together all related information. Note: It is recommended that this System ID counter is left as per the default and is not changed unless you are an experienced user. ProCal User Manual V4.00 Page 22 Procal Calibration Software: User Manual Language Setting The ProCal suite of programs support multiple languages – if these are available on your system they will be listed in the drop down box. Simply select the language from this list. For the new language settings to be implemented, the program must be restarted. Note: To apply the language change, any ProCal Suite program must be closed and restarted after selection. ProCal User Manual V4.00 Page 23 Procal Calibration Software: User Manual Traceability Information of Reference standards used. In order for ProCal to control instruments and / or record information about instruments used for a calibration these instruments need to be added to the systems traceability list. The traceable instruments and reference standards are those instruments that are consistently used to calibrate all of the instruments that pass through the system. This list can be found in ProSet by clicking File->View Instrument Traceability. The is comprised of a list of traceable instruments, with the first 10 instruments reserved for specific types of instrument: Instrument 1 2 3 4 Type Multi-Product Calibrator Multimeter Oscilloscope Calibrator Electrical Test Equipment Calibrator 5 6 7 8 9 10 11+ Reserved for Future Use Reserved for Future Use Reserved for Future Use Reserved for Future Use Reserved for Future Use Reserved for Future Use User defined instrument – no restriction ProCal User Manual V4.00 ProEdit Test Type Meter Measurement Oscilloscope Insulation Tester PAT RCD Tester LOOP Tester N/A N/A N/A N/A N/A N/A N/A Page 24 Procal Calibration Software: User Manual As the list indicates, the system instruments are used by ProCal to determine which instrument to use for a specific type of test. Each instrument requires full traceability information to be entered, including interface address and measured value if relevant: Instrument Model Number and Description This is selectable from a drop down list for the first 10 system instruments. This list is linked to the available software drivers enabling communication to / from the specific instrument selected. Serial Number The Serial Number of an instrument should be entered here. If an instrument doesn’t have a serial number then one can be entered manually. Certificate Number Enter the latest calibration certificate number for this instrument here. Calibration Date Enter the latest date of calibration here, in the format DD/MM/YYYY. Calibration Interval Enter the calibration interval in weeks here – this enables the system to calculate the recalibration date based on the calibration date and the calibration interval and warn the user that this instrument is out of its calibration period (or nearing that period – the length of warning before the next calibration is due can be set by the user e.g. 3 weeks). COM Port (COM1 to COM8 or GPIB Address 0 to 30) Enter the relevant address for the instrument here. This field can be left blank if it is not required. Measured Value (Including Unit) [Optional] This field is not valid for the first 10 instruments as the reference instruments use these places. It allows the measured value for a standard to be stored centrally to allow for easily updateable values, which may change from calibration to calibration. ProCal User Manual V4.00 Page 25 Procal Calibration Software: User Manual Note: The measured value will be used by ProCal as the nominal test value for tests where this standard is selected as the reference in the procedure. Uncertainty Template Each traceable instrument can have a specific uncertainty template associated with it as default. This allows the system to be set up so that when a specific traceable instrument is used within a calibration and the uncertainty is calculated at test time, the uncertainty template selected here will automatically be incorporated into this calculation. For more information on uncertainty templates, see the section further on. Local / Server Storage The local / server option allows an instrument’s information to be stored on the designated server computer. This allows several workstations to share the same instrument information, and avoids the need to enter duplicate information on several workstations. ProCal User Manual V4.00 Page 26 Procal Calibration Software: User Manual Setting up instrument Uncertainties Each traceable instrument can have a table of uncertainties assigned to it, which can be accessed by clicking the Edit Uncertainties button Each range can be assigned the following information: Calibration of Reference : % of Reading : Zero Enter the imported uncertainties from the calibration certificate for this instrument: Stability of Reference : % of Reading : Zero Enter the accuracy of this instrument from the manufacturers specifications. ProCal comes installed with all Transmille calibrator uncertainty tables complete, incorporating the imported uncertainties for calibrations as performed by Transmille. Note: If your Transmille calibrator is not calibrated by Transmille, these imported uncertainties will need to be updated to reflect the uncertainties from the laboratory that calibrated the instrument. ProCal User Manual V4.00 Page 27 Procal Calibration Software: User Manual Adding / Editing Range information The Uncertainties table can be edited by adding a new range or editing an existing range. Note: The uncertainty table for system instruments 1 to 10 should not be changed as these are used by ProCal to automatically determine the correct line to use with a specific test value / frequency. Simply click on the Add Range button to add a new range, an empty box will appear below the last range – then enter new details. To edit a range simply select that row and the new details. To delete a range again highlight the relevant ranges and click the ‘Delete Button’ How does ProCal select the correct range / function from the uncertainties table? ProCal uses a built in look up table to determine the correct range / function / frequency range for a specific test. This is preset for the following instruments: All Transmille 2000 Series calibrators Transmille 2100 Electrical Test Equipment Calibrator HP / Agilent 3458A For all other instruments, the specific line required for use, to calculate the uncertainties must be manually selected. This is covered in further detail in the section on ProEdit. ProCal User Manual V4.00 Page 28 Procal Calibration Software: User Manual Uncertainty Templates For the comprehensive calculation of uncertainties, ProCal allows additional sources of uncertainty to be incorporated into uncertainty templates which can store such sources as connection / lead errors, noise etc. Each uncertainty template can be uniquely named and record one or more source of uncertainty. As required by M3003, this includes the probability devisor to enable correct statistical calculation of the final uncertainty. The left hand list displays the available uncertainty templates, which can be edited. To create a new template, the user should click on the ‘Add Template’ button. To edit the method sheet, use a word document with the file name as template. Click on ‘View method sheet’ To edit an existing uncertainty template first select the required template by clicking on the list. Then click on the box in the table to edit the contents, new uncertainty contributions can be added in the same way to an existing uncertainty template. Once all the new data has been entered, just close the Uncertainty Templates window or move onto the next template and it will save the data. Note the top 4 lines are always present and are greyed out. The value of these will be dynamically calculated at run time. Data is taken from the ‘uncertainty’ table in ProSet, ProCal User Manual V4.00 Page 29 Procal Calibration Software: User Manual which contains both the ‘imported uncertainty’ and ‘stability’ for the reference used by ProCal in that test. Note that ProCal will determine the reference used either automatically or by the reference selected manually in the procedure by ProEdit. If an uncertainty table does not exist for the reference selected then a warning message is displayed. Resolution is taken from the ‘number of digits’ field in the procedure. Noise/Flicker is entered in the drop down box on the measurement screen. This is treated as a rectangular contribution with degrees of freedom = infinity in the uncertainty calculation. Note: All uncertainty contributions are assumed to have degrees of freedom = infinity. Should a calculation contain dominant terms or terms with low degrees of freedom then they should be calculated outside of the auto calculator inside ProCal and be entered either in the procedure as a Pre calculated term or calculated at run time term and be entered in the box at the bottom of the measurement screen. Laboratory Information The address, signatories and environmental information for the laboratory are set up using this screen. These settings are stored with each calibration performed, so changing this information will only affect calibrations performed AFTER the changes. If a certificate or report is printed before any changes are made then the document will need to be reprinted. Note: It is useful to put the laboratory telephone and fax numbers and Email address in the address line 4 location, address length permitting (e.g. TEL: xxxxx xxxxxx • FAX: xxxxx xxxxxx • Email x@x.COM). ProCal User Manual V4.00 Page 30 Procal Calibration Software: User Manual Configuring the Label Printer To set-up the system label printer select File -> Configure Label Printer or click the button. toolbar Note: For the DYMO printer, all settings are configured by the DYMO printer installation. Simply select DYMO 300 Series to use this printer. ProCal User Manual V4.00 Page 31 Procal Calibration Software: User Manual The Calibration Program ProCal ProCal Overview ProCal is the piece of software which is used to perform calibrations on instruments, it controls this sequence from the starting a calibration to the results of the calibration combining the before and after adjustment results to the results database in ‘Access’. These results can then be viewed, or printed into multiple templates as required to meet the customer’s requirements. There are many settings in ProSet – ‘program options’ are used to control the default operation of ProCal to suit individual requirements, including the printing of certificates & labels after calibration. ProCal controls the measurement process by loading a ‘calibration procedure’ that can be created in ProEdit. This procedure is made up of individual measurement tests; the data held in each test is used by ProCal to control the reference instruments, take the measurements, calculate uncertainties etc. There are four main points for performing a calibration with ProCal. Starting the calibration, entering data on the instrument to be calibrated, selecting the procedure etc. Running the procedure, taking the measurements and recording the results. Conducting necessary adjustments if needed, retaking the measurements and recording the new results Finishing the calibration, saving the results, entering comments etc. ProCal is very flexible in the way it can be operated to meet the requirements of different users, the options to the user on starting/finishing a calibration are different for the stand alone calibration system to the networked calibration station integrated with job control (ProCal Track) software. In all cases running the measurement procedure is always the same. ProCal User Manual V4.00 Page 32 Procal Calibration Software: User Manual Starting ProCal: ProCal can be started either from the Start Menu->Transmille Software->ProCal or from the desktop shortcut, ProCal will ask for a user login (if users have been assigned in ProSet) ProCal will then check the reference standards data (as set in ProSet) for any standards requiring calibration and will display a list of any instruments found. This menu can be set to appear on the start-up of ProCal to inform the user of any outstanding calibrations. This list is for information only, and may be closed. If a procedure, which uses an instrument in this list, is selected to be used in ProCal, an error message will be displayed and the calibration will not be able to continue until the instrument has been calibrated. ProCal will then display a message box as it initialises instruments connected to the PC’s interfaces. The user will be prompted to either try again or cancel any instrument not responding. ProCal User Manual V4.00 Page 33 Procal Calibration Software: User Manual ProCal Menus: The File Menu A new calibration may be started by selecting from the file menu either: Calibrate an instrument: - use to start a new calibration. ProCal will search the database for the instrument from either the ID number, serial no, last certificate number or job number (if booked in by ProCal Track). This allows instrument information to be recalled from the database. When a new instrument, unknown to the database is entered ProCal will display a message box and ask if you wish to create this as a new instrument, ProCal will then add the instrument details to the data base as you enter them, saving them in the database so they only need to be entered once. In the future ProCal will recognise this instrument. This powerful feature allows ProCal to learn the instruments as they come through the system, avoiding having to create instruments in the database first. Instrument Calibration Priority List: - select from a list of instruments in order of priority. Displays a list of instruments to be calibrated ordered by the number of days left to calibrate (only available if the instruments have been booked in with ProCal track). This helps organize the workload and keeps the procession of instruments being calibrated/repaired in order. Search for a Procedure: - Select procedure before entering instrument details Allows the calibration procedure to be selected first before entering instrument details. This may be useful for an ad-hock calibration or for checking to see if a calibration procedure exists. ProCal User Manual V4.00 Page 34 Procal Calibration Software: User Manual An unfinished calibration can be completed by selecting: Add after adjustment results Entering the certificate number for the before readings starts after adjustment calibration. Recall a certificate Enter the certificate number to recall either the before or after adjustment results. Using this allows mistakes on certificates to be corrected, e.g. comments, instruments details, even measurements can be remade. This is a very powerful function of ProCal and can save a great deal of time, avoiding having to completely re-run a calibration. To avoid misuse of this function it must first be enabled in ProSet – ProCal ‘options’. Resume a calibration Displays a list of calibrations marked incomplete as set at the end of calibration. This allows an incomplete calibration to be saved, then continued later. Click on the instrument in the list to resume calibration. Recover a calibration Should for any reason a calibration be halted unexpectedly (due to power failure for example) and the results have not been copied to the database, ProCal keeps a recovery file, which can be reloaded. To reload this file the system ID number must be entered. Other options from the file menu: Print Test Summary Prints a results summary type sheet showing only basic instrument details and readings taken against % of spec. Very useful to show faulty ranges etc when passed on to a different engineer or department for repair, or to show the user the problem ranges. Print Job Sheet Prints job sheet, which contains the instruments, details, the customer details etc. Save and Exit Goes straight to the certificate save screen. The certificate number can be noted down onto the Job Label if one has been printed through ProCal-Track. Check Instrument Traceability Checks the reference instrument database for incomplete traceability information or instruments, which are past their calibration date. ProCal User Manual V4.00 Page 35 Procal Calibration Software: User Manual ProCal Menus: Edit Menu The edit Menu allows access to the job information and Instrument information screens below: Job Information Screen From this screen all aspects of a specific job can be viewed and edited. From this menu every aspect of the instruments information can be accessed. Advanced Edit Advanced Edit allows the user to change more intricate details about the instrument, such as the signatory for the certificate, or the traceable instruments used during its calibration. All the details of an instrument can be changed in this menu, so care should be taken that important data is not lost, this function can be set to Administrator Access only. The list of enterable data is long; this list contains the information for every part of the instruments procession through Booking In, Calibration and its Despatch details. ProCal User Manual V4.00 Page 36 Procal Calibration Software: User Manual Instrument Information Screen This menu enables the user to enter important information such as the System ID, Certificate Type and customer details. Without a certificate type selected ProCal will be unable to select the correct procedure for the instrument. (More information can be found in the appendix). ProCal User Manual V4.00 Page 37 Procal Calibration Software: User Manual Control Menu The control menu allows several functions to take place, There are two ‘control’ menus, a short menu for procedures, which use manual control to step on to the next test, and a longer menu for procedures, which use auto step. Auto Step (Y) (only in menu when autostep set) When Auto Step is selected, this function allows ProCal to automatically move onto the next test. For this process to take place, the auto step function must have been selected for the procedure, auto step can also be turned on through Control->AUTOSTEP. If the procedure is for a close loop calibration then this will be checked to allow it to run automatically. Note: If the user only wishes to run one test, then auto step should be turned off. Autostep can be very useful even on manual instruments like decade boxes. Here the Autostep condition can be set to proceed on to the next test if the measurement is within specifications, this will allow the operator to simply switch round the values, with ProCal automatically proceeding to the next test when it has the correct value. Ignore Fail (only in menu when autostep set) This will allow ProCal to proceed on to the next test even if the test fails. This is required when an instrument is out of specification and it is required to let the ProCal procedure run through taking all the measurements without stopping. Show Auto Safety Prompts Selecting prompts allows ProCal to automatically display safety warnings before any test where the output from the calibrator is higher than 200 Volts or 2Amps, before the procedure will move on the operator must click the ‘OK’ button within the message box. Show Auto Connection Prompts ProCal User Manual V4.00 Page 38 Procal Calibration Software: User Manual Set Current Test to Non Printing Selecting this will prevent individual test results being printed on the certificate. May be used where a limited calibration is being performed. Edit Test The Edit Test function can be accessed via the ‘Control’ Menu. This function allows the user to modify parts of tests, and to delete tests that have are not needed by highlighting the relevant test/line and then clicking ‘Clear Test Modify Print Type(s) If the ‘Modify Print Type(s)’ button is clicked, a new menu will open with eight options for the user to choose from. The selected option from the list is entered into the text box, to save click OK, to abort the current action click Cancel. ProCal User Manual V4.00 Page 39 Procal Calibration Software: User Manual Run Calibration Tests This will enable interaction to the external .exe program set in the procedure, allowing for automatic adjustment of the instrument under calibration. Note: This interaction is still conditional on the instruments error being larger than that set in the procedure. Finish Calibration (Review Results) This option allows a direct step to the end of the procedure. A message box will display how many tests are left. Abort Current Test Halts the current test. Takes you to a list of all the test in the procedure, this list allows the user to select which test to complete and in what order, from this menu hitting next will allow the user to enter job comments, input the price and write an engineers report (if needed). Abort Calibration Run Stops calibration and displays the below message: ProCal User Manual V4.00 Page 40 Procal Calibration Software: User Manual Select the required option; note there is a further ‘are you sure’ box after this if ‘Discard results’ is clicked by mistake. Help Menu Used to display & view Technical Help File, Calibration Help and the Uncertainty Template. Note if these files are not present they will be greyed out. About ProCal User Manual V4.00 Page 41 Procal Calibration Software: User Manual Displays the start up screen showing the version number program & data paths, the data paths can be changed by the user, but upon installation they are directed to the local drive on the workstation. ProCal Tweak ProCal Tweak is a quick adjustment tool for ProCal. This menu can be accessed by clicking ‘About->ProCal Tweak). Settings From here the user has access to the printer settings, and the choice of the ProEdit welcome screen, and allows the choice of sounds within ProCal. Uncertainties The Uncertainties tab offers the ability to bypass the uncertainty calculations, although this option should be carefully used ProCal User Manual V4.00 Page 42 Procal Calibration Software: User Manual Appearance From the user can change the appearance of ProCal, a new menu can chosen by clicking ‘Change’. Advanced The Advanced tab provides the options to several settings including enabling uncertainties to be imported and exported, and locking the environmental settings for the laboratory in Procal, e.g. the temperature. ProCal User Manual V4.00 Page 43 Procal Calibration Software: User Manual Performing a Calibration with ProCal: Starting the Calibration ProCal offers several ways to start a calibration to work the way you wish to. Use the file Menu to select the preferred way you wish to start the calibration. The most popular method when running with ProCal Track is by Job number, which can be entered or scanned from the bar code label printed when the instrument was booked via ProCal Track. If using ProCal by itself simply entering the serial number is often the preferred method. Note: The default start up screen can be set in ProSet File>options. (Page15) The Calibration Information screen details the instrument, environmental and calibration information. complete this form with the instruments details and environmental information, the calibration information will be filled in automatically once calibration is complete. This data will all be completed from the database if the instrument is on the database because it has been booked in by ProCal track or because it was previously known. Note: You cannot leave this screen until the serial number and the calibration interval have been filled in. The environmental information will be remembered from the previous calibration. ProCal User Manual V4.00 Page 44 Procal Calibration Software: User Manual Note: The variation, e.g. +/-1°C printed on certificates is entered in ProSet. Customer information can be stored in the customer database by entering the details of a customer and clicking ‘Add Contact’ button, which will add this customer to a drop down list to save re-typing frequently used addresses. Selecting the Procedure ProCal will automatically search for procedures, which match the model number and the type of certificate required, Standard, Accredited etc, and if there are several, it will highlight the one used last time. Use the ‘Search’ button to manually search for a procedure if required. Note: That ProCal uses the Procedure TYPE selected in the search and will only list that TYPE. Use the ‘Technical Help file’ to keep notes on procedures. Then if there are several procedures for one instrument it can be viewed to help select the correct procedure. ProCal User Manual V4.00 Page 45 Procal Calibration Software: User Manual Traceable Reference Instruments & Uncertainty Statements. The list of Reference instruments used in the selected procedure and also the uncertainty statements will be displayed in the below table. Note: That ‘none’ may be displayed in the uncertainty box if the procedure is using individual uncertainties. Note: Traceability information, calibration date etc, on the reference instruments used in this calibration is copied from the Instrument Traceability table in ProSet to the certificate file. The calibration will be halted if any reference instrument used is past its calibration date. Address of Device under Calibration If the procedure has been written to calibrate a UUT (Unit Under Test) using an interface connection either GPIB (IEEE488) or serial COM, then ProCal will ask for the address/COM port of that instrument. ProCal User Manual V4.00 Page 46 Procal Calibration Software: User Manual Before or After Adjustment This screen allows the user to select whether the results to be taken are the before or as found or after adjustment. Normally the user will select first as Found readings, then if required make adjustments and return to the procedure then take another set of ‘After Adjustment’ readings. ProCal will know the ‘As Found’ results have been already taken and this option will be greyed out when returning to take the results. Both As Found and After Adjustment Results will be on the same certificate in this case. If required the user may select directly the ‘After-Adjustments’ results, for example when the instrument had to be repaired first before any as found readings could be taken. In exceptional circumstances it is possible to also select to make two certificates, one for before and one for after results. As this is not the normal way, ProCal will prompt you with an ‘are you sure’ message box. ProCal User Manual V4.00 Page 47 Procal Calibration Software: User Manual Comments from the ‘customer comment box’ on the virtual job sheet are also displayed at this time. These may have been entered when the instrument was booked in. This is to bring to notice any special requirements asked for by the customer. If existing results are found for an instrument, ProCal will ask the user to either attach the current ‘As Found’ results onto the same certificate as the new ‘After Adjustment’ results, or to have the ‘After Adjustment’ results saved onto a new certificate. ProCal Measurement Tests ProCal is now running the procedure as created in ProEdit. The procedure will contain many different types of test depending on the requirement for that test. ProCal User Manual V4.00 Page 48 Procal Calibration Software: User Manual The measurement screen is very similar however for all types of test. This screen will display the tests in the procedure, of about which 10 can be viewed at one time, use the scroll bar to view all. Normally a procedure will be started at test one and will run in sequence through to the end. However it is possible to jump to any test simply by clicking on it in the test list. (Note title tests and print formatting tests cannot be run). Clicking the ‘hand’ symbol in the toolbar at the top stops a test running. The Prompt Screen in ProCal The prompt screen is displayed before a test if set in the procedure. The information can be simply a typed message, a bitmap picture or even a video file. The prompt screen is there to inform the operator of the required connections, instrument settings etc. ProCal User Manual V4.00 Page 49 Procal Calibration Software: User Manual Basic Test Types in ProCal Running a Pass /Fail Test Simple click on the result, ProCal will automatically advance to the next test. ProCal User Manual V4.00 Page 50 Procal Calibration Software: User Manual Running Meter type test: Using a calibrator In this test the computer will set the system calibrator to the output set in the procedure. The operator will enter the reading displayed on the meter usually using the keyboard for a digital meter, or by slewing the output of the calibrator to align the pointer of an analogue meter to a scale mark. Alternatively the reading from the meter under test may be read back using a GPIB (IEEE488) or serial interface. This type of calibration is called ‘closed loop’. ProCal can even control the range and setting of the instrument under calibration, if it is entered into the procedure. The bar graph display on the screen clearly shows the error related to the instrument under the test specifications in a graphical manner. The width of the uncertainty band is also graphically shown as arrowheads extending to the left and right of the measurement pointer. The result of the test is shown in the top right corner of the window. Four possible results will be shown as described below Pass: Probable Pass: Probable Fail: Fail: ProCal User Manual V4.00 Instrument passes regardless of measurement uncertainties Instrument could be out of specification allowing for uncertainty Instrument could be in specification allowing for uncertainty Instrument fails regardless of measurement uncertainties Page 51 Procal Calibration Software: User Manual Uncertainty Calculation To view the Uncertainty calculation window click on the ‘UNCERTS’ button whilst on the above menu. Note: This button will only appear if there are no uncertainty statements selected for the procedure and there is no data in the ‘uncertainty box’. It is necessary to enter numerical value in the ‘noise/flicker’ drop down box to obtain an accurate calculation of uncertainty. The Template for this spread sheet is ‘DCV source’ created in ProSet. 1: Imported Uncertainty is calculated at run time from data in the Uncertainty file created in ProSet for the calibrator in use. The figure is calculated by combining the Zero (Floor) and the % of reading (Gain) using root-sum of squares form the ‘Calibration of reference’ column. ProCal User Manual V4.00 Page 52 Procal Calibration Software: User Manual 2: Stability of Reference is calculated at run time from data in the Uncertainty file created in ProSet for the calibrator in use. The figure is calculated combining the Zero (Floor) and the % of reading (Gain) using root-sum of squares from the ‘Stability of Reference’ column. The data used must be entered in ProSet as K=2, 95% confidence level with infinite degrees of freedom. 3: Resolution is taken from the number set in the D.P (Decimal points box), in the test data for that test in ProEdit. 4: Noise/Flicker or the short term repeatability of a manual instrument, for example a hand held DMM must be observed by the operator and entered in the Noise/flicker drop down box at the bottom of the screen. 5: Connection Lead errors are taken directly from the DCV source template created in ProSet. These values are then combined at run time using the standard method in GUM, M3003 etc as called for by ISO17025 to produce a dynamically calculated figure for uncertainty for 95% for each test reading. For quality audits this visual approach allows all the calculations to be easily verified. Note: The automated calculation assumes that there are no dominate terms and all contributions have infinite degrees of freedom. ProCal User Manual V4.00 Page 53 Procal Calibration Software: User Manual Running a Measurement Test: using a DMM to take the reading This type of test controls & reads from the system DMM (Digital Multi Meter) using the GPIB or serial interface to automatically make a measurement. Typically it would be used for calibrating a voltage source or measuring the output from a process control calibrator. The system DMM must first be selected from the available models in the drop down list in line 2 of the Traceable instruments table in ProSet. If the type of DMM needed is not supported in this list then it may be possible to order a custom driver to support your DMM. Alternatively use a general test to read a DMM using the command window to control the DMM There are three advantages of using a driver to communicate with the DMM, 1: Avoids writing interface code in the procedure, which can be difficult and generally requires a higher level of understanding of controlling instruments. 2: With a driver all that is required to update the system DMM at a future date is to change the selection in the Traceable instruments table in ProSet. 3: A driver for the same procedure may be used on two or more systems with different models of DMM. Note: Additional control commands can still be sent to the system DMM using the command window. Also commands to control the unit under test (UUT) can be sent which makes writing a closed loop procedure very simple. See ProEdit – command window. The measured value is displayed in the same graphical way as the meter test above (Page 47), the only difference is that the reading is being read automatically from the system DMM, as opposed to the meter test above where the reading is being either entered manually using the keyboard or being read back from the UUT over the interface. The reading, Pass & Fail results, and uncertainties are displayed the same. Running a General Test A general test is different from the above oscilloscope, meter and measurement tests etc in three ways: 1: There is no ‘built in’ control of any instrumentation. Only using the command window controls the test. 2: There is also no Default reference instrument. This must be selected in the procedure. 3: There are no predefined units, e.g. volts, Note: Every element of the procedure will need to be selected by the user These differences allow a general test to be written for almost any calibration, using any reference in the Traceable instruments table, where there is a nominal value and a reading with a pass/fail tolerance. ProCal User Manual V4.00 Page 54 Procal Calibration Software: User Manual For example calibrating a pressure gauge using a dead weight tester. Neither instrument is controlled in any way by the software, but a pressure is applied and a reading taken. With this test type the result can be entered the same as any other reading and a certificate can still be produced, the only difference is the user has to manually enter the test results and conduct the test themselves instead of allowing the software to control the test This makes ProCal a universal solution for calibration software throughout the calibration laboratory. Note: The Test Value box can be typed into, to change the Nominal test value if not correct for tests where the actual value cannot be known until the test is run. Running other test types The other test types all follow the same format as the tests mentioned in the preceding examples e.g. they will either be a variant of a meter test, where the calibrator is set by the computer and a reading value is to be entered, a measurement type test where the computer will use an instrument to take the reading or a general test. See the ProEdit section for details of how each test type is used. ProCal User Manual V4.00 Page 55 Procal Calibration Software: User Manual Finishing The Calibration After all the measurements have been taken and the instrument has passed calibration, the certificate comments should be edited. ProCal will copy comments in the procedure across automatically. Simply type in the relevant comments or use the drop down boxes to add further comments. Note: To edit the content of the drop down boxes click the button ‘…’ Notepad will allow you to edit the file & save. The new text will only appear once the current screen has been closed and reopened. Job information Details of any parts used, prices, and an engineers report on any repair work are now entered. Note: That the Job comments print on the service log, and that the engineers report can be used on a crystal report to inform the customer of any further details about the instrument. ProCal User Manual V4.00 Page 56 Procal Calibration Software: User Manual From here the costs for repairs and additional services can be added using the green cross button, this will open a new menu which contains a list of options, once the correct option is selected the new costs will be visible in the Services tab. Setting the Instrument status at the end of calibration Each instrument in the database has a status, which enables ProCal to keep track of what is happening to it and where it is in the calibration cycle. Before saving the results this status can be set. Note: Calibration complete cannot be selected, as the instrument requires adjustment. ProCal User Manual V4.00 Page 57 Procal Calibration Software: User Manual From here a crystal report can also be generated which can be sent directly to the instruments owner to inform them, of any problems, see Calibration fault report. If the calibration has not been completed then the ‘Calibration Complete’ option will be greyed out. From the turn around time for an instrument can be updated, this means if an instruments needs repairs or adjustments the number of days can be changed to help keep track of instruments on the priority list. Assigning the certificate number ProCal will get the next number for the type of certificate produced (based on the procedure used) from the counters set in ProSet. The number is obtained at the completion of calibration to avoid having unused numbers if the calibration is aborted mid-test. The user can type over the automatically generated certificate number to use a custom number. A warning message will be given if a duplicate number is entered. ProCal User Manual V4.00 Page 58 Procal Calibration Software: User Manual Note: Use the back button to return to any previous screen Click finish to complete the calibration and save the certificate number. ProCal User Manual V4.00 Page 59 Procal Calibration Software: User Manual ProEdit: Managing Procedures Overview and Introduction ProEdit’s prime function is to create and edit calibration procedures used by ProCal. A procedure is made from a header, which contains information about model numbers, instrument manufacturers etc, followed by any number of individual tests. The use of in built wizards allows easy and rapid generation of procedures based on generic type instruments. ProEdit also manages the procedure library. Allowing procedures to be copied, printed and deleted. In addition ProEdit can upload to its library, procedures which can be downloaded from the Transmille website. Note: For this function to work a key code from Transmille must first be purchased. ProEdit will be installed as part of the ProCal suite but can be run as a stand alone program, enabling procedures to be worked on remotely from the calibration station. Procedures are stored in Microsoft Access as individual files in .mob format. There is also an index file, which logs the procedures in the library. ProEdit Shortcuts To have this menu open on start-up, click Help->Show Welcome Screen’ and tick the box in the lower left corner. This menu does not need to be used; the same functions can be accessed via the normal menu. From this menu the user can ‘Create a NEW Procedure’ detailed instructions on this function can be found on Page 68. The users can also ‘Edit an EXISITNG Procedure’ with ProCal User Manual V4.00 Page 60 Procal Calibration Software: User Manual detailed instructions on Page 65. The user can also ‘Search for a Procedure’ via this menu. The final option allows the user to ‘Start Procedure Wizard’ for which detailed instructions can be found on Page 66. ProEdit Menus The File Menu The main file menu allows basic controls for creating, editing and copying procedures etc. Create a New Procedure Selecting File ->Create New Procedure will open up a new menu allowing the user to create a procedure without using the wizard, a detailed guide can be found on page 68. Edit an Existing Procedure Select File->Edit an Existing Procedure if changes or updates need to be made to a procedure, changes can be made to any part of a procedure, a detailed guide can be found on Page 65. Procedure Builder Wizard Selecting File->Procedure Builder Wizard opens a new menu with a series of images depicting various instruments that have pre-written procedures, a detailed guide can be found on Page 66. The Utility Menu ProCal User Manual V4.00 Page 61 Procal Calibration Software: User Manual The Utilities menu allows access to the functions in the above image, ‘Import Web Procedures’ will only be greyed out if a key code hasn’t be acquired from Transmille. Edit Uncertainty Statements Selecting Utilities->Edit Uncertainty Statements allows the uncertainty statements, which can be selected in a procedure and printed on the certificate to be created and edited. A default table is loaded when installed, but new lines can be added to suit the requirements of an instrument. Note: This table is only used if uncertainty statements are selected in procedures. Otherwise individual uncertainties will print. ProCal User Manual V4.00 Page 62 Procal Calibration Software: User Manual Note: A procedure only uses the line number of a statement. If the order of statements in this table is changed, a previously written procedure will transfer the new statement, which may be incorrect. Example: If the statement for AC volts were replaced with RPM any procedure that had AC volts originally selected would now transfer the RPM statement to the certificate when used. On Networked systems it should be remembered that this table is on the local C: drive, (as each system will require its own uncertainties) care should be taken to ensure the order of this table is the same for each workstation. Otherwise a procedure will select the incorrect statements on some stations. To check which procedures use a particular statement use the ‘search for procedures’ button Export Procedures This function allows the selected procedures to be exported to back up the data, or to be transferred to another system. Import Procedures This function enables procedures that have been exported by the above method to then be re-imported onto the system. Import Web Procedures The import Web Procedures function is for unzipping compressed procedures downloaded from the www.transmille.com web site and adding them to the procedure library on your system. Note: This function must be enabled first by obtaining a ‘Key code’ from Transmille, which must be entered in the ‘About’ menu in ProEdit. Without this code this function will be greyed out. Procedure files downloaded from the web site cannot be used without this function, as they cannot be loaded and saved into the Procedure library. 1) To navigate to the procedures available for download, please go to www.transmille.com then click on Software, which is located on the top menu. 2) On this new web page are three boxes, within the left box containing information on ProCal, there is a link titled ProCal Procedure Library. 3) The ProCal Procedure Library will take you to a new page with two options Free Calibration Procedures and Full Procedure Library ProCal User Manual V4.00 Page 63 Procal Calibration Software: User Manual Note: The full procedure library is freely available to those who are a Web Downloads Service Subscriber. To subscribe to this full service there will be a fee. Please follow the steps below to IMPORT WEB procedures into your system. STEP 1 Download one or more of the required procedures by clicking the Download hyperlink next to the procedure you require, then choose Save To Disk. Save the file (e.g. MEGGER CM500 Installation tester .WD_) to a folder (directory) on your computer. REPEAT THIS FOR EACH PROCEDURE YOU REQUIRE FROM THE WEBSITE STEP 2 To IMPORT these procedures into your ProCal system, ProEdit must be used. Start up ProEdit and select the UTILITIES MENU, then select IMPORT WEB PROCEDURES (this is different to the IMPORT PROCEDURES function, which does not recognise subscription procedures). ProCal User Manual V4.00 Page 64 Procal Calibration Software: User Manual Select the folder you saved the subscription procedures to, then select the procedures by highlighting them on the right hand side of the screen. Click OK to start importing. ProEdit will now IMPORT all of the selected procedures. Edit Custom Lists Opens with notepad either the ‘Manufacturers list’ or ‘Instrument description list for editing. These lists are used in the drop down boxes. The data in the drop down boxes will no be updated View Edit procedure costing Opens a list box showing procedures with the option to edit the price/code field. Advanced Offers the option to compact and update procedures to the archive for backup. Also allows the user to archive a copy of a procedure before it is edited. Writing and Editing procedures with ProEdit A ProCal procedure is made up of a header and a series of tests. New procedures can be created in three ways: 1: By Using the Wizards 2: By editing an existing procedure 3: By writing it line by line ProCal User Manual V4.00 Page 65 Procal Calibration Software: User Manual Procedure Builder Wizard By using ProEdit, the user can create procedures very easily and quickly by using the inbuilt wizard, which can be used to build a basic procedure for a generic instrument type. If an instrument combines several functions such as a Loop and RCD tester, the wizard can actually amend the second instrument tests to an existing procedure, negating the need to create a new procedure If extra tests or changes to the specification need to be made then using the edit function within ProEdit can perform this. From this screen select the instrument you wish to create a procedure for - Selecting the MultiMeter image will open the menu below. ProCal User Manual V4.00 Page 66 Procal Calibration Software: User Manual Wizard for a Multi meter: To create a Procedure for a DMM (Digital Multi Meter) complete this form and click ‘Build Procedure’ Each separate wizard is used in the same manner to create procedures for different instruments. Choosing a different instrument within the Wizard will open a different form; each one details the individual information that is needed to build the procedure. ProCal User Manual V4.00 Page 67 Procal Calibration Software: User Manual Editing a Procedure Once a procedure has been created it can be very easily edited. Tests can be deleted, copied, inserted & pasted which enables tests to be quickly duplicated and edited. Note: A test can be dynamically edited using ProEdit whilst at the same time running that test in ProCal. In this way a test can be corrected in ProEdit, saved back to the database by using ‘copy test’ button, and then run directly by ProCal by using ‘restart test’. This provides a very quick method to De-bug a procedure. Note: An error will be generated if a test is added or deleted in a procedure by ProEdit when ProCal is running that procedure. Each test in a ProCal procedure is independent, containing all the data required for that procedure and no other. A procedure can be searched for by any one of the above methods, the description of the instrument and the manufacturer can be chosen via the scroll bar or by entering the name manually. Procedures can also be found by selecting if it is a Standard or Accredited procedure using the tick boxes, this option will load a seperate list of all accredited or standard procedures. ProCal User Manual V4.00 Page 68 Procal Calibration Software: User Manual If the procedure is found a new menu will open allowing the user to select the correct procedure if more than has appeared depending on the search options used. Double click the procedure, or select it and click ‘Accept’, if the wrong procedure is found then click ‘Re-Search’ to find the correct one. The Procedure instrument Information menu will be opened, all information can then be edited and updated, the next menu will contain the Uncertainty statements and Traceable instruments that can be changed and updated if required. The final menu contains the tests of which all can be edited, to finish editing a procedure just click ‘Done’. Editing a procedure follows the same outline as creating a new procedure. ProCal User Manual V4.00 Page 69 Procal Calibration Software: User Manual Create new Procedure After selecting ‘create new procedure’ the user is first asked if they are sure they wish to create a new procedure, after selecting “Yes” the user will have the below form to fill in with the details of the procedure and the instrument. The Procedure Header Page: - Instrument Description Use this field to describe instrument functions, this will be printed on the certificate and MUST be completed. Note: The drop down box can be edited in the utilities menu. Manufacturer Used to highlight the manufacturer of the instrument, this will be printed on the certificate and MUST be completed. Note: The drop down box can be edited in the utilities menu. Model Number This field is for the model number of the instrument and is very important, as the model number used in the procedure must match for ProCal to automatically search for it. It is a ProCal User Manual V4.00 Page 70 Procal Calibration Software: User Manual good idea to have a ‘company standard’ method to deal with spaces in model numbers and the use of Roman numerals when entering a model number. Note: That any digital ID images and that the Technical help notepad file are linked to the procedure by model number. Changing model numbers here will require these files to also be renamed and updated. Version Number Used to identify the version of the procedure. Note that when editing a procedure there is an automatic archive option available. The archive option allows the user to save a copy of a procedure before it is edited; this is a valuable function of ProEdit. Certificate Type Used to select the type of calibration and certificate that this procedure will produce. This selection sets both the certificate print style and also to only list procedures in ProCal which match the certificate/report style set for the instrument, as set in ProCal or ProCalTrack. For example: Only procedures for standard calibration will be listed for an instrument which has been booked in for standard calibration, whereas an instrument which has been booked in for an Accredited calibration will only have the Accredited ISO17025 procedures listed. This stops the accidental selection of the wrong type of certificate format. Note there are 5 different certificate/reports available: Standard Certificate Accredited Certificate Certificate of Conformance Electrical Safety Test Test Report None Each with its own certificate number counter as set in ProSet. Any particular model may have for example both a standard certificate procedure, and an ISO17025 accredited style procedure with different test points, uncertainties comments etc. This allows the laboratory to provide complete flexibility in the choice of services it provides. A separate counter is used for each type of certificate/report, allowing for the sequential numbering of certificates. The Test report is of particular interest for hire equipment as it allows a short procedure to be used as a quick check before or after hire, whilst the certificate procedure allows for a full annual calibration. Date Created Used to log the date that a procedure is written. Note: Use the Technical help file to keep details of the procedure history. ProCal User Manual V4.00 Page 71 Procal Calibration Software: User Manual Date last Used Automatically filled in by ProCal when used, useful when checking on the usage of a procedure. Notes (Technical File) Short text field used for procedure notes, e.g. special version. Use the Technical help file to keep longer notes. Note: That the Technical note file is a simple text file edited by Windows notepad, and is automatically created by ProCal as model number .txt from a template file. This file can be easily viewed and edited from many screens in ProCal simply by clicking on the ‘View Technical File’ button. It is very handy for keeping all sorts of notes relating to that instrument. Report File Name If a special style of certificate/report is required for this procedure then a crystal report file name can be entered here and this will always be used for any certificate produced by this procedure. Comment Fields Any comments made in these 5 lines will be copied across to the certificate when this procedure is used. These lines can be edited before the certificate is saved. This can save time and also mistakes. Print Options Set on standard certificates where a test result will be printed as pass/fail or as a percentage of specifications figure. The majority of quality mangers prefer to see Pass/fail printed. Column Headings Sets the titles printed at the top of each measurement page on the printed certificates. Price / Code Sets the Price of a calibration using this procedure, this information is then transferred to ProCal track and used for Job costing and invoicing later. ProCal User Manual V4.00 Page 72 Procal Calibration Software: User Manual Procedure uncertainty statements and Traceable reference instruments used. Use the drop down boxes for the Uncertainty Statements if using this method of uncertainties for the certificate. Note there are a maximum of 10 lines of statements that can be printed on a certificate using this method. LEAVE ALL STATEMENT LINES SET TO ‘**NOT SELECTED**’ IF YOU WANT TO PRINT INDIVADUAL UNCERTANTIES WITH EACH TEST AS REQUIRED FOR AN ISO 25 / 17025 ACCREDITED CERTIFICATE Use the drop down boxes for any reference standards used in the procedure. Not that ProCal automatically knows about reference standards used when manually selected in tests, or are the default instrument for that test. Other standards used as ancillary equipment, for example a thermometer to measure the temperature of a resistor will need to be added here. Instrument 9 ‘Reserved For Unit Under Test (UUT)’ must be clicked. Enable if the UUT’s interface is being used to perform a closed loop calibration. This will cause ProCal to Prompt for the UUT’s interface either as a GPIB (IEEE488) address or as serial COM port number before starting calibration. Test Control When editing a procedure or creating a new procedure the buttons below the data screen enable the user to control the process: ProCal User Manual V4.00 Page 73 Procal Calibration Software: User Manual <Back: Returns the user to the previous screen– Procedure instrument information screen Show All Displays a list of all the tests in the procedure From this screen it is possible to jump to any test simply by double clicking on it or clicking ‘OK’ after highlighting the relevant line. A short print out of the procedure can also be generated from here by clicking on ‘Print Procedure’. Undo Undoes all changes since moving to that test. Delete Removes a test from a procedure. All other tests are shifted up one line. Any formula functions, which use a test number, are also adjusted. Insert Inserts a blank test above the current tests in the procedure, all tests below are shifted down one line. Any formula functions, which use a test number, are also adjusted. ProCal User Manual V4.00 Page 74 Procal Calibration Software: User Manual Paste and Copy Pastes a complete test, which was previously copied using ‘copy’ over the current test. If the ‘Paste’ button is greyed out then there is nothing in the buffer to paste, copy a test first. Note: Paste does not insert a test, it will Paste over any existing data, use ‘Insert’ first to create a new blank test if required. Previous Click to step back a test. – Note you can also double click on the test in the test window. Next/ Add New Test Move down a test, if already on the last test, a new test will be automatically created. Note if you create a new test by mistake use delete. ProEdit Test Types Much of the power of ProCal is the speed and simplicity in which a Procedure can be written; this is due to the ease in which tests can be created. In ProEdit the first action in creating a new test is simply to decide what type of instrument or test is needed. From this first selection ProEdit can restrict the information displayed and the format to only the data required for that test type. When an oscilloscope, meter or measurement type test is selected, ProCal will also know what instrument to use, such as a calibrator or DMM (Digital Multi Meter). As ProCal already knows how to communicate with the default instruments via its inbuilt driver there is no need for any ‘interface code’ to be embedded in a test. All that is required is to set the values required and ProCal will do the rest. This very powerful feature allows a ProCal procedure to be used on different calibrator’s without modification as the driver imbedded within ProCal is handling the interface code. ProCal User Manual V4.00 Page 75 Procal Calibration Software: User Manual As there is no need for most tests to get bogged down in writing interface code, control code tests can be generated very quickly. Description of Test types Oscilloscope For calibrating oscilloscopes using the system oscilloscope calibrator, selected in Line 3 of the traceable instruments table in ProSet Used for Amplitude, time base, rise time and bandwidth tests. Meter Use for calibrating any kind of meter using the system Multi product calibrator, selected in Line 1 of the traceable instruments table in ProSet Measurement Use for calibrating any instrument you need to measure the output, using the systems multi meter (DMM), as selected in line 2 of the traceable instruments table in ProSet. General This test is very powerful as it can be used for almost any type of calibration where there is a test/applied value and a result. For example it could be used for calibrating a pressure gauge using a dead weight tester, or liquid in a glass thermometer with a liquid bath. It does not need to be electrical measurement and does not have to control any instruments at all. Although electrical tests can be performed using this and instruments can still be controlled from the command window. ProCal User Manual V4.00 Page 76 Procal Calibration Software: User Manual Any units can be used in this test, PSI, kgs, millimetres, inches etc. This General test type makes ProCal a completely universal calibration software package. Pass / Fail For tests where there is no numerical result, a simple Pass/Fail result can be chosen, for example a continuity bleeper. Certificate Format Used to format the certificate, although ProCal does not run a format test; they are passed through to the certificate. Allows page breaks, titles, and blank lines to be added to a certificate. Continuity / Insulation testers Tests specifically for calibrating insulation and continuity tester using the Transmille 2100. Covers high value resistance to 10 GOhms, Low value resistance and Insulation test voltage measurement. PAT Tests designed to cover the calibration requirements for PAT testers using the Transmille 2100. Tests include earth bond resistance & current, insulation resistance, leakage current, flash voltage measurement etc. ProCal User Manual V4.00 Page 77 Procal Calibration Software: User Manual RCD Testers A specific test that only works with the Transmille 2100 to calibrate both RCD current and time. Loop Testers For calibration of loop tester using only the 2100. Allows selection of loop values with read-back from 2100 of loop value after correction for local loop supply. Pressure Tests for calibration Pressure indicators, sources and switches using the Druck DPI515 calibrator. Oscilloscope Test. Select this test type for calibrating an oscilloscope’s amplitude, time base, bandwidth & fast rise. See pass/fail test and general tests and meter tests, which may also be used in an oscilloscope procedure This type of test will use the oscilloscope calibrator selected in ProSet>file>instrument traceability: Line/Instrument 3 Select the Test Tab and test type then enter ‘oscilloscope’ The functions that can then be selected are Select the required option and fill in the test data as required. Most fields are obvious. Note: To use deviate the calibrator for amplitude and time base so the trace can be aligned with the graticule. To create an Oscilloscope procedure it is recommended to first use the wizard in ProEdit and then edit the procedure. Further options, setting and controls Many more functions, controlling the UUT, formula, etc are available in the other tabs; these functions are covered in the section following ‘test types’ on Page 79. ProCal User Manual V4.00 Page 78 Procal Calibration Software: User Manual Meter Test (Use calibrator to calibrate meter) One of the most used test types for calibrating all types of meter. 1: Digital or analogue multi meter measuring volts, current and resistance etc. 2: RLC meter 3: Frequency meter 4: Temperature meter 5: Pressure meter 6: RPM meter (for 2000 Series calibrators only) 7: Torque meter 8: Power meter After selecting this test type then select the test function and next select the measurement parameter of the meter. Editing a Procedure ProCal User Manual V4.00 Page 79 Procal Calibration Software: User Manual Test Title This is the Printed title on the certificate, it has no control function and is just text. If performing an AC test the frequency should be in the title. Test Value This is the value that the calibrator will be set too. The units must correspond to the function selected, e.g. mV or V for a voltage tests. Note: The value in this box will be used in the accuracy calculation as the % of reading Instrument Range: This box can be left empty if there is no % of range accuracy, otherwise enter the full scale of range. Accuracy Boxes ProCal will calculate the total instrument error by adding together the contributions by % Of reading This is used to calculate the error of reading from the value in the Test value box above. % Of range This is used to calculate the error of range from the value in the instrument range box above. Zero/Total accuracy This must be entered in the same units as Test value and is used directly Counts Many DMM specifications quote a floor error as a number of digits or counts. The number entered here is used together with the resolution of the last digit taken from the decimal point (D.P. boxes) above. From this ProEdit can work out the error in the units of the test value. These boxes are added together dynamically and the error can be seen to change as data is entered. The 4 boxes have been provided to allow for the way different specifications are written, if there is no specification for one or more boxes leave blank. It is only necessary for ProCal to have one box with data in. Test Value D.P (Decimal Points) This is the number of decimal places the applied value will be printed onto the certificate. Usually set to be one more than the reading. ProCal User Manual V4.00 Page 80 Procal Calibration Software: User Manual Reading D.P. (Decimal Points) This is the number of decimal places used to print the DMM reading to. If left blank it will default to the test value above. This is also used as part of the uncertainty calculation and accuracy calculation above. Result Input Keyboard (Manual); Enter reading from DMM using keyboard. Keyboard (Deviate): Nominal test value is displayed, which may be incremented or decremented by using keyboard. Useful for a frequency counter with long display lengths. Deviate Calibrator: Use mouse/keyboard to slew calibrator until meter reads correct. Very useful for older analogue meters. Uncertainties When uncertainties have been calculated manually enter the value here, this value will be used by ProCal in the test and passed on to the certificate when this test is run. The auto uncertainty calculations function is disabled when a value is entered in this box. Auto Units The auto unit’s option allows units to be preserved as entered. When clicked ProCal will convert values to the most appropriate scaling (e.g. 0.05V would convert to 50mV). Additional Information (Resistance, Temperature & Power Test Functions) The resistance test function also has an additional 4-Wire selection checkbox The temperature test function also requires the thermocouple type to be selected. This is displayed in a drop down list. ProCal User Manual V4.00 Page 81 Procal Calibration Software: User Manual The power test function also requires the voltage and phase angle to be set. Note: The current is automatically calculated based on the Voltage, Phase Angle and Test Value. Tab Function’s in the test data screen in ProEdit Each test in a ProCal procedure has five ‘tabs’ the first tab selects the prime test function, covered in the previous section on Page 74. The other tab functions perform basically the same for all test types: Tabs in the ProEdit test data screen Prompt tab ProCal User Manual V4.00 Page 82 Procal Calibration Software: User Manual 1:Show Help Screen Before Test: Sets ProCal to display a help screen before starting the test. This is to allow the operator to set up the instrument and connection from the on screen information before the test is started. To run the test directly without displaying help click ‘No’ 2:Before Test Prompt File: The name of either a text (.txt), Graphic (.BMP) or video (.AVI) file which will be displayed before the test starts (as above) or when selected with the ‘help’ button on the ProCal measurement screen. The ‘…’ button & the ‘Edit’ button are to help select and edit these files. The files may be created using any program that will produce the required file extension format Note: Windows Media Player is used to play video files. 3:Before Test Prompt Text: One line (40 Characters), which can be typed in here and displayed instead of using the file above. Useful for short instructions for that stage of the procedure. 4:Calibration Test Prompt file: Same as 2:(Before Test Prompt File) but only shown when selected from ‘cal help’ (Calibration Help), button on the ProCal measurement screen. This is to give the operator instructions on how to adjust the instrument. – Note the ‘Technical help file’ is very useful for this as well. The ‘…’ button & the ‘Edit’ button are to help select and edit these files. The files may be created using any program, which will produce the required file extension format. ProCal User Manual V4.00 Page 83 Procal Calibration Software: User Manual Note: Windows Media Player is used to play video files. 5: Calibration Prompt text: Same as 3:(Before Test Prompt Text) but can only be displayed when the option is selected via the ‘Cal help’ button. ProCal User Manual V4.00 Page 84 Procal Calibration Software: User Manual The Instruments Tab Ref Inst Ref Inst: The Default option is usually selected which sets ProCal up to automatically use a reference instrument from the ten instruments listed in the Instrument Traceability List. ProCal will for example automatically select the DMM at position two if it is a measurement test, or the calibrator at position one if it is a meter type test. For a general test it is necessary to select a Custom Reference Instrument, selecting Custom will preset a list of instruments in the drop down list to the right, this list will display all of the instruments in the Instruments Traceability List. (As set in ProSet>File>Instruments.) Select the required instrument. Note: When a custom standard is selected, the value set in the Traceable instrument table will be used as the Nominal test value. Uncert Temp (Uncertainty Template): Selects the uncertainty template required to perform the uncertainty calculation for this test, as created in ProSet. This template will be called and used by ProCal at the time of measurement. Uncert Line (Uncertainty Line): If the reference standard used for this measurement has different bands of accuracy as set in the ‘uncertainty file’ in ProSet then the correct band can be selected here. ProCal User Manual V4.00 Page 85 Procal Calibration Software: User Manual Post-Test Commands: Type in here commands to be sent to instruments using either the GPIB interface or the RS232 serial COM’s port. Click on the ‘?’ to show a list of available commands. Double click on the window to enlarge it. There are three ways to select the address the instrument is to commutate with. The address must be at the start of the line and immediately before the command Communicate with any instrument by directly using its address or COM port For GPIB start the line with the GPIB address of that instrument: Example: 14 SETACV: Will send ‘SETACV’ to instrument with GPIB address 14 For RS232 serial start the line with COMxx, where xx is the COM port number. Example: COM2 SETDCI: will send SETDCI to COM port 2 Set Baud Rate, Parity etc. for serial Commutations. See example in the command window below. The COM command is comprised of the following parameters: COM [Baud Rate, Parity, Data Bits, Stop Bits] Baud Rate: The following table lists the valid baud rates. Setting 110 300 600 1200 2400 9600 (Default) 14400 19200 Parity: The following table describes the valid parity values. Setting E M N ProCal User Manual V4.00 Description Even Mark (Default) None Page 86 Procal Calibration Software: User Manual O S Odd Space Data Bit: The following table lists the valid data bit values. Setting 4 5 6 7 8 (Default) Stop Bit: The following table lists the valid stop bit values. Setting 1 1.5 2 (Default) Notes on use: UUT FUNC: DC 1 COM[1200,N, 8, 1] UUT FUNC: AC 10 COM[1200,N, 8, 1] The COM command MUST be placed at the END of each command line The default COM settings are 9600,n, 8, 1 - these will be used if no COM command is present To Communicate with an instrument in the Instrument Traceability List Use ‘@’ followed by the line number in the list. ProCal will then take the GPIB address entered for that instrument in the instrument data set by ProSet. The advantage of using relative addressing is that should an address of a reference instrument be changed the procedure can remain the same, the only change is to update data in ProSet. Example: @02 SETACV :will send the command ‘SETACV’ to the instrument in the 2 position in the traceability list, e.g. the system DMM. To Commutate with the instrument under test (UUT) If a procedure is set to communicate with the UUT by selecting on the Procedure Instrument information screen when creating/editing a procedure, then when ProCal runs this procedure a message box will prompt the user for an address of the UUT. To use this address in the command window start the line with UUT, commands will then be sent to the address entered by the operator in the address message box. This allows an instrument to be calibrated using it address as set, avoiding changing it. Example: ProCal User Manual V4.00 UUT DCV 1V: Will send ‘DCV 1V’ to the address of UUT. Page 87 Procal Calibration Software: User Manual Terminators: All commands will be sent as entered, to add a carriage return or line feed the append >CR to add carriage return >LF to add line feed >CR>LF to add carriage return and line feed. For GPIB commands the EOI line will be asserted with the last byte sent. Other Commands: Delays: Use to allow a setting delay between two command lines Example Delay 1.5: Gives a 1.5 second delay. Reading a measurement back from a GPIB instrument Set addressed instrument to talker and place data into string variable ‘READING’ until EOI or line feed received. Return instrument back to talker. Timeout of 30 seconds. This command simply reads directly, from the instruments, it usually necessary to first send a range and trigger/take reading commands. Note this command does not use the GPIB ‘SRQ’. Example: or the traceability list. UUT FETCHREAD @02 FETCHREAD : Get reading from the UUT : Get reading from instrument 2 in Note these commands are only meaningful in a General or Meter test type. Formatting the string variable ‘Reading’ The data sent by the instrument to ProCal is stored in the string variable ‘reading’. This will contain other characters sent by the GPIB instrument, which will need to be removed before being changed into a numeric value, which can be used by ProCal. Example TRIM 3, 4 : this will remove the 3 leading and the 4 trailing characters. It may be useful if unsure of the string sent by the instrument to first check using a simple GPIB program first, for example the GPIB test programs supplied with the NI card. Setting the Nominal or measured test values to the reading taken with FetchRead. The readings taken and placed in the variable read, once formatted by the ‘Trim’ command above, can be stored as either the nominal test value or the test value itself used in the ProCal measurement screen. ProCal User Manual V4.00 Page 88 Procal Calibration Software: User Manual Example MEAS=READ NOM = READ With these few simple commands it is possible to set a DMM range, trigger a reading and store it to the nominal test value, and then set and read from another DMM and store it as the test value. Post Test Commands Type in here the commands to be sent to instruments after the test is finished using either the GPIB interface or the RS232 serial COM’s port. This is to reset instruments back to a safe state. Example use of command Window Sending extra commands to the System DMM in a measurement test and setting a calibrator: The DMM is the HP 3458A; the UUT is a Transmille 2000 series calibrator Line 1: Sends the command NPLC=100 to the DMM to set reading rate Line 2: Sends the command LFILTER ON to the DMM to set filter Line 3: Sends the command R1/O100.5/S0 to the calibrator with a carriage return character as a terminator. Note ProCal gets the COM port to which the calibrator is connected from the message box displayed at the start of the calibration. Note: This function must be selected in the Procedure by clicking instrument 9 in the calibration information screen. Example Reading from the UUT ProCal User Manual V4.00 Page 89 Procal Calibration Software: User Manual Line 1: Send command READ? To the UUT to trigger a reading Line 2: Get the reading from the UUT. The FETCHREAD command tells ProCal to set the addressed instrument to talk and then read in up to either EOI or Line feed. This data transfer is not using service requests. Line 3: Trim off unwanted characters Line 4: Set measurement to the value of the reading back from UUT. Note: Click on ‘Click here’ for a list of commands and examples. The Advanced Tab Formula Box Use this box to enter a formula to process or scale the reading. Example 1: Taking off zero / end resistance from readings If you needed to take lead resistance value off another measurement, simply create a test which measures this lead resistance (e.g. test 1), then in subsequent tests (e.g. tests 2 and above) use the formula to subtract the lead resistance value (result of test 1) from the measurements e.g. X-T1 (where X is the current test value and T1 is the reading taken in test 1 – the end resistance). ProCal User Manual V4.00 Page 90 Procal Calibration Software: User Manual When using a 2000 Series calibrator in two-wire ohms mode, the zero value can be used to measure the resistance of the leads without needing to manually short the leads together. Create a two wire ohms meter test using the zero ohms output from the calibrator and use the formula X-Z (where X is the meter reading and Z is the calibrator zero ohm value). When the meter reading is subtracted from the calibrator zero ohm value this gives the actual lead resistance. This lead resistance value can then be used in subsequent tests by subtracting this value from the test value e.g. X-T1. Example 2: Scaling the output from a transducer If you are reading the output of a 20Bar pressure transducer (which gives 10V output for 20Bar pressure) with a DMM using a measurement test and you want the measurement to be in Bar, use a formula to SCALE the reading e.g. X*2 (where X is the voltage being read back by the DMM and 2 is the scale factor). Note: This test would also use the DUAL UNITS function which allows a DMM range to be set to VOLTAGE but the test value to be set as BAR. Example 3: Changing the nominal test value If you want to perform a test where the nominal value is not known until measured, first create a test, which measures this required value (e.g. mains voltage). Then in each subsequent test which requires this value as its nominal, set the formula N=Tx (where N is the nominal value for this test and is being set to the value taken from that test x). Note the ability to use the value for a reference standard in a formula, this can be useful in many cases for example using a current shunts for measuring high current, where the test type would be a measurement of DC voltage which would require the measurement to be divided by the certified value for the shunt to convert to amps. ProCal User Manual V4.00 Page 91 Procal Calibration Software: User Manual For example X/E23 would divide the voltage read by the DMM by the value of the current shunt E23. The value of the standard must be entered in the instrument traceability table by ProSet first. The value of the shunt may of course be used directly in the formula, but by using this method only the value held in ProSet, need be changed when the standard is recalibrated. The formula field does not recognise brackets, the expression is evaluated only from left to right. Dual Units Clicking the DUAL UNITS checkbox allows the test value units to be set to a different type than the DMM range units (e.g. 10Bar for test units and 10V for DMM range). Note: Normally the test value and DMM range must be the same otherwise ProEdit will indicate a test error due to the different units being detected. Dual units permit different units. This is particularly useful when reading back from transducers where a voltage or current is read back from a DMM but the signal is pressure, torque etc. See ‘example 1’ of the formula function for more information Number of turns: This box is for the number of turns of a clamp coil adaptor. The current entered in the test value box for a meter type test is divided by the ‘number of turns’ before being sent to the calibrator. This then sets the calibrator to output the correct current when using a coil. The numbers of turns when using a Transmille Clamp Coil range from 5 to 10 to 50. Auto step: This selects if the test will automatically step on. If clicked ‘yes’ a drop down box can set a further condition, such as the length of time before the current test is stopped and the new one begun. ProCal User Manual V4.00 Page 92 Procal Calibration Software: User Manual From this box the action can be conditional on the result of the test. Select ‘Y’ to allow the test to step on regardless of the result, or select the percent of specification to pass the test by before stepping onto the next test. Note that selecting auto step changes the control menu in ProCal. Auto step can be over ridden via the ‘Control’ menu at run time allowing a procedure to be single stepped in the usual way, which is very useful for testing. Samples Before Auto step: This controls the number of samples or readings that are taken before stepping on to the next test. If left blank three readings are taken on a measurement test. External UUT control Program To perform advanced control and calculation functions outside of the scope of ProCal. By entering the file name of this external program in this box ProCal will automatically create and save test information to a file, and then execute an external program. With ProCal in suspension the external program can then open this file and perform whatever task it is written to do. On closing this program it will pass data in a file back and restart ProCal. This feature allows ProCal to be used for any calibration task. The external program can be written in any language, visual basic, C, etc the user is familiar with. As the external program only has to perform control and measurement it can be relatively small, leaving ProCal to do all the major work. This approach can dramatically speed up the development of semi custom applications. See Appendix for application notes on writing external programs. External UUT adjustment Program As above but this program will be written to make software adjustments to the UUT and will only be called under the following conditions. 1: ProCal will be running after adjustment tests 2: Run Adjustments tests in the ProCal control menu is selected 3: The % of spec error is larger than the figure entered in the ‘% spec’ box. The Print Tab ProCal User Manual V4.00 Page 93 Procal Calibration Software: User Manual Always Print Test: Most used option; the result of the test will always be printed on the certificate. Print Only if Failed: Used mainly for ATE (automatic test equipment) stations where only failed results are of interest. Do not Print test: Use for test to confirm operation or pre-tests, which may not form part of the calibration. Also allows for ‘lead connections error checks’ to be performed, for example before a 20 Amp test perform a 2.1A test to check that the leads are in the correct sockets on the DMM before applying the full current with incorrect connections and blowing up the DMM. Print Only if Completed: This print type allows one procedure to cover an instruments model, which have different option combinations, fitted. When ProCal starts to run a test with this set it will prompt the user if they whish to run this section. ProCal takes the title test before as the name of this section of tests. If the user answer yes the tests are run, if no then the block of tests with print only if completed is jumped over. For example a DMM may come as standard with only DC volts, with options for AC volts, current and resistance. Normally this would require several procedures to be able to cover every combination. By using the print only if completed test, only one procedure is required. ProCal User Manual V4.00 Page 94 Procal Calibration Software: User Manual Certificate Printing using ProCert ProCert is the certificate-printing program and is installed as part of the program suite of ProCal. Using this program certificates can be searched for and reprinted. This program can be used on, as many PC’s as required to print certificates locally from a central ProCal database. Certificates can also be printed at the end of a calibration or from ProCal track. Certificate Types & Styles For flexibility ProCal offers a choice of two methods used for certificates & report styles 1: In built report styles (including a standard certificate and an accredited ISO17025 certificate) built into the program. These offer ease of use but cannot be edited by the user. 2: Crystal reports custom styles. There are several example reports (including a standard certificate and a accredited ISO17025 certificate), which are installed with ProCal and can be used as templates for the user to edit and create their own custom reports. Crystal Reports allow the user complete flexibility in the design of the reports. A report is a mixture of data fields, which take information from the database and text. Once created this report can be given a file name and saved. Reports for all sorts of purposes can be written, as can been seen from the installed examples including instrument fault reports, Quotes, Reverse traceability etc. To edit or create a crystal report the ‘Crystal report’ program must be installed. Once created a report can be used without installing Crystal reports on other workstations. When this report is selected the data fields will be filled up and the complete report is displayed on screen, this can be then printed, emailed, faxed etc as per normal. ProCert will use the type of report stored in the certificate data. This can be either the built in standard certificate report, or the accredited style certificate or use the file name of certificate reports written by the user in Crystal Reports. Note: ProCal will save the file name of a crystal report for ProCert to use. This file name will be copied from the procedure, or if not set in the procedure will use the ‘Global’ name set in ProSet>Program options. If this field is empty then the built in certificate format for that certificate type, standard/accredited/test report etc will be used. ProCal User Manual V4.00 Page 95 Procal Calibration Software: User Manual ProCert Menus File menu: Search for certificates Click on the ‘Search by’ buttons to open up a search box. Enter the details to search by, use ‘*’ as a wildcard. Use more than one search button if required, then click the search button to start the search. Note: that just clicking on ‘search’ will show all the certificates. ProCal User Manual V4.00 Page 96 Procal Calibration Software: User Manual Search Results From this screen select the certificate to print. Print Dialogue Box Select the required options for printing, select the printer and click OK to print certificate. Note a PDF printer can be installed on windows to enable a PDF certificate to be produced. Options Menu ProCal User Manual V4.00 Page 97 Procal Calibration Software: User Manual Set Logo Positions This allows the logo print position to be set for the inbuilt reports. Depending on the logo size and printer resolution this will need to be set by trial and error. Note this positions two different logos, the company logo used on the standard certificate and the ACCREDITED/accreditation logo. Configure Label Printer: Configures Seiko type label printer. ProCal User Manual V4.00 Page 98 Procal Calibration Software: User Manual Edit Certificate of Conformance Clicking Options->Edit Certificate of Conformance Text will open a Notepad file, which can hold customised information for the certificate. ProCal User Manual V4.00 Page 99 Procal Calibration Software: User Manual Appendix Data Paths The below paths are automatically set upon installation of the software Certificates Database C:\PROCAL\CERTIFICATES Enter the path to the certificates database. Click the “…” button to bring up a file window and navigate to the location of the database. The database file name will be ProResDB.mdb and is shared with the ProCal programs. This is where all certificate data will be stored, the data path should not be changed unless linking paths and files are also updated. Contacts Database C:\PROCAL\CERTIFICATES\CONTACTS.MDB Enter the file name of the contacts database. Click the “…” button to bring up a file window and navigate to the location of the database. Digital Photos C:\PROCAL\INSTRUMENTPHOTOS Enter the path containing digital photographs of the instruments. Click the “…” button to bring up a file window and navigate to the location of this directory. The digital photographs directory contains a number of bitmap files with the same name as the instrument they illustrate. Sales Database C:\PROSALES Enter the location of the sales database. Click the “…” button to bring up a file window and navigate to the location of the database. Stock Database Enter the location of the stock database. Click the “…” button to bring up a file window and navigate to the location of the database. PDF Scans C:\SCANTEMP Enter the location where scanned documents will be stored. Click the “…” button to bring up a file window and navigate to the location of the .PDF files Advanced Edit Advanced Edit can be found on all virtual job sheets, to manoeuvre to this menu, click File>View/Edit an Instrument, enter the identifying number such as an instruments serial or job number, when the instrument details appear, double click them, or highlight them and click View/Edit. ProCal User Manual V4.00 Page 100 Procal Calibration Software: User Manual Once this menu appears, click on Advanced Edit to change more intricate details about the instrument, such as the signatory for the certificate, or the traceable instruments used during its calibration. ProCal User Manual V4.00 Page 101 Procal Calibration Software: User Manual All the details of an instrument can be changed in this menu, so care should be taken that important data is not lost, this function can be set to Administrator Access only. The list of enterable data is long; this list contains the information for every part of the instruments procession through Booking In, Calibration and its Despatch details. Certificate Number If an instrument has been subcontracted out to an external company, then upon its return, the certificate will need to be linked to the instruments details, go into the Advanced Edit of that instrument, highlight ‘Cert_No’ by clicking it, and then type the certificate number into the text box below, once the information has been entered click “Save Changes” and then “Yes”. For a sub-contracted instrument it is advisable to also scan and link the certificate to the instrument. Editing Signatories To edit the signatory of a certificate, the same method is followed as for entering a Certificate Number, search and open the Job Sheet of the required instrument, open The Advanced Edit menu, and scroll down, highlight the line data that needs to be entered, and type the information into the text box. ProCal User Manual V4.00 Page 102 Procal Calibration Software: User Manual Editing Traceable Instruments The same process can also be applied for editing the traceable instruments that were used during the calibration process. As the image below shows, each traceable instrument has its name, serial number, certificate number, the date that instrument was calibrated, and the calibration period. ProCal User Manual V4.00 Page 103 Procal Calibration Software: User Manual Note: Once Save is clicked, any changed data will be saved and could affect certificates, reports, and can change information such as despatch addresses, therefore it is wise to operate within Advanced Edit with care. Note: Only a user with administrator access will have the Advanced Edit function available to them on a Virtual Job Sheet, both the engineer and the operator are unable to access this menu. Editing Drop Down Menus/ “…” Each drop down menu will have a button next to it with three dots “…”, once clicked this button will open up a text file in Notepad, once the changes have been made save and close the text file. For the changes to appear in the drop down menu, the screen that is being worked from must be reset. Note: The program will not need to be reset, only the current screen or menu will need to be closed and reopened. ProCal User Manual V4.00 Page 104 Procal Calibration Software: User Manual Contact Us Telephone +44 (0) 1580 890700 Fax +44 (0) 1580 890711 Email sales@transmille.com All of these details and more can be found at our website www.transmille.com ProCal User Manual V4.00 Page 105