1
Ocularis 5 - Getting Started Guide
Ocularis 5 Getting Started
This quick reference is for customers who have a legacy version of Ocularis and need to add new camera licenses. You must first
upgrade Ocularis Base and Client(s) to v5, then install an Ocularis 5 recorder and add the new cameras to that recorder. Keep your
existing recorder(s) in place.
Use these steps when installing Ocularis Professional, Enterprise or Ultimate on a single computer. Refer to the Ocularis Installation and
Licensing Guide or the Upgrading to Ocularis document for more detailed installation instructions. A recommended process flow to add
a v5 recorder to an existing system is listed below. Each numbered step is described in detail following this list.
1. Download and Extract the Ocularis 5 installation file.
2. Upgrade and license the Ocularis Base software.
3. Access the Ocularis Component Downloads web page.
4. Upgrade Ocularis Administrator.
5. Upgrade Ocularis Client.
6. Verify the success of the upgrade.
7. Install the Ocularis 5 recording component software.
8. Add Cameras to the Recorder.
9. Apply Basic Configuration of Ocularis Base using Ocularis Administrator.
10. License the Ocularis 5 Recording Component.
See the Release Notes for the current Ocularis version for known issues, feature changes and fixes.
1. Download and Extract the Ocularis Installation File
1.
2.
3.
4.
5.
Download the Ocularis file for the desired model from http://onssi.com/software-downloads/.
On the Ocularis Base machine, launch the file downloaded in the prior step.
An Installer Extraction wizard appears. Click Next throughout this wizard to extract the installation files (making changes where
you deem necessary).
At the end of the wizard, you are given the option to ‘Install Ocularis Base’. Make sure this checkbox is selected and click Finish.
Proceed to step 2 Upgrade and License Ocularis Base below.
2. Upgrade and License Ocularis Base
Be sure you have your new Ocularis 5 SLC handy when installing or upgrading Ocularis Base.
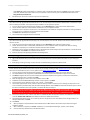
1. (continued from prior section). If a previous version is detected, you'll be asked to install as an upgrade. Click Yes.
2. For upgrades from Ocularis 4.x or earlier, a message stating that the SLC is not supported will appear. Deactivate the old SLC and
insert the new one. Click the Deactivate button in the Ocularis License Activation application.
3. At the warning message, click Yes to confirm the deactivation. Click OK to close the 'License successfully deactivated' pop-up.
4. Enter the new SLC starting with '905' (found in the email you received with your purchase) into the Step 1: Enter SLC box (or
paste it from Windows clipboard). Click Activate License.
5. Click OK at the 'License activation successful' pop-up.
6. Click Close to continue with the installation of Ocularis Base.
7. Follow the wizard prompts for the remainder of Ocularis Base installation.
8. Read and accept the EULA. Click Next.
9. Choose Typical or Custom installation and click Next. ‘Typical’ installs files in default locations for new installations. ‘Custom’
allows you to modify file locations and database settings. ‘Typical’ is the recommended selection.
The Ocularis Base files are installed to the specified directory. Accept defaults if prompted.
10. An informational message regarding the installation of dependencies may appear. Click OK. Dependencies are installed including
SQL Express 2008. This may take several minutes. A new installer website is also created.
11. A Setup Wizard Complete screen appears. Click Finish.
3. Access the Ocularis Component Downloads Webpage from the Base
During the installation of Ocularis Base, the files required to install other Ocularis components were also installed on the Base
computer. These installation files may be accessed from other computers on the network via a local webpage. On each satellite PC,
access the webpage on the Base to download and install Ocularis components.
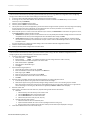
1. Access the Ocularis installation webpage through a browser using the following URL:
http://[Base_IP]:[port]/OcularisService
On-Net Surveillance Systems, Inc.
1