1
DIRECT SIMPLE SHEAR TESTING
© 2013 Geocomp Corp.
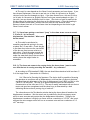
9. Measure the distance between the right side of the water bath box and the right limit
switch. Adjust the right limit switch so that the distance is 12.7 mm (0.5 in).
10. When you are satisfied that everything has been adjusted correctly, use the View
menu on the SHEAR:DSS control window to open the System Monitor window. Adjust
the physical position of the horizontal displacement sensor until the Horizontal reading
on the System Monitor window is 32767 counts (this is half the maximum reading of
65535 counts).
I-3. Q: We are running out of travel during consolidation. The soil is an organic peaty
material. It appears that the maximum vertical travel is 12.7 mm (0.50 in). How can we
solve this problem?
There are two possible solutions for this problem.
First, after you have swung the crossbar into position, use the Initialize option on the lefthand LCD Position menu to start the loading mechanism near its highest position. Then use
the nuts on the vertical threaded rods to lower the crossbar until the load cell button is close
to the stainless steel ball. This will provide the largest possible downward travel.
If there is still not enough travel, you will need to reduce the thickness of your sample.
But you have to maintain the conditions that the shear plane is midway between the top and
bottom of the sample, that there are porous stones on both ends of the sample, and the top
cap is the same height above the bottom of the shear box. A way to do this is to use two
porous stones at the bottom of shear box, a sample that is 12.7 mm (0.5 in) high, and two
porous stones on the top of the sample. (Each porous stone is 6.4 mm, or 0.25 in, thick.)
I-4. Q: While running our ShearTrac-II-DSS we have noticed that the arm for our vertical
displacement sensor is bumping into the rear four-prong nut that holds the crossbar in
position.
A: At the start of a test (while the crossbar is still swung to one side), use the left-hand
keypad on the ShearTrac-II-DSS front panel to initialize the vertical loading mechanism.
(From the LCD main menu, select the Position option, choose Initialize, then press the Ent
key.) The loading mechanism will move to its highest position, activate the upper limit
switch, and then move down about 3 mm (0.12 in). Loosen the nut that clamps the LVDT arm
to the vertical post and slide the arm up a ways. Raise the LVDT shaft into the housing and
use a piece of tape to hold it in the raised position. Swing the crossbar into position. Now
lower the LVDT arm until its underside is about 6 to 10 mm (0.25 to 0.4 in) above the rear
four-prong nut. Remove the tape and lower the LVDT shaft onto the crossbar. If necessary,
adjust the horizontal position of the LVDT arm so that the shaft is midway between the sides
of the crossbar. (It is best to raise the shaft slightly while doing this to avoid having it catch
on anything and damage the LVDT.) There should now be clearance even when the loading
mechanism is a high as it will go.
II. LIMIT SWITCHES
Geocomp Corporation · 125 Nagog Park · Acton, MA 01720 · Tel 978-635-0012 · Fax 978-635-0266