1
“VideoCap” from the “E-Microscope” program group.
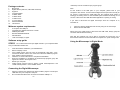
Package contents:
1.
2.
3.
4.
5.
6.
7.
8.
9.
10.
Microscope
Digital camera (with lens, USB cable and stand)
Eyepiece.
2 prepared slides
10 blank slides
12 blank labels
12 slide covers
12 cover glasses
Software CDROM
This manual
Minimum system requirements:
·
A computer with USB port
·
Intel Pentium II 350MHz Processor or faster
·
64MB System RAM
·
Windows 98SE/Me/2000/XP
·
CD-ROM drive
·
16-bit color display or higher
Software setup guide
Note:
For the location of the USB ports on your computer, please refer to your
computer’s user manual. To ensure that the digital microscope works normally, do
not connect or disconnect the USB cable from the computer while system is
starting up or shutting down. To avoid unstable system software functioning, do not
connect or disconnect the USB cable while application is opening or closing.
If you want to disconnect the digital microscope when the computer is on,
remember to:
1.
2.
Close any software application that currently using for the microscope.
Disconnect the USB cable.
Never pull on the cable portion to disconnect the USB cable, always grasp the
connector itself while disconnecting.
Note that the computer may not be able to recognize the microscope if it is
disconnected and then reconnected while the computer is in power saving mode.
Using the Microscope in Digital Mode:
STOP!!! Do not attach the microscope digital camera to your computer! Make
sure you install the software first.
1.
2.
3.
4.
5.
6.
7.
8.
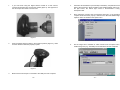
Insert the software CDROM to your CDROM drive
Wait for autoplay to start
If the installer screen does not come up automatically, click “Start”, “Run”,
and execute the file “autorun.exe” of the CD to start the installation program.
Click “Install E. Microscope Driver”
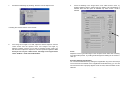
Follow the on-screen instructions to complete the installation.
When the installation is completed, the E-Microscope program group will
appear as a folder in the Program menu.
Restart your computer.
Install ArcSoft Camera Suite by clicking “Install PhotoImpression” and
“Install VideoImpression” on the installer screen.
Connecting the Digital Microscope:
1.
2.
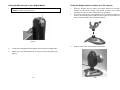
After the E-Microscope software has been installed, plug the microscope’s
USB cable into your computer’s USB port.
Go to the Windows Start menu to launch the software “AMCap” or
-1-
-2-