1
Operating Instructions
Power On
1) Ensure that good batteries are installed.
2) Simultaneously press and hold the AUDIO and
FREQ buttons until the Power On Boot Sequence is initiated (3 seconds).
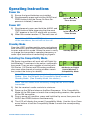
Initial Power On
Timer Screen
Power Off
1) Simultaneously press and hold the AUDIO and
FREQ buttons while observing that the word
“Off” appears in the LCD along with a counter.
2) When the counter reaches “0”, the unit turns off.
Initial Power Off
Timer Screen
Note: If the AUDIO and FREQ buttons are released before the end
of the countdown, the unit will not turn off.
Standby Mode
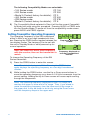
From the “OFF” position, quickly press and release
both the AUDIO and FREQ buttons simultaneously
to enter and exit this mode. Allows the user to verify
or change the transmitter’s operating frequency or
audio input level without transmitting any signals.
Standby Screen
Selecting the Compatibility Mode
SM Series transmitters will work with all Digital Hybrid Wireless™ receivers in the native, compandorless mode. They are also capable of working with
200 Series, 100 Series and IFB analog receivers,
plus some other brands of analog wireless receivers (contact the factory for details).
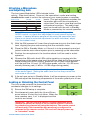
400 Series or Digital
Hybrid Wireless™
Compatibility Mode
Note: RF transmission is prevented while selecting Compatibility
Modes. Also, the SM exits the Compatibility Mode screen to
Standby Mode. (See Standby Mode, this section.)
Note: The unit comes from the factory configured as a 400 Series
transmitter.
1) Set the receiver’s audio controls to minimum.
2) Power up the SM and observe the Boot Sequence. If the Compatibility
Mode for the SM does not match the corresponding receiver, then power
off the SM transmitter.
3) From a power off condition, press and hold the Up arrow, then press the
AUDIO and FREQ buttons simultaneously.
4) The LCD will display the current Compatibility Mode. Use the Up or Down
arrow buttons to set the Compatibility Mode to match the corresponding
receiver.
www.lectrosonics.com