1
INTRODUCTION
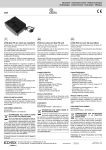
MEMORY CARD (optional)
Parameters and setpoint values can be copied from one device to
another using the Memory car.
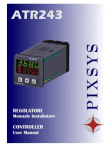
Thanks for choosing a Pixsys device.
Timer TCT201 can be set in 5 different modes; Timer-ON, Timer-OFF,
Pause-Work, Oscillator, PWM (time-proportioned output), all options
with independent setting of ON-OFF time.
3 universal digital inputs are availables (NPN/PNP) for external
commands like Start, Stop and Reset; one input is also analogue in
order to allow the modification of working times by an external
potentiometer.
5 different time bases (hundredths, tenths, seconds, minutes, hours).
TCT201-1ABC USER MANUAL
PIXSYS www.pixsys.net
e-mail: sales@pixsys.net - support@pixsys.net
Software V 2.03
2300.10.137-RevA 130510
I3
NPN
4
OUT 24V
50mA
3
I1
2
I2
1
I3
8A 230V
Q1
Resistive
1/2HP
7
8A 230V
Q2
Resistive
1/2HP
6
TCT201-1ABC
CAUTION
I3
Risk of Electric Shock
Disconnect power
supply before
servicing
1
8
10 SUPPLY
24...230V
AC/DC
9
8
8A 230V
Q1
Resistive
1/2HP
7
8A 230V
Q2
Resistive
1/2HP
6
TCT201-1ABC
I2
1
I2
CAUTION
2
8
8A 230V
Q1
Resistive
1/2HP
7
8A 230V
Q2
Resistive
1/2HP
6
2
Risk of Electric Shock
Disconnect power
supply before
servicing
I1
TCT201-1ABC
CAUTION
3
REM
I1
10 SUPPLY
24...230V
AC/DC
9
Insert the memory card and press the programming button.
When writing the parameters, the LED turns red and on completing the procedure
it changes to green. It is possible to repeat the procedure.
UPDATING MEMORY CARD.
To update the memory card values, follow the procedure described in the first
method, setting display 2 to
so as not to load the parameters on controller.
Enter configuration and change at least one parameter.
Exit configuration. Changes are saved automatically.
3
I1
2
I2
1
I3
1
OUT 24V
50mA
6
4
3
Spessore suggerito
2 ÷ 6 mm
Suggested thickness
8
8A 230V
Q1
Resistive
1/2HP
7
8A 230V
Q2
Resistive
1/2HP
6
I1
2
I2
1
I3
10 SUPPLY
24...230V
AC/DC
9
8A 230V
Resistive
1/2HP
8A 230V
Resistive
1/2HP
8
Q1
7
Q2
MEMORY C.241
SETPOINT MODIFICATION
PRESS
1
2
6
DISPLAY
Visualizes SETPOINT 1 / 2
or
Modifies selecter SET
TECHNICAL DATA
Operating Operating temperature 0-40°C, humidity
temperature 35..95uR%
Sealing IP65 (with gasket) on front panel,
Ip20 box and terminal bloks
or
to confirm
5
Potentiometer:
To modify Set1 or Set2 by external potentiometer follow the steps below:
1- use potentiometers 5kOhm to 10kohm
2- connect cursor to pin I3; a wrong connection may damage the potentiometer and
lead to lock of the device.
3- accuracy on input is max 1000 points, therefore set the parameters "Upper limit"
and "Lower limit" with a max difference of 1000 units.
(Ex.: LoS1 to 50,0 and uPS1 to 150,0 to modify time value related to Set1 between
50 and 150 seconds with steps of one tenth). Greater differences would make
unstable the less significant digit.
4- To calibrate the scale of potentiometer enter the configuration mode and select:
Hin.3 as Pot
Fin.3 as Set1 or Set2
P.tAr as Enable
Exit configuration mode and place potentiometer at minimum level and press key,
then place potentiometer at max level and press premere
key: the device
automatically exit the calibration procedure.
N.B.: A switch-off of the device would interrupt the calibration.
2
3
Scroll parameters
+
or
pressing
Digital Inputs 3PNP/NPN configurable as analogue for
potentiometers.
Outputs 2 relays 5A resistive charge
.
Back-UP Rechargeable battery, approx. 60days autonomy
Programming Labsoftview 2.0
Software
Power Supply 24...230Vac/Vdc +/-15% 50/60Hz / 2W
and an arrow key
Enter the new data
that will be
saved when releasing keys
End configuration, controller exits
from configuration
+
SET for
3 seconds
DISPLAY
Modify blinking digit and
or
DO
On display 1 appears
with 1st digit blinking, while
display 2 shows
Enter Password
P-07 Active State Input 2
High Level
Low Level
Rising edge
Input 2 activation
P-08 Active State Input 3
High Level
Low Level
Rising edge
Input 3 activation
P-09 Function Input 1
Disable
Start / Stop
Start / Stop-Reset
Reset-Start / Stop
Reset / Start / Stop
Input 1 function
P-10 Function Input 2
Disable
Reset
Input 2 function
P-11 Function Input 3
Disable
Wait
Hold
Potent. To SET1
Potent. To SET2
Input 3 function
to confirm
Device loads
default values
Switch the device off
and restart it
LIST OF PARAMETERS
P-01 Timer Function
Timer functions
Activates output at count end
Deactivates output at count end
T1 and T2 start in sequency
T1 and T2 start in sequency repeatedly
Percentage output activation on fixed time base
Default
n.o.
n.c.
n.o.
n.c.
PNP
TTL
Potentiometer
High level
Low level
Transitory in rising
High level
Low level
Transitory in rising
Disabled
Only timer value in memory
Timer value and START/STOP status in memory
Default
Disabled
Start / Stop
Start / Stop-Reset
Reset-Start / Stop
Reset / Start / Stop
Disabled
Reset
Disabled
Wait (count lock)
Hold (locks display but count continuels)
Modify SET1 by potentiometer
Modify SET2 by potentiometer
Disabled
Start / Stop
Start / Stop-Reset
Reset-Start / Stop
Reset / Start / Stop
Reset
Wait (count lock)
Hold (locks display but count continuels)
Default
Default
Disabled
Timer output 1 n.o.
Timer output 1 n.c.
Timer output 2 n.o.
Timer output 2 n.c.
Start
Stop
Incremental
Decremental
SETPOINT CONFIGURATION
P-16 Format Set 1
Incremental
Decremental
Second.Cent
Second.Decimal
Second
Minute.Second
Hour.Minute
Hour
Disable
Visualized
Modifiable
P-03 Hardware Input 1
NPN
PNP
TTL
P-04 Hardware Input 2
Input 1 configuration
NPN
PNP
TTL
Default
Input 2 configuration
NPN
PNP
TTL
Default
Default
Default
Default
Default
Default
Output Q1 selection
Disabled
Timer output 1 n.o.
Timer output 1 n.c.
Timer output 2 n.o.
Timer output 2 n.c.
Start
Stop
Default
Default
Count mode
Default
Count format
Count format
Seconds, Cents
Seconds, Tenths
Seconds
Minutes, Seconds
Hour, Minutes
Hour
Set 1 visualization
Disabled
Visualized
Visualized and modifiable
Default
Default
Set 2 visualization
Disabled
Visualized
Visualized and modifiable
Default
P-20 Lower limit Set 1
Set 1 lower limit
0.0
P-21 Upper limit Set 1
Set 1 upper limit
99.9
P-22 Lower limit Set 2
Set 2 lower limit
0.0
P-23 Upper limit Set 2
Set 2 upper limit
99.9
P-24 Potent. tarature
Potentiometer calibration procedure
INPUT CONFIGURATION
NPN
PNP
TTL
Default
Function of
Output Q2 selection
Disable
Visualized
Modifiable
Power-off memory
High level
Low level
Transitory in rising
P-14 Output Q2 Setup
Disable
Out Timer 1 n.o.
Out Timer 1 n.c.
Out Timer 2 n.o.
Out Timer 2 n.c.
Start
Stop
DISPLAY CONFIGURATION
P-15 Type of Timer
P-19 Display Set 2
BACKUP MEMORY CONFIGURATION
Disable
Only Timer
Timer / State
1
1
2
2
P-18 Display Set 1
FUNCTION CONFIGURATION
Timer On
Timer Off
Pause/Work
Oscillator
PWM
Disable
Out Timer
Out Timer
Out Timer
Out Timer
Start
Stop
P-17 Format Set 2
pass to the next one pressing
P-02 Power-off Memory
Material PC ABS UL94V0 self-extinguishing
Enter Password
configuration table
or
LOADING DEFAULT VALUES
PRESS
1
DO
pass to the next one pressing
Display shows first parameter of
Increase or decrease visualized value
6
PIXSYS
CN1
2
3
4
On display 1 appears
with 1st digit blinking, while
display 2 shows
Modify blinking digit and
SET for
3 seconds
6
POTENTIOMETER 5..10 Kohm
Accuracy 1000 points
1
CONFIGURATION PARAMETER MODIFICATION
PRESS
DISPLAY
1
TCT201-1ABC
5
Memory Card
10 SUPPLY
24...230V
AC/DC
9
OUTPUT
CAUTION
Sensore
di Prossimità PNP 3
3 Fili
Dima di foratura
46 x 46 mm
Frontal panel cut-out
OUT 24V
50mA
TCT201-1ABC
Sensore
di Prossimità PNP 2
2Fili
5
4
CAUTION
GND
Risk of Electric Shock
Disconnect power
supply before
servicing
POSITIVO
Risk of Electric Shock
Disconnect power
supply before
servicing
106 mm
Input 1 activation
Disable
Start / Stop
Start / Stop-Reset
Reset-Start / Stop
Reset / Start / Stop
Reset
Wait
Hold
OUTPUT CONFIGURATION
P-13 Output Q1 Setup
1
10
48 mm
P-06 Active State Input 1
High Level
Low Level
Rising edge
P-12 Function Key UP
LOADING DEFAULT VALUES
This procedure restores the factory settings of the instrument.
Sensore
di Prossimità PNP 1
2 Fili
Input 3 configuration
LED ROSSO: acceso in programmazione
LED VERDE: programmazione eseguita
key .
2
Risk of Electric Shock
Disconnect power
supply before
servicing
48 mm
TUN
3
5
3
MAN
10 SUPPLY
24...230V
AC/DC
9
OUT 24V
50mA
4
PNP
4
A3
NPN
PNP
5
4
C1
C2
A1
A2
RED LIGHT: waiting f or programming
GREEN LIGHT: done
The memory card is equipped with an internal battery with a life of about 1000
uses.
5
6
CN1
Confirm using the
key display 2 shows
> With the controller disconnected from the power supply:
42mm
insert
Memory Card
MEMORY C.241
1
By pressing the
WIRING DIAGRAM
TCT201
OUT 24V
50mA
(Only if the values stored on Mmeory Card are correct).
The device loads the new data and starts again.
SIZE AND INSTALLATION
5
On activation display 1 shows and display 2 shows
Counting can be incremental or decremental.
*2300.10.137-A*
42mm
inserimento
Memory Card
There are two methods:
> With the device connected to the power supply
insert the memory card when the controller is off.
P-05 Hardware Input 3
PNP
TTL
Potent.
Disable
Enable
Disabled
Enabled
Default
TCT201-1ABC “TIMER”
FUNCTION CONFIGURATION
P-01
Timer
Function
DISPLAY CONFIGURATION
Timer On
Stop/Reset
Set
Start/Stop/Reset
Reset
Wait/Hold/Set1-2
Start/Stop/Reset/Wait/Hold
Set1
Set2
Timer On (Nota 1)
Timer Off (Nota 1)
Pause/Work (Nota 1)
Oscillator
PWM
BACKUP MEMORY CONFIGURATION
Disable
Only Timer
Timer / State
INPUT CONFIGURATION
P-09
Function
Input 1
I1
High Level
Low Level
Rising edge
P-07
Active State
Input 2
Disable
Start / Stop (Nota 2)
Start / Stop-Reset (Nota 3)
Reset-Start / Stop (Nota 4)
Reset / Start / Stop (Nota 5)
P-10
Function
Input 2
I2
NPN
PNP
TTL
P-05
Hardware
Input 3
High Level
Low Level
Rising edge
P-08
Active State
Input 3
Disable
Reset
P-11
Function
Input 3
I3
PNP
TTL
Potent.
1
0
Stop
1
0
Reset
P-06
Active State
Input 1
NPN
PNP
TTL
Start
High Level
Low Level
Rising edge
Disable
Wait
Hold
Potent. To SET1
Potent. To SET2
P-24
Potentiometer
tarature
Key UP
Disable
Start / Stop (Nota 2)
Start / Stop-Reset (Nota 3)
Reset-Start / Stop (Nota 4)
Reset / Start / Stop
Reset
Wait
Hold
SETPOINT CONFIGURATION
P-16
Format
Set 1
Second.Cent
Second.Decimal
Second
Minute.Second
Hour.Minute
Hour
P-17
Format
Set 2
Second.Cent
Second.Decimal
Second
Minute.Second
Hour.Minute
Hour
P-18
Display
Set 1
Disable
Visualized
Modifiable
P-19
Display
Set 2
Disable
Visualized
Modifiable
P-21
Upper limit
Set 1
P-20
Lower limit
Set 1
P-23
Upper limit
Set 2
P-22
Lower limit
Set 2
3
P-13
Output Q1
Setup
Q1
Disable
Out Timer 1 n.o.
Out Timer 1 n.c.
Out Timer 2 n.o.
Out Timer 2 n.c.
Start
Stop
1
0
Timer Off
Stop/Reset
Set
Start/Stop/Reset
Reset
Wait/Hold/Set1-2
Start/Stop/Reset/Wait/Hold
Set1
Set2
Timer value
Out Timer 1
Out Timer 2
SET1
P-14
Output Q2
Setup
TIMER 1
Q2
Time
Out Timer 1
1
0
Start
1
0
Stop
1
0
Reset
1
0
Disable
Out Timer 1 n.o.
Out Timer 1 n.c.
Out Timer 2 n.o.
Out Timer 2 n.c.
Start
Stop
Pause / Work
Stop/Reset
Set
Start/Stop/Reset
Reset
Wait/Hold/Set1-2
Start/Stop/Reset/Wait/Hold
Set1
Set2
Out Timer 2
1
0
Start
1
0
Stop
1
0
Oscillator
Stop/Reset
Set
Start/Stop/Reset
Reset
Wait/Hold/Set1-2
Start/Stop/Reset/Wait/Hold
Set1
Set2
TIMER 1
Timer value
Out Timer 1
Out Timer 2
SET1
SET2
TIMER 2
Input
Type
TIMER 1
Timer value
Out Timer 1
Out Timer 2
SET1
SET2
Out Timer 2
1
0
Start
1
0
Stop
1
0
PWM
Stop/Reset
Set
Start/Stop/Reset
Reset
Wait/Hold/Set1-2
Start/Stop/Reset/Wait/Hold
Set1
Set2
SET2 (Period)
Time
Start
1
0
Stop
1
0
H
< 9,0 v
>10,5 v (I1, I2)
>12,3 v (I3)
>2,9 v
L
> 10,5 v
< 9,0 v (I1, I2)
< 11,0 v (I3)
< 2,4 v
TABLE of ERROR MESSAGES
ERROR in WRITING of EEPROM Memory
ERROR in READING of EEPROM Memory
Incorrect calibration data (Note 1)
Incorrect status data (Note 1)
Incorrect BACKUP registersI (Note 2)
Timer value
Out Timer 1
Out Timer 2
SET1(% duty-Cycle)
1
0
TTL
Input
Note 1: Switch the device off and restart it; if error is still notified,
contact technical service
Note 2:
Discharged battery: keep the device connected to power supply in
order to recharge the battery.
TIMER 1
Out Timer 2
PNP
Input
Incorrect parameters (Note 1)
TIMER 2
Time
Out Timer 1
NPN
Input
Logic
Level
1
0
Out Timer 1 10
Nota 1: In this timer functioning, if P-06 Active State Input 1 = Rising Edge or P-09 Function Input 1 = Disable,
at count end (reaching setpoint), timer will switch automatically to STOP.
Nota 2: This function not reset timer value, and so it requires an input for the reset.
Nota 3: This function reset timer at STOP.
Nota 4: This function reset timer at START.
Nota 5: This function è attiva solo se P-06 Active State Input 1 = Rising Edge
2
OUTPUT CONFIGURATION
Out Timer 1 10
P-12
Function
Key UP
1
Incremental
Decremental
Time
Disable
Enable
P-15
Type
of Timer
TIMER 1
Out Timer 1 10
POWER-ON
RESET
P-04
Hardware
Input 2
SET1
Time
P-02
Power-off
Memory
P-03
Hardware
Input 1
Timer value
Out Timer 1
Out Timer 2
In PWM mode, the only option available on
parameters 16
and 17
for format of
SET1 and SET2 is
(seconds).
Low and upper limits for SET1 (related to
percentage of work or Duty Cycle) are allowed in
the range 0 ... 100 (%). da 0 a 100 (%).