1
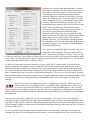
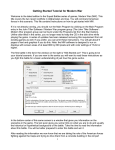
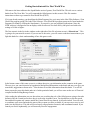
Once you click on “OK” or hit the enter key you’ll see another
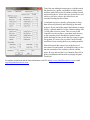
menu of choices. This is the A/I Selection Dialog. In this menu
you will pick which side you will be controlling. So choose
“Manual” for the Allied Powers A/I which means you will be
controlling the Allied side. Next, click either on “Automatic” or
“Automatic with FOW” for the Central Powers side. Now the
computer will control the opposition. “FOW” stands for fog of
war. If you choose it, you won’t be able to see any enemy units
unless they come within the line of sight (LOS) of one or more of
your units. Playing with FOW turned on makes the battle much
more realistic and exciting as surprise and LOS are key elements
of small unit actions. If you are, however, a first time player, it will be easier to play without FOW.
Notice the word “Rules…” at the bottom of the dialog box. Clicking on it will allow you turn on and or off the
optional rules in the game. We’ll leave that alone for this time, but when starting future battles you can go in
and select the optional rules that you desire. For more details on each rule, check the “Help” button on that
screen. After you have picked the method of play in the A/I Selection Dialog Menu, click on “OK.”
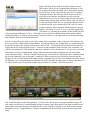
Since you are playing the Allies you will go first. That may not always be
the case, as sometimes the A/I will go first. A box will appear telling the
player which Army’s turn it is to move as well as turn number and the total
number of turns in the scenario. This box will appear at the beginning of
each turn throughout the game. You can either left-click on it to make it go
away and then repeat that each turn, or you can right-click on it and it will
display briefly then automatically go away each turn for the remainder of
your session.
Notice a small dialog box that appears once your turn starts stating
that you have support in this scenario as well as Smoke & Chemical
limits. Support refers to airstrikes, off-map artillery or in this situation
Rolling Barrages. Remember this and we will come back to it in a
couple of minutes. For now, just click the OK button.
Now you see the battlefield and your troops. If you wish to easily
scroll around the map, click on the menu list at the top called
“Settings.” Then left-click on “Auto Scroll” unless there is already a
check mark next to it. Now you can simply run your mouse pointer to
any edge of the map and the screen will scroll in that direction until the edge of the map is reached.
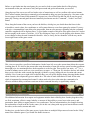
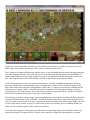
As you scroll around the map you will see your line along the bottom of the map and the extensive trench lines
of the Central powers stretching upwards. There are barbed wire obstacles before their lines as well as multiple
bunkers at key points giving the enemy overlapping fields of fire, enough to make any man tremble in his boots.
It will be imperative for you to neutralize, or at least significantly damped those bunkers if you plan on making
any progress at all. As mentioned in the opening notes, and evidenced buy the abundant craters along the line,
the first volley of the rolling barrage has already fallen on the Central lines. The barrage will continue at the
beginning of subsequent turns.
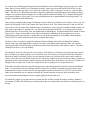
Take note of the 7 hexes along the lines with grey boxes with numbers in them, for example hex 18,13 – these
are objective hexes and are points you need to aim to take. Capturing these along with casualty counts are what
determine who wins and looses a battle. The color of the boxes represent the controlling nation and the number
inside is the point value they are worth.