1
�������������������
��������
�������
(C)
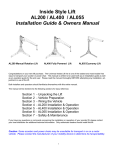
1 x BUBBLY seat section (inc. two transfer flaps)
1 x BUBBLY base section
1 x Actuator (Attached to Seat Section – ONLY REMOVE
IF TO BE USED IN THREE SECTIONS)
1 x Hand control
1 x Charger
1 x User Manual.
2 x Transit Clip (REMOVE BEFORE USE!!!)
2 x Side flap diverters (in with user manual)
�
Unpacking – Simply remove the bathlift parts from the
packaging and check them to make sure that no
damage has been caused during transit.
�
Hand Control - This must be put on charge for 12
hours before using your BUBBLY Bathlift for the first
time.
�
Connect the hand control to the battery charger
and plug the charger into a mains power supply
OUTSIDE THE BATHROOM and allow the battery to
charge for a minimum of 12 hours. (See “Battery
Charging”)
��������
(A)
(B)
Seat and base sections - The BUBBLY can be
easily separated into two or three sections for
transportation and ease of back strain. �������������
��������������������������������������������������
����������������������������������
� Seat section including actuator (A)
� Base section (B)
� Actuator (C)
�������
Transit Clip
�������
�������
�������
To separate the seat and base section:
� REMOVE BOTH TRANSIT CLIPS (Fig 3)!!!
� Fully lower the seat and fold the transfer flaps onto the
seat.
� Lift the seat section clear of the base section.
� Reassemble in the reverse order, leaving the transit clip
off unless transporting the whole bathlift.
� Only reattach transit clips for transportation and remove
before using the bathlift again.
To remove the actuator from seat section:
� Release the Lower Actuator bracket (Fig 4).
� Pull the Actuator latch at the back of the
seat (Fig. 5) and lift the seat sufficiently to allow
the actuator to disengage itself from the bracket. The
actuator can now be removed from the seat section.
� Reassemble in the reverse order.
3