1
1
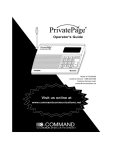
PS2000AN Operator’s Guide
Unpacking the PS2000AN
When you open the PS2000AN box for the first time, inspect the contents. In the box, you should find the following
items:
If any of these items are missing or damaged, contact the dealer where you purchased the unit, or call Customer
Service at the number listed in "Service Information."
Installing the PS2000AN
Positioning the PS2000AN
You can operate the PS2000AN from a flat surface
such as a table, counter, or shelf. Or, you can use the
supplied wall-mount brackets to mount it on a wall.
Steel and concrete walls reduce transmitting range. If
the PS2000AN is located in a concrete or steel
building, and part of the coverage area is located
outside the structure, place the unit and antenna close
to a window.
To mount the PS2000AN on a wall, perform the
following steps:
3. Mark the positions for the 2 supplied mounting
screws on the wall. The positions should be 6"
apart. Drill the 2 holes, then thread the screws into
the wall. The screws should extend 3/16". Do not
over tighten the screws.
4. Align the keyholes on the back of the brackets with
the 2 screws, then push in and press down to secure
the PS2000AN to the wall.
1. Slide the wall-mount brackets into the 2 wall-mount
slots, as shown.
Back of the
PS2000AN
2. Insert the center-loaded antenna connector into the
ANTENNA jack on the PS2000AN. Turn the
connector clockwise until the antenna locks in
place. For maximum efficiency, extend the antenna
to its full length, orient it vertically, and avoid
contact with walls and metal objects.
For best transmission, both the center-loaded antenna
and the black antenna ground wire must be fully
extended. Do not coil the antenna ground wire, as this
will decrease transmission efficiency.
Back of the
PS2000AN