1
4
6
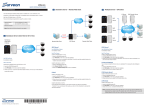
System Connections
IP Camera(s)
Logging into SMR
The VMS Client will prompt for the following information after the SMR system is powered on:
Please click OK after the configuration is done, and the system will reboot automatically.
About 2 minutes later, the Wizard window will appear again. Click Next to continue.
These are the RAID options for SMR models.
Remote VMS Client
Management Center
Access Method:
Analog Camera(s)
Directly Access
Minimum Hard Drives
Port:
Internet
IP Encoder
Monitor
Type:
VMS
VMS/NVR:
DAISYCHAN - 172.18.6.91
RAID Options
Descriptions
2
RAID0
Provides no protection, but offers maximum capacity.
2
RAID1
Provides best protection. Your data will be mirrored.
3
RAID5
Provides protection against one drive failure.
Search
3. System initialization will start.
Username:
admin
Password:
admin
Ethernet Connection
Auto Login
USB Connection
Note: Shaded areas are optional devices.
Login
Video/Monitor Connection
Cancel
Connect cables to the rear panel ports as follows:
●
Insert mouse, keyboard to the USB for operating VMS.
●
●
Insert the LAN Cable to the upper LAN Port to a local network where your IP Camera reside.
●
●
Access Method: Directly Access.
Type: Choose VMS.
(Connection to analog cameras is also available via an IP encoder).
●
VMS/NVR: The default IP address for the SMR Server. You can click Search button to obtain it.
Connect an external monitor capable of 32 bit or higher color quality to the VGA port to view the
●
Username: The username of the domain, which is always admin.
●
Password: The password of the domain. Default password is admin.
VMS interface.
Note: Users can only use the right LAN port.
The system will shut down after the initialization is done successfully. Please click OK.
Press the power switch to restart the system. About 1.5 minutes later, the Wizard window will pop up again.
4. The recommended monitor resolution for SMR is 1280x1024. Click Open Resolution Tool to change the
resolution setting.
Note: If you need to connect remote PC(s) to the SMR server within a private LAN, please
refer to Port Forwarding and Start the VMS Client section in SMR user manual for more
details.
Click Login after the password is entered.
5 Powering up S MR
1. Attach the power cable to the power socket (blue rectangles).
7
2. Press the power switch (blue circle).
Install Wizard
When you run the SMR series for the first time, you need to go through the following steps within the
Quick Install Wizard after logging in.
2
3. When turned on, the service LED
should remain off while the rest
of the status LEDs on the front
panel should light up green to
indicate normal operation.
1.Make sure the hard drives are inserted into the SMR case. Click Next to continue.
2. Click Storage Manager to do RAID configuration.
1
RS 232/485
Choose Single Display as the operate mode and monitor as the display selection in Primary Device.
Change the screen resolution in Display Settings. Click OK to finish.
Service LED: Off
Power LED: Green
Cooling fan LED: Green
Thermal LED: Green
System fault LED: Green
Click Next to continue.
5. The default password for SMR login is admin. If you want to change the password, please enter a new
one in both the blanks of New Password and Confirm.
/4
2/3