1
useful standalone tool, it is integrated into SystemImager so that its use is transparent to the user.
So while you will need to install SystemConfigurator, you don't need to learn the details of
SystemConfigurator to get started using SIS. Consequently, this section focuses on SystemImager.
Since SystemImager uses client-server architecture, you will need to set up two machines initially
before you can begin cloning systems. The image server manages the installation, holds the clone
image, and usually provides other needed services such as DHCP. You will also need to set up the
model node or golden client. Once you have created the golden client, its image is copied to the
server and can then be installed on the remaining machines within the cluster.
The installation of SystemImager can be divided into four multistep phases-setting up the image
server, setting up the golden client, transferring the image to the image server, and copying the
image to the remaining nodes in the cluster. Each of these phases is described in turn. If you
installed OSCAR, this setup has already been done for you. However, OSCAR users may want to skim
this material to get a better idea of how OSCAR works and can be used.
8.2.3.1 Image server setup
In setting up the image server, you will need to select a server, install Linux and other system
software as needed, install the SystemImager software on the server, and determine both how you
will assign IP addresses to clients and how you will start the download.
You'll want to take care in selecting your server. Typically, the SystemImager server will also act as
the head node for your cluster and will provide additional network services such as DHCP. While it is
possible to distribute some of this functionality among several machines, this isn't usually done and
won't be discussed here. If you already have a server, this is a likely choice provided it has enough
space.
Unlike g4u, the images SystemImager creates are stored as uncompressed directory trees on the
server. This has a number of advantages. First, it works nicely withrsync. And as a live filesystem,
you can chroot to it and make changes or even install packages (if you are a brave soul). You'll only
copy useful files, not unused sectors. While this approach has a number of advantages, even a single
image can take up a lot of space. Heterogeneous clusters will require multiple images. Taken
together, this implies you'll want a speedy machine with lots of disk space for your server.
Because of dependencies, you should install all of SIS even if you plan to use only SystemImager.
You have a couple of choices as to how you do this. There is a Perl installation script that can be
downloaded and run. It will take care of downloading and installing everything else you need. Of
course, you'll need Internet access from your cluster for this to work. Alternatively, you can download
DEB or RPM packages and install. Downloading these packages and burning them onto a CD-ROM is
one approach to setting up an isolated cluster. This chapter describes the installation process using
RPM packages.
Since SIS supports a wide variety of different Linux releases, you'll need to select the correct
packages for your distribution, and you'll need a number of packages to install SystemImager. These
can be downloaded from SourceForge. Go to http://sisuite.sourceforge.net and follow the links to
SystemConfigurator, SystemImager, and SystemInstaller, as needed, to download the individual
packages. If in doubt, you can read the release notes for details on many of the packages.
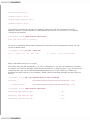
There may be additional dependencies that you'll also need to address. For a simple Red Hat install,
you'll need to install the following packages, if they are not already on your system, in this order: