1
Appendix I
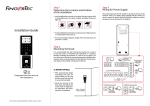
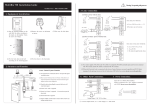
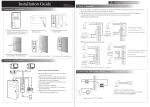
Power Supply & Door Lock System Wiring Diagrams
Appendix II
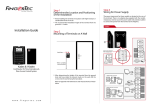
Terminal Dimensions and Measurements
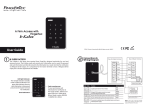
Door Lock Connectors
Diagram1 • Normally Close (NC)
WIRING PORT USAGE
NC2
COM2
NO2
NC1
COM1
NO1
BUT
+ DC12V
_ Electronic Door
Lock (Type NC)
NO1
NC1
2 Emergency
Break Glass
3 (Type NC)
A Overwrite
Keyswithch
C (Type NC)
GND
Push Release
Button
SEN
GND
COM1
DC12V 3A
Power Supply
+12V
NO2
Diagram 2 • Normally Open (NO)
COM2
NC2
COM2
NO2
NC1
COM1
NO1
BUT
+ DC12V
_ Electronic Door
Lock (Type NO)
1 Emergency
Break Glass
3 (Type NO)
B Overwrite
Keyswithch
D (Type NO)
GND
SEN
GND
Push Release
Button
DC12V 3A
Power Supply
+12V
*Door Sensor, Alarm, Doorbell.
Doorbell
NC2
BEEL-
COM2
BEEP
NO2
GLED
NC1
RLED
COM1
INWD0
NO1
INWD1
BUT
GND
SEN
GND
+12V
Use either Type NO or Type NC alarm device.
Dry Contact
(Independent power supply for door lock)
• NO type door lock (NO1-COM)
• NC type door lock (NC1-COM)
Power Contact
(Using power from terminal to power on door lock)
• COM1 - +12V
Alarm System
NO Type – NO2 – COM2
NC Type – NC2- COM2
NC2
SEN
GND
Door Sensor (SEN-GND)
Release Button(BUT-GND)
BUT
Bell+
Bell-
Door Bell
The terminal will trigger the alarm output (NO or NC)
for the following situations:
• Door forced open (A door sensor must first be installed)
Diagram 3 • Other Accessories
BEEL+
Dry Contact
(Independent power supply for door lock)
• NO type door lock (NO1-COM)
• NC type door lock (NC1-COM)
Power Contact
(Using power from terminal to power on door lock)
• NO type door lock (NO-GND)
• NC type door lock (NC-GND)
Alarm Device
Type NC dry
contact
Alarm Device
Type NO dry
contact
Door Sensor
DC12V 3A
Power Supply
• Door open time out (A door sensor must first be installed)
• Terminal has been illegally dismantled
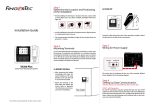
Front View of i-Kiosk 100