1
HDTV Digital QAM
PHDQ 1000 ASI LAN
KLASSE
PHDQ 1001
English
CLASS
GSS
Grundig SAT Systems GmbH
Beuthener Strasse 43
D-90471 Nuremberg
Phone:
Fax:
E-mail:
Internet:
+49 (0) 911 / 703 8877
+49 (0) 911 / 703 9210
info@gss.de
http://www.gss.de
Contents
1 Safety regulations .....................................................................................................4
2 General information .................................................................................................4
2.1 Packing contents ..........................................................................................4
2.2 Meaning of the symbols used ........................................................................5
2.3 Technical data .............................................................................................5
2.4 Description .................................................................................................6
2.4.1 Input signal path “INROUTE” ..............................................................6
2.4.1.1 Menu setting “A+ASI = 1 B+ASI = 2”...................................6
2.4.1.2 Menu setting “A+B+ASI = 1 ASI = 2”...................................6
2.4.2 Output signal path “OUTROUTE” ........................................................7
2.4.2.1 Menu setting “ASI => ASI” ....................................................7
2.4.2.2 Menu setting “1 => ASI ASI => MA” ...................................7
2.4.2.3 Menu setting “2 => ASI ASI => MB” ....................................7
2.4.3 General ...........................................................................................8
2.5 Software query............................................................................................8
2.6 How the TPS module works ...........................................................................9
2.7 Explanation of the term “symbol rate” ..........................................................10
3 Assembly ............................................................................................................... 11
3.1 Installing the cassette..................................................................................11
3.2 EMC regulations ........................................................................................11
3.3 Connecting the cassette ..............................................................................12
3.4 Retrofitting a CA module ............................................................................13
4 The control panel at a glance .................................................................................. 14
4.1 Menu items ...............................................................................................14
4.2 Control panel ............................................................................................14
5 Programming ......................................................................................................... 15
5.1 Preparation ...............................................................................................15
5.2 Notes on level setting .................................................................................15
5.3 Programming procedure .............................................................................16
5.3.1 Channel strips “A” (without CA module) and “B”.................................16
5.3.2 Channel strip “A” with CA module ....................................................19
5.4 Programming the cassette ..........................................................................20
Selecting the cassette .................................................................................20
Selecting the input signal path .....................................................................21
Selecting the output signal path ...................................................................21
Setting the ASI transfer rate .........................................................................22
Setting the ASI options ...............................................................................23
Selecting the channel strip ..........................................................................24
Selecting channel / frequency setting ...........................................................24
Setting the output channel ...........................................................................25
Setting the output frequency ........................................................................25
Switching the modulator off or on ................................................................26
Adjusting the output levels of the channel strips .............................................26
-2-
PHDQ 1000 ASI LAN / PHDQ 1001
Setting the LNB oscillator frequency .............................................................27
Setting the input symbol rate .......................................................................28
Setting the DVB mode ................................................................................28
Setting the input frequency ..........................................................................28
Testing the signal to noise ratio ....................................................................29
Setting the station filter ...............................................................................31
Setting the QAM modulation ......................................................................35
Inverting the user signal ..............................................................................35
Setting stuffing...........................................................................................36
Setting a substitute signal in the case of an incorrect input signal ....................37
Network Information Table (NIT) ..................................................................38
Network/operator identification ..................................................................39
Deleting a PID ...........................................................................................40
Renaming a PID.........................................................................................40
Saving settings ..........................................................................................41
5.4.1 Operation with a CA module ............................................................41
Setting the encoding (only PHDQ 1001) ............................................. 41
Setting the PID monitoring ................................................................42
Configuring the CA module ..............................................................43
Setting the station filter .....................................................................44
6 Final procedures .....................................................................................................46
7 Channel and frequency tables .................................................................................47
-3-
PHDQ 1000 ASI LAN / PHDQ 1001
1
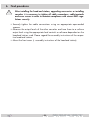
Safety regulations
Caution
UÊÃÃiLÞ]Ê ÃÌ>>ÌÊ >`Ê ÃiÀÛV}Ê Ã
Õ`Ê LiÊ V>ÀÀi`Ê ÕÌÊ LÞÊ >ÕÌ
ÀÃi`Ê
electricians.
UÊ-ÜÌV
ÊvvÊÌ
iÊ«iÀ>Ì}ÊÛÌ>}iÊvÊÌ
iÊÃÞÃÌiÊLivÀiÊLi}}ÊÜÌ
Ê>ÃÃiLÞÊ
or service work or pull out the mains plug.
UÊ ÊÌÊ«iÀvÀÊÃÌ>>ÌÊ>`ÊÃiÀÛViÊÜÀÊ`ÕÀ}ÊÌ
Õ`iÀÃÌÀð
UÊÃÌ>ÊÌ
iÊÃÞÃÌiÊÃÊÌÊÜÊÌÊLiÊ>LiÊÌÊÛLÀ>Ìio
Ê Ê Ê>Ê`ÕÃÌvÀii]Ê`ÀÞÊiÛÀiÌ
-Ê ÊÊÃÕV
Ê>Ê>iÀÊÌ
>ÌÊÌÊÃÊ«ÀÌiVÌi`ÊvÀÊÃÌÕÀi]ÊvÕiÃ]Êë>Ã
}ÊÜ>ÌiÀÊ>`Ê
dampness
- somewhere protected from direct sunlight
- not within the immediate vicinity of heat sources
- in an ambient temperature of -20 °C to +50 °C.
UÊÃÕÀiÊÌ
>ÌÊÌ
iÊ
i>`i`ÊÃÌ>ÌÊÃÊ>`iµÕ>ÌiÞÊÛiÌ>Ìi`°Ê
Do not cover the ventilation slots.
UÊiÜ>ÀiÊvÊÃ
ÀÌÊVÀVÕÌÃÊ
UÊ Ê>LÌÞÊÃÊ>VVi«Ìi`ÊvÀÊ>ÞÊ`>>}iÊV>ÕÃi`ÊLÞÊv>ÕÌÞÊViVÌÃÊÀÊ>«propriate handling.
UÊ "LÃiÀÛiÊÌ
iÊÀiiÛ>ÌÊÃÌ>`>À`Ã]ÊÀi}Õ>ÌÃÊ>`Ê}Õ`iiÃÊÊÌ
iÊÃÌ>>ÌÊ>`Ê
operation of antenna systems.
UÊ>ÀÌ
ÊÌ
iÊSAT receiver in accordance with DIN EN 50083-1 / EN 60728-11
>`Ê6ÊänxxÊi>ÀÌ
i`]ÊiµÕ«ÌiÌ>ÊL`}®°Ê
U For further information please read the assembly instructions for the headend station used.
Take action to prevent static discharge when working on the device.
2
General information
2.1 Packing contents
1
2
1
1
Cassette PHDQ 1000 ASI LAN or PHDQ 1001
HF cables
CD (assembly instructions)
Brief assembly instructions
-4-
PHDQ 1000 ASI LAN / PHDQ 1001
2.2 Meaning of the symbols used
Important note
—>
UÊ
General note
Ê
Ê
*iÀvÀ}ÊÜÀÃ
2.3 Technical data
The devices meet the following EU directives:
ÓääÈÉxÉ
]ÊÓää{É£änÉ
The product fulfils the guidelines and standards for CE labelling.
HF input
ÀiµÕiVÞÊÀ>}i\ÊÊ
iÛiÊÀ>}i\Ê
ÊÊ
DVB-S modes:
DVB-S2 modes:
-ÞLÊÀ>ÌiÊ6-\Ê Ê
-ÞLÊÀ>ÌiÊ6-Ó\ÊÊ
Ê Ê
Ê
Ê
Ê
ÓxÊoÊÓ£xäÊâ
ÈäÊ`6ÊoÊnäÊ`6
DVB-S 1/2 ]Ê2/3 ]Ê3/4 ]Ê5/6 ]Ê7/8
QPSK 1/2 ]Ê3/5 ]Ê2/3 ]Ê3/4 ]Ê4/5 ]Ê5/6 ]Ê8/9 ]Ê9/10
8PSK 3/5 ]Ê2/3 ]Ê3/4 ]Ê5/6 ]Ê8/9 ]Ê9/10
+*-\Ê Ê ÓÊoÊ{xÊ-ÞLÉÃ
+*-\Ê £äÊoÊÎäÊ-ÞLÉÃ
n*-\Ê £äÊoÊΣÊ-ÞLÉÃ
HF output
>iÃ\Ê
ÊÊ
ÀiµÕiVÞÊÀ>}i\ÊÊ
Output level:
Output impedance:
-Ó£ÊoÊ
È
{Ó°äÊâÊoÊnÈä°äÊâÊ
typ. 97 dBµV
75
Connections
SAT inputs:
HF output:
-Ê«ÕÌ\Ê
ÊÊ
-ÊÕÌ«ÕÌ\Ê
ÊÊ
Connection strip (10-pin):
RS-232 socket:
Conditional access:
2 F sockets
1 IEC socket
£Ê ÊÃViÌ]ÊÇxÊ
£Ê ÊÃViÌ]ÊÇxÊ
for supply voltages and control circuits
serial interface for software update
several channels can be decoded.
-5-
PHDQ 1000 ASI LAN / PHDQ 1001
2.4 Description
/
iÊ `ÕLiÊ ÌÀ>Ã`Õ>ÌÀÊ V>ÃÃiÌÌiÊ ÃÊ >Ê +*-VÛiÀÌiÀ]Ê Ü
V
Ê VÛiÀÌÃÊ >Ê
stations modulated according to DVB-S / DVB-S2 standard into two QAM-modulated cable signals. The cassette has two digital SAT IF inputs and one HF output.
Additionally it is equipped with an ASI input and an ASI output (ASI – Asynchronous Serial Interface acc. DIN EN 50083-9).
The transport stream fed via the ASI socket can be inserted into the transport
streams of the receiving stages via the TPS module. The signal path is set in the
menu items input signal path “INROUTE” and output signal path ”OUTROUTE”.
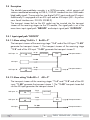
2.4.1 Input signal path “INROUTE”
2.4.1.1 Menu setting “A+ASI = 1
B+ASI = 2”
The transport streams of the receiving stage “TS A” and of the ASI input “TS ASI”
generate the transport stream 1. The transport streams of the receiving stage
“TS B” and of the ASI input “TS ASI” generate the transport stream 2.
SAT input ”A“
Receiving stage
"A"
TS A
CA module
TPS
Transport stream 1
TPS
Transport stream 2
TS ASI
ASI input SAT input ”B“
Receiving stage
"B"
TS B
2.4.1.2 Menu setting “A+B+ASI = 1
ASI = 2”
The transport streams of the receiving stages “TS A” and “TS B” and of the ASI
input “TS ASI” generate the transport stream 1. The “TS ASI” transport stream fed
via the ASI input generates the transport stream 2.
SAT input ”A“
Receiving stage
"A"
SAT input ”B“
Receiving stage
"B"
TS A
CA module
TS B
TPS
TS ASI
Transport stream 1
Transport stream 2
ASI input -6-
PHDQ 1000 ASI LAN / PHDQ 1001
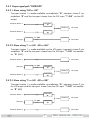
2.4.2 Output signal path “OUTROUTE”
2.4.2.1 Menu setting “ASI => ASI”
Transport stream 1 is made available via modulator “A»]ÊÌÀ>ëÀÌÊÃÌÀi>ÊÓÊÛ>Ê
modulator “B” and the transport stream from the ASI input “TS ASI” via the ASI
output.
Modulator
"A"
Transport stream 1
Combiner
Modulator "B"
Transport stream 2
ASI input
HF output
TS ASI
2.4.2.2 Menu setting “1 => ASI
ASI output
ASI => MA”
/À>ëÀÌÊÃÌÀi>Ê£ÊÃÊ>`iÊ>Û>>LiÊÛ>ÊÌ
iÊ-ÊÕÌ«ÕÌ]ÊÌÀ>ëÀÌÊÃÌÀi>ÊÓÊÛ>Ê
modulator “B” and the transport stream from the ASI input “TS ASI” via modulator “A” (MA).
Transport stream 1
ASI input
ASI output
TS ASI
Modulator
"A"
Combiner
HF output
Modulator "B"
Transport stream 2
2.4.2.3 Menu setting “2 => ASI
ASI => MB”
Transport stream 1 is made available via modulator “A»]ÊÌÀ>ëÀÌÊÃÌÀi>ÊÓÊÛ>Ê
the ASI output and the transport stream from the ASI input “TS ASI” via modulator “B” (MB).
Modulator
"A"
Transport stream 1
Combiner
ASI input
TS ASI
HF output
Modulator "B"
Transport stream 2
ASI output
-7-
PHDQ 1000 ASI LAN / PHDQ 1001
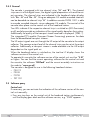
2.4.3 General
The cassette is equipped with two channel strips (“A” and “B”). The channel
ÃÌÀ«ÃÊVÃÃÌÊvÊÌ
iÊ`}Ì>ÊÌÕiÀÃ]ÊÌ
iÊ`}Ì>ÊÃ}>Ê«Ài«>À>ÌÊÕÌÃÊ>`ÊÌ
iÊÕÌput converter. The channel strips are indicated in the head-end station display
with “Bx …A” and “Bx …B”. Using an adequate CA module encoded channels
can be decoded via channel strip “A”. In addition cassette PHDQ 1001 is able
to encode uncoded channels via an adequate CA module. The control of the
cassette takes place via the control unit of the head-end station.
Two LEDs indicate if the respective channel strip is switched on (LED illuminates)
ÀÊvv]Ê>`Ê>ÃÊ«ÀÛ`iÊ>Ê`V>ÌÊvÊÌ
iÊÃ}>ʵÕ>ÌÞÊL>Ãi`ÊÊÌ
iÀÊVÕÀ°Ê
Additionally the quality of the transport stream received is displayed (“CN…”).
The integrated TPS module (Transport Stream Processing) processes the data
from the demodulated transport streams.
The HF output signals are sent through the HF output of the cassette to the output
collector. The common output level of the channel strips can be set at the output
collector. Additionally a transport stream is made available via the ASI output
dependent on the signal path set.
7
iÊÌ
iÊ
i>`i`ÊÃÌ>ÌÊÃÊÃÜÌV
i`Ê]ÊÌ
iÊÌÜiÊ
Ê`ë>ÞÊÃ
ÜÃÊÌ
iÊ
software version of the control unit.
To operate this cassette the software version of the control unit must be “V 41”
or higher. You can find the current operating software for the control unit and
Ì
iÊV>ÃÃiÌÌi]ÊÌ
iÊÃvÌÜ>ÀiʺBE-Flash” and the current assembly instructions on
the website “www.gss.de”.
The cassette is designed for use in the following head-end stations:
– PSU 12
– PSU 8
– PGT 8
– PST 19-1
2.5 Software query
Control unit
vÊiViÃÃ>ÀÞ]ÊÞÕÊV>Ê>VÌÛ>ÌiÊÌ
iÊ`V>ÌÊvÊÌ
iÊÃvÌÜ>ÀiÊÛiÀÃÊvÊÌ
iÊVtrol unit manually:
UÊ*ÀiÃÃÊ>ÞÊÌÜÊiÞÃÊÊÌ
iÊVÌÀÊÕÌÊvÊÌ
iÊ
i>`i`ÊÃÌ>ÌÊÃÕÌ>iÕÃÞÊ
ÕÌÊÌ
iÊ`ë>ÞÊ}iÃÊ`>ÀÊ>`ÊÌ
iÊÃvÌÜ>ÀiÊÛiÀÃ]Êi°}°ÊºV 41” appears.
-8-
PHDQ 1000 ASI LAN / PHDQ 1001
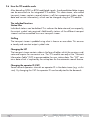
2.6 How the TPS module works
vÌiÀÊ`iV`}Ê+*-ÊÀÊn*-`Õ>Ìi`ÊÃ}>Ã]ÊÌ
iÊ`i`Õ>Ìi`Ê`>Ì>ÊÃÌÀi>Ê
V>ÊLiÊ>VViÃÃi`ÊÛ>ÊÌ
iÊÌi}À>Ìi`Ê/*-Ê`Õi°Ê/
ÃÊ`>Ì>ÊÃÌÀi>]Ê>ÃÊV>i`Ê
ÌÀ>ëÀÌÊÃÌÀi>]ÊVÌ>ÃÊÃiÛiÀ>ÊÃÌ>ÌÃÊÊ>ÊÌ
iÀÊV«iÌÃÊÛ`i]Ê>Õ`]Ê
`>Ì>Ê>`ÊÃiÀÛViÊvÀ>Ì®]ÊÜ
V
ÊV>ÊLiÊV
>}i`ÊÕÃ}ÊÌ
iÊ/*-Ê`Õi°
The individual functions
Station filter
`Û`Õ>ÊÃÌ>ÌÃÊV>ÊLiÊ`iiÌi`°Ê/
ÃÊÀi`ÕViÃÊÌ
iÊ`>Ì>ÊÀ>ÌiÊ>`]ÊVÃiµÕiÌÞ]Ê
the output symbol rate required. Additionally stations of the different transport
streams can be assembled to a new transport stream.
Stuffing
/
iÊÌÀ>ëÀÌÊÃÌÀi>ÊÃÊ«>``i`ÊÕÃ}ÊÜ
>ÌÊÃÊÜÊ>ÃÊâiÀÊ`>Ì>°Ê/
ÃÊiÃÕÀiÃÊ
a steady and constant output symbol rate.
Changing the NIT
The transport stream contains data in the form of tables which the receivers evaluate and require for convenient use. The TPS module can adjust the “Network
Information Table” (NIT) to accommodate the new station data. The “NIT” contains data which is required by the set-top box for the automatic search feature.
Changing the operator ID (CAT)
Some network operators transmit an operator ID in the data stream (e.g. visAvision). By changing the CAT the operator ID can be adjusted to the demands.
-9-
PHDQ 1000 ASI LAN / PHDQ 1001
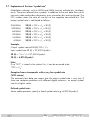
2.7 Explanation of the term “symbol rate”
Modulation schemes such as QPSK and QAM transmit multiple bits simultaneously. These are referred to as symbols. In addition to the user data flow which
ÌÀ>ÃÌÃÊÛ`iÊ>`Ê>Õ`ÊvÀ>Ì]ÊiÀÀÀÊVÀÀiVÌÊLÌÃÊ>ÀiÊÌÀ>ÃviÀÀi`°Ê/
iÊ
FEC number states the ratio of user bits to the complete transmitted bits. The
output symbol rate is calculated as follows:
256-QAM:
128-QAM:
64-QAM:
32-QAM:
16-QAM:
4-QAM:
SR (A) = FEC x 1/4 x SR (E)
SR (A) = FEC x 2/7 x SR (E)
SR (A) = FEC x 1/3 x SR (E)
SR (A) = FEC x 2/5 x SR (E)
SR (A) = FEC x 1/2 x SR (E)
SR (A) = FEC x 1/1 x SR (E)
Example:
"ÕÌ«ÕÌÊÃÞLÊÀ>ÌiÊÈ{+] FEC= 3/4]
«ÕÌÊÃÞLÊÀ>ÌiÊ-,Ê®ÊrÊÓÇ]xääÊkSymb/s
SR (A) = 3/4 x 1/3ÊÝÊÓÇ]xääÊkSymb/s
SR (A) = 6,875 kSymb/s
Note:
vÊʺ
»ÊÃÊÃÌ>Ìi`ÊÊÌ
iÊÃÌ>ÌÊÃÌÃ]ÊÌÊV>ÊLiÊ>ÃÃÕi`ÊÌÊLi
“FEC = 3/4”.
Reception from a transponder with a very low symbol rate
(SCPC station)
The extremely low data rate means that the output symbol rate is very low. If
Ì
iÀiÊ>ÀiÊÀiVi«ÌÊ«ÀLiÃÊÜÌ
Ê`vviÀiÌÊ`}Ì>ÊÀiViÛiÀÃ]ÊÃiÌÊÕÌ«ÕÌÊÃÞLÊ
rate to a higher value.
Defined symbol rates
-iÊV>LiÊ«iÀ>ÌÀÃÊëiVvÞÊ>ÊvÝi`ÊÃÞLÊÀ>ÌiÊi°}°ÊÈ]ääÊ-ÞLÉî°Ê
- 10 -
PHDQ 1000 ASI LAN / PHDQ 1001
3
Assembly
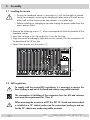
3.1 Installing the cassette
– Ensure the head-end station is mounted so it will not be able to vibrate.
Û`]ÊvÀÊiÝ>«i]ÊÕÌ}ÊÌ
iÊ
i>`i`ÊÃÌ>ÌÊÌÊ>ÊvÌÊÃ
>vÌÊÀÊ>ÞÊ
other wall or floor construction that vibrates in a similar way.
– Before installing or changing a cassette unplug the power cable from the
mains power socket.
UÊ,iÛiÊÌ
iÊv>ÃÌi}ÊÃVÀiÜÃÊ1 of an unoccupied slot from the bracket of the
head-end station.
UÊÃiÀÌÊÌ
iÊV>ÃÃiÌÌiÊÊÌ
ÃÊÃÌÊ>`Ê«ÕÃ
ÊÌÊÌÊÌ
iÊ
ÕÃ}°
UÊ}ÊÌ
iÊV>ÃÃiÌÌiÊ>`Ê>««ÞÊÃ}
ÌÊ«ÀiÃÃÕÀiÊÌÊViVÌÊÌÊÌÊÌ
iÊViVÌÃÊvÊ
the board and the HF bus bar.
UÊ>ÃÌiÊÌ
iÊV>ÃÃiÌÌiÊÜÌ
ÊÌ
iÊÃVÀiÜÃÊ1.
ACHTUNG!
Vor dem Kassettenwechsel
unbedingt denNetzstecker ziehen.
KASSETTE
KASSETTE
KASSETTE
KASSETTE
KASSETTE
KASSETTE
KASSETTE
KASSETTE
KASSETTE
KASSETTE
KASSETTE
KASSETTE
0°
AUSGANG
max. 90 dBµV
CAUTION!
Before changing cassettes remove
mains plug.
Grundig SAT Systems
3.2 EMC regulations
KLASSE
To comply with the current EMC regulations, it is necessary to connect the
lines leading in and out of the head-end station using cable terminals.
CLASS
The attenuation of shielding of the connection lines for ASI and antenna
must meet the requirements for “Class A”.
When mounting the cassette in a PGT 8 or PST 19-1 head-end station which
is installed in a 19" cabinet, make sure the connections leading in and out
for the 19" cabinet are made using cable terminals.
- 11 -
PHDQ 1000 ASI LAN / PHDQ 1001
UÊÃiÀÌÊÌ
iÊÀiµÕÀi`ÊÕLiÀÊvÊV>LiÊÌiÀ>ÃÊÊÌ
iÊ«i}ÃÊ«ÀÛ`i`ÊÊÌ
iÊ
head-end station or in the 19" cabinet.
—> Cable terminals are not included in the scope of delivery.
Tighten the nut on the cable terminal until the teeth on the lock washer have
penetrated the exterior coating and a good connection is made between the
housing and cable terminal.
3.3 Connecting the cassette
SAT input "A"
ASI input
Slot for a
CA module
SAT input "B"
LAN
ASI output
RS 232
UÊPlug the SAT input cables into the SAT input sockets “SAT input A” 2 (channel
strip “A”) and “SAT input B” 1 (channel strip “B”).
—> LAN socket 3 (intended for additional functions)
UÊ iVÌÊÌ
iÊ-ÊÃViÌÃÊ4 and 5.
U Connect the head-end station to the mains power supply.
6
7
Slot for a CA module
“RS-232“ socket
The operating software of the cassette can be updated via the 9-Pin D-SUB
socket “RS232” using a PC or notebook and the software “BE-Flash”.
You can find the current operating software on the website “www.gss.de”.
- 12 -
PHDQ 1000 ASI LAN / PHDQ 1001
3.4 Retrofitting a CA module
The cassette is equipped with a common interface. It allows you to connect
a CA module for various encryption systems and service providers. Encoded
channels can only be decoded with a CA module suitable for the encoding
system and the corresponding smart card. The smart card contains all the infor>ÌÊvÀÊ>ÕÌ
ÀÃ>Ì]Ê`iV`}Ê>`ÊÃÕLÃVÀ«Ì°
Ê
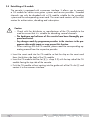
Caution
– Check with the distributor or manufacturer of the CA module to be
used to ensure that it is suitable for decoding several channels.
– The hardware and software of this cassette have been thoroughly prepared and tested.
– Any changes made by programme providers to the structures in the programme data might impair or even prevent this function.
qÊ 7
iÊÜÀ}ÊÜÌ
ÊÌ
iÊ
Ê`Õi]Ê«i>ÃiÊÀi>`ÊÌ
iÊVÀÀië`}Ê«erating manual from the respective provider.
UÊÃiÀÌÊÌ
iÊÃ>ÀÌÊV>À` into the CA module so that the chip on the smart card
faces the thicker side (top) of the CA module.
UÊÃiÀÌÊÌ
iÊ
Ê`ÕiÊÌÊÌ
iÊÃÌ 6 (s. chap. 3.3) with the top side of the CA
module facing the top side of the cassette.
UÊ*ÕÃ
ÊÌ
iÊ
Ê`ÕiÊÜÌ
ÕÌÊV>Ì}ÊÌÊÌ
iÊ}Õ`iÊÀ>ÃÊvÊÌ
iÊ
ÊÃÌÊ6 and
contact it to the common interface.
- 13 -
PHDQ 1000 ASI LAN / PHDQ 1001
4
The control panel at a glance
4.1 Menu items
Programme the cassette using the buttons on the control unit of the head-end station. The two-line display of the control unit then shows the menus.
The parameters and functions to be set are underlined.
Use the
key to select the following main menu items:
– Input signal path
– Output signal path
BE-Remote
V41
– Channel strip
PROFESSIONAL
– Selecting channel / frequency setting
– Output channel / output frequency
– Output level
– LNB oscillator frequency
– Input symbol rate
– Input frequency
– Station filter
– QAM modulation
– Stuffing
– Substitute signal
– Network Information Table (NIT)
– Network/operator identification
– Deleting a PID
– Renaming a PID
4.2 Control panel
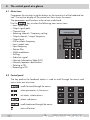
The key pad on the head-end station is used to scroll through the menus and
menu items one at a time:
scrolls forward through the menus.
select parameters in the menus.
ÃiÌÊÛ>ÕiÃ]ÊÌ>ÌiÊ>VÌð
selects sub-menus.
scrolls backward through the menus.
saves all entries.
- 14 -
PHDQ 1000 ASI LAN / PHDQ 1001
5
Programming
5.1 Preparation
UÊ
iVÌÊÌ
iÊÌiÃÌÊÀiViÛiÀÊÌÊÌ
iÊÊÕÌ«ÕÌÊÀÊÌ
iÊÌiÃÌÊÕÌ«ÕÌÊvÊÌ
iÊ
i>`i`Ê
station.
UÊ-iÌÊÌ
iÊÕÌ«ÕÌÊV
>iÊÉÊÕÌ«ÕÌÊvÀiµÕiVÞÊvÊÌ
iÊcassette (s. page 25) and
adjust the TV test receiver to this channel.
UÊSwitch on the channel strip (modulator) if necessary (s. page 26). For each
V
>iÊ ÃÌÀ«]Ê Ì
iÀiÊ ÃÊ >Ê ÃÌ>ÌÕÃÊ Ê Ü
V
Ê `V>ÌiÃÊ vÊ Ì
iÊ V
>iÊ ÃÌÀ«Ê ÃÊ
switched on.
Status LED Channel strip
"B"
Status LED Channel strip
"A"
UÊ>>ViÊÌ
iÊÕÌ«ÕÌÊiÛiÃÊvÊÌ
iÊV
>iÊÃÌÀ«ÃʺA” and “B” if the difference in
level is 1 dB (page 26).
5.2 Notes on level setting
In order to prevent interference within the head-end station and the cable sysÌi]ÊÌ
iÊÕÌ«ÕÌÊiÛiÊvÊÌ
iÊV>ÃÃiÌÌiÊÕÃÌÊLiÊ`iVÀi>Ãi`ÊLÞÊ£äÊ`ÊV«>Ài`ÊÌÊ
>>}ÕiÊV>ÃÃiÌÌiÃÊ>ÌÊÈ{Ê+]Ê>`ÊLÞÊ{Ê`ÊV«>Ài`ÊÌÊ>>}ÕiÊV>ÃÃiÌÌiÃÊ
at 256 QAM.
UÊi>ÃÕÀiÊÌ
iÊÕÌ«ÕÌÊiÛiÃÊvÊÌ
iÊÌ
iÀÊV>ÃÃiÌÌiÃÊ>`ÊÌÕiÊÌ
iÊÌÊ>ÊÕvÀÊ
output level using the appropriate level controls or software dependent on the
head-end station used. Please regard the assembly instructions of the respective head-end station.
- 15 -
PHDQ 1000 ASI LAN / PHDQ 1001
5.3 Programming procedure
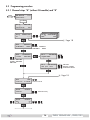
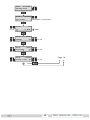
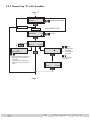
5.3.1 Channel strips “A” (without CA module) and “B”
Ein / On
BE–Remote
V 41
please wait …
t > 10 s
Bx 1A
TWIN-SAT
C5-12,S3-24
C07
+
Box 4
Bx 1A
TWIN-SAT
Böx 4
TWIN-SAT
Bx 5A
DVBT-DVBT
C5-12,S3-24
C07
C5-12,S3-24
C07
BD3
C09
DVBS2-TPM
V 1 – – –
A Page 18
Bx 4
INROUTE
A+B+ASI=1 Bx 4
1=>ASI ASI=2
A+ASI=1 B+ASI=2 /
A+B+ASI=1 ASI=2
Bx 4
OUTROUTE
ASI RATE
Ï/Å
108000 KBits ASI=>MA
1=>ASI ASI=>MA
2=>ASI ASI=>MB
ASI=>ASI
Bx 4
ASI OPTION
188 pos. cont. Ï / Å 188 / 204
positive / negativ
continuous / burst
B Page 18
Bx 4
LINE
Line A <= => Line B
Bx 4A
Ï/Å
Line A / Line B
OUTPUT
Channel
Bx 4A
S21
Channel / Freq.
OUTPUT
on
Ï/Å
on / off
- 16 -
PHDQ 1000 ASI LAN / PHDQ 1001
Bx 4A
LEVEL
0 dB
0 … -10 dB
Bx 4A
LNB
Ï/Å
SYMBOL
Ï/Å
10600 MHz
Ï/Å
Bx 4A
27500
Ï/Å
DVB-S Bx 4A
11836 -1.8
Bx 4A
Filter
DVB-S / DVB-S 2 …
FREQ
Bx 4A
CN 12
12.0 dB
PROGRAM
C/N
(+ 9.6) OK
Bx 4A TV +
off
Ï/Å
Bx 4B TV +
Ï/Å
TV +
Bx 4A
Ï/Å
Bx 4A
4 … 256
64-QAM
Kanalzug “A” mit CA-Modul Channel strip “A“ with CA module
QAM
normal
nächster Service (Programm) next service (station)
PROGRAM
Filter
ohne CA-Modul without CA module
Kanalzug “B” Channel strip “B“
nächster Service (Programm) next service (station)
Programme entfernen / hinzufügen
Removing / activating stations
01/10
. . . . .
nächster Service (Programm) next service (station)
Programme entfernen / hinzufügen
Removing / activating stations
02/19
SWF3
Å
Programme entfernen / hinzufügen
Removing / activating stations
01/10
Das Erste
ASI Anzeige: Signalqualität
Display: Signal quality
on
on / off
C
Page 19
D
Ï/Å
normal / inverse
- 17 -
PHDQ 1000 ASI LAN / PHDQ 1001
Bx 4A
STUFFING
Ï/Å
SR=6900 (6325)
Bx 4A
FAILURE
Null Packets
Null Packets … Single Carrier Bx 4A
on / off
Ï/Å
NIT
off
=> Make
Bx 4A
CAT-ID
0XDE00
Ï/Å
Ï/Å
off
Bx 4A
DROP
PID 0x0000
Ï/Å
Å Make
Bx 4A
on / off
Ï/Å
off
REMAP
0x0000 –> 0000
off
on / off
Page 16
Ï/Å
on / off
B
A
M
- 18 -
PHDQ 1000 ASI LAN / PHDQ 1001
5.3.2 Channel strip “A” with CA module
Page 17
C
Bx 4A
CA
scramble
scramble / descramble
scramble
only PHDQ 1001
descramble
Bx 4A
CA
PID Check
on
Bx 4A
M
CA
Menu <= Bx 4A 01/03 MENU on / off
=> Edit
X / 0 Ï
Å
Bx 4A TV X 04/09
. . . . Information *)
S
*) Die angezeigte Information ist abhängig vom verwendeten
CA-Modul. The information displayed is dependent on the CA module
used.
X – 0 – entschlüsselt decrypted
verschlüsselt encrypted
Ï/Å
nächster Service
next service
Bx 4A
Menu <= CA
=> Edit
D
Page 17
- 19 -
PHDQ 1000 ASI LAN / PHDQ 1001
5.4 Programming the cassette
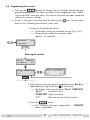
—> Pressing the
button for longer than 2 seconds cancels the programming procedure. This takes you back to the programme item “Selecting the cassette” from any menu. Any entries that have not been saved are
reset to the previous settings.
—> Entries in the menus can be saved by pressing the
key. You are taken
back to the “Selecting the cassette” menu item.
Ein / On
BE–Remote
UÊ-ÜÌV
ÊÊÌ
iÊ
i>`i`ÊÃÌ>Ì
—> The display shows the software version (e.g. V 41)
—> The processor reads the cassettes‘ data
(approx. 10 seconds).
_
V 41
please wait …
t > 10 s
Selecting the cassette
Bx 1A
TWIN-SAT
C5-12,S3-24
C07
+
Box 4
V 1 DVBS2-TPM
– – –
Bx 1A
TWIN-SAT
Böx 4
TWIN-SAT
Bx 5A
DVBT-DVBT
C5-12,S3-24
C07
C5-12,S3-24
C07
BD3
C09
A
UÊ-iiVÌÊÌ
iÊcassette you want to programme (e.g. Box 4) by
repeatedly pressing the button
if necessary.
—> The display shows e.g. the menu “Box 4 DVBS2-TPM“:
“Box 4”
stands for slot 4
”DVBS2-TPM” Type of cassette
”V 1”
Software version of the cassette
UÊ*ÀiÃÃÊÌ
iÊ
button.
—> The “Selecting the input signal path” – “INROUTE”
menu is activated.
- 20 -
PHDQ 1000 ASI LAN / PHDQ 1001
Selecting the input signal path
In this menu you define the signal path of the input transport
streams.
Menu setting “A+ASI = 1 B+ASI = 2”
ðÊV
>«°ÊÓ°{°£°£]Ê«>}iÊÈ®°
Menu setting “A+B+ASI = 1
ðÊV
>«°ÊÓ°{°£°Ó]Ê«>}iÊÈ®°
Bx 4
ASI = 2”
INROUTE
A+B+ASI=1 ASI=2
A+ASI=1 B+ASI=2 /
A+B+ASI=1 ASI=2
UÊ1ÃiÊÌ
iÊ
buttons to select the signal path wished.
UÊ*ÀiÃÃÊÌ
iÊ
button.
—> The “Selecting the output signal path” – “OUTROUTE”
menu is activated.
Selecting the output signal path
In this menu you define the signal path of the output transport
streams.
Menu setting “ASI => ASI”
Ê
ðÊV
>«°ÊÓ°{°Ó°£]Ê«>}iÊÇ®°
Menu setting “1 => ASI ASI => MA”
Ê
ðÊV
>«°ÊÓ°{°Ó°Ó]Ê«>}iÊÇ®°
Menu setting “2 => ASI ASI => MB”
Ê
ðÊV
>«°ÊÓ°{°Ó°Î]Ê«>}iÊÇ®°
Bx 4
1=>ASI OUTROUTE
ASI=>MA
Bx 4
ASI RATE
Ï/Å
108000 KBits 1=>ASI ASI=>MA
2=>ASI ASI=>MB
ASI=>ASI
UÊ1ÃiÊÌ
iÊ
Bx 4
ASI OPTION
Ï / Å 188 / 204
buttons to select the signal path wished.
- 21 -
PHDQ 1000 ASI LAN / PHDQ 1001
UÊvÊÞÕÊ`ÊÌÊÜ>ÌÊÌÊ`Ê-ÊÃiÌÌ}Ã]Ê«ÀiÃÃÊÌ
iÊ
button.
—> The “Selecting the channel strip” – “LINE” menu is
activated (page 24).
UÊ*ÀiÃÃÊÌ
iÊ
button.
—> The “Setting the ASI transfer rate” – “ASI RATE” menu
is activated.
Setting the ASI transfer rate
In this menu you set the transfer rate for the ASI component
connected.
For this setting please take the required information from the
documentation (technical data) of the ASI component to be
connected.
Bx 4
1=>ASI OUTROUTE
ASI=>MA
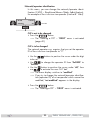
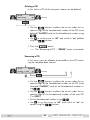
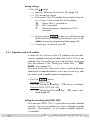
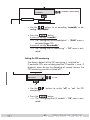
Bx 4
ASI RATE
Ï/Å
108000 KBits 1=>ASI ASI=>MA
2=>ASI ASI=>MB
ASI=>ASI
Bx 4
ASI OPTION
Ï / Å 188 / 204
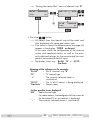
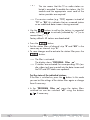
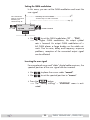
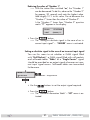
UÊ1ÃiÊÌ
i
buttons to place the cursor under the digits
to be set for the transfer rate then use the
buttons to
set the transfer rate wished.
UÊ*ÀiÃÃÊÌ
iÊ
button.
—> The “Setting the ASI options” – “ASI OPTION” menu is
activated.
- 22 -
PHDQ 1000 ASI LAN / PHDQ 1001
Setting the ASI options
Ê Ì
ÃÊ iÕÊ ÞÕÊ `iviÊ Ì
iÊ ÃâiÊ vÊ Ì
iÊ `>Ì>Ê «>ViÌÃ]Ê Ì
iÀÊ
polarity and the type of transmission.
For this setting please take the required information from the
documentation (technical data) of the ASI component to be
connected.
2=>ASI ASI=>MB
ASI=>ASI
Bx 4
ASI OPTION
188 pos. cont. Ï / Å 188 / 204
positive / negativ
continuous / burst
UÊ*ÀiÃÃÊÌ
iÊ
ÊLÕÌÌÃÊÌÊÃiÌÊÌ
iÊÃâiÊvÊÌ
iÊ`>Ì>Ê«>ViÌÃÊ
(“188” or “204” bits).
UÊvÊ Ì
iÊ «>ÀÌÞÊ vÊ Ì
iÊ `>Ì>Ê ÌÊ LiÊ ÌÀ>ÃÌÌi`Ê
>ÃÊ ÌÊ LiÊ
V
>}i`]Ê«ÀiÃÃÊÌ
i
buttons to place the cursor under “pos.” (positive – standard) and using the
buttons set to “neg.” (negative).
UÊ/ÊV
>}iÊÌ
iÊÌÞ«iÊvÊÌÀ>ÃÃÃÊ«ÀiÃÃÊÌ
i
buttons
to position the cursor under “cont.” (continuous – standard)
and using the
set to “burst”.
—> Setting “cont.”
The data packets of the user data are collected to a
great data packet in the transport stream.
—> Seting “burst”
The data packets of the user data are spaced out
evenly in the transport stream.
UÊ*ÀiÃÃÊÌ
iÊ
button.
—> The “Selecting the channel strip” – “LINE” menu is
activated.
- 23 -
PHDQ 1000 ASI LAN / PHDQ 1001
Selecting the channel strip
B
Bx 4
LINE
Line A <= => Line B
Ï/Å
Line A / Line B
UÊÞÊ«ÀiÃÃ}
select channel strip “A” (“Line A”) or select
channel strip “B” (“Line B”) by pressing the
button.
UÊ*ÀiÃÃÊÌ
iÊ
button.
—> The “Selecting channel / frequency setting” –
“OUTPUT” menu is activated.
Selecting channel / frequency setting
ÊÌ
ÃÊiÕ]ÊÞÕÊV>ÊÃiiVÌÊÌ
iÊV
>iÊÀÊvÀiµÕiÊVÞÊÃiÌÌ}Ê
for the adjustment of the HF output. The channel setting coviÀÃÊÌ
iÊÀ>}iÊvÊV
>iÃÊ-Ó£ÊoÊ
È]ÊÌ
iÊvÀiµÕiVÞÊÃiÌÌ}Ê
VÛiÀÃÊÌ
iÊÀ>}iÊvÀÊ{Ó°äÊâÊÌÊnÈä°äÊâ°
The QAM signal is normally transmitted with a bandwidth of
nÊâ°Ê/
ÃÊi>ÃÊÌ
>ÌÊÞÕÊV>ÊÞÊÕÃiÊÌ
iÊV
>i centre
frequency of the existing channel grid in the range of chaniÃÊ-Ó£ÊoÊ
ÈÊvÀiµÕiVÞÊ}À`ÊnÊâ®°Ê/
iÊ
,Êchannel
}À`Ê ÃÊ ÇÊâÊ Ê Ì
iÊ À>}iÊ vÊ Ì
iÊ ÜiÀÊ vÀiµÕiVÞÊ L>`ÃÊ
V
>iÃÊ
ÓÊoÊ-Óä®°Ê/
iÀivÀiÊÌ
iÊvÀiµÕiVÞÊÃiÌÌ}ÊÃÊÕÃi`Ê
here. If one uses the existing channel }À`ÊvÊÇÊâÊÊÌ
iÃiÊ
channel ranges]ÊÌ
ÃÊÜÊÀiÃÕÌÊÊÌiÀviÀiViÊÛiÀ>««}®Ê
ÜÌ
ÊÌ
iÊnÊâÊ+ÊÃ}>Ê«>V>}iÃ]ÊÌ
ÕÃÊV>ÕÃ}ÊÌÀ>Ãmission problems.
For programming in these channel ranges and in the frequenVÞÊÀ>}iÃÊLiÜÊÌ
i]ÊÜiÊÀiVi`ÊÃÌ>ÀÌ}ÊÜÌ
ÊV
>iÊ
-Ó£ÊÉÊÎäÈÊâÊ}}ÊL>VÊÊÃÌi«ÃÊvÊnÊâÊðÊvÀiµÕiVÞÊ
Ì>LiÊÊ«>}iÊ{Ç®]ÊÀÊÀi`ÕV}ÊÌ
iÊL>`Ü`Ì
ÊvÊÌ
iÊ+Ê
output signal by removing stations.
- 24 -
PHDQ 1000 ASI LAN / PHDQ 1001
Bx 4A
OUTPUT
Channel
Channel / Freq.
UÊ1ÃiÊ
to select channel setting “Channel” or frequency setting “Freq.”.
UÊ*ÀiÃÃÊÌ
iÊ
button.
—> The “Setting the output channel” or “Setting the output frequency” – “OUTPUT” menu is activated.
Setting the output channel
In this menu you set the output channel of the channel strip.
Additionally the modulator of the channel strip can be
switched off or on (page 26).
Bx 4A
S21
OUTPUT
on
Ï/Å
on / off
UÊ Use the
buttons to set the output channel.
Setting the output frequency
In this menu you set the output frequency of the channel strip
{Ó°äÊoÊnÈä°äÊâ®.
Additionally the modulator of the channel strip can be switched
off or on (page 26).
Ï/Å
Bx 4A
OUTPUT
466.00
on
UÊ1ÃiÊÌ
i
Ï/Å
on / off
buttons to place the cursor under the digit
- 25 -
PHDQ 1000 ASI LAN / PHDQ 1001
to be set for the frequency display then use
the output frequency wished.
to set
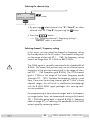
Switching the modulator off or on
UÊ/Ê ÃÜÌV
Ê vvÊ Ì
iÊ `Õ>ÌÀÊ «>ViÊ Ì
iÊ VÕÀÃÀÊ Õ`iÀÊ ºon”
using the
button and switch “off” the modulator of the
channel strip using the
buttons.
—> The switched off modulator is indicated by “ - - - “ in
the display.
—> The status LED is switched off (s. also page 15).
UÊvÊÌ
iÊ`Õ>ÌÀÊÃÊÃÜÌV
i`ʺoff” use the
it “on”.
to switch
UÊ*ÀiÃÃÊÌ
iÊ
button.
—> The “Adjusting the output levels of the channel strips”
– “LEVEL” menu is activated.
Adjusting the output levels of the channel strips
This menu item is used to set the output levels of the modulators of the channel strips “A” and “B” to the same value.
Bx 4A
0 dB
LEVEL
0 … -10 dB
UÊi>ÃÕÀiÊ >`Ê ÌiÊ `ÜÊ Ì
iÊ ÕÌ«ÕÌÊ iÛiÊ vÊ Ì
iÊ V
>iÊ
strip. To adjust the output level to the output levels of theother cassettes please pay attention to chapter 7 “Final
procedures”.
UÊÞÊÀi«i>Ìi`ÞÊ«ÀiÃÃ}ÊÌ
iÊ
button scroll back to
the “Selecting the channel strip” menu.
UÊ -iiVÌÊÌ
iÊÌ
iÀÊV
>iÊÃÌÀ« (page 24) and set the
following menu items:
UÊ º-iiVÌ}ÊV
>iÊÉÊvÀiµÕiVÞÊÃiÌÌ}»]Ê«>}iÊÓ{
UÊ º-iÌÌ}Ê Ì
iÊ ÕÌ«ÕÌÊ V
>i»Ê ÀÊ º-iÌÌ}Ê Ì
iÊ ÕÌ«ÕÌÊ
vÀiµÕiVÞ»]Ê«>}iÊÓx
- 26 -
PHDQ 1000 ASI LAN / PHDQ 1001
UÊ -ÜÌV
ÊÊÌ
iÊ`Õ>ÌÀÊvÊiViÃÃ>ÀÞ]Ê«>}iÊÓÈ
UÊ i>ÃÕÀiÊ>`ÊÌiÊ`ÜÊÌ
iÊÕÌ«ÕÌÊiÛi°
UÊVÌÛ>ÌiÊ Ì
iÊ “LEVEL” menu of the channel strip with the
higher output level.
UÊÞÊ «ÀiÃÃng
adjust the higher output level of one
channel strip to the lower output level of the other channel
strip incrementally from “0” to “–10 dB”.
UÊ*ÀiÃÃÊÌ
iÊ
button.
—> The “Setting the LNB oscillator frequency” – “LNB”
menu is activated.
Setting the LNB oscillator frequency
Set the oscillator frequency of the LNB used in this menu.
Bx 4A
LNB
Ï/Å
10600 MHz
UÊ1ÃiÊ
to place the cursor under the digit to be set for
the frequency display.
UÊ*ÀiÃÃÊ
to enter the oscillator frequency of the LNB
used.
UÊ*ÀiÃÃÊÌ
iÊ
button.
—> The “Setting the input symbol rate” – “SYMBOL” menu
is activated.
- 27 -
PHDQ 1000 ASI LAN / PHDQ 1001
Setting the input symbol rate
The symbol rates of the satellite transponders can be found in
Ì
iÊVÕÀÀiÌÊV
>iÊÌ>LiÊvÊÌ
iÊÃ>ÌiÌiÊ«iÀ>ÌÀ]ÊÊÛ>ÀÕÃÊ
Ã>ÌiÌiÊ>}>âiÃÊ>`ÊÊÌ
iÊÌiÀiÌ°
Ï/Å
Bx 4A
27500
SYMBOL
DVB-S Ï/Å
DVB-S / DVB-S 2 …
UÊ1ÃiÊ
to position the cursor under the digit to be set
for the symbol rate displayed.
UÊ*ÀiÃÃ
to enter the values of the symbol rate.
Setting the DVB mode
/
iÊ V>ÃÃiÌÌiÊ ÀiV}âiÃÊ Ì
iÊ ÌÀ>ÃÌÌi`Ê 6Ê `iÊ >`Ê
switches over between the normal QPSK mode (DVB-S) and
Ì
iÊ 6-ÓÊ `i°Ê ,iViÛ}Ê ÃÌ>ÌÃÊ ÜÌ
Ê 6-ÓÊ `i]Ê
we suggest to preset the DVB mode to shorten the time for
searching stations.
UÊ1ÃiÊÌ
iÊ
button to place the cursor under “DVB-S” and
set the required DVB-S2-mode with the buttons
.
UÊ*ÀiÃÃÊÌ
iÊ
button.
—> The “Setting the input frequency” – “FREQ” menu is
activated.
Setting the input frequency
If three dots “ …ʺÊ>««i>ÀÊÊÌ
iÊÃiV`ÊiÊvÊÌ
iÊ`ë>Þ]Ê
the cassette is in the “station search” mode. Please wait until
the process has finished.
"ViÊÌ
iÊÊÀiViÛiÀÊ
>ÃÊÃÞV
ÀÃi`ÊÌÊÌ
iÊ«ÕÌÊÃ}>]Ê
>ÞÊvvÃiÌÊÌÊÌ
iÊÌ>À}iÌÊvÀiµÕiVÞÊÃÊ`ë>Þi`ÊÊâ]Êi°}°Ê
“– 1.8”.
If a question mark “?” appears in the second line of the dis«>Þ]ÊÌ
iÀiÊÃÊÊ«ÕÌÊÃ}>Ê«ÀiÃiÌ°Ê
iVÊÌ
iÊVv}ÕÀ>ÌÊ
of the antenna system and head-end station as well as the
preceding settings of the cassette.
- 28 -
PHDQ 1000 ASI LAN / PHDQ 1001
Ï/Å
Bx 4A
11836 -1.8
FREQ
Bx 4A
CN 12
12.0 dB
C/N
(+ 9.6) OK
Anzeige: Signalqualität
Display: Signal quality
Programme entfernen / hinzufü
UÊ1ÃiÊ
to position the cursor under the digit to be set
of the frequency displayed.
UÊ *ÀiÃÃÊ
to set the input frequency.
UÊ -iÌÊÌ
iÊvÀiµÕiVÞÊvvÃiÌÊÃ
ÜÊÊÌ
iÊ`ë>ÞÊ(e.g. “– 1.8”)
ÌÊiÃÃÊÌ
>Ê£ÊâÊby varying the input frequency using
the
buttons.
UÊ*ÀiÃÃÊÌ
iÊ
button.
—> The “Testing the signal to noise ratio” – “C/N” menu
is activated.
Testing the signal to noise ratio
In this menu you can estimate the quality of the input signal.
Ï/Å
Bx 4A
11836 -1.8
FREQ
Bx 4A
CN 12
12.0 dB
C/N
(+ 9.6) OK
Anzeige: Signalqualität
Display: Signal quality
Programme entfernen / hinzufü
C/N
Bx 4A
12.0 dB
(+ 9.6) OK
1
2
Current signal to noise ratio
This value shows the difference between the quality
of the input signal and the threshold of the tuner at
this type of modulation.
At a value lower than “5” picture dropouts can occur.
3
If “OK»ÊÃÊÃ
Ü]ÊÌ
iÊÃ}>ÊÌÊÃiÊÀ>ÌÊÃÊ°
If a value < 5 is shown under 2 the display changes
- 29 -
PHDQ 1000 ASI LAN / PHDQ 1001
from “OK” to “??”. In this case test the input signal.
—>Ê Ê >``ÌÊ ÌÊ Ì
iÊ `V>ÌÀÊ Ê Ì
iÊ `ë>Þ]Ê Ì
iÀiÊ ÃÊ
also a status LED which indicates the quality of the
received transport stream:
Status LED Channel strip "A"
LED indicator
Green
Yellow
Red
Off
Status LED Channel strip "B"
UÊ*ÀiÃÃÊÌ
iÊ
Indication
Signal quality is good
Signal quality is poor
No signal
The channel strip (modulator)
is switched off
button to return to the main menu.
If the input signal path “A+B+ASI=1 ASI=2” is selected the
station filter of channel strip “B” is used in the channel
strip “A”. Therefore perform the settings for channel strip “B”
>VVÀ`}ÊÌÊÌ
iÊ«>}iÃÊÓÇÊÉÊÓn]ÊLivÀiÊ>VÌÛ>Ì}ÊÌ
iʺ-iÌting the station filter” – “PROGRAM” menu.
If the input signal path “A+ASI=1 B+ASI=2” is selected the
channel strips can be programmed one after the other.
UÊ*ÀiÃÃÊÌ
iÊ
button.
—> The “Setting the station filter” – “PROGRAM” menu
is activated.
- 30 -
PHDQ 1000 ASI LAN / PHDQ 1001
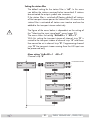
Setting the station filter
The default setting for the station filter is “off”. In this menu
you define the stations received to be transmitted. If stations
are activated the output symbol rate increases.
If the station filter is switched off (factory default) all stations
of the transport stream passes the station filter. As soon as the
station filter is activated all stations are inactive and can be
added to the transport stream selectively.
The figure of the menu below is dependent on the setting of
the “Selecting the input signal path” menu (page 21).
The menu shows the setting ”A+B+ASI = 1 ASI = 2”.
With this setting the transport stream of channel strip “B” is
routed to the transport stream of channel strip “A” and therefore cannot be set in channel strip “B”. Programming channel
strip “B” the transport stream coming from the ASI input can
be processed only.
Menu setting ”A+B+ASI = 1
Channel strip “A”
Bx 4A
Filter
PROGRAM
ASI = 2”.
Bx 4A TV +
off
Das Erste
Ï/Å
Bx 4B TV +
Ï/Å
TV +
Å
Bx 4A
Filter
- 31 -
nächster Service (Programm) next service (station)
Programme entfernen / hinzuf
Removing / activating stations
01/10
. . . . .
nächster Service (Programm) next service (station)
Programme entfernen / hinzuf
Removing / activating stations
02/19
SWF3
ASI Programme entfernen / hinzuf
Removing / activating stations
01/10
Ï/Å
nächster Service (Programm) next service (station)
PROGRAM
on
on / off
PHDQ 1000 ASI LAN / PHDQ 1001
—> “Setting the station filter” menu of channel strip “B”
Bx 4B
Filter
PROGRAM
ASI off
TV –
01/10
. . . . .
Å
Bx 4B
Filter
Ï/Å
PROGRAM
on
on / off
UÊ Press the
button.
pÊ ÊÃÌ>ÌÃÊvÀÊÌ
iÊV
>iÊÃÌÀ«ÊÜÊLiÊÀi>`]Ê>`Ê
then displayed with name and station type.
pÊ vÊÊÃÌ>ÌÊÃÊvÕ`]ÊÌ
iÊvÜ}ÊiÀÀÀÊiÃÃ>}iÊÜÊ
appear in the display: “FILTER no Service”.
Ê
ÊÌ
ÃÊV>Ãi]ÊV
iVÊÌ
iÊVv}ÕÀ>ÌÊvÊÌ
iÊ>Ìi>Ê
ÃÞÃÌiÊ >`Ê
i>`i`Ê ÃÌ>Ì]Ê >ÃÊ ÜiÊ >ÃÊ Ì
iÊ «ÀiÛously adjusted settings for the cassette and the components connected to the ASI input.
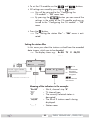
—> The display shows e.g.: Bx 4A TV + 01/10
Das Erste
Meaning of the indicators in the example:
“Bx 4A»ÊÊ
qÊ -ÌÊ{]ÊV
>iÊÃÌÀ«ÊºA”
“TV”
– TV channel type
“+”
– The currently selected station is
switched on.
“01/10”
– The 1st of 10 stations is being displayed.
“Das Erste” – Station name
Further possible terms displayed:
“RA”
Radio channel type
Ê
ÀÊÀ>`ÊÃÌ>ÌÃ]ÊÌ
iÊL>Vground of the screen of
the connected TV or test receiver is darkened.
“–”
The currently selected station is switched off.
- 32 -
PHDQ 1000 ASI LAN / PHDQ 1001
“
*”
The star means that the TV or radio station seiVÌi`ÊÃÊiV`i`°Ê/Êi>LiÊÌ
iÊÃÌ>ÌÃ]ÊÌ
iÊ
Ê
module and the appropriate smart card of the
station provider are required.
—> If a service number (e.g. “131”) appears instead of
“TV” or “RA»]ÊÌ
ÃÊ`V>ÌiÃÊÌ
>ÌÊ>ÊÕ>i`ÊÃÌ>ÌÊ
or an undefined data stream is being received.
UÊ 1ÃiÊÌ
i
buttons to call up the stations in sequential
À`iÀ]ÊÌ
iÊÕÃiÊ
to activate (indicated by “ + ”) or to
remove them (“ – ”).
Factory default: All stations are deactivated.
U Press the
button.
UÊ-iÌÊÌ
iÊÃÌ>ÌÊvÌiÀÃÊvÊV
>iÊÃÌÀ«ÊºB” and “ASI” in the
same way as channel strip “A”.
U To save changes and to activate the station filter press the
button.
—> The filter is activated.
The display shows “PROGRAM Filter on”.
—> If stations are activated the corresponding PIDs (au`]ÊÛ`i]ÊÌiÝÌ®Ê>ÀiÊÃiÀÌi`ÊÌÊÌ
iÊ`>Ì>ÊÃÌÀi>Ê>`Ê
the PAT and SDT tables are updated.
Test the status of the individual stations:
Ê vÊÌ
iÊvÌiÀÊÃÊÃÜÌV
i`Ê]Ê«ÀiÃÃÊÌ
i
button. In this mode
you can test the settings of the station filters again or change
them if necessary.
UÊÊ Ì
iÊ ºPROGRAM Filter on” menu the station filters
switched on can be switched “off” using the buttons
if necessary.
- 33 -
PHDQ 1000 ASI LAN / PHDQ 1001
Menu setting ”A+ASI = 1
Channel strip “A”
Bx 4A
Filter
B+ASI = 2”.
PROGRAM
Bx 4A TV +
off
01/10
Das Erste
ASI Ï/Å
TV +
02/19
ORF2
Å
Bx 4A
Filter
Ï/Å
PROGRAM
on
on / off
UÊ-iÌÊÌ
iÊV
>iÊÃÌÀ«ÊºA” or “B”.
—> The setting of the channel strips “A” and “B” is identical and follows the description above.
UÊ*ÀiÃÃÊÌ
iÊ
button.
—> The “Setting the QAM modulation” – “QAM” menu is
activated when the channel strips “A” without a CA
module installed and “B” are programmed.
—> Programming the channel strip “A” with a CA module
installed the settings for the CA module are activated
(s. page 41).
- 34 -
PHDQ 1000 ASI LAN / PHDQ 1001
Setting the QAM modulation
ÊÌ
ÃÊiÕ]ÊÞÕÊV>ÊÃiÌÊÌ
iÊ+Ê`Õ>ÌÊ>`ÊÛiÀÌÊÌ
iÊ
user signal.
ohne CA-Modul without CA module
Kanalzug “B” Channel strip “B“
Bx 4A
4 … 256
64-QAM
Kanalzug “A” mit CA-Modul Channel strip “A“ with CA module
QAM
normal
C
D
Ï/Å
normal / inverse
UÊ Use
to set the QAM modulation (“4»Êoʺ256”).
—> ÀÊ
}
iÀÊ +Ê `Õ>Ì]Ê Ì
iÊ ÕÌ«ÕÌÊ ÃÞLÊ
rate is lowered. An output QAM modulation of >
64 QAM places a large burden on the cable netÜÀ°Ê ÕiÊ ÌÊ Ãi]Ê `i>ÞÊ >`Ê vÀiµÕiVÞÊ ÀiëÃiÊ
«ÀLiÃ]Ê ÀiVi«ÌÊ vÊ Ì
iÊ VÛiÀÌi`Ê ÕÌ«ÕÌÊ Ã}>Ê
can be affected.
Inverting the user signal
ÀÊiÝVi«Ì>ÊV>ÃiÃÊ>`ʺ`iÀ»Ê`}Ì>ÊV>LiÊÀiViÛiÀÃ]ÊÌ
iÊ
spectral position of the user signal can be inverted.
UÊ1ÃiÊ
UÊ1ÃiÊ
to place the cursor under “normal”.
to set the spectral position to “inverse”.
UÊ*ÀiÃÃÊÌ
iÊ
button.
—> The “Setting stuffing” – “STUFFING” menu is activated.
- 35 -
PHDQ 1000 ASI LAN / PHDQ 1001
Setting stuffing
Bx 4A
STUFFING
Ï/Å
SR=6900 (6325)
SR=6900 (= “Number 1”): Active output symbol rate
Bx 4A
31667 Number 1 STUFFING
(28352)
Number 2
(6325) (= “Number 2”):
The current measured output symbol rate.
Ê vÊÌ
iÊÃÌ>ÌÊvÌiÀÊÃÊ>VÌÛ>Ìi`]ÊÌ
ÃÊÛ>ÕiÊÃÊÜiÀÊÌ
>ÊÌ
iÊ
Û>ÕiÊ vÊ Ì
iÊ º ÕLiÀÊ £»°Ê /
iÊ Û>ÕiÊ vÕVÌÕ>ÌiÃ]Ê ÃViÊ Ì
iÊ
data rates of individual stations are dynamically modified
by the broadcasters.
—> “Number 2” is not displayed in the channel strips “A”
or “B” at the settings
“OUTROUTE 1=>ASI ASI=>MA” or
“2=>ASI ASI=>MB»]Ê vÀÊ Ì
iÊ ÃÞLÊ À>ÌiÊ vÊ Ì
iÊ
ASI input signal cannot be measured. The ASI input signal therefore must be built in such a way
so that the output symbol rate (“Number 1”) is not
exceeded.
The symbol rates of the transport streams built
by the cassette can be measured at the setting
“OUTROUTE ASI=>ASI” and be displayed in the respective channel strip.
UÊ Use the
buttons to place the cursor under the
number to be changed (“Number 1”) and set the symbol
rate with the buttons
.
The value set corresponds to the new output symbol rate.
Increasing the value of “Number 1”.
—> The “Number 1” can be increased to any value up to
7500.
- 36 -
PHDQ 1000 ASI LAN / PHDQ 1001
Reducing the value of “Number 1”.
—> With the station filter switched “on»]ÊÌ
iʺ ÕLiÀÊ£»Ê
V>ÊLiÊ`iVÀi>Ãi`°Ê/Ê`ÊÌ
Ã]ÊLÃiÀÛiÊÌ
iʺ ÕLiÀÊÓ»Ê
for approx. 30 seconds and note the highest value.
Add roughly 10 % to this value. Do not decrease the
“Number 1” lower than the value of “Number 2”.
Is the “Number 1” lower than “Number 2” question
marks “??” appear in the display.
Bx 4A
31667 STUFFING
(36906) ??
UÊ*ÀiÃÃÊÌ
iÊ
button.
—> The “Setting a substitute signal in the case of an incorrect input signal” – “FAILURE” menu is activated.
Setting a substitute signal in the case of an incorrect input signal
You use this menu to set whether a QAM signal filled
with “Null Packets»]Ê>Ê+ÊÃ}>Êvi`ÊÜÌ
ÊÕÊ«>ViÌÃÊ
and self-made tables ”Tables“ or a “Single Carrier” signal
should be provided as an output signal whenever an incorrect input signal occurs. Self-made tables are transmitted
furthermore.
Bx 4A
FAILURE
Null Packets
Null Packets … Single Carrier U Use the
buttons to set the output signal required.
UÊ*ÀiÃÃÊÌ
iÊ
button.
—> The “Network Information Table” – “NIT” menu is activated.
- 37 -
PHDQ 1000 ASI LAN / PHDQ 1001
Network Information Table (NIT)
Bx 4A
on / off
off
NIT
=> Make
Å Make
UÊ/ÊÃÜÌV
Ê /ÊÉvvʺon”/”off”) press the
buttons.
UÊ*ÀiÃÃÊÌ
iÊ
button to activate NIT “Make”.
Ê>VÌÛiÊo+ÊV>ÃÃiÌÌiÃÊÕÃÌÊLiÊÃiÌÊ>`ÊÀi>`ÞÊ
for reception.
—> The NIT of all oQAM cassettes are switched on.
—> The cassette fetches all the information (output freµÕiViÃ]ÊÕÌ«ÕÌÊÃÞLÊÀ>ÌiÃ]ÊiÌV°®ÊÌÊii`ÃÊvÀÊ>Ê
the oQAM cassettes in order to generate the cable
NIT. This process may take a few seconds.
Ê
/
iÊ Ì
iÊ /Ê ÃÊ }iiÀ>Ìi`]Ê >``i`Ê >`Ê ÃiÌÊ ÌÊ >Ê
oQAM cassettes°Ê/
iÊÌ
iÀÊo+Êcassettes also
>``Ê Ì
ÃÊ iÜÊ V>LiÊ /°Ê /
iÊ ÃÌ>ÌÕÃÊ vÊ >Ê o+Ê
cassettes in the NIT menu changes to “on”.
The display shows: “read … / copy …”.
UÊ/ÊÃÜÌV
ÊvvÊÌ
iÊiÜÊ /Ê(”off”) press the
button.
/
iÊ V>LiÊ /ÃÊ vÊ Ì
iÊ Ì
iÀÊ o+Ê cassettes will
stay switched on. When the cable NIT of the cassette
is switched on again (“on”) by pressing the
LÕÌÌ]Ê
the previously generated NIT is added again. If you
>ÛiÊV
>}i`Ê«>À>iÌiÀÃÊÊÌ
iÊi>Ìi]ÊÞÕÊÕÃÌÊ
first select “Make»ÊÌÊ}iiÀ>ÌiÊ>ÊiÜ]ÊÕ«Ì`>ÌiÊ /°
UÊ*ÀiÃÃÊÌ
iÊ
button.
—> The “Network/operator identification” – “CAT-ID”
menu is activated.
- 38 -
PHDQ 1000 ASI LAN / PHDQ 1001
Network/operator identification
Ê Ì
ÃÊ iÕ]Ê ÞÕÊ V>Ê V
>}iÊ Ì
iÊ iÌÜÀÉ«iÀ>ÌÀÊ `iÌfication (CAT-ID – Conditional Access Table - IdiÌvV>Ì®]Ê
for example of the visAvision transponder (Eutelsat 8° West).
Ï/Å
Bx 4A
0XDE00
CAT-ID
off
Ï/Å
on / off
CAT is not to be changed.
UÊ*ÀiÃÃÊÌ
iÊ
button.
—> The “Deleting a PID” – “DROP” menu is activated
(page 40).
CAT is to be changed.
The network operator e.g. requires that you set the operator
ID of the visAvision transponder to “2”.
UÊUse the
buttons to position the cursor under the digit
to be set.
UÊ1ÃiÊ
to change the operator ID from “0xDE00” to
“0xDE02”.
UÊ1ÃiÊÌ
iÊ
button to position the cursor under “off]»ÊÌ
iÊ
use
to activate the new CAT “on”.
—> The menu display switches to “modified”.
—> If you try to change the network/operator identification (operator ID) of a transponder which cannot be
`vi`]ʺnot modified” appears in the display.
UÊ*ÀiÃÃÊÌ
iÊ
button.
—> The “Deleting a PID” – “DROP” menu is activated.
- 39 -
PHDQ 1000 ASI LAN / PHDQ 1001
Deleting a PID
In this menu a PID of the transport stream can be deleted.
Ï/Å
Bx 4A
DROP
PID 0x0000
Ï/Å
off
on / off
UÊ1ÃiÊ Ì
iÊ
buttons to place the cursor under the respective digit of the hexadecimal number of the PID to be
deleted (“0x0000”) and set the hexadecimal number using
.
UÊ1Ãi
to set the cursor to “off” and switch to “on” (delete)
using the
buttons.
UÊ*ÀiÃÃÊÌ
iÊ
button.
—> The “Renaming a PID” – “REMAP” menu is activated.
Renaming a PID
In this menu you can allocate a new address to a PID retaining the complete data content.
Ï/Å
Bx 4A
REMAP
0x0000 –> 0000
off
Ï/Å
on / off
B
A
M
UÊ1ÃiÊ Ì
iÊ
buttons to place the cursor under the respective digit of the hexadecimal number of the PID to be
changed (“0x0000”) and set the hexadecimal number using
.
UÊ1ÃiÊ Ì
iÊ
buttons to place the cursor under the respective digit of the hexadecimal number of the new PID
(“–> 0000”).
UÊ-iÌÊÌ
iÊ
iÝ>`iV>ÊÕLiÀÊÕÃ}Ê
.
UÊ1ÃiÊ
to set the cursor to “off” and switch to “on” (rename) using the
buttons.
- 40 -
PHDQ 1000 ASI LAN / PHDQ 1001
Saving settings
UÊ*ÀiÃÃÊÌ
iÊ
button.
—> Back to “Selecting the cassette” A (page 20).
—> The settings are saved.
pÊ vÊvÕVÌÃÊvÊÌ
iÊ/*-Ê`ÕiÊ>ÀiÊ>VÌÛ>Ìi`]ÊÌ
iÀÊÃÌ>tus is shown in the second line of the display:
“M” – Station filter is switched on.
“N” – NIT is activated.
“C” – Network/operator identification CAT is
activated.
—> By pressing the
ÊLÕÌÌ]ÊÞÕÊÜÊLiÊÀiÌÕÀi`Ê
to the menu item “Selecting the channel strip” via B
without saving the programmed data (page 24).
—> If necessary set channel strip “B”.
5.4.1 Operation with a CA module
Ê À`iÀÊ vÀÊ Ì
ÃÊ vÕVÌÊ vÊ Ì
iÊ Ê `ÕiÊ ÌÊ LiÊ «ÃÃLi]Ê
stations capable of being encoded (only PHDQ 1001) or decoded by the CA module you are using and your smart card
must be selected in the “Setting the station filter” – “PROGRAM” menu (page 31).
Short-term picture loss may occur when switching between
coded and uncoded broadcasts within one service (e.g. coded stations and uncoded regional broadcasters).
UÊ*ÀiÃÃÊÌ
iÊ
button.
Cassette PHDQ 1001:
—> The “Setting the encoding” – “CA” menu is activated.
Cassette PHDQ 1000 ASI LAN:
—> The “Setting the PID monitoring” – “CA” menu is activated (page 42).
Setting the encoding (only PHDQ 1001)
With cassette PHDQ 1001 it is possible to encode uncoded
channels. You can set whether you want to decode encoded
V
>iÃÊ º`iÃVÀ>Li»®]Ê ÀÊ ÌÊ iV`iÊ ÕV`i`Ê V
>iÃÊ
(“scramble”).
- 41 -
PHDQ 1000 ASI LAN / PHDQ 1001
C
Bx 4A
CA
scramble
scramble / descramble
scramble
descramble
Bx 4A
CA
PID Check
UÊ1ÃiÊÌ
iÊ
on / off ”scramble“ or deonto set encoding
buttons
coding ”descramble”.
M
Bx 4A 01/03
Information *)
*) UÊ*ÀiÃÃÊÌ
iÊ
button.
Bx 4A
CA
In case
of
setting
“scramble”:
Menu <= => Edit
—> The “Setting the QAM modulation” – “QAM” menu isX / 0 Ï
Å 35).
activated
(page
Bx 4A TV X 04/09
MENU X – entschlüsselt decrypted
In case of setting “descramble”:
. . . . 0 – verschlüsselt —> The “Setting the PID monitoring” – “CA” menu is
actiencrypted
S
vated.
Ï /Å
Die angezeigte Information ist abhängig vom verwendeten
C
CA-Modul. The information displayed is Setting
the PID
dependent on the CA module
Bx 4A
used.
The factory
scramble
scramble
M
nächster Service
next service
monitoring
CA
Bx 4A
Bx 4A
CA
PID Check
on
Bx 4A
CA
UÊ1ÃiÊ Ì
iÊ => Edit
Menu <= Bx 4A 01/03 MENU monitoring.
Ï
Å
on / off
buttons to switch “off” or “on”. the PID
X / 0 Bx 4A TV X 04/09
UÊ*ÀiÃÃÊÌ
iÊ
button.
. . . . —> The “Configuring the CA
S
vated.
*) Die angezeigte Information ist Information *)
CA
default
monitoring
is => Edit
switched on.
scramble / descramble
of the PID
Menu <= If particular PIDs are not decrypted the CI module is reset. If
dropouts occur during the decoding of several stations the
PID descramble
monitoring can be switched off.
D
abhängig vom verwendeten
CA-Modul. The information displayed is dependent on the CA module
used.
Bx 4A
acti-
Ï/Å
nächster Service
next service
CA
Menu <= - 42 -
X – entschlüsselt decrypted
0 – verschlüsselt module” – “CA”
menu is
encrypted
=> Edit
PHDQ 1000 ASI LAN / PHDQ 1001
Configuring the CA module
The menu varies according to which CA module you are
ÕÃ}°ÊÀÊÌ
ÃÊÀi>Ã]Ê«i>ÃiÊÀiviÀÊÌÊÌ
iÊ«iÀ>Ì}Ê>Õ>Ê
of your particular CA module. The relevant information is
shown in the display of the head-end station. This may appear as a fixed display or as scrolling text according to display capabilities.
Bx 4A
M
Menu <= CA
=> Edit
Ï
Bx 4A 01/03 MENU X / 0 Å
Bx 4A TV X 04/09
. . . . Information *)
S
*) Die angezeigte Information ist abhängig vom verwendeten
CA-Modul. The information displayed is dependent on the CA module
used.
X – 0 – entschlüsselt decrypted
verschlüsselt encrypted
Ï/Å
nächster Service
next service
Bx 4A
CA
Menu <= => Edit
—> By pressing the
button you can skip the
“Configuring the CA module” – “CA” menu and activate the “Setting the QAM modulation” – “QAM”
menu (page 35).
UÊ*ÀiÃÃÊÌ
iÊ
button to activate the menu of the CA module.
—> The display shows e.g.: Bx 4A 01/03 MENU
Information
Meaning of the indicators:
“Bx 4A»ÊÊ
qÊ -ÌÊ{]ÊV
>iÊÃÌÀ«ÊºA”
“01/03”
– The first of three menu items is activated.
“MENU”
– The menu of the CA module is activated.
For the explanation of further details please use the operating instructions of the CA module used.
UÊ1ÃiÊÌ
iÊ
UÊ*ÀiÃÃÊÌ
iÊ
UÊ1ÃiÊÌ
iÊ
buttons to activate the menu desired.
button to activate the menu.
buttons to select the function desired.
- 43 -
PHDQ 1000 ASI LAN / PHDQ 1001
UÊ/ÊÃiÌÊÌ
iÊ
Ê`ÕiÊÕÃiÊÌ
iÊ
and
buttons.
UÊÊÃiÌÌ}ÃÊ>ÀiÊÃ>Ûi`ÊLÞÊ«ÀiÃÃ}ÊÌ
iÊ
button.
—> You will be returned to the “Configuring the
CA module” – “CA” menu item.
—> By pressing the
button you can cancel the
settings in the menu of the CA module and are returned to the “Configuring the CA module” – “CA”
menu.
UÊ*ÀiÃÃÊÌ
iÊ
button.
—> The “Setting the station filter” – “Edit” menu is activated.
Setting the station filter
In this menu you select the stations wished from the encoded
`>Ì>ÊÃÌÀi>]ÊÜ
V
Ê>ÀiÊÌÊLiÊ`iV`i`°
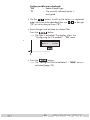
—> The display shows e.g.: Bx 4A TV X 04/09
....
Bx 4A
M
Menu <= Bx 4A 01/03 MENU Information *)
Ï
CA
=> Edit
X / 0 Å
Bx 4A TV X 04/09
. . . . S
*) Die angezeigte Information ist abhängig vom verwendeten
CA-Modul. The information displayed is X – 0 – entschlüsselt decrypted
verschlüsselt encrypted
Ï/Å
nächster Service
next service
Meaning of the indicators in the example:
“Bx 4A»ÊÊ
qÊ -ÌÊ{]ÊV
>iÊÃÌÀ«ÊºA”
“TV”
– TV channel type
“X”
– The currently selected station is
decrypted.
“04/09”
– The 4th of 9 stations read is being
displayed.
“. . . .”
– Station name
- 44 -
PHDQ 1000 ASI LAN / PHDQ 1001
scramble
descramble
Bx 4A
FurtherCA
possible terms displayed:
on / offchannel type
on
– Radio
“0”
– The currently selected station is
encrypted.
PID Check“RA”
Bx 4A
M
Bx 4A 01/03 MENU Information *)
*) CA
UÊ 1ÃiÊÌ
i
buttons to call up the stations in sequential
Menu <= => Edit
À`iÀÊÜ
V
Ê>ÀiÊÌÊLiÊ`iV`i`]ÊÌ
iÊÕÃiX / 0 to decrypt
Ï
(“X”)Åor not to
decrypt
them
(“0”).
Bx 4A TV X 04/09
X – entschlüsselt Die angezeigte Information ist abhängig vom verwendeten
CA-Modul. The information displayed is dependent on the CA module
used.
decrypted
0 – verschlüsselt station
filter:
encrypted
. . . . U Save changes and activate the
S
Press the
button.
Ï/Å
nächster Service
—> The filter is activated. The display
shows the
next service
“Configuring the CA module” – “CA” menu.
Bx 4A
Menu <= CA
=> Edit
D
UÊ*ÀiÃÃÊÌ
iÊ
button.
—> The “Setting the QAM modulation” – “QAM” menu is
activated (page 35).
- 45 -
PHDQ 1000 ASI LAN / PHDQ 1001
6
Final procedures
After installing the head-end station, upgrading accessories or installing
cassettes it is necessary to tighten all cable connections, cable terminals
and cover screws in order to maintain compliance with current EMC regulations securely.
UÊ-iVÕÀiÞÊ Ì}
ÌiÊ Ì
iÊ V>LiÊ ViVÌÃÊ ÕÃ}Ê >Ê >««À«À>ÌiÊ «ii`i`Ê
spanner.
UÊi>ÃÕÀiÊÌ
iÊÕÌ«ÕÌÊiÛiÃÊvÊÌ
iÊÌ
iÀÊV>ÃÃiÌÌiÃÊ>`ÊÌÕiÊÌ
iÊÌÊ>ÊÕvÀÊ
output level using the appropriate level controls or software dependent on the
head-end station used. Please regard the assembly instructions of the respective head-end station.
UÊ ÕÌÊÌ
iÊvÀÌÊVÛiÀÊðÊ>ÃÃiLÞÊÃÌÀÕVÌÃÊvÊÌ
iÊ
i>`i`ÊÃÌ>Ì®°
- 46 -
PHDQ 1000 ASI LAN / PHDQ 1001
7
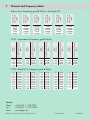
Channel and frequency tables
ÀiµÕiâÀ>ÃÌiÀ
Frequency grid
Qâ]
ÀiµÕiâÀ>ÃÌiÀ
Frequency grid
Qâ]
ÀiµÕiâÀ>ÃÌiÀ
Frequency grid
Qâ]
ÀiµÕiâÀ>ÃÌiÀ
Frequency grid
Qâ]
ÀiµÕiâÀ>ÃÌiÀ
Frequency grid
Qâ]
ÀiµÕiâÀ>ÃÌiÀ
Frequency grid
Qâ]
`ÛViÊvÀÊ>ÊvÀiµÕiVÞÊ}À`ÊnÊâ®ÊÊÌ
iÊ>`ÊÉ
42.00
50.00
58.00
66.00
74.00
82.00
114.00
122.00
130.00
138.00
146.00
154.00
162.00
170.00
178.00
186.00
194.00
202.00
210.00
218.00
226.00
234.00
242.00
250.00
258.00
266.00
274.00
282.00
290.00
298.00
26
27
28
29
346.00
354.00
362.00
370.00
S
S
S
S
30
31
32
33
378.00
386.00
394.00
402.00
S
S
S
S
34
35
36
37
410.00
418.00
426.00
434.00
S 38
S 39
S 40
S 41
442.00
450.00
458.00
466.00
C
C
C
C
C
C
C
C
C
C
51
52
53
54
55
56
57
58
59
60
714.00
722.00
730.00
738.00
746.00
754.00
762.00
770.00
778.00
786.00
C
C
C
C
C
C
C
C
C
794.00
802.00
810.00
818.00
826.00
834.00
842.00
850.00
858.00
Kanal
Channel
>>ÌÌivÀiµÕiâ
Channel centre frequency
Qâ]
Kanal
Channel
>>ÌÌivÀiµÕiâ
Channel centre frequency
Qâ]
Kanal
Channel
S
S
S
S
>>ÌÌivÀiµÕiâ
Channel centre frequency
Qâ]
306.00
314.00
322.00
330.00
338.00
Kanal
Channel
21
22
23
24
25
>>ÌÌivÀiµÕiâ
Channel centre frequency
Qâ]
S
S
S
S
S
>>ÌÌivÀiµÕiâ
Channel centre frequency
Qâ]
Kanal
Channel
,ÊqÊÞ«iÀL>`ÊÀiµÕiVÞÊ}À`ÊnÊâ®
,ÊqÊ>`Ê6É6ÊÀiµÕiVÞÊ}À`ÊnÊâ®
C
C
C
C
C
C
C
C
C
C
21
22
23
24
25
26
27
28
29
30
474.00
482.00
490.00
498.00
506.00
514.00
522.00
530.00
538.00
546.00
C
C
C
C
C
C
C
C
C
C
31
32
33
34
35
36
37
38
39
40
554.00
562.00
570.00
578.00
586.00
594.00
602.00
610.00
618.00
626.00
C
C
C
C
C
C
C
C
C
C
41
42
43
44
45
46
47
48
49
50
634.00
642.00
650.00
658.00
666.00
674.00
682.00
690.00
698.00
706.00
61
62
63
64
65
66
67
68
69
Service:
Phone:
Fax:
Email:
+49 (0) 911 / 703 2221
+49 (0) 911 / 703 2326
service@gss.de
Alterations reserved. Technical data E. & O.E.
© GSS GmbH
19102009