1
GETTING STARTED
Step
1 Connect
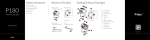
. Insert the microUSB head of the cable into the
microUSB slot (G).
. Insert the USB head of the cable into the
power adaptor.
. Assemble the power adaptor by screwing the
plug head into the adaptor body.
. Plug the adaptor into a wall outlet to power the
controller.
. Connect the lights to the controller using the
unit link cable.
For more detailed setup information, please visit www.kessil.com.
Step
2 Set Up
. Use the direction pad (C) to
navigate to the Settings tab.
. Press to access the settings.
. Set the Time & Date.
. Press to return to the main
menu.
Step
3 Manual Configuration
. Navigate to the Manual tab.
. Press to enter manual mode.
. Adjust the color and intensity on the two
bars. This can be done individually for
each port or both at the same time.
. Press
to return to the main menu.
Step
4 Program
. Navigate to the Program tab.
. Press to enter program mode.
. Select Quick Set to create a custom light schedule.
i Adjust intensity and color at each time point.
ii Review your cycle with preview mode.
iii Make sure to save when finished.
. Select Acclimation to set an acclimation schedule.
Step
5 Port Settings
. Navigate to Port Set tab.
. Press to enter port settings.
. Set the desired schedule for each
port.
Step
6 Mounting
. Use the screws provided to mount
the magnetic back plate to a
wooden surface.
. If mounting to a wall, pre-drill two
1/4" (6.5mm) holes and insert nylon
anchors before screwing the plate in.
i Set the length of acclimation and starting intensity.
ii Specify the color and intensity schedule you want the
acclimation to follow.
iii Save when finished.
. Press
to return to the main menu.
You're Finished !