1
Package Contents
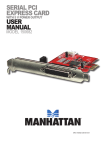
RS232 PCI Adapter Card
This manual
Low Profile & Standard PCI Brackets
Driver CD
Breakout cable (for 4 Port and 8 Port cards only)
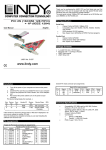
5V Jumper Settings for each RS232 Port
DC5V on Pin9 of DB9 Connector = 5V Short
Normal RI function on Pin9 of DB9 Connector = RI Short
Installation
After driver installation, for proper operation, please setup the correct Data Rate to
14.745MHz frequency or by automatic frequency detection
Windows 2000 / XP installation
1. Power off the system. Remove the case covers and carefully insert the PCI Card into an
available PCI slot.
2. Replace the case covers, power up the system, and insert the driver CD into your
CD-ROM/DVD drive.
3. Windows will display the Found New Hardware Wizard, Click Next.
4. Select Search for a suitable driver for my device (Recommended) and click Next.
Make sure the Driver CD is in your CD-ROM/DVD.
5. Ensure Specify a location is checked and click Next.
6. Type in E:\ (where ‘E’ refers to your CD-ROM/DVD drive ) and click Browse.
7. Specify the driver location, e.g. E:\PCI IO Host \OXmPCI \Windows, and click OK.
8. When the wizard indicates that it has found a driver for the device click Next, then click
Finish.
9. Repeat Steps 3 – 8 until all the relevant files have been installed.