1
2.2 Install the Control/Communicator
2.0 Enclosure Installation
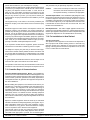
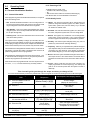
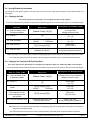
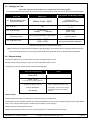
The DS7400Xi control/communicator and the enclosure are shipped
together. The control, however, still needs to be installed into the
enclosure. Hardware for mounting the enclosure to a wall, and the
control to the enclosure is located in its own hardware pack.
CAUTION:
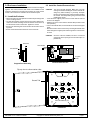
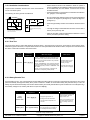
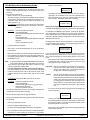
2.1 Install the Enclosure
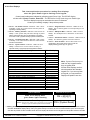
• Use the enclosure as a template and mark the top mounting holes
on the mounting surface.
• Pre-start the mounting screws for these two holes. Slide the enclosure onto these mounting screws so that the screws move up
into the thinner section of the holes. Tighten the screws.
• Screw in the remaining two screws in either set of bottom mounting holes.
• Knock out the desired wire entrances on the enclosure.
•
•
•
•
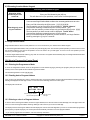
The control is static sensitive. Make sure you touch
earth ground before handling the control. This will discharge any static electricity in your body. Example:
Run the ground wire to the enclosure before handling
the control. Then keep holding the ground wire while
installing the control.
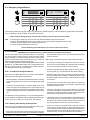
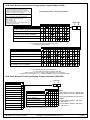
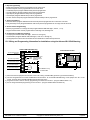
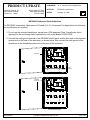
Insert the three support posts into the control retainer holes as
shown in the diagram.
Slide the top of the control into the retainer tabs (the slots under
the top frame).
Once in the retainer tabs, the control will rest on the three support
posts.
Secure the bottom of the enclosure by screwing the bottom three
holes through the support posts and through to the control retainer holes.
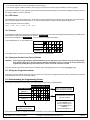
CAUTION:
Once the control is installed, be sure to connect its
ground wire to the top hinge of the enclosure (the unpainted tab).
Enclosure
Ground Wire
Circuit board
DS7400Xi
Program
Pads
Control/Communicator
Support Post Assembly
Flip-up view to show retainer tabs
Retainer Tabs
Ground Tab
Control Retainer Holes (3 places)
Support Posts
Wire Entrances (6)
Enclosure
DS7400Xi Ver. 3+ Reference Guide
Copyright © 1995-96 Detection Systems, Inc.
Page 7