1
Software installation
This section describes how to install Matrox software for Windows 95 and Windows NT 4.0. For
other operating systems, see “Other software”, page 14.
1
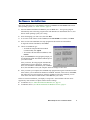
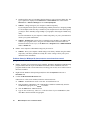
Insert the Matrox Installation CD-ROM in your CD-ROM drive – the mgasetup program
automatically starts. This setup program works with Windows 95 and Windows NT 4.0, and
detects which operating system you’re using.
2
Select the language you want to use, then click Next.
3
To see notes on the contents of the CD-ROM, click View ReadMe. To continue, click Next.
4
If this is a first-time installation, the setup program lists drivers that are not installed.
To begin the software installation, click Install.
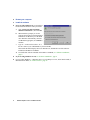
5
Choose an installation type:
To install the complete MGA PowerDesk
(recommended), click Typical.
To customize the PowerDesk installation, click
Custom.
If you click Custom, the setup program prompts you
for a destination folder and what PowerDesk options
you want to install.
After you choose, the setup program automatically
installs Matrox software and drivers. After this is
done, leave the Matrox CD-ROM in your CD-ROM
drive, then click OK to restart your computer and for all changes to take effect.
6
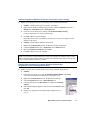
After you restart your computer, the CD-ROM setup program starts again. The main menu lists
other software you can install from the Matrox CD-ROM. To install, select an item, click Install,
then follow the on-screen instructions. After the installation of an item is finished, you can
return to the main menu to install another. Click Exit when you’re done.
If this is a first-time installation, your display is using a 640 × 480 resolution with 256 colors –
supported by most monitors. To adjust software monitor settings:
for Windows 95, see “MGA PowerDesk for Windows 95”, page 10.
for Windows NT 4.0, see “MGA PowerDesk for Windows NT 4.0”, page 12.
Matrox Graphics Card – Installation Guide
9