1
CL50User Page 38 Wednesday, January 27, 1999 10:10 AM
38
ePhoto CL50 User’s Guide
Locking/Unlocking Images
To lock/unlock images:
1. Press OK. A column of green icons appears on the color LCD.
2. Press ▼ to highlight the
icon.
3. Press OK. The LOCK/UNLOCK menu appears.
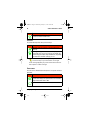
4. Select the desired option:
◗
◗
◗
◗
Lock/Unlock — to select an image to lock/unlock.
Lock all — to lock all images.
Unlock all — to unlock all locked images.
Exit — to leave the menu without locking/unlocking any
images.
5. If you select Lock/Unlock, press ▲/▼ to scroll to the image you
want to lock/unlock and then press OK. The LOCK/UNLOCK
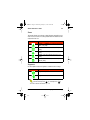
menu appears. Select the desired option:
◗
◗
◗
Lock/Unlock — to lock/unlock the image.
Next — to select another image.
Done — when you are finished locking/unlocking images.
6. If you select Lock all or Unlock all, a confirmation screen
appears. Select Yes to lock/unlock all of the images and exit the
menu, or No to return to the LOCK/UNLOCK menu.
Printing Images
You can specify which images you want to print and then bring the
memory card to a photo shop or minilab to have the photos developed. If you want to specify how many copies to print, use singleimage view.
To tag images for print:
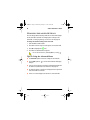
1. Press OK. A column of green icons appears on the color LCD.
Working with Captured Images