1
Installation, cont’d
Tip
Sleeve
Tip (Left)
Sleeve (Gnd)
Ring (Right)
Tip (Left)
Tip (Signal)
Sleeve (Gnd)
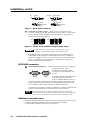
Unbalanced Mono
Sleeve (Gnd)
Unbalanced Stereo
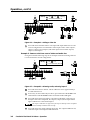
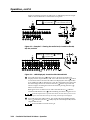
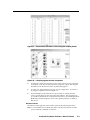
Figure 7 — Phono audio connectors
5
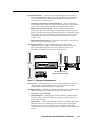
Connections for audio outputs — These 3.5 mm, 5-pole captive screw
connectors output the selected unamplified, line level audio. Connect audio
devices, such as an audio amplifier or powered speakers. See figure 8 to
properly wire an output connector.
Tip
Ring
Sleeve (s)
Tip
Ring
Tip
See warning
Sleeve
Tip
See warning
Balanced Output
Unbalanced Output
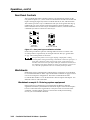
Figure 8 — Captive screw connector wiring for audio output
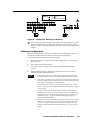
Connect the sleeve to ground (Gnd). Connecting the sleeve to a
negative (-) terminal will damage the audio output circuits.
By default, the audio output follows the video switch. Audio breakaway,
commanded via the front panel, under RS-232/422 control, or Windowsbased control program, allows you to select from any one of the audio input
sources. See chapter 3, Operation, chapter 4, Programmer’s Guide, and
chapter 5, Matrix Software for details.
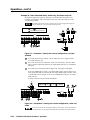
RS-232/422 connection
6
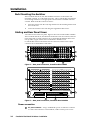
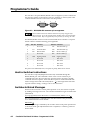
Remote/RS-232/RS-422 port — Connect a host device, such as a computer or
touch panel control, to the
CrossPoint Plus via this 9-pin D
5
1
1
5
connector for serial RS-232/RS-422
control.
9
6
Female
6
9
Male
If desired, attach an MCP 1000 remote
control panel master unit to the
switcher’s RS-232/RS-422 connector.
You can also attach an MKP 1000 remote keypad or MCP 1000 slave unit to
the MCP 1000 master unit. Refer to the “MCP 1000 Remote Control Panel
User’s Manual” and the “MKP 1000 User’s Manual” for details.
See chapter 4, Programmer’s Guide, for definitions of the SIS commands and
chapter 5, Matrix Software to install and use the control software.
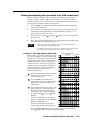
The CrossPoint Plus Series Matrix Switchers are factory configured for
RS-232 control. To use the switcher under RS-422 control, an internal cable
must be moved. See appendix B for the procedure for shifting the cable.
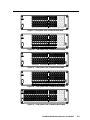
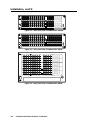
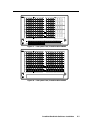
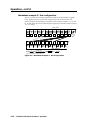
Additional rear panel views
The following figures show the rear panels of all CrossPoint Plus switchers, except
for the CrossPoint Plus 128HVA, which is shown in figure 4, and the
CrossPoint Plus 1616HVA, which is shown in figure 5.
2-4
CrossPoint Plus Matrix Switchers • Installation