1
Installation
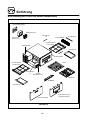
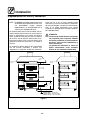
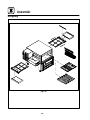
Oven Assembly
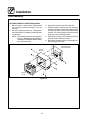
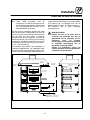
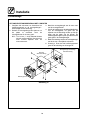
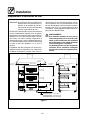
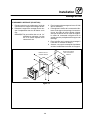
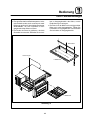
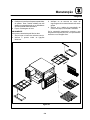
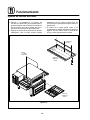
STACKING THE OVENS (if applicable)
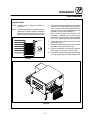
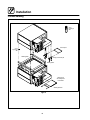
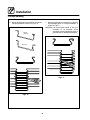
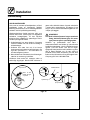
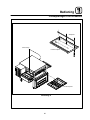
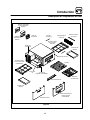
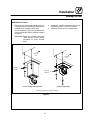
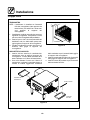
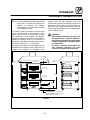
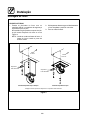
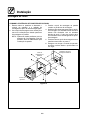
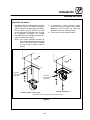
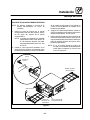
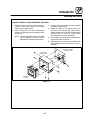
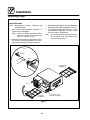
1. Install the supports on the bottom unit as described.
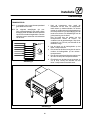
2. Have several persons carefully lift the oven off
the pallet and set it onto the casters.
3. Engage the brakes on the front casters.
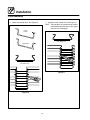
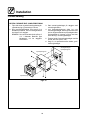
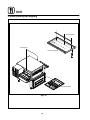
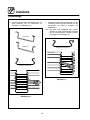
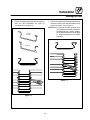
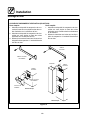
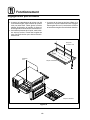
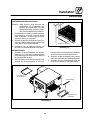
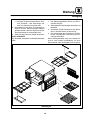
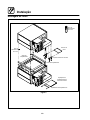
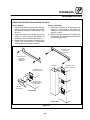
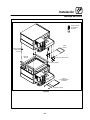
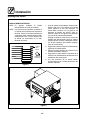
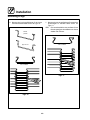
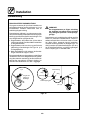
4. Rest the top oven on its back. Install the four
oven alignment pins into the nuts on the bottom of the upper oven. The pointed end of the
pin will go through the stacking rails and into
the holes on top of the lower oven.
5. Lay the stacking rails on top of the lower oven.
The holes in the rails should line up with the
holes in the oven.
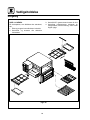
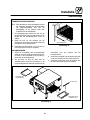
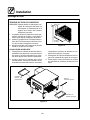
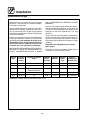
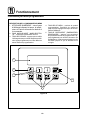
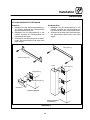
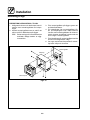
6. For ovens with integral computers, mount
each heat shield bracket to the bottom of the
control tunnel of the top oven with the open
end facing out.
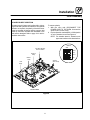
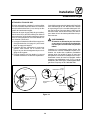
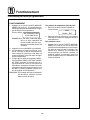
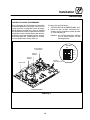
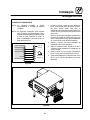
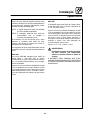
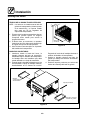
7. Attach the control box stacking spacer as follows:
a.) Place the control box stacking spacer on
top of the control box of the bottom unit.
b.) Loosen the two screws at the top rear of
the control box of the lower oven.
c.) Slide the stacking trim over the loosened
screws. Tighten the screws.
d.) Attach the stacking trim to the side of the
stacking spacer with the screws provided.
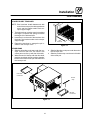
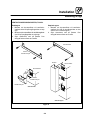
8. Have several persons carefully place the
upper oven on top of the lower oven. Align the
alignment pins with the holes in the top of the
lower oven.
9. For ovens with integral computers, slide the
front heat shield into the heat shield support.
9