1
Music Level Control
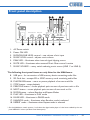
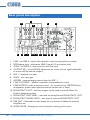
A front panel-mounted music level control 4 is provided. Remote control of music
level is possible by connecting a remote control plate (either RSL-4/RSL-4A or RL-1/
RL-1A), see “Remote Control of Music Source Select and Level” on page 17below.
If the music level is set too high, the front-panel PEAK LED 5 illuminates. Note that
this LED also indicates excessive mic signal level.
Remote Control of Music Source Select and Level
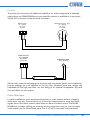
The MA60 and MA60media mixer-amplifiers are compatible with standard Cloud
remote control plates types RSL-4/RSL-4A (music source select and level) and RL-1/
RL-1A (level only). Either type of unit may be connected at the rear 3-pin 5 mm-pitch
screw terminal connector 15 , using the wiring shown below.
REMOTE SOURCE & LEVEL CONTROL WIRING
REMOTE LEVEL CONTROL WIRING
RL-1
1
REMOTE MUSIC
CONNECTOR
1
2
3
1
2
SINGLE-CORE SCREENED CABLE MAY BE USED
3
2
3
REMOTE MUSIC
CONNECTOR
RSL-4
1
2
3
USE TWO-CORE SCREENED CABLE
Use two-core (RSL-4/RSL-4A or RL-1/RL-1A) or single-core (RL-1/RL-1A only)
screened cable to connect the remote level plate. The maximum recommended cable
length is 100 m.
Pressing the REMOTE/LOCAL button 16 above the rear panel connector activates
the remote control plate and disables both the front panel level and source select
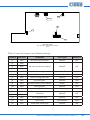
controls. If an RL-1/RL-1A is being used, the internal jumper J9 should be moved from
its default ‘SW’ setting to ‘FR’, to override the disabling of the front panel source
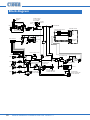
select switch. See “PCB layout diagrams” on page 30 for further information
regarding the internal jumpers.
Music Priority
One audio source can be given automatic priority over all other music inputs by
connecting it to Line 4 input and moving internal jumpers J12A and J12B from the
OFF position (factory default) to ON. This is a useful facility when a Juke Box, Digital
MA60 & MA60media Installation and User Guide v1.2
17