1
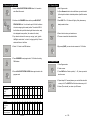
4.4.3 Running Scenes
4. Operation Guide
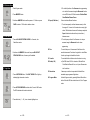
1. Enter Program mode.
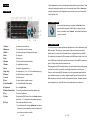
You can easily control pan, tilt, shutter, gobo, color, rotation, dimmer and focus functions on
the lighting fixtures by pressing the relevant buttons showing on the control panel. With the
2. Press MEMORY button.
use of joystick/ sliders, you will be able to quickly set the fixtures’ Pan or Tilt position to make
scenes. You can then save all these scenes step by step in a memory to create a chase
3. Press a button 1~12 or press PAGE select button 13~24 for
manually running a scene.
( show ). The controller allows you to program 24 chases with 485 programmable scenes
maximum.
4. Press the same button again. The second scene will be run after the
first scene.
4.1.1 Program mode
When power is turned on, the controller enters Programming mode
Note:
automatically. The LED above this button lights off indicating Program
The SAVE button is used to store the current status into memory.
mode in active.
The PAGE button is used to select the position of memory. The controller has 24 position in
which you can save chases ( shows ) into them. When the upper LED is on, then button 1 =
4.1.2 Blackout Mode
memory 1, button 2 = memory 2… etc, when the lower LED is on then button 1 = memory
Press the BLACKOUT/STAND ALONE button, the LED above this
13, button 2 = memory 14… etc.
button lights up indicating Blackout in active.
The MEMORY button is used to read exiting scenes. The LEDs will light up if there is
memory saved into the buttons.
4.1.3 Stand Alone Mode
4.4.4 Insert a Scene
Hold on the BLACKOUT/STAND ALONE for 3 seconds, the LED
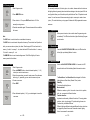
1. Enter Program mode.
2. Press the MEMORY button, choose the desired position ( 1 ~ 24 )
in which you want to insert a scene.
3. Select the scene where you want to insert a scene. Press the same
button ( e.g. 6 ) repeatedly, you can view the scene one by one.
4. Create a new scene.
5. Press SAVE.
6. Press the desired position ( 1~24 ) you selected again to insert the
new scene.
on - 14D -
above this button will blink indicating Stand-Alone mode in active.
The Stand Alone 1 and Stand Alone 2 are designed for iSolution
lighting fixtures in Stand Alone ( Master/ Slave ) mode.
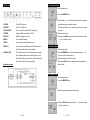
Stand By:
To blackout the lighting fixtures.
Mode selection:
Different run modes, e.g. fast / slow, audio / manual / auto, position,
latch, etc., correspond to different functions.
Function selection:
Implements a wide variety of effects, like strobe, X/Y moving pattern
selection, gobo/ color changing, X/Y position setting, dimmer, etc.
Functions vary with different fixtures.
Different lights have different modes and different functions, which can
be triggered by Stand Alone mode. Please refer to each lighting
fixture's user manual for more details.
on - 7D -