1
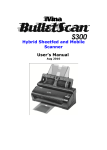
iVina BulletScan User’s Manual For Mac OS X TM Copyright Copyright© 2011 All rights reserved. Information in this document is subject to change without notice. The software described in this document is furnished under a license agreement or nondisclosure agreement. The software may be used or copied only in accordance with the terms of those agreements. No part of this publication can be reproduced in any form or by any means without prior written permission of iVina Inc. Trademark Mac, and Mac OS are trademarks of Apple Computer, Inc., registered in the United States. Other names and products mentioned in this document may be trademarks or registered trademarks of their respective companies. ii Contents 1 Overview ............................................................................ 1 1.1. Introduction ........................................................................................................ 1 System Requirements .................................................................................................... 2 2 3 1.2 Installing the Scanner Driver ........................................................................... 2 1.3 Connecting the Scanner to Your Mac ............................................................ 4 1.4 Uninstalling the Scanner Driver ...................................................................... 5 Quick Tour .......................................................................... 6 2.1 Before You Begin................................................................................................... 6 2.2 Starting and Exiting the Scanner’s User Interface .................................. 6 2.3 Scanning a New Document ............................................................................... 8 Using the Scanner Driver ................................................. 10 3.1 Buttons on the User Interface ....................................................................... 11 Using the Preview Window ............................................................................ 13 3.2 The Profile Tab ..................................................................................................... 14 3.2.1 Profile Selection Box ........................................................................... 15 3.2.1 Adding a New Profile ........................................................................... 19 3.2.2 Deleting a Current Profile ................................................................. 20 3.3 The Image Tab ..................................................................................................... 21 3.2.2 Converting Your Image to a Bi-tonal Image.............................. 22 3.2.3 Adjusting Your Brightness and Contrast Value ......................... 26 3.2.4 Choosing Your Ideal Resolution ...................................................... 27 3.2.5 Reversing the Brightness and the Colors of Your Scanned Image .................................................................................................................... 28 3.2.6 Choosing Your Paper Size ................................................................. 29 3.2.7 Choosing Your Scan Source ............................................................. 29 3.2.8 Changing Your Image Name and Location ................................. 30 3.2.9 Changing Your File Format ............................................................... 31 3.4 The Color Dropout Tab ...................................................................................... 34 3.5 The Paper Tab ...................................................................................................... 38 iii 3.5.1 Choosing Your Desired Paper Size and Orientation ................ 39 3.5.2 Using the Multi-Feed Detection Option ........................................ 41 4 3.6 The Options Tab .................................................................................................. 43 3.7 The Information Tab .......................................................................................... 47 Using the Scanner ............................................................ 48 Buttons .................................................................................. 48 4.1 Pressing the Scanner Button to Start A Scan .......................................... 48 4.2 Redefining Your Button Settings ................................................................... 54 Index ..................................................................................... 55 iv 1 1.1. Overview Introduction This manual documents how to install and use the iVina BulletScan Mac OS X scanner driver. This scanner driver also provides the following features: Scan document or photos and save it to popular file formats such as JPEG, TIFF, Windows Bitmap, PDF, Searchable PDF (with full text OCR) and PNG files Automatic page straightening and page size detection Automate your workflows with a variety of user profiles Automatic blank page removal Optimize black and white documents using dynamic thresholding to fade out colored paper, while retaining important data This manual provides information and usage information for the following iVina BulletScan scanners: BulletScan S300 BulletScan S400 BulletScan M80 BulletScan F200 BulletScan F600 1 System Requirements Operating System: Mac OS X 10.5 or later Computer: Intel® CoreTM Solo or Duo Processor (recommended: Intel® CoreTM Duo Processor 1.83 GHz or higher) 1.2 512 MB or more of RAM Installing the Scanner Driver 1. Insert the iVina BulletScan Disc into your Optical drive. 2. When the drive is mounted and shows up on your desktop, double-click on it to begin installation. 3. Select your scanner model from the menu and double-click on it. 4. This will open the disc image (dmg) file. When the dmg file is opened, the scanner driver will be displayed in Finder. 5. To install the scanner driver on your computer, drag the scanner icon to your Applications folder. You can either use the alias we provide (as seen above) or the folder on the left. Once it’s done copying, the scanner driver will be displayed in your list of Applications as seen below. example below is the S300 driver. 2 In the 3 1.3 Connecting the Scanner to Your Mac Before connecting, make sure the power switch (if any) is off. 1. If your scanner comes with a power adapter, plug the small end of the power adaptor into the power jack of your scanner. Plug the other end to an appropriate power outlet. 2. Connect the square end of the USB cable to the USB port of your scanner. Connect the rectangle end to the USB port of your Mac. 3. For the S400, F200, and F600 scanners after the power cable and the USB cable have all been connected, press the power switch to the ―-‖ position to turn on the scanner. To turn off the scanner, press the ―o‖ position. For the S300 scanner, turn the knob to any of the number positions to turn the scanner on. Example connection ports of your scanner 4 1.4 Uninstalling the Scanner Driver 1. Choose your scanner model from your Applications, for example, S300. 2. Simply drag the icon of your scanner model to your Trash Can. right-click the icon and choose Move to Trash. 3 Empty your Trash. 4 The scanner driver will be removed from your Macintosh. 5 Or 2 Quick Tour 2.1 Before You Begin Before you begin to use the software, please first make sure your scanner is turned on and is connected correctly to your Macintosh. 2.2 1. Starting and Exiting the Scanner’s User Interface To start the scanner driver, double click the scanner model from your Applications, for example, S300. The S300 appears on your Dock menu and begins searching for supported scanner. 6 2. The following main window will be displayed. Your scanner model will be indicated on the top of the window. To exit the main window, Choose Exit BulletScan from the BulletScan menu or click the Exit button on the bottom to leave the main window. 7 2.3 Scanning a New Document To start scanning, follow these steps: 1. Place document on the auto document feeder with text face down. If you have an F600 or F200 you may instead place your document on the flatbed. 2. In the dropdown list of profiles, choose one of the preset profiles that matches what you want to scan. For example, ―Normal Text Documents, Both Sides‖ will select Front B&W and Rear B&W as illustrated. This means the scanner will scan both the front side and rear side of your document in black and white mode. 3. Click the Scan button in the main window to start scanning. 4. When the scanner has scanned all of the documents in the Automatic 8 Document Feeder, it will then convert the scanned pages to your output file. The file will be saved in the location shown under ―Image Path‖ 5. To close the scanner driver, press the Exit button. Note: To perform your first scan, we recommend you to use the default scan settings. When you become more familiar with the software, feel free to create new profiles that fit your own purpose. 9 3 Using the Scanner Driver The user interface of the scanner driver allows you to configure the scanner’s settings. It consists of several tabbed windows each of which will be described in this chapter. 10 3.1 Buttons on the User Interface The buttons on the main window Buttons Default Scan Description Click to revert to the default scan settings. After all the scan settings are satisfactory, click the Scan button to start scanning your document. Exit Click to leave the main window. Preview Click to open a Preview window to let you view and set your Window scan area before the actual scan. 11 The following table shows the default settings. Different scanner models have slightly different default settings: Tab name Default settings Image Image:Front B&W, Back B&W (Back is only available on the duplex scanners) Binarization:Dynamic Threshold (Fixed processing for S300) Brightness:0 Contrast:0 Resolution:300 dpi (200 dpi for S300) Invert:Blank on White Paper Size: Automatic Scan Source:Auto Document Feeder Profile: Normal Documents, Both Sides (M80, S400, F600); Normal Documents Fast, One Sided (S300); Normal Documents, One Sided (F200) Image Name: Image_### File Format: PDF Image Path: /Users/<login name>/Documents Color None Dropout Paper Paper Size:Automatic Deskew:Yes Orientation:Portrait Multi-Feed Detection:None (Ultrasonic enabled for F600) Unit:Inch Options Rotation Degrees:None Blank Page Removal:On Edge Fill:White,1 mm Despeckle: None Enable Energy Saver:Enable, 15 minutes after last scan action Image Count: -1 (Unlimited) Transport Timeout: 0 second 12 Using the Preview Window The Preview window allows you to preview your image before final scan. This preview image lets you allocate your scan area. Note: If you choose ―Automatic‖ from the Paper Size drop-down list box in the Paper tab or the Image tab, manual selection is disabled. To select your scan area, 1. Click the Preview Window button to open the Preview window. 2. Click Preview to perform a preview scan. 3. Place your cursor on the Preview window, click and drag it diagonally across the Preview window. A red rectangle box will appear to indicate the selected area. 4. Click the Scan button to scan in your selected size. 5. To close the Preview window, simply click the Preview Window button again. 13 3.2 The Profile Tab The Profile tab allows you to choose your desired profile to fit a variety of your scan tasks. 14 3.2.1 Profile Selection Box The Profiles Selection Box provides a number of frequently used scan tasks with predefined scan settings to save your time. The default scan profiles are listed in below: Profile Name Description Predefined Scan Settings Business Card in This scans a business card in color. Color Front Color, 300 dpi, Auto Crop, PDF, Edge Cleanup: Off, Blank Page Removal: On, Despeckle: Off Business Card This scans a business card in grayscale. Front Gray, 300 dpi, Auto Crop, PDF, Edge Cleanup: Off, Blank Page Removal: On, Despeckle: Off Fine Print Document This scans letter-size documents in black and white at 600 dpi. This is best for documents with very small or fine print. Front B&W, Rear B&W, 600 dpi, US Letter (8.5‖x 11‖), PDF, Edge Cleanup: 1 mm, Blank Page Removal: On, Despeckle: On Legal Sized This scans a legal size documents in black and white at Document 300 dpi. Front B&W, Rear B&W, 300 dpi, US Legal (8.5‖x14‖), PDF, Edge Cleanup: 1 mm, Blank Page Removal: On, Despeckle: On Mixed Sized This scans any size document in black and white at 300 Document dpi, automatically detecting the size. Front B&W, Rear B&W, 300 dpi, Auto Crop, PDF, Edge Cleanup: 1 mm, Blank Page Removal: On, Despeckle: On 15 Profile Name Description Predefined Scan Settings Normal Documents This scans letter size documents in black and white at 200 Fast, Both Sides dpi. This is good for many documents, especially if the text is clear. Front B&W, Rear B&W, 300 dpi, US Letter (8.5‖x11‖), PDF, Edge Cleanup: 1 mm, Blank Page Removal: On, Despeckle: On Normal Documents This scans letter size documents in black and white at 200 Fast, One Sided dpi. This is good for many documents, especially if the text is clear. Front B&W, 300 dpi, US Letter (8.5‖x11‖), PDF, Edge Cleanup: 1 mm, Blank Page Removal: On, Despeckle: On Normal Documents in Color, Both Sides This scans letter size documents in color at 200 dpi. Front Color, Rear Color, 200 dpi, US Letter(8.5‖x11‖), PDF, Edge Cleanup: 1 mm, Blank Page Removal: On, Despeckle: On Normal Documents in Color, One Sided This scans letter size documents in color at 200 dpi. Front Color, 200 dpi, US Letter(8.5‖x11‖), PDF, Edge Cleanup: 1 mm, Blank Page Removal: On, Despeckle: On Normal Documents This scans letter size documents in black and white at 300 Both Sides dpi. This is the recommended setting in most cases for scanning documents. Front B&W, Rear B&W, 300 dpi, US Letter(8.5‖x11‖), PDF, Edge Cleanup: 1 mm, Blank Page Removal: On, Despeckle: On Normal Document, This scans letter size documents in black and white at 300 One Sided dpi. Front B&W, 300 dpi, US Letter (8.5‖x11‖), PDF, Edge Cleanup: 1 mm, Blank Page Removal: On, Despeckle: On 16 Profile Name Description Predefined Scan Settings Photo in Color This does a color scan and automatically detects the photo size. Front Color, 300 dpi, Auto Crop, JPEG, Edge Cleanup: Off, Blank Page Removal: On, Despeckle: Off Photo in Grayscale This does a grayscale scan and automatically detects the photo size. This is recommended for traditional black and white photos. Front Gray, 300 dpi, Auto Crop, JPEG, Edge Cleanup: Off, Blank Page Removal: On, Despeckle: Off Text Searchable Business Card in Color This scans a business card in color and runs OCR on it. Front Color, 300 dpi, Auto Crop, PDF, Edge Cleanup: Off, Blank Page Removal: On, Despeckle: Off Text Searchable This scans a business card in grayscale and runs OCR on it. Business Card Front Gray, 300 dpi, Auto Crop, PDF, Edge Cleanup: Off, Blank Page Removal: On, Despeckle: Off Text Searchable Fine This scans letter size documents in black and white at 600 Print Document dpi and runs OCR on it. This is very processor intensive. Front B&W, Rear B&W, 600 dpi, US Letter (8.5‖x11‖), PDF, Edge Cleanup: 1 mm, Blank Page Removal: On, Despeckle: On Text Searchable This scans legal size documents in black and white at 300 Legal Sized dpi and runs OCR on it. Document Front B&W, Rear B&W, 300 dpi, US Legal (8.5‖x14‖), PDF, Edge Cleanup: 1 mm, Blank Page Removal: On, Despeckle: On 17 Profile Name Description Predefined Scan Settings Text Searchable This scans letter size documents in black and white at 300 Normal Document, dpi and runs OCR on it. Both Sides Front B&W, Rear B&W, 300 dpi, US Letter (8.5‖x11‖), PDF, Edge Cleanup: 1 mm, Blank Page Removal: On, Despeckle: On Text Searchable This scans letter size documents in black and white at 300 Normal Documents, dpi and runs OCR on it. One Sided Front B&W, 300 dpi, US Letter (8.5‖x11‖), PDF, Edge Cleanup: 1 mm, Blank Page Removal: On, Despeckle: On 18 3.2.1 Adding a New Profile Some document types may require you to make custom adjustments. If you will use the custom adjustments more than once, you can save it as a profile, adding it to the list of other profiles, even letting you assign it to one of the scanner buttons. To add a new profile, 1. Start at the Image tab on the main window. 2. Once you start changing the scan settings, the Profile dropdown will change to ―Custom‖. Choose your desired scan settings from the Image dialog box and clicking the Paper tab, the Color Dropout tab, or the Options tab if required. 19 For example, choose your file format ―JPEG‖ from the File Format drop-down list box, choose your ideal resolution ―200 dpi‖ from the Resolution drop-down list box, and click the Options tab to change the Energy Saver from 15 minutes to 20 minutes. 3. After your desired scan settings have been made, click the Plus ( ) button next to the Profile drop-down list box. Type your profile name and click OK and the new profile will be added in the Profile Selection box. 3.2.2 Deleting a Current Profile To delete a profile, 1. Choose the profile you wish to delete from the Profile drop-down list box. 2. Click the Minus ( ) button next to the Plus button. A Confirmation dialog box is prompted. Click OK to delete the selected profile. 20 3.3 The Image Tab The Image tab allows you to pick your basic scan settings, select your desired file format, and change your file name and the location of your scanned image. The features are described in the following pages. 21 3.2.2 Converting Your Image to a Bi-tonal Image Binarization This is the process of converting a grayscale or color image to a bi-tonal or Black and White image. There are several different methods of performing this conversion. Options: Dynamic Threshold, Fixed Processing, Halftone 1~5, Diffusion. Dynamic Threshold: Selecting Dynamic Threshold allows the scanner to dynamically evaluate each document to determine the optimal threshold value to produce the highest quality image. This is used to scan mixed documents containing faint text, shaded background, or color background with a single setting. If Dynamic Threshold is selected, Threshold, Brightness, and Contrast are not available. Sensitivity of Dynamic Threshold Occasionally your scanned image may contain small dots or speckles. To remove these spots, increase the sensitivity value by moving the bar to the right. The value ranges from 1 to 30. The default is 20. Fixed Processing: Used for black-and-white and other high contrast documents. A single level is set to determine the black-and-white transition. The threshold is programmable over the entire density range. Fixed Processing sets Contrast to 0. If Fixed Processing is selected, Contrast is not available. Halftone: In addition to the black and white display, Halftone can present a somehow gray shade of image by using different sizes of dots. Halftone image looks like the picture we have seen in the newspaper. Options include Halftone 1, Halftone 2, Halftone 3, Halftone 4, Halftone 5. 22 Diffusion: Diffusion is a type of Halftone. Diffusion gives good image texture and makes text in images more readable than Halftone. Halftone Image Diffusion Image 23 Threshold Used to convert a grayscale image to a bi-tonal image. The value ranges from 0 to 255. A low threshold value produces a lighter image, and can be used to subdue backgrounds and subtle, unneeded information. A high threshold value produces a darker image, and can be used to help pick up faint images. Adjust the threshold setting by dragging the Threshold sliding bar to the left or right to achieve the desired threshold setting. 200 dpi, Threshold:80, 200 dpi, Brightness: 0 Threshold:170, Brightness: 0 Gray Document Type: Normal, Photo, Document Three options of document type are provided when you choose Gray as the image type for your scanned document. Choice: Normal, Photo, Document. Document: Choose Document if your original contains pure text or a mixture of text and graphic since it is an optimal setting for regular business document. When using Document, only Threshold can be adjusted. Photo: Choose Photo if your original is a photo or similar to reproduce your photo in vivid grayscale image. When using Photo, Threshold and Contrast are locked. Normal: When using Normal, Threshold, Brightness, and Contrast can be adjusted. 24 Threshold: The value ranges from 0 to 255. The default is 230. A low threshold value produces a lighter image, and can be used to subdue backgrounds and subtle, unneeded information. A high threshold value produces a darker image, and can be used to help pick up faint images. Adjust the threshold setting by dragging the Threshold sliding bar to the left or right to achieve the desired threshold setting. Normal Photo Document (Threshold: 230) Normal Photo Document (Threshold: 230) 25 3.2.3 Adjusting Your Brightness and Contrast Value Brightness Adjusts the lightness or darkness of an image. The higher the value, the brighter the image. Drag the slider to the right or left to increase or decrease the brightness. The range is from –100 to +100. Contrast Adjusts the range between the darkest and the lightest shades in the image. The higher the contrast, the bigger the difference in grayscale. Drag the slider to the right or left to increase or decrease the contrast. The range is from –100 to +100. Brightness: -50 Contrast: -50 Brightness: 0 (Normal) Brightness: +50 Contrast: 0 (Normal) 26 Contrast: +50 3.2.4 Choosing Your Ideal Resolution Resolution Resolution is the value that controls how much information is captured when the scan is performed. A higher resolution will capture more information and increase the file size, trading off performance for quality. Most business documents are best saved in 200 or 300 DPI (Dots Per Inch) depending on the size and quality of the text. For reference, a letter size color image scanned at 300 dpi at in color consumes about 25 MB of disk space when uncompressed. When OCR (Optical Character Recognition) is to be performed on a scan, 300dpi should be used. Choose a resolution value from the drop down list. The default value is 200 dpi. Available resolutions are 75, 100, 150, 200, 300, 400 and 600. Or you may use the arrow buttons to select a custom value. Resolution: 75 dpi Resolution: 150 dpi 27 3.2.5 Reversing the Brightness and the Colors of Your Scanned Image Invert Reverses the brightness and the colors in the image. The default setting is Black on a White background. Reverse mode is White on a Black background. For color images, each pixel will be changed into its complementary color at the command of Invert. Black on White White on Black 28 3.2.6 Choosing Your Paper Size Paper Size Choose your desired paper size with the Paper Size drop-down list box. Or you may select a custom paper size by choosing Custom to define your desired scan size. Choice: Automatic, US Letter- 8.5‖x 11‖, US Legal – 8.5‖ x 14‖, ISO A4 – 21 x 29.7 cm, ISO A5 – 14.8 x 21 cm, ISO A6 – 10.5 x 14.8cm, ISO A7 – 7.4 x 10/5 cm, ISO B5 – 17.6 x 25 cm, ISO B6 – 12.5 x 17.6 cm, ISO B7 – 8.8 x 12.5 cm, JIS B5 – 18.2 x 25.7 cm, JIS B6 – 12.8 x 18.2 cm, JIS B7 – 9.1 x 12.8 cm, Scanner Maximum, Custom. Automatic: Automatic adjusts the cropping window according to different document sizes. Use this option for batches of mixed-sized documents. 3.2.7 Choosing Your Scan Source Choose your scan source from the Scan Source drop-down list box. Note the options may vary based on your type of scanner. Scan Choice: Source Auto Document Feeder: Flatbed: Used to scan multiple pages. Used to scan a single page. For example, pages from newspaper clipping, paper with wrinkles or curls. Automatic: Allow the scanner automatically set its scan source. If Automatic is selected and there is document in both the auto document feeder (ADF) and the flatbed, then the scan source will be automatically set to ADF. If Automatic is selected and there is document only in flatbed, then the scan source will be set to flatbed. 29 3.2.8 Changing Your Image Name and Location To change where the finished scans are stored, from the Image tab, click on the More… button. Enter the path or click Browse to select the path for your Path scanned image. Default: \Users\<login username>\Documents\ Image The image name consists of text, and special tokens that Name automatically generate a name. All of the available tokens will be displayed on this window with the current effective value they will have. When a scan is performed, the tokens are automatically converted to their actual values at scan time. For example, the default setting of ―Image-%Seq‖ will be converted to Image-001 for the first scan, Image-002 for the second, and so on. You may change the default name in the box, and it is recommended that you use a counter or a unique identifier so that no two output files will have the same name. 30 The following tokens are available for use: 3.2.9 Token Converts to # Numbered Counter YYYY Current Year, 4 digits YY Current Year, 2 digits MM Current Month, 4 digits MMM Current Month, JAN DD Current Day, 01~31 HH Hour, 01~24 NN Minute, 01~60 SS Second, 01~60 Seq Sequence number, 001~999 Changing Your File Format File Choose your preferred file format from the File Format Format drop-down list box. Choices include JPEG, TIFF, Windows Bitmap, PDF, PNG, Searchable PDF. Check Multi-Page One File if you wish to create a multi-page PDF file. JPEG: JPEG (Joint Photographic Experts Group) compression provides the best results with continuous-tone color and the smallest file size. This is recommended for photos and similar graphics. It is not recommended for anything with text or crisp lines. This compression is lossy and may lose some fidelity compared to the original image. TIFF: TIFF (The Tagged-Image File Format) is a flexible image format container supported by many paint, image-editing, and page-layout applications. Also, virtually all desktop scanners 31 can produce TIFF images. There are several different compression types used within the TIFF format, some are lossy, some are lossless. This is recommended for when PDF is not desired and when scanning in black and white. Windows Bitmap: Bitmap is the standard Windows image format on DOS and Windows-compatible computers. The BMP format supports RGB, indexed-color, grayscale, and Bitmap color modes. The BMP format is not compressed and may create large files. This is a lossless format. PNG: PNG (Portable Network Graphics) format is a lossless format that many newer image editors and viewers can use. It is recommended for when PDF is not desired and the scanned item will have a mix between color content and text or other crisp lines. 32 PDF, Searchable PDF: PDF(Portable Document Format) is a very popular file format used by Adobe. You can view PDF files using Adobe Acrobat or Adobe Reader. Searchable PDF allows users to create PDF files with searchable text so they can be indexed by search engines. When creating a Searchable PDF, Optical Character Recognition is performed by the scanner driver which will increase the processing time based on the content and condition of the page. The following table gives you a rough idea of file size vs. file format To scan an 8.5‖ by 11‖ color image in 200 dpi, File Format BMP TIFF PDF JPEG File Size 10M 10M 53KB 212KB 1.3M 33 GIF 3.4 The Color Dropout Tab Color Dropout is a special type of image processing designed to improve OCR results by removing specific types of background color content. Typically this is used in conjunction with specially designed forms that have colored boxes or checkboxes that people fill in. Using dropout allows you to remove these specially colored boxes from the image and provides you with better OCR results. It can also be used to remove a specific background color if it is causing a lot of noisy speckling. 34 Color Dropout The Color Dropout dropdown list allows you drop either of the red, blue, or green color channel in your scanned image. You may also click Custom to specify your desired color channel to be removed by entering its RGB (Red, Green, and Blue) value respectively. Note: This function applies only when outputting black & white or gray images. Original Remove Blue Color Channel Tolerance Specify the allowable color range to be removed for the color you selected. Specified range: 1 ~ 100 The large the numeric value, the wider the color dropout range is. 35 Advanced Processing provides two options that can adjust your scanned image in the best optimal result. Filter This value is used to determine the color which will be Threshold dropped out. A lower value will drop more of the selected color out, while a higher value will leave more of the selected color in. Background The pixel which is higher than the background value will be Level adjusted to the lightest point. Adjust the value for both the Filter Threshold and Background Level to produce the best optimal result. Example, slightly adjusting the background value makes your text more clear. Original Remove Blue, Threshold: 20, Background: 255 36 Remove Blue, Threshold: 20, Background Level: 210 37 3.5 The Paper Tab The Paper tab allows you to adjust the specific area to scan. 38 3.5.1 Choosing Your Desired Paper Size and Orientation Paper Size Choose your desired paper size with the Paper Size drop-down list box. Or you may select a custom paper size by choosing Custom and enter your desired length and width value. Choice: Automatic, US Letter- 8.5‖x 11‖, US Legal – 8.5‖ x 14‖, ISO A4 – 21 x 29.7 cm, ISO A5 – 14.8 x 21 cm, ISO A6 – 10.5 x 14.8cm, ISO A7 – 7.4 x 10/5 cm, ISO B5 – 17.6 x 25 cm, ISO B6 – 12.5 x 17.6 cm, ISO B7 – 8.8 x 12.5 cm, JIS B5 – 18.2 x 25.7 cm, JIS B6 – 12.8 x 18.2 cm, JIS B7 – 9.1 x 12.8 cm, Scanner Maximum, Custom. Automatic: Automatically adjusts the cropping window according to different document sizes and automatically straightens your skewed image. Use this option for batches of mixed-sized documents. Units: Define the primary measurement system. Inches, Millimeters, and Pixels are available. Orientation Choose your paper orientation. Choice: Portrait, Landscape. ABC ABC Portrait Landscape 39 The following options are only available when Fixed to Transport is selected. X-Offset — the distance from the left end of the scanner to the left edge of the scanning area. Y-Offset — the position from the top end of the document to the top end of the scanning area. Width — the width of the scanning area. Length — the length of the scanning area. 40 3.5.2 Using the Multi-Feed Detection Option Multi-Feed Detection allows you to detect overlapped document that go through the auto document feeder. Multi-Feed usually occurs due to stapled documents, adhesives on documents, or electro-statically charged document. Note: The availability of the function varies based on type of scanner. Additional Length Additional Length Detection allows you to define the Detection length of document being multi-fed. This value indicates the additional length exceeding your scan area. A value of 0 indicates no additional length detection. The Additional Length Detection is best used when scanning same-size documents in the auto document feeder. This feature is disabled if the paper size is set to Automatic. Ultrasonic Ultrasonic Detection allows you to set overlapped Detection document by detecting paper thickness between documents. Note: The availability of the function varies based on type of scanner. There are two options available if Multi-Feed is detected. Stop Scanning after Multi-Feed If this is selected, the scanner will stop the feeder and display the following Warning dialog box if multi-feed is detected. Action: 1. Follow the instruction on the Warning dialog box to remove the rest pages on the feeder. 2. Click OK to close the Warning dialog box. 3. Scan the rest pages. Multi-Feed Alarm 41 If a wave file is added, the scanner will make a sound alarm if multi-feed is detected yet no Warning dialog box will be displayed. If ―Stop Scanning after Multi-Feed‖ is selected, the scanner will stop the feeder. If ―Stop Scanning after Multi-Feed‖ has not been selected, the scanner will continue to scan till the end of your document. Action: 1. If ―Stop Scanning after Multi-Feed‖ is selected, follow the action described in the preceding section ―Stop Scanning after Multi-Feed‖ on the previous page to complete your job. 2. If ―Stop Scanning after Multi-Feed‖ has not been selected, rescan the pages where multi-feed is detected. How to add the sound alarm: 1. Click the Browse button on the right side of the speaker icon. The Open dialog box appears. 2. Choose your wave file. 3. Click the Open button. The wave file is added. 42 3.6 The Options Tab The Options tab allows you to set following additional image processing settings. 43 Rotation Rotate your image. Degree Choice: None, 90 Degrees CCW, 90 Degrees CW, 180 Degrees. Original Rotate 90 Degrees CW Rotate 90 Degrees CCW Rotate 180° Blank Page Check the Blank Page Removal box to delete your blank Removal page and move the slider to the left or right to define your desired threshold to detect the blank page. 44 Edge Fill Check White or Black if you wish to add white or black edge on the border of your scanned image. Enter the value from 0 to 5 mm. Default value is 1 mm. Original Despeckle Edge Fill: 5mm (Black) Occasionally small dots or specks appear in the background of a scanned image. Remove unwanted speckles provides a cleaner image for OCR (Optical Character Recognition) processing, and also helps to reduce compressed file size. Define the speckles (also known as image noise) you wish to remove by specifying its number (size) and radius (range). The measuring unit is pixel. The higher the number, the more speckles will be removed. Before Despeckle (noise number:0, noise radius:1) 45 After Despeckle (noise number:22, noise radius:10) Note: The function is currently available for Black and White image only. To scan at rated speed, it is recommended to set the noise radius up to 10 pixels. Enabler Move the slider to set the amount of time to start the Energy Saving energy saver after your last action. The range is from 1 to 240 minutes. The default is 15 minutes. This control may be unavailable for some scanners (M80, S300). Image Count Defines the scan job size. The scanner will scan the entire contents of the Automatic Document Feeder when this is set to -1, which is the default. To force the scanner to only scan a certain number of pages at a time, set this number to the desired value. For example, to scan 10 pages at a time and automatically stop scanning, set this to 10. Transport Timeout Set the amount of time the scanner will wait and then start resume scanning after the ADF is empty. If you have many separate documents need to be scanned at the same scan settings, this feature is especially useful. The default is 0. The value ranges from 0 to 30 seconds. 46 3.7 The Information Tab The Information tab displays the following scanner information. The information is very helpful when you report a problem to the service center. 47 4 Using the Scanner Buttons If your scanner comes with buttons on the panel, you can directly start a scan by pressing the button to complete your scan. Yet, before using the scanner button, please first make sure the user interface of the scanner driver has been opened. Otherwise, the button can not work. 4.1 Pressing the Scanner Button to Start A Scan The scanners are designed with predefined button settings. Simply select your button number and press the Scan button, the scanner starts scanning with the predefined scan settings. The following tables show the default button settings with various BulletScan scanner models: M80 Button Setting Profile Name Description Predefined Scan Settings Normal Documents This scans letter size documents in black and white at 300 dpi. Both Sides Front B&W, Rear B&W, 300 dpi, US Letter(8.5‖x11‖), PDF, Edge Cleanup: 1 mm, Blank Page Removal: On, Despeckle: On 48 S300 Button Settings Button Profile Name Name Button 1 Description Predefined Scan Settings Normal This scans letter size documents in black and white at Documents Fast, 200 dpi. One Sided Front B&W, 300 dpi, US Letter (8.5‖x11‖), PDF, Edge Cleanup: 1 mm, Blank Page Removal: On, Despeckle: On Button 2 Normal Documents in Color, One Sided This scans letter size documents in color at 200 dpi. Front Color, 200 dpi, US Letter(8.5‖x11‖), PDF, Edge Cleanup: 1 mm, Blank Page Removal: On, Despeckle: On Button 3 Mixed Sized This scans any size document in black and white at Document 300 dpi, automatically detecting the size. Front B&W, Rear B&W, 300 dpi, Auto Crop, PDF, Edge Cleanup: 1 mm, Blank Page Removal: On, Despeckle: On Button 4 Photo in Color This does a color scan and automatically detects the photo size. Front Color, 300 dpi, Auto Crop, JPEG, Edge Cleanup: Off, Blank Page Removal: On, Despeckle: Off Button 5 Business Card This scans a business card in grayscale. Front Gray, 300 dpi, Auto Crop, PDF, Edge Cleanup: Off, Blank Page Removal: On, Despeckle: Off Button 6 Text Searchable This scans letter size documents in black and white at Normal 300 dpi. Document, Both Sides Front B&W, Rear B&W, 300 dpi, US Letter (8.5‖x11‖), PDF, Edge Cleanup: 1 mm, Blank Page Removal: On, Despeckle: On 49 S400 Button Settings Button Profile Name Name Button 1 Description Predefined Scan Settings Normal This scans letter size documents in black and white at Documents Both 300 dpi. Sides Front B&W, Rear B&W, 300 dpi, US Letter(8.5‖x11‖), PDF, Edge Cleanup: 1 mm, Blank Page Removal: On, Despeckle: On Button 2 Normal Documents in Color, One Sided This scans letter size documents in color at 200 dpi. Front Color, 200 dpi, US Letter(8.5‖x11‖), PDF, Edge Cleanup: 1 mm, Blank Page Removal: On, Despeckle: On Button 3 Mixed Sized This scans any size document in black and white at Document 300 dpi, automatically detecting the size. Front B&W, Rear B&W, 300 dpi, Auto Crop, PDF, Edge Cleanup: 1 mm, Blank Page Removal: On, Despeckle: On Button 4 Photo in Color This does a color scan and automatically detects the photo size. Front Color, 300 dpi, Auto Crop, JPEG, Edge Cleanup: Off, Blank Page Removal: On, Despeckle: Off Button 5 Business Card This scans a business card in grayscale. Front Gray, 300 dpi, Auto Crop, PDF, Edge Cleanup: Off, Blank Page Removal: On, Despeckle: Off Button 6 Text Searchable This scans letter size documents in black and white at Normal 300 dpi. Document, Both Sides Front B&W, Rear B&W, 300 dpi, US Letter (8.5‖x11‖), PDF, Edge Cleanup: 1 mm, Blank Page Removal: On, Despeckle: On 50 S400 Button Settings Button Profile Name Name Button 7 Description Predefined Scan Settings Legal Sized This scans a legal size documents in black and white Document at 300 dpi. Front B&W, Rear B&W, 300 dpi, US Legal (8.5‖x14‖), PDF, Edge Cleanup: 1 mm, Blank Page Removal: On, Despeckle: On Button 8 Fine Print This scans letter-size documents in black and white Document at 600 dpi. Front B&W, Rear B&W, 600 dpi, US Letter (8.5‖x 11‖), PDF, Edge Cleanup: 1 mm, Blank Page Removal: On, Despeckle: On Button 9 Text Searchable This scans letter size documents in black and white at Fine Print 600 dpi. Document Front B&W, Rear B&W, 600 dpi, US Letter (8.5‖x11‖), PDF, Edge Cleanup: 1 mm, Blank Page Removal: On, Despeckle: On 51 F200 Button Settings Button Profile Name Name Button 1 Description Predefined Scan Settings Normal This scans letter size documents in black and white at Document, One 300 dpi. Sided Front B&W, 300 dpi, US Letter (8.5‖x11‖), PDF, Edge Cleanup: 1 mm, Blank Page Removal: On, Despeckle: On Button 2 Normal Documents in Color, One Sided This scans letter size documents in color at 200 dpi. Front Color, 200 dpi, US Letter(8.5‖x11‖), PDF, Edge Cleanup: 1 mm, Blank Page Removal: On, Despeckle: On Button 3 Mixed Sized This scans any size document in black and white at Document 300 dpi, automatically detecting the size. Front B&W, Rear B&W, 300 dpi, Auto Crop, PDF, Edge Cleanup: 1 mm, Blank Page Removal: On, Despeckle: On Button 4 Photo in Color This does a color scan and automatically detects the photo size. Front Color, 300 dpi, Auto Crop, JPEG, Edge Cleanup: Off, Blank Page Removal: On, Despeckle: Off Button 5 Business Card This scans a business card in grayscale. Front Gray, 300 dpi, Auto Crop, PDF, Edge Cleanup: Off, Blank Page Removal: On, Despeckle: Off Button 6 Text Searchable This scans letter size documents in black and white at Normal 300 dpi. Documents, One Sided Front B&W, 300 dpi, US Letter (8.5‖x11‖), PDF, Edge Cleanup: 1 mm, Blank Page Removal: On, Despeckle: On 52 F200 Button Settings Button Profile Name Name Button 7 Description Predefined Scan Settings Legal Sized This scans a legal size documents in black and white Document at 300 dpi. Front B&W, Rear B&W, 300 dpi, US Legal (8.5‖x14‖), PDF, Edge Cleanup: 1 mm, Blank Page Removal: On, Despeckle: On Button 8 Fine Print This scans letter-size documents in black and white Document at 600 dpi. Front B&W, Rear B&W, 600 dpi, US Letter (8.5‖x 11‖), PDF, Edge Cleanup: 1 mm, Blank Page Removal: On, Despeckle: On Button 9 Text Searchable This scans letter size documents in black and white at Fine Print 600 dpi. Document Front B&W, Rear B&W, 600 dpi, US Letter (8.5‖x11‖), PDF, Edge Cleanup: 1 mm, Blank Page Removal: On, Despeckle: On 53 4.2 Redefining Your Button Settings To redefine your button settings, please follow these steps: 1. Click on the Profile tab to see the following Profile dialog box. 2. When selecting a profile, if it is linked to an event, it will be shown in the Event dropdown. To link it to a button number, choose the new button number from the Event drop-down. 3. To release a button number back to the Event drop-down list, you can manually release each event by selecting the profile it is linked to, and when it displays which Event is will be used for, change it to ―None‖. 4. You can also reset all of the Button Numbers using the Clear all button. 54 Index A E add a new profile, 19 Edge Fill, 45 Additional Length Detection, 41 Energy Saving, 46 B F Background Level, 36 File Format, 31 Binarization file formats Dynamic Threshold, Fixed Processing, 22 JPEG, TIFF, Windows Bitmap, PDF, M-PDF, Blank Page Removal, 44 Searcable PDF, PNG, 1 Brightness, 26 Filter Threshold, 36 C G Color Dropout, 34 Gray, 24 Contrast, 26 I D Image Count, 46 default settings, 12 Invert, 28 delete a profile, 20 Despeckle J Noise Number, Noise Radius, 45 Diffusion, 23 JPEG, 31 Document Type M Normal, Photo, Document, 24 Dynamic Threshold sensitivity, 22 Multi-Feed Detection, 41 55 44 O S Orientation Portrait, Landscape, 39 Scan Source Auto Document Feeder, Flatbed, Automatic, 29 P Searchable PDF, 33 Paper Size, 29, 39 T PDF, 33 Preview, 13 TIFF, 31 Preview window, 11, 13 Transport Timeout, 46 Profiles Selection Box, 15 U R Ultrasonic Detection, 41 Resolution, 27 RGB, 35 W Rotate 90 degrees CCW, 90 degrees CW, 0, 180 degrees, Windows Bitmap, 31 56