1
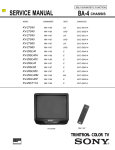
KV-27S40 / 27S45 / 27S65 / 29SL40 / 29SL40A / 29SL40C/
29SL45 / 29SL65 / 29SL65C/ 29XL40M / 29XL40P / 29XT11A
SELF-DIAGNOSTIC FUNCTION
SERVICE MANUAL
MODEL
KV-27S40
KV-27S40
KV-27S45
KV-27S45
KV-27S65
KV-27S65
KV-29SL40
KV-29SL40A
KV-29SL40C
KV-29SL45
KV-29SL65
KV-29SL65C
KV-29XL40M
KV-29XL40P
KV-29XT11A
COMMANDER
BA-4 CHASSIS
DEST.
CHASSIS NO.
RM-Y165
US
SCC-S01H-A
RM-Y165
CND
SCC-S03E-A
RM-Y167
US
SCC-S01J-A
RM-Y167
CND
SCC-S03F-A
RM-Y167
US
SCC-S01K-A
RM-Y167
CND
SCC-S03G-A
RM-Y165
E
SCC-S04X-A
RM-Y165
E
SCC-S04S-A
RM-Y165
E
SCC-S04U-A
RM-Y167
E
SCC-S04Y-A
RM-Y167
E
SCC-S06F-A
RM-Y167
E
SCC-S04V-A
RM-Y165
MX
SCC-S02D-A
RM-Y165
E
SCC-S04R-A
RM-Y165
E
SCC-S04T-A
RM-Y167
KV-27S45
TRINITRON® COLOR TV
—1—
KV-27S40 / 27S45 / 27S65 / 29SL40 / 29SL40A / 29SL40C/
29SL45 / 29SL65 / 29SL65C/ 29XL40M / 29XL40P / 29XT11A
SPECIFICATIONS
Power Requirements
Number of inputs/outputs
Video 1)
KV-27S40
KV-29XL40M
KV-27S45
KV-29SL40A
KV-29XL40P
KV-29SL40
KV-27S65
KV-29SL65
KV-29SL40C
KV-29XT11A
KV-29SL45
KV-29SL65C
120V,60Hz
120V,60Hz
220V,50/60Hz
120V,60Hz
220V,50/60Hz
1
2
1
2
2
S Video 2)
-
1
-
1
1
Audio 3)
1
2
1
2
2
Audio Out 4)
1
1
1
1
1
5W x 2
5W x 2
5W x 2
10W x 2
10W x 2
140W
140W
140W
140W
140W
2W
2W
3W
2W
3W
(mm)
660.4 x 598
x 505.5mm
660.4 x 598
x 505.5mm
660.4 x 598
x 505.5mm
660.4 x 598
x 505.5mm
660.4 x 598
x 505.5mm
(in.)
26 x 231/2 x 20 in
26 x 231/2x20 in
26 x 231/2 x 20 in
26 x 231/2 x 20 in
26 x 23 1/2 x 20 in
Speaker Output (W)
Power Consumption(W)
In Use (Max)
In Standby
Dimensions (W/H/D)
Mass
(kg)
38 kg
38 kg
38 kg
38 kg
38 kg
(lbs)
84 lbs
84 lbs
84 lbs
84 lbs
84 lbs
1)
1 Vp-p 75 ohms unbalanced, sync negative
Y: 1 Vp-p 75 ohms unbalanced, sync negative
C: 0.286 Vp-p (Burst signal), 75 ohms
3)
500 mVrms (100% modulation), Impedance: 47 kilohms
4)
More than 408 mVrms at the maximum volume setting (variable)
2)
Television system
American TV standard
PAL-M, PAL-L, NTSC (KV-29SL40A,29XT11A only)
Channel coverage
VHF:2-13/UHF:14-69/CATV:1-125
Visible screen size
27-inch picture measured
29-inch picture measured
Actual screen size
27-inch picture measured
29-inch picture measured
Antenna
75 ohm external terminal for VHF/UHF
Supplied Accessories
Remote commander (w/2 size AA (R6) batteries)
RM-Y165: (KV-27S40,29SL40/A/C,29XL40M,29XL40P,
29XT11A)
RM-Y167: (KV-27S45, 27S65, 29SL45, 29SL65,
29SL65C)
Optional Accessory
Connecting Cables:
VMC-810S/820S, MC-720M, YC-15V/30V, RK-74A
TV Stand SU-27A3
U/V Mixer EAC-66
Design and specifications are subject to change without notice.
—2—
(l ) SRS (SOUND RETRIEVAL SYSTEM)
The ( l ) SRS (SOUND RETRIEVAL SYSTEM) is manufactured by Sony Corporation under license from SRS
Labs, Inc. It is covered by U.S. Patent No. 4,748,669. Other
U.S. and foreign patents pending.
The word ‘SRS’ and the SRS symbol (l ) are registered
trademarks of SRS Labs, Inc.
BBE and BBE symbol are trademarks of BBE Sound,Inc.
and are licensed by BBE Sound, Inc. under USP
4638258.4482866,
KV-27S40 / 27S45 / 27S65 / 29SL40 / 29SL40A / 29SL40C/
29SL45 / 29SL65 / 29SL65C/ 29XL40M / 29XL40P / 29XT11A
TABLE OF CONTENTS
Section
Title
Page
Warnings and Caution ..................................................... 4
Self-Diagnostic Function ................................................ 4
Safety Check Out Instructions ........................................ 7
Section
6-2.
6-3.
• P Board....................................................................... 47
• K Board ..................................................................... 49
• C Board...................................................................... 50
• E Board ...................................................................... 51
Using Your Menus.......................................................15
Operating Video Equipment....................................... 19
2-1.
2-2.
Rear Cover Removal ..................................................... 22
A Board Removal ..................................................... 22
2-3.
2-4.
Service Position ........................................................ 22
Picture Tube Removal ................................................... 23
Circuit Boards Location.............................................. 38
Printed Wiring Boards and Schematic Diagrams .......38
• A Board...................................................................... 39
Basic Set Up .............................................................. 12
Using Your TV.............................................................12
2. DISASSEMBLY
Page
6. DIAGRAMS
6-1. Block Diagrams.......................................................... 35
1. GENERAL
Connecting and Installing the TV ............................. 8
Operating a Cable Box or DBS Receiver.................... 20
Troubleshooting.......................................................... 20
Title
• HZ Board.................................................................... 52
6-4.
Semiconductors........................................................... 53
7. EXPLODED VlEWS
7-1.
Chassis ..........................................................................54
(KV-27S40/27S45/29SL40/29SL45/29XL40M/29XL40P/
29XT11A/29SL40A/29SL40C)
7-2 .
Chassis..........................................................................55
7-3.
Main Power Switch...................................................... 56
(KV-27S65/29SL65/29SL65C)
3. SET-UP ADJUSTMENTS
3-1. Beam Landing............................................................. 24
(KV-29SL40A/29XT11A)
3-2.
3-3.
Convergence............................................................... 25
Focus........................................................................... 26
3-4.
3-5.
Screen (G2)................................................................. 26
Method of Setting the Service Adjustment Mode....... 26
3-6.
White Balance Adjustments........................................ 26
• A Board Common Parts List....................................... 59
• A Board Variant Lists.................................................. 68
4. SAFETY RELATED ADJUSTMENTS......................... 27
• C Board Parts List....................................................... 79
• E Board Parts List....................................................... 79
5. CIRCUIT ADJUSTMENTS
• K Board Parts List....................................................... 80
• P Board Parts List....................................................... 81
5-1.
5-2.
8. ELECTRICAL PARTS LIST
• Table of Contents for Parts List...................................57
Electrical Adjustment by Remote Commander........... 29
A Board Adjustments.................................................. 32
• HZ Board Parts List.....................................................82
• Accessories and Packaging........................................ 82
—3—
KV-27S40 / 27S45 / 27S65 / 29SL40 / 29SL40A / 29SL40C/
29SL45 / 29SL65 / 29SL65C/ 29XL40M / 29XL40P / 29XT11A
WARNINGS AND CAUTIONS
CAUTION!
ATTENTION
SHORT CIRCUIT THE ANODE OF THE PICTURE TUBE AND
THE ANODE CAP TO THE METAL CHASSIS, CRT SHIELD,
OR CARBON PAINTED ON THE CRT, AFTER REMOVING
THE ANODE.
APRES AVOIR DECONNECTE LE CAP DE L'ANODE, COURT-CIRCUITER
L'ANODE DU TUBE CATHODIQUE ET CELUI DE L'ANODE DU CAP AU
CHASSIS METALLIQUE DE L'APPAREIL, OU AU COUCHE DE CARBONE
PEINTE SUR LE TUBE CATHODIQUE OU AU BLINDAGE DU TUBE
CATHODIQUE.
WARNING!!
ATTENTION!!
AN ISOLATION TRANSFORMER SHOULD BE USED
DURING ANY SERVICE TO AVOID POSSIBLE SHOCK
HAZARD, BECAUSE OF LIVE CHASSIS.THE CHASSIS OF
THIS RECEIVER IS DIRECTLY CONNECTED TO THE AC
POWER LINE.
SAFETY-RELATED COMPONENT WARNING!!
COMPONENTS IDENTIFIED BY SHADING AND MARK
¡ ON THE SCHEMATIC DIAGRAMS, EXPLODED VIEWS
AND IN THE PARTS LIST ARE CRITICAL FOR SAFE
OPERATION. REPLACE THESE COMPONENTS WITH
SONY PARTS WHOSE PART NUMBERS APPEAR AS
SHOWN IN THIS MANUAL OR IN SUPPLEMENTS
PUBLISHED BY SONY. CIRCUIT ADJUSTMENTS THAT
ARE CRITICAL FOR SAFE OPERATION ARE IDENTIFIED
IN THIS MANUAL. FOLLOW THESE PROCEDURES
WHENEVER CRITICAL COMPONENTS ARE REPLACED
OR IMPROPER OPERATION IS SUSPECTED.
AFIN D'EVITER TOUT RESQUE D'ELECTROCUTION PROVENANT D'UN
CHÁSSIS SOUS TENSION, UN TRANSFORMATEUR D'ISOLEMENT DOIT
ETRE UTILISÉ LORS DE TOUT DÉPANNAGE. LE CHÁSSIS DE CE
RÉCEPTEUR EST DIRECTEMENT RACCORDÉ À L'ALIMENTATION
SECTEUR.
ATTENTION AUX COMPOSANTS RELATIFS A LA SECURITE!!
LES COMPOSANTS IDENTIFIES PAR UNE TRAME ET PAR UNE MARQUE
¡ SUR LES SCHEMAS DE PRINCIPE, LES VUES EXPLOSEES ET LES
LISTES DE PIECES SONT D'UNEIMPORTANCE CRITIQUE POUR LA
SECURITE DU FONCTIONNEMENT. NE LES REMPLACER QUE PAR DES
COMPOSANTS SONY DONT LE NUMERO DE PIECE EST INDIQUE DANS
LE PRESENT MANUEL OU DANS DES SUPPLEMENTS PUBLIES PAR
SONY. LES REGLAGES DE CIRCUIT DONT L'IMPORTANCE EST CRITIQUE
POUR LA SECURITE DU FONCTIONNEMENT SONT IDENTIFIES DANS
LE PRESENT MANUEL. SUIVRE CES PROCEDURES LORS DE CHAQUE
REMPLACEMENT DE COMPOSANTS CRITIQUES, OU LORSQU'UN
MAUVAIS FONTIONNEMENT SUSPECTE.
SELF-DIAGNOSTIC FUNCTION
The units in this manual contain a self-diagnostic function. If an error occurs, the STANDBY/TIMER lamp will automatically begin to
flash. The number of times the lamp flashes translates to a probable source of the problem. A definition of the STANDBY/TIMER lamp
flash indicators is listed in the instruction manual for the user's knowledge and reference. If an error symptom cannot be reproduced, the
remote commander can be used to review the failure occurrence data stored in memory to reveal past problems and how often these
problems occur.
1. DIAGNOSTIC TEST INDICATORS
When an error occurs, the STANDBY/TIMER lamp will flash a set number of times to indicate the possible cause of the problem. If there
is more than one error, the lamp will identify the first of the problem areas.
Results for all of the following diagnostic items are displayed on screen. No error has occured if the the screen displays a "0" .
Diagnostic Item
Description
* Power does not turn on
No. of times
STANDBY/TIMER
lamp flashes
Self-diagnostic display/
Diagnostic result
Does not light
Probable Cause
Location
Detected Symptoms
* Power cord is not plugged in.
* Power does not come on.
* Fuse is burned out (F5050) (E Board)
* No power is suppled to the TV.
* AC power supply is faulty.
* +B overcurrent (OCP)
* Vertical deflection stopped
2 times
4 times
2:0 or 2:1
4:0 or 4:1
* H.OUT (Q502) is shorted. (A board)
* Power does not come on.
* IC1751 and Q1751 is shorted. (C board)
* Load on power line is shorted.
* +13V is not supplied. (A board)
* Has entered standby state after horizontal raster.
* IC 541 is faulty (A board)
* Vertical deflection pulse is stopped.
* Power line is shorted or power supply is stopped.
* White balance failure
(not balanced)
5 times
5:0 or 5:1
* Video OUT (Q306 to 308) is faulty. (A board) * No raster is generated.
* IC301 is faulty. (A board)
* G2 is improperly adjusted. (Note 2)
Note 1: If a +B overcurrent is detected, stoppage of the vertical deflection is detected simultaneously.
The symptom that is diagnosed first by the microcontroller is displayed on the screen.
Note 2: Refer to Screen (G2) Adjustment in Section 3-4 of this manual.
—4—
* CRT cathode current detection reference pulse
output is small.
KV-27S40 / 27S45 / 27S65 / 29SL40 / 29SL40A / 29SL40C/
29SL45 / 29SL65 / 29SL65C/ 29XL40M / 29XL40P / 29XT11A
2. DISPLAY OF STANDBY/TIMER LIGHT FLASH COUNT
2 times
4 times
5 times
Lamp ON 0.3 sec.
Lamp OFF 0.3 sec.
Lamp OFF
3 sec.
STANDBY/SLEEP lamp
Diagnostic Item
Flash Count*
+B overcurrent
2 times
Vertical deflection stopped 4 times
White balance failure
5 times
* One flash count is not used for self-diagnostic.
3. STOPPING THE STANDBY/TIMER FLASH
Turn off the power switch on the TV main unit or unplug the power cord from the outlet to stop the STANDBY/TIMER lamp from flashing.
4. SELF-DIAGNOSTIC SCREEN DISPLAY
For errors with symptoms such as "power sometimes shuts off" or "screen sometimes goes out" that cannot be confirmed, it is pos sible to bring up
past occurances of failure for confirmation on the screen:
[To Bring Up Screen Test]
In standby mode, press buttons on the remote commander sequentially in rapid succession as shown below:
Screen display
channel 5
Sound volume –
Power ON
Note that this differs from entering the service mode (sound volume + ).
Self-Diagnostic screen display
SELF DIAGNOSTIC
2:
3:
4:
5:
101:
N/A
N/A
0 <-------------Numeral "0" means that no fault has been detected.
0
0
1 <-------------Numeral "1" means a fault has been detected one time only.
0
5. HANDLING OF SELF-DIAGNOSTIC SCREEN DISPLAY
Since the diagnostic results displayed on the screen are not automatically cleared, always check the self-diagnostic screen during repairs. When
you have completed the repairs, clear the result display to "0".
Unless the result display is cleared to "0", the self-diagnostic function will not be able to detect subsequent faults after completion of the repairs.
[Clearing the result display]
To clear the result display to "0", press buttons on the remote commander sequentially as shown below when the diagnostic screen is being
displayed.
Channel 8
ENTER
[Quitting Self-diagnostic screen]
To quit the entire self-diagnostic screen, turn off the power switch on the remote commander or the main unit.
—5—
KV-[13M40/50/51], KV-[14MB40/40C/40A], KV-[20M40/S40/S41/V80], KV-[21SE40/40A/40C/80/80A/80C],
KV-[21MB40C/40M/40P], KV-[21ME40/40P], KV-[21SB40/40M/40P], KV-21XT4A
6. SELF-DIAGNOSTIC CIRCUIT
IC301
Y/CHROMA JUNGLE
FROM
CRT
21
IC541
V.OUT
IO-BDAT
IK IN
REF
FROM
IC521
PIN 7
IC001
SYSTEM
3
IC003
MEMORY
36
5
B-DAT
17 I-PROT
18 HP/PROTECT
SDA
+B overcurrent (OCP)
37
35
SDAT
O-LED
18
Occurs when an overcurrent on the +B(115V) line is detected by pin 18 of IC301. If the
voltage to pin 18 of IC301 is less than 1V when V.SYNC is more than seven verticals in a
period, the unit will automatically turn off.
Vertical deflection stopped
Occurs when an absence of the vertical deflection pulse is detected by pin 17 of IC001.
Power supply will shut down when waveform interval exceeds 2 seconds.
White balance failure
If the RGB levels* do not balance within 2 seconds after the power is turned on, this error
will be detected by IC301. TV will stay on, but there will be no picture.
*(Refers to the RGB levels of the AKB detection Ref pulse that detects IK.)
—6—
KV-27S40 / 27S45 / 27S65 / 29SL40 / 29SL40A / 29SL40C/
29SL45 / 29SL65 / 29SL65C/ 29XL40M / 29XL40P / 29XT11A
SAFETY CHECK-OUT
After correcting the original service problem, perform the
following safety checks before releasing the set to the
customer:
1. Check the area of your repair for unsoldered or poorlysoldered connections. Check the entire board surface
for solder splashes and bridges.
2. Check the interboard wiring to ensure that no wires
are “pinched” or contact high-wattage resistors.
3. Check that all control knobs, shields, covers, ground
straps, and mounting hardware have been replaced.
Be absolutely certain that you have replaced all the
insulators.
4. Look for unauthorized replacement parts, particularly
transistors, that were installed during a previous
repair. Point them out to the customer and
recommend their replacement.
5. Look for parts which, though functioning, show
obvious signs of deterioration. Point them out to
the customer and recommend their replacement.
6. Check the line cords for cracks and abrasion.
Recommend the replacement of any such line cord
to the customer.
7. Check the B+ and HV to see if they are specified
values. Make sure your instruments are accurate;
be suspicious of your HV meter if sets always have
low HV.
8. Check the antenna terminals, metal trim, “metallized"
knobs, screws, and all other exposed metal parts for
AC Leakage. Check leakage as described below.
LEAKAGE TEST
The AC leakage from any exposed metal part to earth ground
and from all exposed metal parts to any exposed metal part having
a return to chassis, must not exceed 0.5 mA (500 microampere).
Leakage current can be measured by any one of three methods.
1. A commercial leakage tester, such as the Simpson 229 or
RCA WT-540A. Follow the manufacturers' instructions to
use these instructions.
2. A battery-operated AC milliammeter. The Data Precision
245 digital multimeter is suitable for this job.
3. Measuring the voltage drop across a resistor by means of
a VOM or battery-operated AC voltmeter. The "limit"
indication is 0.75 V, so analog meters must have an accurate
low voltage scale. The Simpson's 250 and Sanwa
SH-63Trd are examples of passive VOMs that are suitable.
Nearly all battery operated digital multimeters that have a
2V AC range are suitable. (See Fig. A)
HOW TO FIND A GOOD EARTH GROUND
A cold-water pipe is guaranteed earth ground; the cover-plate
retaining screw on most AC outlet boxes is also at earth ground.
If the retaining screw is to be used as your earth-ground, verify
that it is at ground by measuring the resistance between it and a
cold-water pipe with an ohmmeter. The reading should be zero
ohms. If a cold-water pipe is not accessible, connect a 60-l00 watts
trouble light (not a neon lamp) between the hot side of the receptacle and the retaining screw. Try both slots, if necessary, to
locate the hot side of the line, the lamp should light at normal
brilliance if the screw is at ground potential. (See Fig. B)
To Exposed Metal
Parts on Set
0.15 µF
1.5 k Ω
AC
Voltmeter
(0.75 V)
Earth Ground
Fig. A. Using an AC voltmeter to check AC leakage.
—7—
KV-27S40 / 27S45 / 27S65 / 29SL40 / 29SL40A / 29SL40C/
29SL45 / 29SL65 / 29SL65C/ 29XL40M / 29XL40P / 29XT11A
SECTION 1
GENERAL
The instructions mentioned here are partial abstracts from the Operating Instruction Manual.
The page numbers shown reflect those of the Operating Instruction Manual.
Connecting and Installing the TV
Making Connections
Refer to the table below, it will direct you to the diagram suitable to the components you will be
connecting.
If you will be connecting
See page
Cable or antenna only
5
Cable and antenna (KV-27S65, 27V65 only)
5
Cable box
6
Cable box and cable to view scrambled channels (KV-27S65, 27V65 only)
6
VCR and cable or antenna
7
VCR and cable box
7
Direct Broadcast Satellite Receiver (DBS)
8
VCR and Direct Broadcast Satellite Receiver (DBS)
9
Digital Versatile Disc receiver (DVD)
10
Audio system
10
Two VCRs for tape editing (KV-27V40, 27V45, 27V65 only)
11
Camcorder to view tapes
11
4
Cable or Antenna Connections
Connecting directly to cable or an
antenna
The connection you choose will depend on the
cable found in your home. Newer homes will
be equipped with standard coaxial cable
(see A ); older homes will probably have
300 -ohm twin lead cable (see B ); still other
homes may contain both (see C ).
75-ohm coaxial cable
C
• VHF
(Rear of TV)
VHF/UHF
and
Note
• In order to receive channels with an
antenna, you will need to turn your CABLE
to OFF (see page 23) and perform the
AUTO PROGRAM function.
EAC-66 U/V mixer
(not supplied)
• UHF
300-ohm twin lead cable
Cable and antenna
• KV-27S65, 27V65 only
A
• VHF only
or
• VHF/UHF
or
• Cable
B
75-ohm
(Rear of TV)
coaxial cable VHF/UHF
300-ohm twin
(Rear of TV)
• VHF only
VHF/UHF
lead cable
or
• UHF only
or
• VHF/UHF
Antenna connector
If your cable provider does not feature local
channels, you may find this set up convenient.
Select Cable or ANT mode by pressing ANT
on the remote control. You will be able to
alternate between the two input sources.
CATV cable
(No connection "TO
CONVERTER" in this case)
(Rear of TV)
AUX
TO CONVERTER
Antenna cable
VHF/UHF
5
—8—
KV-27S40 / 27S45 / 27S65 / 29SL40 / 29SL40A / 29SL40C/
29SL45 / 29SL65 / 29SL65C/ 29XL40M / 29XL40P / 29XT11A
Connecting and Installing the TV (continued)
Cable Box Connections
Some pay cable TV systems use scrambled or
encoded signals that require a cable box* to
view all channels.
If you will be controlling all channel selection
through your cable box, you should consider using
the CHANNEL FIX feature discussed on page 23.
Cable box
(Rear of TV)
VHF/UHF
Cable
1 Connect the coaxial connector from your
2
cable or antenna to the IN on your cable
box.
Using a coaxial cable, connect OUT on
your cable box to VHF/UHF on your TV.
Cable box and cable
• KV-27S65, 27V65 only
For this set up, you can switch between
scrambled channels (through your cable box),
and normal (CATV) channels by pressing
ANT on your remote control.
IN
OUT
*Cable box
If you are connecting a cable box through the AUX input and would
like to switch between the AUX and normal (CATV) input you should
consider using the CHANNEL FIX feature discussed on page 23.
(Rear of TV)
AUX
*Cable box
scrambled
channels
Notes
• Your Sony remote control can be
programmed to operate your cable box.
(see page 28)
• When using PIP, you cannot view the
window picture with the AUX input.
TO CONVERTER
75-ohm coaxial
cable (not supplied)
(signal)
VHF/UHF
CATV cable
(unscrambled channels)
6
Disconnect all power sources before making any connections.
VCR Connections
Connecting an antenna/cable TV
system with a VCR
1
2
3
(Rear of TV)
VCR must be connected and
turned on to operate PIP
(KV-27S45, 27V45 only).
Attach the coaxial connector from your cable
or antenna to IN on your VCR.
Using A/V connectors, connect AUDIO and
VIDEO OUT on your VCR to AUDIO and
VIDEO IN on your TV (Yellow-VIDEO,
White-AUDIO Left, Red-AUDIO Right).*
Using a coaxial connector, connect OUT on
your VCR to VHF/UHF on your TV.
VIDEO IN
1
Coaxial cable
You will need a splitter (not supplied) for the
following connection.
1 Connect the single (input) jack of the splitter
to your incoming cable connection. Connect
the other two (output) jacks (using coaxial
cable) to IN on your cable box and VHF/UHF
on your TV.
2 Using a coaxial connector, connect OUT on
your cable box to IN on your VCR.
3 Using A/V connectors, connect AUDIO and
VIDEO OUT on your VCR to AUDIO and
VIDEO IN on your TV (Yellow-VIDEO,
White-AUDIO Left, Red-AUDIO Right).
S VIDEO
AUDIO OUT
(VAR/FIX)
VIDEO
3
L
VCR
1
Cable
OUT
(MONO)
AUDIO
AUDIO R AUDIO L VIDEO
R
S VIDEO
LINE
OUT
IN
AUDIO-R (red)
AUDIO-L (white)
VIDEO (yellow)
2
* If you are connecting a monaural VCR, connect only the
single white audio output to the left input on your TV.
Connecting a VCR and TV with a
cable box
2
VHF/UHF
VMC-810S/820S (not supplied)
For optimum picture quality, use S VIDEO instead of
the yellow A/V cable. S Video does not provide sound,
your audio connectors must still be connected.
(Rear of TV)
VIDEO IN
1
VHF/UHF
Coaxial cable
IN
AUDIO R AUDIO L VIDEO
L
(MONO)
AUDIO
S VIDEO
R
LINE
OUT
2
1
S VIDEO
AUDIO OUT
(VAR/FIX)
VIDEO
VCR
OUT
2
3
Cable
OUT
AUDIO-R (red)
AUDIO-L (white)
VIDEO (yellow)
VMC-810S/820S (not supplied)
IN
Splitter
(not supplied)
—9—
Cable box
7
KV-27S40 / 27S45 / 27S65 / 29SL40 / 29SL40A / 29SL40C/
29SL45 / 29SL65 / 29SL65C/ 29XL40M / 29XL40P / 29XT11A
Connecting and Installing the TV (continued)
Disconnect all power sources before making any connections.
DBS Connections
Connecting a DBS (Direct
Broadcast Satellite) receiver
1 Connect the cable from your satellite
2
3
For optimum picture quality, use S VIDEO
instead of the yellow A/V cable. S Video does
not provide sound, your audio connectors
must still be connected.
(Rear of TV)
2
VIDEO IN
1
2
S VIDEO
VHF/UHF
antenna to your DBS receiver.
Attach the coaxial connector from your
cable or antenna to VHF/UHF on your
TV.
Using A/V connectors, connect AUDIO
and VIDEO OUT on your DBS receiver to
AUDIO and VIDEO IN on your TV.
AUDIO OUT
(VAR/FIX)
VIDEO
DBS receiver
1
L
SATELLITE IN
Satellite
antenna
cable
(MONO)
VHF/UHF
AUDIO R AUDIO L VIDEO
AUDIO
IN
S VIDEO
R
OUT
LINE OUT
AUDIO-R (red)
AUDIO-L (white)
VIDEO (yellow)
3
VMC-810S/820S (not supplied)
8
Disconnect all power sources before making any connections.
DBS Connections (continued)
For optimum picture quality, use S VIDEO instead of
the yellow A/V cable. S Video does not provide sound,
your audio connectors must still be connected.
Connecting a DBS (Direct Broadcast
Satellite) receiver and a VCR
1 Connect the cable from your satellite
antenna to your DBS receiver.
2 Attach the coaxial connector from your
3
4
5
cable or antenna to VHF/UHF IN on your
VCR.
Using a coaxial connector, connect
VHF/UHF OUT on your VCR to
VHF/UHF on your TV.
Using A/V connectors, connect AUDIO
and VIDEO OUT on your DBS receiver to
AUDIO and VIDEO IN on your VCR.
Using A/V connectors, connect AUDIO
and VIDEO OUT on your VCR to AUDIO
and VIDEO IN on your TV.
4
1
(Rear of TV)
VMC-810S/820S (not supplied)
VIDEO IN
1
VCR
SATELLITE IN
VHF/UHF
AUDIO R AUDIO L VIDEO
S VIDEO
OUT
LINE OUT
AUDIO R AUDIO L VIDEO
IN
2
VHF/UHF
2
S VIDEO
VHF/UHF
LINE IN
AUDIO OUT
(VAR/FIX)
VIDEO
L
(MONO)
AUDIO
IN
DBS receiver
S VIDEO
R
OUT
LINE OUT
3
AUDIO-R (red)
AUDIO-L (white)
VIDEO (yellow)
5
VMC-810S/820S (not supplied)
Note
• To view from the DBS or VCR, select the
video input to which your DBS receiver or
VCR is connected by pressing TV/VIDEO
on the remote control.
9
— 10 —
KV-27S40 / 27S45 / 27S65 / 29SL40 / 29SL40A / 29SL40C/
29SL45 / 29SL65 / 29SL65C/ 29XL40M / 29XL40P / 29XT11A
Connecting and Installing the TV (continued)
Disconnect all power sources before making any connections.
Additional Connections
The following connections are for accessories
that will enhance your viewing options.
Connecting a DVD Player
For optimum picture quality, use S VIDEO
instead of the yellow A/V cable. S Video
does not provide sound, your audio
connectors must still be connected.
(Rear of TV)
VIDEO IN
1
2
S VIDEO
VHF/UHF
AUDIO OUT
(VAR/FIX)
VIDEO
1 Using A/V connectors, connect LINE OUT
(Rear of DVD player)
on your DVD to VIDEO IN on your TV
(Red-AUDIO Right, White-AUDIO Left,
Yellow-VIDEO).
L
(MONO)
LINE OUT
AUDIO R AUDIO L VIDEO
R
AUDIO-R (red)
AUDIO-L (white)
VIDEO (yellow)
AV outputs
1
Note
• For the best picture quality, connect the
DVD player directly to the TV.
AUDIO
S VIDEO
VMC-810S/820S (not supplied)
Connecting an audio system
For enhanced sound, connect your audio
system to your TV.
1 Using AUDIO connectors, connect AUDIO
OUT on your TV to one of the unused line
inputs (e.g. TV, AUX, TAPE 2) on your
stereo (White-AUDIO Left, Red-AUDIO
Right).
2 Set your stereo to the chosen line input
(e.g. TV, AUX, TAPE 2). Refer to page 20
of this manual for additional audio setup
instructions.
(Rear of TV)
VIDEO IN
1
2
S VIDEO
VHF/UHF
AUDIO OUT
(VAR/FIX)
VIDEO
1
RK-74A
(not supplied)
AUDIO-L (white)
L
(MONO)
AUDIO
R
AUDIO-R (red)
Line
input
2
HRD
10
Connecting two VCRs for tape
editing using MONITOR OUT
• KV-27V40, 27V45, 27V65 only
MONITOR OUT gives you the ability to use a
second VCR to record a program being played
by the primary VCR or to perform tape
editing and dubbing.
1 Connect the VCR intended for playback
using the setup instructions on page 7 of
this manual.
2 Using A/V connectors, connect AUDIO
and VIDEO IN on your VCR intended for
recording to MONITOR AUDIO and
VIDEO OUT on your TV.
Connecting a camcorder
This connection is convenient for viewing a
picture directly from your camcorder.
Disconnect all power sources before making any connections.
(Rear of KV-27V65)
You cannot change video
inputs while editing using
MONITOR OUT.
AUX
TO
CONVERTER
IN
VHF/UHF
OUT
VIDEO 1 VIDEO 3 MONITOR
AUDIO
(VAR/FIX)
S VIDEO
VIDEO
L
VCR (for recording)
(MONO)
VCR (for playback)
AUDIO
R
AUDIO R AUDIO L VIDEO
AUDIO R AUDIO L VIDEO
OUT
LINE
OUT
OUT
LINE
IN
IN
2
1
IN
VIDEO (yellow)
AUDIO-L (white)
AUDIO-R (red)
VMC-810S/820S (not supplied) VMC-810S/820S (not supplied)
If you have an S Video equipped
camcorder, you can use an S Video
connection for optimum picture quality.
(Front of KV-27V40, 27V45, 27V65 only)
Using A/V connectors, connect AUDIO and
VIDEO OUT on your camcorder to AUDIO
and VIDEO IN on your TV (Yellow-VIDEO,
White-AUDIO Left, Red-AUDIO Right).
VIDEO 2 INPUT
VIDEO L(MONO)-AUDIO-R
VIDEO L(MONO)-AUDIO-R
VIDEO 2 INPUT
Connection can also be made directly to your
A/V input located on the rear of your TV.
Note
• If you are connecting a monaural camcorder,
connect only the single white audio output
to the left input on your TV.
VIDEO (yellow)
AV output
AUDIO-R (red)
AUDIO-L (white)
VMC-810S/820S
(not supplied)
11
— 11 —
KV-27S40 / 27S45 / 27S65 / 29SL40 / 29SL40A / 29SL40C/
29SL45 / 29SL65 / 29SL65C/ 29XL40M / 29XL40P / 29XT11A
Basic Set up
Inserting batteries
Insert two size AA (R6) batteries (supplied) by
matching the + and – on the batteries to the
diagram inside the battery compartment.
Using the remote control,
Move & Select buttons
0
MTS
TV DBS
Move
GUIDE
RESET
MENU
VOL
Several menu windows will provide prompts
and instructions to assist you in navigating
through the different functions. When
presented, use these to supplement the instructions
in this manual.
CH
Select
CODE SET
Notes
• Remove the batteries to avoid damage
from possible battery leakage whenever
you anticipate that the remote control will
not be used for an extended period.
• Handle the remote control with care.
Avoid dropping it, getting it wet, or
placing it in direct sunlight, near a heater,
or where the humidity is high.
• Your remote control can be programmed to
operate most video equipment. (see page 26)
On-Screen Help/Instructions
The supplied remote control has "arrow"
buttons (V, v, B, b) which allow for
movement of the on-screen selector in four
directions. Pressing on the outer buttons will
cause the selector to move in the
corresponding direction. Pressing the center
button (
) will select the item.
Note
• To reset your TV to factory settings, turn
the TV on. Then, while pressing the RESET
button, press the POWER key on your TV.
The TV will turn itself off, then back on.
(except KV-20V80).
Adjustments bars
When menu items present an adjustment bar
(
or
), use the arrow buttons to
change the setting.
12
Using your New TV
Setting up the TV automatically
Using the buttons on the front of the TV:
VOLUME
SET UP TV/VIDEO
The Easy Setup Guide allows you to set the
on-screen language and set all receivable
channels. The Easy Setup Guide screen
appears every time you turn on the TV until
you perform AUTO PROGRAM.
The Easy Setup Guide feature does not apply for
installations that use a cable box for all channel
selection.
To set up the TV manually, refer to “Using the
SET UP menu” on page 23.
Tips
z
• Performthisfunctionduringtheday,withtheantenna
and/orcableproperlyconnected,toensurethatallavailable
channelswillbebroadcastingandreceivable.
• AfterusingtheEasySetup Guide youwillstillhavethe
optionofadjustinganyofthesystemsettings,likeskipping
channels, through the SET UP menu (page 24).
• The TV must be set to the TV input to execute AUTO
PROGRAM.PressANTuntilachannelnumberappears.
• If your cable or antenna is connected to AUX, then
press ANTuntilAUXappearsnexttothechannel
number. (KV-27S65, 27V65 only)
– VOLUME +
– CHANNEL +
POWER
AUTO PROGRAM
For KV-27V65, the control buttons are located
on the top of the TV.
1 Press POWER to turn on the TV.
The Easy Setup Guide screen appears.
POWER
ENGLISH:
[CH+]
ESPANOL:
[CH-]
AUTO SET UP: [VOL+]
DEMO:
[VOL-] First please connect
cable/antenna.
Press [SETUP]to exit
2 (except Canadian models)
Press CH + to select English screens or
CH – to select Spanish screens.
– CHANNEL +
3 Press VOL + to continue or VOL – for a
DEMO of functions and menus.
AUTO PROGRAM appears and the TV
starts scanning and presetting channels
automatically. When all the receivable
channels are stored, the lowest numbered
channel is displayed. If the TV receives
cable TV channels, CABLE is set ON
automatically.
To perform AUTO SET UP again
• Press SET UP on the TV.
• Press CH + or CH – to select a language.
• Press VOL + to restore factory settings
(CONTINUE TO AUTO PROGRAM? will
appear on the screen). Press CH + to
continue or CH – to exit.
• Press SET UP to exit.
Note
• When you perform AUTO PROGRAM,
your CHANNEL FIX, CHANNEL BLOCK
and ON/OFF TIMER settings will be
erased.
13
— 12 —
KV-27S40 / 27S45 / 27S65 / 29SL40 / 29SL40A / 29SL40C/
29SL45 / 29SL65 / 29SL65C/ 29XL40M / 29XL40P / 29XT11A
Using your New TV (continued)
Watching the TV
All of the TV features can be accessed via the
remote control. The following chart will
explain the function of the buttons found on
your remote control.
REFER TO THE
ILLUSTRATION OF THE
REMOTE CONTROL ON THE
INSIDE FRONT COVER OF
THIS MANUAL AS YOU
REVIEW THIS CHART
Using the White Labeled Buttons for TV Operations.
FUNCTION
VTR/DVD DBS/CABLE
POWER
TV
0 - 9
CH
JUMP
MUTING
TV
Activate the remote control for use with the following components: TV, DBS/CABLE,
VTR/DVD. Press when you want to control connected components with your remote
control. (see pages 26-28 for instructions on programming your remote control)
Turns the TV on and off. If VIDEO appears on the screen, press TV/VIDEO or
ANT until a channel number appears.
Use for direct channel selection. Press 0-9 to select a channel, the channel will
change after 2 seconds, or you can press ENTER for immediate selection.
Press to scan through the channels.
Keeping the CH + or – pressed allows you to rapidly scan to the desired channel.
Press to alternate or jump back and forth between two channels. You can jump
between the last two channels selected with the 0-9 keys.
Press to mute the sound (MUTING will appear on the screen). Press again or
press VOL + to restore sound.
14
Using the White Labeled Buttons for TV Operations.
FREEZE
Press to freeze the window picture while in PIP mode. If you are not in PIP mode,
pressing FREEZE will cause the main picture to freeze into a window picture.
Great for copying down phone numbers, addresses, recipes, etc.
SLEEP
Press repeatedly until the TV displays the approximate time in minutes (30, 60, or
90) that you want the TV to remain on before shutting off automatically.
Cancel by pressing until SLEEP OFF appears.
SET UP
CHANNEL SET UPŁ
FAVORITE CHANNELŁ
CHANNEL BLOCKŁ
VIDEO LABELŁ
CAPTION VISION:CC1
MENU
CAPTION VISION
(Closed Caption)
DISPLAY
TV/VIDEO
ANT
(AUX input)
TV/VTR
+
MTS
GUIDE
Press repeatedly to step through available displays:
Status
Channel number, current time, channel caption (if set) and Multi-Channel TV
Sound (MTS) are displayed.
The MTS mode indication disappears after three seconds.
CAPTION VISION
CAPTION VISION will be displayed on the screen if the broadcaster offers this
service. (see right)
To cancel the display, press DISPLAY repeatedly until DISPLAY OFF appears.
DISPLAY OFF disappears after three seconds.
Move
Select
Exit
Some programs are broadcast with CAPTION
VISION.
CC1, 2, 3 or 4
Shows you a printed version of the dialog or
sound effects of a program. (The mode should
be set to CC1 for most programs)
TEXT1, 2, 3 or 4
Shows you network/station information
presented using either half or the whole screen.
It is not usually related to the program.
Press repeatedly to step through available video inputs:
TV and VIDEO 1 (KV-27S40 only)
TV, VIDEO 1 and VIDEO 2 (KV-20V80, 27S45, 27S65, 27V40 only)
TV, VIDEO 1, VIDEO 2 and VIDEO 3 (KV-27V45, 27V65 only)
XDS (Extended Data Service)
Shows a network name, program name,
program length, and time of the show if the
broadcaster offers this service.
Press to change the VHF/UHF input to the AUX input (KV-27S65, 27V65 only).
For detailed connection information, see “Cable and antenna” or "Cable box and
cable” on pages 5-6.
Note
Press when you are finished using a VCR and you want to switch to the TV input.
Your VCR power will remain on.
Press this button to cycle through the Multi-channel TV Sound (MTS) options.
(see page 21).
GUIDE is a feature of DBS, refer to your DBS operation instructions.
— 13 —
MENU
• Poor reception of TV programs can cause
errors in CAPTION VISION and XDS.
Captions may appear with a white box or
other errors instead of intended text.
15
KV-27S40 / 27S45 / 27S65 / 29SL40 / 29SL40A / 29SL40C/
29SL45 / 29SL65 / 29SL65C/ 29XL40M / 29XL40P / 29XT11A
Using your New TV (continued)
Watching two programs at
one time - PIP
The Picture-in-Picture (PIP) feature allows you
to view two channels simultaneously, one in
the full size “main” picture and one in a smaller
“window” picture. This means that two
separate tuners must be available to provide
the two signals.
Certain models (KV-27S45, 27V45 only) are
equipped with a single tuner. This simply means
that a VCR must be connected and turned on for
PIP to operate.
Tip
z
To ensure a correct single tuner PIP connection
(KV-27S45, 27V45 only), make sure the following list
is complete before using PIP:
• A cable or antenna is connected to the VCR
• The VCR is connected to your TV
• The VCR is turned on
(for detailed connection information, see pages 5-7)
The sound of the main
picture is received.
Main
picture
Input-source mode
or TV channel for
the main picture
Input-source mode
or TV channel for
the window picture
Window
picture
REFER TO THE ILLUSTRATION OF
THE REMOTE CONTROL ON THE
INSIDE FRONT COVER OF THIS
MANUAL AS YOU REVIEW THIS
CHART
Use the Yellow Labeled Buttons for PIP Operations.
PIP
TV/VIDEO
AUDIO
Note
• You must press TV (FUNCTION) before you
can control PIP with the yellow labeled buttons.
Press once to display the window picture (1/9 size).
Press again to reduce the size of the window picture (1/16 size).
Press a third time to remove the window picture.
Press repeatedly to step through available video inputs:
TV, VIDEO 1, VIDEO 2, and VIDEO 3 (KV-27S45, 27S65, 27V45,
27V65 only)
If you have a single tuner, your PIP input source is the VCR.
Press to alternate sound between the main picture and the window
will appear for a few seconds to indicate which picture is
picture. A
receiving sound.
16
Use the Yellow Labeled Buttons for PIP Operations.
TV/VTR
+
CH
Press to change the TV channel in the window picture. (KV-27S65, 27V65 only)
For models KV-27S45, 27V45, you must press VTR/DVD (FUNCTION), then use
the main CH +/- buttons to change channels. (see right)
–
POSITION
Changing channels with a single
tuner PIP
• KV-27S45, 27V45 only
1 Press TV/VIDEO until you reach the TV
input.
2 Press PIP (the window picture appears).
Press to move the location of the window picture (counterclockwise) around the
main picture.
To change the window picture:
1 Press VTR/DVD (FUNCTION).
2 Press the main CH +/– buttons to change
FREEZE
SWAP
Press to freeze the window picture. Great for copying down phone numbers,
addresses, recipes, etc.
Press FREEZE again to restore the previous screen(s).
Press to switch the audio and video of the main picture and the window picture.
Each time you press SWAP, the picture and sound of the two will be swapped.
Any channels being received through the AUX jack cannot be displayed as a
window picture. (KV-27S65, 27V65 only)
channels.
To change the main picture:
1 Press TV (FUNCTION).
2 Press the main CH +/– buttons to change
channels.
Note
• If you have the same program in both the
window and the main picture and cannot
change the channel in the window; press
TV/VIDEO until you reach the TV input in the
main picture.
17
— 14 —
KV-27S40 / 27S45 / 27S65 / 29SL40 / 29SL40A / 29SL40C/
29SL45 / 29SL65 / 29SL65C/ 29XL40M / 29XL40P / 29XT11A
Using your Menus
3 Press V or v to move to the desired option.
Learning menu selection
5 Press V or v to make your selection and
Use the MENU button to access a menu and
use the select buttons (V or v) to alter settings.
Use the following example, in which we
activate the CABLE, to learn how to modify
settings.
.
press
SET UP
CHANNEL SET UPŁ
FAVORITE CHANNELŁ
CHANNEL BLOCKŁ
VIDEO LABELŁ
CAPTION VISION:CC1
LANGUAGE: ENGLISH MENU
CHANNEL SET UPŁ
Ł
CABLE: ONŁ
CHANNEL FIX: OFFŁ
AUTO PROGRAM
CHANNEL SKIP/ADDŁ
CHANNEL CAPTIONŁ
MENU
Move
Select
Exit
MENU
Move
.
Options for your selection will be
displayed.
Select
CHANNEL SET UPŁ
Exit
) and press
Move
Select
Exit
MENU
Move
to
Exit
Select
Exit
MENU
Notes
• Pressing MENU on the remote control will
allow you to exit from the menus at any
time.
• If any menu items are "blacked out", press
the ANT button on your remote control
until a channel number appears.
SET UP
CHANNEL SET UPŁ
FAVORITE CHANNELŁ
CHANNEL BLOCKŁ
VIDEO LABELŁ
CAPTION VISION:CC1
LANGUAGE: ENGLISH MENU
Select
SET UP
CHANNEL SET UPŁ
FAVORITE CHANNELŁ
CHANNEL BLOCKŁ
VIDEO LABELŁ
CAPTION VISION:CC1Ł
LANGUAGE: ENGLISH MENU
Move
When you are finished making changes to the
selected menu, choose MENU to return to
the main menu.
CABLE: OFFŁ
CHANNEL FIX: OFFŁ
AUTO PROGRAM
CHANNEL SKIP/ADDŁ
CHANNEL CAPTIONŁ
MENU
MENU
2 Press V or v to highlight the desired menu
(in this case SET UP
select it.
MENU
Ł
Move
Exit
4 Press
VIDEOŁ
MODE: VIVID
PICTURE
Ł
BRIGHTNESS COLOR
Ł
HUE
SHARPNESSŁ
MENU
Select
The main menu appears.
MENU
1 Press the MENU button.
MENU
18
Using the VIDEO menu
Customized picture
viewing
VIDEOŁ
MODE: VIVID
PICTURE
Ł
BRIGHTNESS COLOR
Ł
HUE
SHARPNESSŁ
MENU
}
Adjustment
bars
Select
Exit
PICTURE
Picture Adjustment
Move
MODE
BRIGHTNESS
For detailed information on using the remote
to modify menu settings, refer to “Learning
menu selection” on page 18.
To select the VIDEO
HUE
Highlight
Adjust left to decrease picture contrast and soften the color.
Adjust right to increase picture contrast and create more vivid color.
MENU
Picture Adjustment
Display
(except KV-20V80)
VIVID: Select to receive a vivid, bright picture.
STANDARD: Select to receive a standard picture.
MOVIE: Select to receive a softened picture.
menu:
Select
MENU
COLOR
Picture Adjustment
Picture Adjustment
SHARPNESS
Picture Adjustment
Adjust left to darken the picture.
Adjust right to brighten the picture.
Adjust left to decrease color intensity.
Adjust right to increase color intensity.
Adjust left to decrease the green tones.
Adjust right to increase the green tones.
Adjust left to soften the picture.
Adjust right to sharpen the picture.
To restore the factory VIDEO
settings
Press RESET while the VIDEO menu is
displayed.
19
— 15 —
KV-27S40 / 27S45 / 27S65 / 29SL40 / 29SL40A / 29SL40C/
29SL45 / 29SL65 / 29SL65C/ 29XL40M / 29XL40P / 29XT11A
Using your Menus (continued)
Using the AUDIO menu
AUDIO
TREBLE
Ł
BASS BALANCE
Ł
AUTO VOLUME: ON
SPEAKER: OFFŁ
AUDIO OUT: VARIABLE
OPTIONS MENU Move
Select
Exit
} Adjustment
bars
TREBLE
Adjust left or right to decrease or increase higher pitched sound
BASS
Adjust left or right to decrease or increase low pitched sounds.
BALANCE
Adjust left or right to emphasize speaker volume.
AUTO VOLUME
(KV-27V40, 27V45, 27V65 only).
ON: Select to stabilize the volume when changing channels.
OFF: Select to turn AUTO VOLUME off.
Stabilizes volume
MENU
For detailed information on using the remote
to modify menu settings, refer to “Learning
menu selection” on page 18.
To select the AUDIO
Display
Highlight
menu:
Select
MENU
SPEAKER
Custom selection of
audio output source
AUDIO OUT
Use to control the
TV's volume through
a stereo
ON: Select to listen to the sound from the TV speakers and a separate stereo
system.
OFF: Select to turn off the TV speakers and listen to the TV's sound only through
external audio system speakers.
AUDIO OUT can only be set when speakers are set to OFF.
VARIABLE: Sound output varies according to the TV settings.
Useful when you want to use your remote control to control the output of a
separate audio system.
FIXED: Sound output is held at a fixed level through your stereo.
To restore the factory AUDIO
settings
Press RESET while the AUDIO menu is
displayed.
Tip
Press
z
for direct selection of an AUDIO setting.
20
OPTIONS
Enhanced audio
options
With the OPTIONS menu open:
to access the feature you want to change.
1 Press
2 Press V or v to cycle through the options.
MTS: Press V or v to select one of the following options:
STEREO: Select for stereo reception when viewing a broadcast in stereo.
SAP: Select to listen to bilingual broadcast. (Non-SAP programs will be muted when this feature is selected.)
MONO: Select for mono reception (use to reduce noise during stereo broadcasts.)
Quick MTS access: Press MTS on your remote control to cycle through the MTS options.
OPTIONSŁ
Ł
MTS: STEREOŁ
EFFECT: SRSŁ
MENU
Move
Select
Exit
MENU
EFFECT: Press V or v to select one of these customized effects based on the program you are viewing:
SRS: Produces a dynamic three dimensional sound for stereo audio signals.
(KV-27V40, 27V45, 27V65 only)
SURROUND: Simulates theater quality sound (only for stereo programs).
(KV-20V80, 27S40, 27S45, 27S65 only)
SIMULATED: Adds a surround-like effect to mono programs.
(KV-27V40, 27V45, 27V65 only)
21
— 16 —
KV-27S40 / 27S45 / 27S65 / 29SL40 / 29SL40A / 29SL40C/
29SL45 / 29SL65 / 29SL65C/ 29XL40M / 29XL40P / 29XT11A
Using your Menus (continued)
Using the TIMER menu
TIMERŁ
DAYLIGHT SAVING: YES
CURRENT TIME SET
ON/OFF TIMER MENU
Automatically adjusts
the time.
Ł
CURRENT
TIME SET
DAYLIGHT
SAVING
Move
Select
Exit
MENU
Necessary for the
TIMER.
For detailed information on using the remote
to modify menu settings, refer to “Learning
menu selection” on page 18.
To select the TIMER
Display
menu:
Highlight
Select
ON/OFF TIMER
Wake up or
scheduled viewing.
MENU
Spring: Select YES to compensate for Daylight Saving Time.
The current time automatically moves one hour ahead.
Fall: Select NO at the end of Daylight Saving Time.
The current time moves back one hour.
CURRENT TIME SET menu will appear.
.
1 Press
2 Press V or v until the current day is displayed. Press
to select.
3 Press V or v until the current hour and AM/PM is
to select.
displayed. Press
4 Press V or v until the current minute is displayed,
.
press
The clock is set. Press MENU to exit.
CURRENT TIME SETŁ
Ł
___--:-- AMŁ
MENU
Move
Select
Exit
MENU
ON/OFF TIMERŁ
ON/OFF TIMER menu will appear.
Ł
___Ł
.
1 Press
--:-- AM_h CH____Ł
MENUŁ
2 Press V or v until the desired day or range of days
to select.
is displayed. Press
3 Indicate the time that you want the TV to turn on by
SUN 12:00 AM
Move
Select
Exit
.
pressing V or v and then
4 Set the time duration (maximum of 6 hours) by
.
pressing V or v and then
5 Press V or v until you reach the desired channel.
to select.
Press
The ON/OFF TIMER is now set. Press MENU to exit.
When you perform AUTO PROGRAM, all ON/OFF TIMER settings will be erased.
MENU
To cancel the ON/OFF TIMER
function
Press RESET while the TIMER menu is
displayed.
Tip
z
Set daylight saving time before setting the clock. Any
loss of power will cause these settings to be erased.
22
Using the SET UP menu
SET UP
CHANNEL SET UPŁ
FAVORITE CHANNELŁ
CHANNEL BLOCKŁ
VIDEO LABELŁ
CAPTION VISION:CC1
LANGUAGE: ENGLISH MENU
Basic set up
options for
viewing
Select
Exit
MENU
For detailed information on using the remote
to modify menu settings, refer to “Learning
menu selection” on page 18.
To select the SET UP
Display
Highlight
CHANNEL SET UPŁ
With the CHANNEL SET UP menu open:
Ł
CABLE: ONŁ
1 Use V or v to access the feature you want to change.
CHANNEL FIX: OFFŁ
AUTO PROGRAM
2 Press
to select the feature.
CHANNEL SKIP/ADDŁ
CHANNEL CAPTIONŁ
CABLE: Select ON if your TV is connected to a cable
MENU
system. (After setting CABLE, you will need to run
Move
Select
Exit
AUTO PROGRAM.)
CHANNEL FIX: Press
and then use the V or v buttons to set the TV's input
to one of the following options:
2-6: When a cable box is connected to the VHF/UHF input. Press DBS/CABLE
(FUNCTION) and then CH +/– to change channels.
AUX 2-6: When a cable box is connected to AUX and a cable or antenna is
connected to VHF/UHF. You can alternate between the two inputs by pressing
ANT on the remote control. (KV-27S65, 27V65 only)
VIDEO 1: When you have connected video equipment (e.g. A/V receiver) and
you want the TV input fixed to it. You will be able to alternate between video
sources using the A/V receiver.
OFF: When you want to switch CHANNEL FIX off.
Press ANT on the remote control until you reach a picture.
ON/OFF TIMER and CHANNEL BLOCK settings will be erased when
CHANNEL FIX is set.
AUTO PROGRAM: Instructs the TV to automatically program all receivable
channels.
CHANNEL SKIP/ADD:
CHANNEL SKIP/ADDŁ
With the CHANNEL SKIP/ADD window open:
33Ł
SKIPŁ
1
Place the cursor next to SKIP or ADD. (only
MENUŁ one option will be displayed)
use (0-9) or (CH+/-)
2
Choose the desired channel using CH +/–, or
to select the channel
by selecting with the 0-9 buttons and pressing
Move
Select
Exit
ENTER.
3
Press
to activate.
MENU
Move
CHANNEL
SET UP
menu:
Select
MENU
Notes
• The FAVORITE CHANNEL feature is not
available for the AUX input.
• Your remote control can be programmed to
operate your cable box. (see page 28)
MENU
23
— 17 —
KV-27S40 / 27S45 / 27S65 / 29SL40 / 29SL40A / 29SL40C/
29SL45 / 29SL65 / 29SL65C/ 29XL40M / 29XL40P / 29XT11A
Using your Menus (continued)
Using the SET UP menu
(continued)
SET UP
CHANNEL SET UPŁ
FAVORITE CHANNELŁ
CHANNEL BLOCKŁ
VIDEO LABELŁ
CAPTION VISION:CC1
LANGUAGE: ENGLISH MENU
.
CHANNEL CAPTIONŁ
CHANNEL CAPTION: You will be able to label up to 12
channels with their call letters.(except KV-20V80)
With the CHANNEL CAPTION menu open:
1
Press
and then V or v to access the desired
channel, and press
again.
Move
Select
2
Press V or v to display the first letter or number
of the caption and press
to select it.
3
Press
to activate. To erase a caption, press RESET.
CHANNEL
SET UP
(continued)
Basic set up
options for
viewing
Move
Select
Exit
Display
Highlight
___Ł
____
MENUŁ
Exit
MENU
MENU
For detailed information on using the remote
to modify menu settings, refer to “Learning
menu selection” on page 18.
To select the SET UP
-
menu:
Select
MENU
CHANNEL
BLOCK
Prevent child access
to certain channels.
CHANNEL BLOCKŁ
You will be able to block two channels.
Ł
With the CHANNEL BLOCK window open:
1.CH___Ł
2.CH___Ł
1
Choose 1 or 2 and press
.
MENU 2
Press V or v to display the channel you want to
block.
Select
a program
Move
Select
Exit
3
Press
to activate.
When you select the blocked channel, BLOCKED
will appear on the screen. CAPTION VISION will also be blocked.
When you perform AUTO PROGRAM, your CHANNEL BLOCK settings will be erased.
MENU
To erase the CHANNEL BLOCK
settings
Press RESET while the SET UP menu is
displayed.
24
FAVORITE
CHANNEL
Quick access to
favorite channels
VIDEO LABEL
Easy recognition of
connected equipment
(e.g. DBS, VHS, etc.)
FAVORITE CHANNELŁ
Setting FAVORITE CHANNEL:
MODE: AUTO
PREVIEW: ONŁ and then V or v to select AUTO or MANUAL. (Selecting AUTO will display the last five channels
1 Press
1.___Ł 2.___Ł
chosen with the remote control.)
3.___Ł
4.___Ł
2 Press V or v to move the cursor to 1, 2, 3, 4 or 5 and press
.
5.___
MENUŁ
3 Press V or v to access the desired channel and press
.
Move
Select
Exit
4 For KV-27S65, 27V65 only, you can preview your favorite channels in the window picture, to do so, set
PREVIEW to ON.
125 ESPN
14 ABC
Using FAVORITE CHANNEL:
48 CBS
16 HBO
1 Press
when in normal viewing mode. Your FAVORITE CHANNEL options will appear.
5 CBC
Exit
2 Press V or v to access the channel you want to watch, and press
.
3 For models KV-27S65, 27V65 only, if PREVIEW is ON, a window picture displays your favorite channels as you cycle
through the options.
This feature allows you to label each input mode so that you can easily identify connected equipment (e.g. you
can label VIDEO 1 as VHS). (except KV-20V80)
With the VIDEO LABEL window open:
1 Press V or v to move to the input mode you want to label and press
.
2 Press V or v to choose the label and press
.
MENU
VIDEO LABELŁ
Ł
VIDEO 1: VIDEO
1Ł
VIDEO 2: VIDEO 2Ł
VIDEO 3: VIDEO 3Ł
MENUŁ
Ł
Ł
Ł
Move
Select
Exit
MENU
VIDEO LABEL Options:
Video 1: VHS, 8mm, BETA, LD, GAME, DBS, DVD, WEB, RECEIVER, DTV.
Video 2/3: VHS, 8mm, BETA, LD, GAME, DBS, DVD, WEB, RECEIVER, DTV.
When VIDEO LABEL is set to WEB, the picture will darken, creating an ideal picture for WebTV viewing.
LANGUAGE
(except Canadian models)
You can change the language of your menus to either ENGLISH or ESPAÑOL.
25
— 18 —
KV-27S40 / 27S45 / 27S65 / 29SL40 / 29SL40A / 29SL40C/
29SL45 / 29SL65 / 29SL65C/ 29XL40M / 29XL40P / 29XT11A
Operating video equipment
Programming the remote
You can use the supplied remote control to
operate Sony or non-Sony video equipment.
1
2
3
4
Press CODE SET.
Press VTR/DVD (FUNCTION).
Use the 0-9 buttons to key in the
manufacturer's code number from the
following chart.
Press ENTER.
VCR manufacturer code numbers
Manufacturer
Sony
Aiwa
Broksonic
Canon
Daewoo
Emerson
Fisher
Funai
General Electric
Go Video
Goldstar
Hitachi
JVC
Kenwood
LXI (Sears)
Code
301, 302, 303
338, 344
319, 317
309, 308
341, 312, 309
319, 320, 316, 317, 318,341
330, 335
338
329, 304, 309
322
332
306, 304, 305,338
314, 336, 337, 345, 346, 347
314, 336, 332, 337
332, 305, 330, 335, 338
Magnavox
Mitsubishi/MGA
NEC
Panasonic
Philips
Pioneer
Quasar
RCA/PROSCAN
Realistic
Sansui
Samsung
Sanyo
Sharp
Sylvania
Symphonic
Technics
Toshiba
Wards
Zenith
308, 309, 310
323, 324, 325, 326
314, 336, 337
308, 309, 306, 307
308, 309, 310
308
308, 309, 306
304, 305, 308, 309, 311,
312, 313, 310, 329
309, 330, 328, 335, 324, 338
314
322, 313, 321
330, 335
327, 328
308, 309, 338, 310
338
309, 308
312, 311
327, 328, 335, 331, 332
331
To search the
picture forward or
backward
To change input
mode
Press p.
Press ).
Press 0.
Press P.
To resume normal playback,
press again or press (.
Press ) or 0 during
playback.
To resume normal playback,
release the button.
Press TV/VTR.
Tips z
• In some rare cases, you may not be able to operate
your non-Sony video equipment with the supplied
remote control. In this case, please use the
equipment’s own remote control.
• The code numbers for Sony VCR's are assigned at the
factory as follows:
Operating a VCR
Buttons on the
remote control
To turn on or off
To select a channel
directly
To change
channels
To record
Press VTR (POWER).
Press the 0 – 9 buttons.
To play
To stop
To fast forward
To rewind the tape
To pause
VHS VCR
8 mm VCR
Beta, ED Beta VCRs
Press CH +/–.
Press ( and r
simultaneously.
Press (.
301 (preset code
for the supplied
remote control)
302
303
• When you remove the batteries, the code number may
revert to the factory setting.
26
MDP (Multi Disc Player)
manufacturer code numbers
Manufacturer
Sony
Panasonic
Pioneer
DVD (Digital Versatile Disc)
manufacturer code numbers
Code
701
704, 710
702
Operating an MDP
Buttons on the remote
control
To turn on or off
To play
To stop
To pause
Press VTR/DVD (POWER).
Press (.
Press p.
Press P.
To resume normal playback,
press again or press (.
Press ) or 0 during
playback.
To resume normal playback,
press (.
Press CH +/–.
To search the picture
forward or backward
To search the
chapter forward or
backward
Manufacturer
Code
Sony
Panasonic
Pioneer
RCA
Toshiba
751
753
752
755
754
Operating a DVD
player
Buttons on the remote
control
To turn on or off
To play
To stop
To pause
Press VTR/DVD (POWER).
Press (.
Press p.
Press P.
To resume normal playback,
press again or press (.
Press ) or 0 during
playback.
To resume normal playback,
press (.
Press CH +/–.
To search the picture
forward or backward
To search the
chapter forward or
backward
To select chapters
directly
MENU
To move cursor in
menu
0–9 + ENTER.
Press to display DVD menu.
Use your arrow buttons
V v, B b.
27
— 19 —
KV-27S40 / 27S45 / 27S65 / 29SL40 / 29SL40A / 29SL40C/
29SL45 / 29SL65 / 29SL65C/ 29XL40M / 29XL40P / 29XT11A
Operating a cable box or DBS receiver
Programming the remote
You can program the supplied remote control
to operate a cable box or DBS receiver.
1
2
3
4
If the remote control doesn’t work
• First, try repeating the setup procedures
using the other codes listed for your
equipment.
Press CODE SET.
Tips z
Press DBS/CABLE (FUNCTION).
• If more than one code number is listed, try entering
them one by one until you come to the correct code for
your equipment.
Use the 0-9 buttons to key in the
manufacturer's code number from the
following chart.
Press ENTER.
For more details on operating the
cable box or DBS receiver
• If you enter a new code number, the code number you
previously entered at that setting is erased.
• In some rare cases, you may not be able to operate
your equipment with the supplied remote control. In
this case, use the equipment’s own remote control
unit.
• Whenever you remove the batteries the code numbers
may revert to the factory setting and must be reset.
Refer to the operating instructions that were
supplied with the equipment.
Manufacturer code numbers
(cable box)
Manufacturer
Hamlin/Regal
Jerrold/G. I.
Oak
Panasonic
Pioneer
Scientific Atlanta
Tocom
Zenith
Code
222, 223, 224, 225, 226
201, 202, 203, 204, 205, 206,
207, 208, 218
227, 228, 229
219, 220, 221
214, 215
209, 210, 211
216, 217
212, 213
Manufacturer code numbers
(DBS receiver)
Manufacturer
Sony
General Electric
Hitachi
Hughes
Panasonic
RCA/PROSCAN
Toshiba
Code
801 (preset code for
remote control)
802
805
804
803
802, 808
806, 807
28
Troubleshooting
Consult the table below; it suggests solutions to specific problems. If you need more information, consult the operating instructions guide.
Problem
What it could be
What you can do
Cannot Operate Single Tuner PIP • VCR may not be connected to your TV properly.
• VCR may not be turned on.
(KV-27S45, 27V45)
• Ensure that you have set your VCR correctly. (see page 7)
• Call your local Sony service center.
A red light keeps flashing on the
TV for more than a few seconds
• Your TV may need service.
TV makes a noise when turned
on
• This is a normal function of your TV.
Screen is not lit and there is no
sound
• Power cord may not be plugged in.
• Batteries may not have been placed with the correct
polarity.
• TV/VIDEO setting may be incorrect.
• Press TV/VIDEO until you receive a channel.
• Perform AUTO SET UP again by pressing the SET UP
button on your TV. (see page 13)
Poor or no picture (screen lit),
good sound
• VIDEO menu settings may not be adjusted correctly.
• Antenna/cable connections may be faulty.
• VIDEO LABEL inputs may be set to WEB. (This label
darkens the screen for ideal WebTV viewing.)
• Readjust your VIDEO menu settings.(see page 19)
• Check your VIDEO LABEL settings. (see page 25)
Good picture, no sound
• Sound may be set to MUTE.
• Your TV may be set to SAP.
• Speaker may not be set correctly.
• Check the MTS setting in the AUDIO menu. (see page 21)
• Check your SPEAKER settings. (see page 20)
No color
• Color settings may not be adjusted correctly.
• Adjust the COLOR settings in the VIDEO menu.
(see page 19)
29
— 20 —
KV-27S40 / 27S45 / 27S65 / 29SL40 / 29SL40A / 29SL40C/
29SL45 / 29SL65 / 29SL65C/ 29XL40M / 29XL40P / 29XT11A
Troubleshooting (continued)
Problem
What it could be
What you can do
Only snow and noise
appear on the screen
• CABLE setting may not be set
correctly in the SET UP menu.
• Antenna/cable connections may
not be correct.
• TV may be set to AUX mode.
Cannot receive upper
channels (UHF) when
using an antenna
• CABLE setting may not be correct • Ensure that CABLE is set to OFF
in the SET UP menu.
in the SET UP menu. (see page 23)
• Use AUTO PROGRAM to add
receivable channels that are not
presently in TV memory. (see
page 24)
Cannot receive any
channels when using
cable
• CABLE setting may not be set
correctly in the SET UP menu.
• Ensure that CABLE is set to ON
in the SET UP menu. (see page 23)
• Use AUTO PROGRAM to add
receivable channels that are not
presently in TV memory. (see
page 24)
Cannot gain enough
volume when using a
cable box
• Volume may not be adjusted on
your cable box.
• Press TV (FUNCTION) and
adjust the TV's volume.
TV is fixed to one
channel
• CHANNEL FIX settings may not
be correct.
• Check your CHANNEL FIX
settings. (see page 23)
• Ensure that you have selected the
correct CABLE mode in the
SET UP menu. (see page 23)
• Press ANT on your remote
control to change the input mode.
(see page 15)
If, after reading these operating instructions, you have additional questions related to the use of your Sony
television, please call our Direct Response Center at 1-800-222-SONY (7669).
30
— 21 —
KV-27S40 / 27S45 / 27S65 / 29SL40 / 29SL40A / 29SL40C/
29SL45 / 29SL65 / 29SL65C/ 29XL40M / 29XL40P / 29XT11A
SECTION 2
DISASSEMBLY
2-1.
REAR COVER REMOVAL
Rear Cover
Seven screws
(BVTP 4X16)
One screw
(BVTP 3X12)
2-2. A BOARD REMOVAL
2-3. SERVICE POSITION
P
— 22 —
KV-27S40 / 27S45 / 27S65 / 29SL40 / 29SL40A / 29SL40C/
29SL45 / 29SL65 / 29SL65C/ 29XL40M / 29XL40P / 29XT11A
2-4. PICTURE TUBE REMOVAL
WARNING
Before removing anode cap:
H.V. remains in the CRT even after the power is disconnected.
To avoid electrical shock, discharge CRT before attempting to remove the anode
cap : Short between anode and CRT coating earth ground strap.
Coating earth
ground strap
E board
Chassis assy
Degaussing coil
K board
(KV-27S65/29SL65/29SL65C ONLY)
C board
Neck assy
Deflection yoke
P board
(KV-27S45/27S65/29SL45/29SL65C/29SL65)
Four screws
(Tapping screw 7)
Tension spring (B)
Anode cap
Picture tube
Cushion
REMOVAL OF THE ANODE-CAP
NOTE: Short circuit the anode of the picture tube and the anode cap to the metal chassis, CRT shield or carbon painted on the CRT, after
removing the anode.
REMOVAL PROCEDURES
Turn up one side of the rubber cap in
the direction indicated by arrow .
Use your thumb to pull the rubber cap
firmly in the direction indicated by
arrow .
HOW TO HANDLE AN ANODE-CAP
Do not use sharp objects which may cause damage to the surface of the anode-cap.
Do not squeeze the rubber covering too hard to avoid damaging the anode-cap. A material fitting called a shatter-hook terminal is built into the rubber.
Do not force turn the foot of the rubber cover. This may cause
the shatter-hook terminal to protrude and damage the rubber.
— 23 —
When one side of the rubber cap separates from the anode button, the anodecap can be removed by turning the rubber cap and pulling it in the direction of
arrow .
KV-27S40 / 27S45 / 27S65 / 29SL40 / 29SL40A / 29SL40C/
29SL45 / 29SL65 / 29SL65C/29XL40M / 29XL40P / 29XT11A
SECTION 3
SET-UP ADJUSTMENTS
The following adjustments should be made when a
complete realignment is required or a new picture
tube is installed. These adjustments should be performed
with rated power supply voltage unless otherwise noted.
The controls and switch should be set as follows
unless otherwise noted:
Perform the adjustments in order as follows:
1.
2.
3.
4.
Beam Landing
Convergence
Focus
Screen (G2) and White Balance
Note: Test Equipment Required
1.
2.
3.
4.
PICTURE control ................. normal
BRIGHTNESS control ......... normal
Color Bar Pattern Generator
Degausser
DC Power Supply
Digital Multimeter
3-1. BEAM LANDING
Preparation:
•
•
Feed in the white pattern signal.
Before starting, degauss the entire screen.
1.
Input a raster signal with the pattern generator.
2.
Loosen the deflection yoke mounting screw, and set the
purity control to the center as shown in Fig.2.
3.
Turn the raster signal of the pattern generator to
green.
4.
Move the deflection yoke backward, and adjust with the
purity control so that green is in the center and red and
blue are at the sides evenly. (Fig.3)
5.
Move the deflection yoke forward, and adjust so that the
entire screen becomes green. (Fig.1)
6.
Switch over the raster signal to red and blue and confirm
the condition.
7.
When the position of the deflection yoke is determined,
tighten it with the deflection yoke mounting screw.
8.
When landing at the corner is not right, adjust by using
the disk magnets. (Fig.4)
Fig. 2
Fig. 3
Disk magnets or
rotatable disk
magnets correct
these areas (a-d).
Fig. 4
Fig. 1
— 24 —
KV-27S40 / 27S45 / 27S65 / 29SL40 / 29SL40A / 29SL40C/
29SL45 / 29SL65 / 29SL65C/29XL40M / 29XL40P / 29XT11A
If the blue dot does not converge with red and green dots,
perform the following steps:
3-2. CONVERGENCE
Preparation:
•
•
•
Before starting, perform FOCUS, V. LIN and V. SIZE
adjustments.
Set BRIGHTNESS control to minimum.
Feed in dot pattern.
• Move BMC magnet (a) to correct insufficient H. Static
convergence.
• Rotate BMC magnet (b) to correct insufficient V. Static
convergence.
In either case, repeat Beam Landing Adjustment.
(1) Vertical Static Convergence
BMC magnet
V. STAT magnet
Fig. 6
Fig. 5
1.
Adjust V. STAT magnet to converge red, green and blue
dots in the center of the screen. (Vertical movement)
Tilt the V. STAT magnet and adjust static convergence
to open or close the V. STAT magnet.
Fig. 7
( 2 ) Dynamic Convergence Adjustment
Preparation:
2.
When the V. STAT magnet is moved in the direction of
arrow a and b, red, green, and blue dots move as
shown below:
•
Before starting, perform Horizontal and Vertical
Static Convergence Adjustment.
1.
Slightly loosen deflection yoke screw.
2.
Remove deflection yoke spacers.
3.
Move the deflection yoke for best convergence as shown
below. ( Fig. 8)
4.
Tighten the deflection yoke screw.
5.
Install the deflection yoke spacers.
Fig. 8
— 25 —
KV-27S40 / 27S45 / 27S65 / 29SL40 / 29SL40A / 29SL40C/
29SL45 / 29SL65 / 29SL65C/29XL40M / 29XL40P / 29XT11A
(3) Screen-corner Convergence
3-5. METHOD OF SETTING THE SERVICE
ADJUSTMENT MODE
(1) SERVICE MODE PROCEDURE
1.
Standby mode. (Power off)
2.
on the
Remote Commander. (Press each button within a second.)
Fig. 9
(2) SERVICE ADJUSTMENT MODE IN
Affix a permalloy assembly corresponding to the misconverged
areas:
Disp.
(Item)
SERVICE
Adjust FOCUS control for best picture.
AFC
0
3.
The CRT displays the item being adjusted.
4.
Press 1 or 4 on the Remote Commander to
select the item.
5.
Press 3 or 6 on the Remote Commander to
change the data.
6.
Press
3-3. FOCUS
1.
Item
data
then
to write into memory.
(3) SERVICE ADJUSTMENT MODE MEMORY
Green
Red
7.
Fig. 10
3-6. WHITE BALANCE ADJUSTMENTS
3-4. SCREEN (G2)
1.
Input a dots pattern.
2.
Set the PICTURE and BRIGHT controls at minimum
and COLOR control at normal.
Adjust SBRT, GCUT, BCUT in service mode with an
oscilloscope as shown in Fig. 11 so that voltages on the red,
green, and blue cathodes are 170Vdc.
170Vdc
170
V dc
GND
4.
N
N
Fig. 11
pedestal
1.
Input an entire white signal.
2.
3.
Set to Service adjustment Mode.
Set DCOL to "0"
4.
5.
Set the PICTURE and BRIGHT to minimum.
Adjust with SBRT if necessary.
6.
7.
Select GCUT and BCUT with 1 and 4 .
Adjust with 3 and 6 for the best white balance.
8.
9.
Set the PICTURE and BRIGHT to maximum.
Select GDRV and BDRV with 1 and 4 .
10. Adjust with 3 and 6 for the best white balance.
11. Reset DCOL to "1".
12. Write into the memory by pressing
N
3.
Turn set off and on to exit.
Observe the screen and adjust SCREEN (G2) VR
to obtain the faintly visible background of dot signal.
— 26 —
then
.
KV-27S40 / 27S45 / 27S65 / 29SL40 / 29SL40A / 29SL40C/
29SL45 / 29SL65 / 29SL65C/ 29XL40M / 29XL40P / 29XT11A
A BOARD
SECTION 4
SAFETY RELATED ADJUSTMENTS
R584 CONFIRMATION METHOD (HV HOLD-DOWN CONFIRMATION) AND READJUSTMENTS
The following adjustments should always be performed when
replacing the following components which are marked with ] on
the schematic diagram:
DY, C511,C572, C573, C574, C575, D573, D574, R582, R583
R585, R586, R578, R579, T504, IC301, IC521, IC603, C507,
C508, C509, C515, C520, L591,L501
(3)
Hold-down Readjustment
If the current setting indicated in step 2-2 cannot be met,
readjustment should be performed by altering the resistance value
of R584, a component marked with .
T504
FBT
(1)
Preparation before Confirmation
ammeter
3.0 mA DC
range
Using Variac, apply AC input voltage: 120+2VAC
(or 220 + 2 VAC for KV-29SL40A/29SL40C
29SL65C/29XT11A ONLY)
ABL
+
A
-
I ABL
1)
Turn the POWER switch ON.
2)
Input a white signal and set the PICTURE and BRIGHT
controls to maximum.
3)
(2)
1)
Confirm that the voltage between C574 (+) or TP503 and
ground is more than: 105VDC.
Hold-down Operation Confirmation
Connect the current meter between Pin 11 of the FBT
(T504) and the PCB land where Pin 11 would normally
attach. (see figure 1.0 on next page)
2)
Input a dot signal and set PICTURE and BRIGHTNESS to
minimum: IABL = 100+100µA
3)
Confirm the voltage of A board TP-600 is 135 ± 3VDC
4)
Connect the Digital Voltmeter and the DC power supply
via diode 1SS119 to C574 (+). (See figure 1.0 on next
page.)
5)
Increase the DC power voltage gradually until the picture blanks out.
6)
Turn DC power source off immediately.
7)
Read the digital voltmeter indication.
STANDARD
Less than or equal to:
The following adjustments should always be performed
when replacing the following components which are marked
with ] on the schematic diagram:
IC603, IC601, R699
1) Using Variac, apply AC input voltage: 130 + 2.0 VAC
(or 220.0 ± 2.0 VAC for KV-29SL40A/29SL40C/
29SL65C/29XT11A only).
2) Input a dot signal.
3) Set the PICTURE control and the BRIGHT control to
minimum.
4) Set to service adjustment mode.
5) Select PADJ with and .
6) Adjust with to the 0 level.
7) Confirm the voltage of A BOARD TP-600 is less than
138 VDC.
8) If step 7 is not satisfied, replace the components, repeat the
above steps.
9) Adjust with and for: 135 ± 3 VDC
10) Write into the memory by pressing
141.3 VDC
.
8)
Input a white signal and set PICTURE and BRIGHTNESS
to maximum: IABL = 1750+100µA
9)
Repeat steps from (4) to (7).
STANDARD
Less than or equal to:
B+ VOLTAGE CONFIRMATION AND ADJUSTMENT
141.3 VDC
— 27 —
4. ba4 (2) safety adjustment
27
6/6/98, 4:31 PM
then
KV-27V40 / 27V45 / 27V65 / 29VL40 / 29VL65A / 29VL65C / 29VL85 / 29VL95
DIGITAL
MULTIMETER
TP600
[ R582
C574
[A BOARD]
T504
FBT
ABL 11
AMMETER
3mA dc range
DIGITAL
MULTIMETER
POWER
SUPPLY
1SS119
Figure 1.0
— 24 —
— 28 —
KV-27S40 / 27S45 / 27S65 / 29SL40 / 29SL40A / 29SL40C/
29SL45 / 29SL65 / 29SL65C/ 29XL40M / 29XL40P / 29XT11A
SECTION 5
CIRCUIT ADJUSTMENTS
5-1. ELECTRICAL ADJUSTMENT BY REMOTE COMMANDER
7. Press then
initialize.
Use Remote Commander (RM-Y167) to perform circuit
adjustments on this model.
SERVICE
NOTE : Test Equipment Required:
1. Pattern Generator
2. Frequency Counter
3. Digital Multimeter
4. Audio OSC
(1) Method of Setting the Service
Adjustment Mode
on the Remote Commander to
RESET
Carry out step 7 when adjusting
IDs 0 to 4 and when replacing
and adjusting IC003.
8. Turn set off and on to exit.
SERVICE MODE PROCEDURE
(2) Memory Write Confirmation Method
1. Standby mode. (Power off)
1. After adjustment, pull out the plug from the AC outlet,
then replace the plug in the AC outlet again.
2. Turn the power switch ON and set to service mode.
3. Call the adjusted items again to confirm they were adjusted.
2.
on the
Remote Commander. (Press each button within a
second.)
(3) Adjust Buttons and Indicator
SERVICE ADJUSTMENT MODE IN
Disp.
(Item)
SERVICE
SYS
Item
data
0
3. The CRT displays the item being adjusted.
4. Press
item.
or
on the Remote Commander to select the
5. Press
data.
or
on the Remote Commander to change the
6. Press
then
to write into memory.
SERVICE ADJUSTMENT MODE MEMORY
SERVICE
WRITE
Green
Red
RM-Y167
— 29 —
KV-27S40 / 27S45 / 27S65 / 29SL40 / 29SL40A / 29SL40C/
29SL45 / 29SL65 / 29SL65C/ 29XL40M / 29XL40P / 29XT11A
(4) Item of Adjustments
INITIAL DATA
NO.
1
2
3
4
5
6
7
8
9
10
11
12
13
14
15
16
17
18
19
20
21
22
23
24
25
26
27
28
29
30
31
32
33
34
35
36
37
38
39
40
41
42
43
44
45
46
47
48
49
50
51
52
53
54
55
56
57
58
59
60
ITEM
HSIZ
HPOS
VBOW
VANG
TRAP
PAMP
CPIN
VSIZ
VPOS
VLIN
SCOR
VZOM
EHT
ASP
SCRL
HBLK
LBLK
RBLK
VUSN
HDW
EWDC
LVLN
UVLN
RDRV
GDRV
BDRV
RCUT
GCUT
BCUT
DCOL
SHUE
SCOL
SBRT
RON
GON
BON
AXPL
AXNT
CBPF
CTRP
COFF
KOFF
SSHP
SHPF
PREL
Y-DC
GAMM
ABLM
VTH
YDEL
NCOL
FSC
K-ID
HOSC
VSS
HSS
HMSK
VTMS
CDMD
AFC
FUNCTION
HORIZONTAL AMP. ADJ.
HORIZONTAL POS. ADJ.
VRT LINE BOWING ADJ.
VRT LINE BOW SLANT ADJ.
HORIZ. TRAPEZOID ADJ.
HORIZ. PIN DISTORTION ADJ.
SAME AS PAMP-SCRN TP/BTM
VERTICAL AMP. ADJUST
VERTICAL POSITION ADJ.
VERTICAL LINEARITYADJ.
VERTICAL AMOUNT ADJ.
16:9 CRT Z MODE ON/OFF
VRT Hl-VOLT. CORRECTION
ASPECT RATIO CONTROL
16:9 CRT Z MODE TRAN SCRL
RGB OUT WIDTH CONTROL
LEFT SCREEN HBLK CONTROL
RGT SCREEN HBLK CONTROL
V SAW WAVEFORM COMPRES
H. DRIVE PULSE WIDTH
EW/DC ADJUST
SCREEN BTM VRT LIN ADJUST
SCREEN TOP VRT LIN ADJUST
R OUTPUT DRIVE CONTROL
G OUTPUT DRIVE CONTROL
B OUTPUT DRIVE CONTROL
R OUTPUT CUTOFF CONTROL
G OUTPUT CUTOFF CONTROL
B OUTPUT CUTOFF CONTROL
DYNAMIC COLOR ON/OFF
SUB HUE
SUB COLOR
SUB BRIGHTNESS
R OUTPUT ON/OFF
G OUTPUT ON/OFF
B OUTPUT ON/OFF
AXIS PAL
AXIS NTSC
CHROMA BPF ON/OFF
Y TRAP FILTER ON/OFF
COLOR ON/OFF
SET COLOR KILLER
SUB SHARPNESS
SHARPNESS CIRCUIT F0
PRE/OVR SHOOT SWITCHING
DC TRANS RATIO SWITCHING
GAMMA CORRECTION AMNT
ABL MODE SWITCHING
ABL C D VTH SWITCHING
Y DELAY TIME CONTROL
NO COLOR ID
FSC OUT ON/OFF
KILLER ID CONTROL SW
H VCO OSCILLATION FREQ
V SYNC SLICE LEVEL
H SYNC SLICE LEVEL
SELECT SIGNAL VTIM PIN
V CNT DWN MODE SWITCHING
AFC LOOP GAIN SWITCHING
DATA
RANGE
0-63
0-63
0-15
0-15
0-15
0-63
0-63
0-63
0-63
0-15
0-15
0,1
0-15
0-63
0-63
0,1
0-15
0-15
0,1
0,1
0,1
0-15
0-15
0-63
0-63
0-63
0-15
0-15
0-15
0,1
0-31
0-31
0-31
0,1
0,1
0,1
0,1
0,1
0,1
0,1
0,1
0,1
0-15
0,1
0,1
0,1
0-3
0,1
0,1
0-15
0,1
0,1
0,1
0-15
0,1
0,1
0,1
0-3
0-3
0-3
NTSC
PAL-M
PAL-N
45
10
45
10
6
5
7
20
40
31
35
6
8
0
4
47
31
1
15
3
0
0
0
0
0
35
30
30
10
7
7
0
14
14
11
1
1
1
0
0
45
10
20
40
31
35
6
8
14
0*,
1* ,
AVERAGE
DATA
48
10
6
5
5
30
30
35
35
6
8
0
4
47
31
1
15
3
0
0
0
0
0
40
35
35
7
5
5
1
8
14
12
1
1
1
0
0
20
40
38
35
6
8
14
1**
0**
0
0
7
1
1
1
0
1
1
7
1
1*,
1
0
0
7
1
1
1
0
1
1
7
1
0**
0
7
0
0
1
0
0
0
— 30 —
VIDEO
0
7
0
0
1
0
1
0
KV-27S40 / 27S45 / 27S65 / 29SL40 / 29SL40A / 29SL40C/
29SL45 / 29SL65 / 29SL65C/ 29XL40M / 29XL40P / 29XT11A
INITIAL DATA
NO.
61
62
63
64
65
66
67
68
69
70
71
72
73
74
75
76
77
78
79
80
81
82
83
84
85
86
87
88
89
90
91
92
93
94
95
96
97
98
99
100
101
102
103
104
105
106
ITEM
FIFR
SBAL
DISP
PADJ
PSHP
PPIX
PHUE
PCOL
PTRP
PAFC
PYDR
UPED
VPED
U2PE
V2PE
Y2DR
U2DR
V2DRV
PSFO
PCD2
PDCT
PP/O
PDLY
PBG
PEXT
PHMK
ABL0
ABL1
PHPO
PVPO
PYSD
PYDL
PHVI
PCLP
PCLK
PIHS
PIVS
PMVS
PCON
PFRY
PFRC
PFRW
PSEL
PPLL
PVPE
PUPE
FUNCTION
FIELD FREQUENCY
SUB BALANCE
OSD POSITION
POWER ADJUSTMENT
PIP SUB SHARPNESS
PIP SUB CONTRAST
PIP SUB HUE
PIP SUB COLOR
PIP C TRAP F0
PiP AFC
PIP Y DRIVE
U PED
V PED
U2 PED
V2 PED
Y2 DRIVE
U2 DRIVE
V2 DRIVE
PIP SHP F0
PIP CD MODE 2
PIP DC TRAN
PIP PRE/OVER
PIP Y DELAY
PIP BG
PIP EXT COLOR
PIP HORIZONTAL POSITION
PiP VERTICAL POSiTiON
PIP YS DELAY
PIP Y INPUT DELAY
PIP HV SYNC
PIP CLAMP
PIP CLOCK
INSET HORIZONTAL SYNC
INSET VERTICAL SYNC
MAIN VERTICAL SYNV
PIP CONTRAST
PIP FRAME Y
PIP FRAME CHROMA
PIP FRAME WIDTH
PIP SEL
PIP PLL
PIP V PED
PIP U PED
DATA
RANGE
0-3
0-31
0-127
0-63
0-15
0-15
0-15
0-15
0-15
0-3
0-31
0-15
0-15
0-15
0-15
0-31
0-31
0-31
0,1
0,1
0-7
0-3
0-3
0-15
0,1
0,1
0,1
0-7
0-63
0-31
0-15
0-7
0,1
0-3
0,1
0-15
0-63
0-63
0-15
0-15
0-255
0-31
0,1
0-3
0-15
0-15
NTSC
5
PAL-M PAL-N
3*,
1**
14
15
3
7
7
3
5
5
7
1
14
8
8
5
5
20
18
9
1
1
4
1
0
5
1*,
0**
0
0
1
58
18
1
0
0
0
1
2
22
17
10
5
0
20
1
0
0
0
VIDEO
1
1
AVERAGE
DATA
14
15
3
7
7
3
5
7
1
14
8
8
5
5
20
18
9
1
1
4
1
0
5
1** 0*
0
0
1
58
18
1
0
0
0
1
2
22
17
10
5
0
20
1
0
0
0
* NTSC MODELS
** TRINORMA MODELS
SERVICE
ID0
25
Note: No. 1 through 106 show adjustment order.
— 31 —
1
27S40
2
27S40
3
27S45
4
27S45
5
27S65
6
27S65
7
29SL40
8 29SL40A
9 29SL40C
10 2 9 S L 4 5
11 2 9 S L 6 5
12 2 9 S L 6 5 C
13 29XL40M
14 2 9 X L 4 0 P
15 29XT11A
5-2.
(US)
(CND)
(US)
(CND)
(US)
(CND)
(E)
(E)
(E)
(E)
(E)
(E)
(MX)
(E)
(E)
ID-0
ID-1
ID-2
ID-3
ID-4
ID-5
ID-6
ID-7
KV-
(5) Feature ID Map
DESTINATION
KV-27S40 / 27S45 / 27S65 / 29SL40 / 29SL40A / 29SL40C/
29SL45 / 29SL65 / 29SL65C/ 29XL40M / 29XL40P / 29XT11A
153
129
153
129
153
129
145
151
145
145
145
145
145
145
151
1
1
27
27
27
27
1
1
1
27
27
19
1
1
1
13
13
13
13
15
15
141
141
141
141
143
143
141
141
141
195
195
195
195
195
195
195
195
195
195
195
195
195
195
195
31
31
31
31
31
31
63
55
63
63
63
63
63
63
55
1
1
1
1
1
1
1
1
1
1
1
1
1
1
1
0
0
1
1
7
7
0
0
0
1
7
7
0
0
0
64
64
64
64
64
64
64
64
64
64
64
64
64
64
64
A BOARD ADJUSTMENTS
1: ON
0: OFF
H. FREQUENCY ADJUSTMENT
1. Input a monoscope signal.
2. Set to Service adjustment Mode.
3. Connect a frequency counter to base of Q501
(TP-500 H. DRIVE).
4. Select the item of AFC, set to 3 level (free run).
5. Check H. Frequency for the 15735 ± 200 Hz. (NTSC) or
check H. Frequency for the 15650 ± 200 Hz. (Trinorma)
6. Select the item of AFC again, adjust the level "0".
7. Write into the memory by pressing
then
SERVICE
RON
1
6. Connect an oscilloscope probe to C Board, CN301 Pin 5
(RED OUT).
7. Select RDRV with and .
8. Adjust with and for: 1.90 ± 0.05 Vp-p.
.
n
V. FREQUENCY ADJUSTMENT
White
1.8 ± 0.05 Vp-p
SUB CONTRACT ADJUSTMENT (SCON)
1.
2.
3.
4.
5.
1.90 ± 0.05 Vp-p
n
1. Select video 1 with no signal input.
2. Set the conditions with standard setting.
3. Connect the frequency counter across TP-508 or CN501
VDY (+) pin 6 connector and ground.
4. Check V. Frequency for the 60 ± 2 Hz (NTSC)
5. Check V. Frequency for the 50 ± 2 Hz (Trinorma).
Black
9. Reset the item DCOL to "1" level.
10. Write the memory by pressing
then
11. Return the following back to normal after adjustment.
PICTURE . . . . . . . . . . . MAX
COLOR . . . . . . . . . . . CENTER
BRIGHT . . . . . . . . . . . CENTER
Input a color-bar signal.
Select the red color.
Set to Service adjustment Mode.
Select the item DCOL to "0" level.
Set the conditions as follows.
PICTURE . . . . . . . . . . .
COLOR . . . . . . . . . . .
BRIGHT . . . . . . . . . . .
MAX
MIN
CENTER
R ON
G ON
B ON
ON (1)
OFF (0)
OFF (0)
...........
...........
...........
R ON
G ON
B ON
— 32 —
. . . . . . . . . . . ON (1)
. . . . . . . . . . . ON (1)
. . . . . . . . . . . ON (1)
.
KV-27S40 / 27S45 / 27S65 / 29SL40 / 29SL40A / 29SL40C/
29SL45 / 29SL65 / 29SL65C/ 29XL40M / 29XL40P / 29XT11A
V. CENTER ADJUSTMENT (VPOS)
DISPLAY POSITION ADJUSTMENT (DISP)
1. Input a color-bar signal.
2. Set to Service adjustment Mode.
1.Input a cross-hatch signal.
2.Set to Service adjustment Mode.
3.
4.
5.
6.
3.Select VPOS with and .
4.Adjust with and for the best vertical center.
5.Write into the memory by pressing
then
Select DISP with and .
Adjust with and for adjustment of characters to center .
then
.
Write the memory by pressing
Check if the text is displayed on the screen.
V. CENTER (VPOS)
SERVICE
DISP
15
/
?
H. CENTER ADJUSTMENT (HPOS)
Note : Perform this adjustment after checking H. FREQUENCY.
SUB BRIGHT ADJUSTMENT (SBRT)
1. Input a cross-hatch signal.
2. Set to Service adjustment Mode.
3. Set the PICTURE and BRIGHT to minimum.
1. Input a cross-hatch signal.
2. Set the Service adjustment Mode.
3. Select HPOS with and .
4. Adjust with and for the best horizontal center.
5. Write into the memory by pressing
then
4. Select SBRT with and .
5. Adjust with and to obtain a faintly visible cross-hatch.
6. Write into the memory by pressing
then
.
H. CENTER (VPOS)
/
SUB HUE, SUB COLOR ADJUSTMENT (SHUE, SCOL)
1. Input a color-bar signal.
2. Set to Service adjustment Mode.
3. Select the item DCOL and set to "0" level.
4. Connect oscilloscope probe to C Board, CN301 Pin 7
?
V. LINEARITY (VLIN) AND V CORRECTION
1. Input a cross-hatch signal.
2. V. Correction is automatically adjusted from the circuit and
should satisfy the conditions below:
(BLUE OUT).
5. Select SHUE and SCOL with and .
6. Adjust with and for the V1 = V4 ± 0.1Vp-p (SCOL)
and V2 = V3 ± 0.1Vp-p (SHUE).
V1
V2 V3
V4
…
7. Reset the item DCOL to "1" level.
8. Write into the memory by pressing
then
.
SERVICE ADJUSTMENT MODE MEMORY
1. Change DCOL to "1".
2. After completing all adjustments, press "0" then
V. SIZE ADJUSTMENT ( VSIZ)
1. Input a cross-hatch signal.
2. Set to Service adjustment mode.
READ FROM MEMORY
SERVICE
3. Select VSIZ with and .
4. Adjust with and for the best vertical size.
Green
0
V. SIZE (VSIZ)
Red
/
/
READ
— 33 —
.
6-2.
Circuit Boards Location
Adjustment ([)
Part replaced (])
DY, C511, C572, C573, C574, C575,
D573, D574, R582, R583, R585,
R586, R578, R579, T504, IC301,
IC521,IC603, C507, C508, C509,
C515, C520, L591, L501
HZ
(KV-29SL40A/29XT11A)
P
(KV-27S45/29SL45/
29SL65C/27S65/
29SL65)
IC603, IC601, R699
E
K
(KV-27S65/
29SL65/29SL65C)
•
•
Printed Wiring Boards and Schematic
Diagrams
Note:
• All capacitors are in µF unless otherwise noted.
pF: µµF 50WV or less are not indicated except
for electrolytic and tantalums.
• All electrolytics are 50V unless otherwise specified
• Indication of resistance, which does not have one for
rating electrical power, is as follows:
Pitch: 5mm
Rating electrical power 1/4W
• All resistors are in ohms.
KΩ=1000Ω, MΩ=1000KΩ
• f nonflammable resistor.
• ∆: internal component.
• p: panel designation and adjustment for repair.
• All variable and adjustable resistors have characteristic curve B, unless otherwise noted.
• The components identified by ] in this manual have
been carefully factory-selected for each set in order to
satisfy regulations regarding X-ray radiation. Should
replacement be required, replace only with the value
originally used.
• When replacing components identified by ] make the
necessary adjustments indicated. If results do not
meet the specified value, change the component
identified by [ and repeat the adjustment until the
specified value is achieved.
(Refer to R584 on page 27 and 28).
B+ VOLTAGE
CONFIRMATION
All voltages are in V.
Voltage is DC with respect to ground unless otherwise
noted.
Readings are taken with a 10MΩ digital multimeter.
Readings are taken with a color-bar signal input.
Voltage variations may be noted due to normal production tolerance.
Circled numbers are waveform references.
•
•
•
•
6-3.
HV HOLD-DOWN
(R584)
•
: B + Line
•
- - - - - : B - Line
m
•
: signal path
Reference Information
RESISTOR
:
:
:
:
:
:
:
:
COIL
:
CAPACITOR :
:
:
:
:
:
:
:
:
RN
RC
FPRD
FUSE
RW
RS
RB
LF-8L
TA
PS
PP
PT
MPS
MPP
ALB
ALT
ALR
METAL FILM
SOLID
NON FLAMMABLE CARBON
NON FLAMMABLE FUSIBLE
NON FLAMMABLE WIREWOUND
NON FLAMMABLE METAL OXIDE
NON FLAMMABLE CEMENT
ADJUSTMENT RESISTOR
MICRO INDUCTOR
TANTALUM
STYROL
POLYPROPYLENE
MYLAR
METALIZED POLYESTER
METALIZED POLYPROPYLENE
BIPOLAR
HIGH TEMPERATURE
HIGH RIPPLE
Note: The symbol G display is on the component side.
The components identified by shading and mark ¡ are
critical for safety. Replace only with part number
specified.
• When replacing parts in the table below be sure to
perform the related adjustment.
The symbol G indicates fast operating fuse.
Replace only with fuse of same rating as marked.
— 38 —
6-4. SEMICONDUCTORS
2SA1162-G
2SD601A-Q
2SA1037A-T146-R
2SA1175-HFE
2SC2785-HFE
2SA933AS-QRT
2SC3209LK
2SD1312-K
2SD774-34
2SC4159-E
LETTER SIDE
C
B
E
E C
B
E C
B
2SK2845-LB102
RD9.1EW
2SC5426-01
B
C E
MA111
ANODE
G
CATHODE
B
D
C
E
S
D10SC4M
D3SB60F
MX0541B-F
D2S4MF
CATHODE
{
‘
‘
|
12
{
1
‘
‘
|
3
B1
2
ANODE
3
D1N20R
RD6.2ESB2
RD8.23SB2
MTZJ-5.1C
RD5.6ESB2
RD10ESB2
MTZJ-30D
RD3.3ESB2
C2
B2
E2
U05G
D1NL40-TA2
ERA22-08TP3
LNK0120022G
1SS133T-77
ERC06-15S
MDV04-600
S2L60F
EZ0150AV1
D1NL20-TA
EGP20G
EL1Z
1SS83
CATHODE
CATHODE
ANODE
E1 C1
22
CATHODE
ANODE
ANODE
KV-27S40 / 27S45 / 27S65 / 29SL40 / 29SL40A / 29SL40C/
29SL45 / 29SL65 / 29SL65C/29XL40M / 29XL40P / 29XT11A
SECTION 7
EXPLODED VIEWS
• Items with no part number and no
description are not stocked because
they are seldom required for routine service
Note: PART NO.
REF.NO.
DESCRIPTION
• Items marked " * " are not stocked
since they are seldom required for routine
service. Some delay should be
anticipated when ordering these items.
• The component parts of an assembly
are indicated by the reference numbers in
the remarks column.
Note:
REF.NO.
REMARK
PART NO.
DESCRIPTION
REMARK
Les composants identifies per un trame et une marque
¡ sont critiques pout la securite. Ne les remplacer que
par une piece portant le numero specifie.
The components identified with gray shading and a critical
symbol ( ¡ ) are critical for safety. Replace only with part
number specified.
7-1. CHASSIS (KV-27S40/27S45/29SL40/29XL40M/29XL40P/29XT11A/29SL40A/29SL40C/29SL45)
16
7-685-663-79 SCREW +BVTP 4X16
26
9
27
11
8
6
15
5
13
14
12
17
18
8
2
20
3
25
4
21
24
7
1
6
5
REF.NO.
PART NO.
DESCRIPTION
REMARK
1
2
2
2
2
2
4-046-160-11
X-4035-815-1
X-4035-816-1
X-4035-818-1
X-4035-819-1
X-4035-820-1
EMBLEM (NO.9)
BEZNET ASSY (KV-27S40/29SL40/29SL40C)
BEZNET ASSY (KV-27S45/29SL45)
BEZNET ASSY (KV-29XL40M/29XL40P)
BEZNET ASSY (KV-29SL40A)
BEZNET ASSY (KV-29XT11A)
3
4
4
5
6
4-063-573-01
4-063-570-01
4-063-570-11
1-504-531-11
4-388-477-01
BUTTON, MULTI
GUIDE,LED (EXCEPT KV-29XT11A/29SL40A)
GUIDE,LED (KV-29XT11A/29SL40A ONLY)
SPEAKER (13.1 x 6.2CM)
SCREW (3 x 16), TAPPING, WASHER
7 ¡
8-733-873-05
7 ¡
8-733-874-05
CRT29NX (KV-27S45/27S40/29SL40/
29XL40M/29XL40P/29SL45)
CRT29NX(KV-29XT11A/29SL40C/29SL40A)
8
9
11
12 ¡
4-041-268-01
3-704-372-31
4-053-005-01
8-451-486-11
SCREW (7) TAPPING
HOLDER, HV
SPACER, DY
DYY29 NXA-V
13 *
14
15 ¡
A-1331-775-A C BOARD, COMPLETE
4-036-329-01 SPRING (B), TENSION
1-416-588-11 COIL, DEMAGNETIC
(EXCEPT KV-29XT11A/29SL40C/29SL40A)
1-416-589-21 COIL, DEMAGNETIC
(KV-29XT11A/29SL40C/29SL40A)
15 ¡
3,4
3,4
3,4
3,4
3,4
22
REF.NO.
PART NO.
DESCRIPTION
REMARK
16 *
4-063-572-41
16 *
17 ¡
4-063-572-31
1-751-057-21
17 ¡
17 ¡
1-769-796-71
1-783-838-41
COVER, REAR (KV-27S40/29SL40/29XL40M/
29XL40P/29XT11A/29SL40C/29SL40A)
COVER, REAR (KV-27S45/29SL45)
CORD, POWER (KV-27S45/27S40/29SL45/29SL40/
29XL40M/29XL40P)
CORD, POWER (KV-29SL40C)
CORD, POWER (KV-29XT11A/29SL40A)
18 ¡
19
20
21 ¡
1-453-268-11
4-064-646-01
1-766-374-11
8-598-431-00
TRANSFORMER ASSY, FLYBACK NX-4005//X4J4
CLIP, CHASSIS
PLUG,F-PIN
TUNER FSS BTF-WA411
22 *
A-1298-484-A A BOARD, COMPLETE
(KV-27S40/29SL40/29XL40M/29XL40P)
A-1298-543-A A BOARD, COMPLETE (KV-29XT11A/29SL40A)
A-1298-542-A A BOARD, COMPLETE (KV-29SL40C)
A-1298-483-A A BOARD, COMPLETE (KV-27S45/29SL45)
22 *
22 *
22 *
23 *
24 *
25 *
25 *
26
27
— 54 —
A-1190-306-A P BOARD, COMPLETE (KV-27S45/29SL45 only)
3-703-353-05 SUPPORT, PC BOARD
A-1343-525-A E BOARD, COMPLETE
(EXCEPT KV-29XT11A/29SL40C/29SL40A)
A-1343-526-A E BOARD, COMPLETE (KV-29XT11A/29SL40C/29SL40A)
1-452-032-00 MAGNET, DISC
4-062-047-01 PIECE A (110)
KV-27S40 / 27S45 / 27S65 / 29SL40 / 29SL40A / 29SL40C/
29SL45 / 29SL65 / 29SL65C/29XL40M / 29XL40P / 29XT11A
• Items with no part number and no
description are not stocked because
they are seldom required for routine service
REF.NO.
Note: PART NO.
• Items marked " * " are not stocked
since they are seldom required for routine
service. Some delay should be
anticipated when ordering these items.
• The component parts of an assembly
are indicated by the reference numbers in
the remarks column.
DESCRIPTION
REMARK
Note:
REF.NO.
PART NO.
DESCRIPTION
REMARK
Les composants identifies per un trame et une marque
¡ sont critiques pout la securite. Ne les remplacer que
par une piece portant le numero specifie.
The components identified with gray shading and a critical
symbol ( ¡ ) are critical for safety. Replace only with part
number specified.
7-2. CHASSIS (KV-27S65/29SL65/29SL65C)
16
7-685-663-79 SCREW +BVTP 4X16
31
13
32
11
9
15
6
5
14
12
10
25
21
23
19
22
9
2
20
17
26
3
4
24
18
7
1
6
28
30
5
29
REF.NO.
PART NO.
DESCRIPTION
REMARK
1
2
3
4
4-046-160-11 EMBLEM (NO.9)
X-4035-817-1 BEZNET ASSY
4-063-573-01 BUTTON, MULTI
4-063-570-01 GUIDE,LED
5
6
7¡
7¡
43504-531-11
4-388-477-01
8-733-873-05
8-733-874-05
SPEAKER (13.1X6.2CM)
SCREW (3X16),TAPPING,WASHER
CRT29NX (KV-27S65/29SL65)
CRT29 NX (KV-29SL65C)
9
10
10
11
12 *
4-041-268-01
8-451-486-11
8-451-486-21
4-053-005-01
A-1331-775-A
SCREW (7), TAPPING
DY-Y29 NXA-V (KV-27S65/29SL65)
DY-Y29 NXA-V2 (KV-29SL65C)
SPACER, DY
C BOARD, COMPLETE
13
14
15 ¡
15 ¡
16 *
3-704-372-31
4-036-329-01
1-416-588-11
1-416-589-21
4-063-572-21
HOLDER, HV
SPRING (B), TENSION
COIL, DEMAGNETIC (KV-27S65/29SL65)
COIL, DEMAGNETIC (KV-29SL65C)
COVER, REAR
17 *
17 *
18 *
19 ¡
19 ¡
A-1343-525-A
A-1343-526-A
3-703-353-05
1-751-057-21
1-769-796-71
E BOARD, COMPLETE (KV-27S65/29SL65)
E BOARD, COMPLETE (KV-29SL65C)
SUPPORT, PC BOARD
CORD, POWER (KV-27S65/29SL65)
CORD, POWER (KV-29SL65C)
REF.NO.
3,4
PART NO.
27
DESCRIPTION
REMARK
20 ¡ 1-453-268-11
21 4-064-646-01
22 1-783-800-11
23 8-598-414-00
24 ¡ 8-598-431-00
25 * 4-064-176-01
TRANSFORMER ASSY, FLYBACK NX-4005//X4J4
CLIP, CHASSIS
CABLE, PIN
ANTENNA SWITCH (KV-29SL65/29SL65C)
TUNER FSS BTF-WA411
BRACKET, ANTENNA
26
27 *
28 ¡
29 *
29 *
CABLE, P-P
K BOARD, COMPLETE
TUNER FSS BTF-FA401
A BOARD, COMPLETE (KV-29SL65C)
A BOARD, COMPLETE (KV-27S65/29SL65)
1-557-056-31
A-1380-579-A
8-598-430-00
A-1298-485-A
A-1298-541-A
30 * A-1190-306-A P BOARD, COMPLETE (KV-29SL65/29SL65C)
31 1-452-032-00 MAGNET, DISC
32 4-062-047-01 PIECE A ( 110)
— 55 —
KV-27S40 / 27S45 / 27S65 / 29SL40 / 29SL40A / 29SL40C/
29SL45 / 29SL65 / 29SL65C/29XL40M / 29XL40P / 29XT11A
• Items with no part number and no
description are not stocked because
they are seldom required for routine service
• The component parts of an assembly
are indicated by the reference numbers in
the remarks column.
Note:
Note:
• Items marked " * " are not stocked
since they are seldom required for routine
service. Some delay should be
anticipated when ordering these items.
Les composants
per un trame et uneREMARK
marque
REF.NO.
PART NO. identifies
DESCRIPTION
The components
with gray shading andREMARK
a critical
REF.NO.
PART NO. identified
DESCRIPTION
¡ sont critiques pout la securite. Ne les remplacer que
par une piece portant le numero specifie.
symbol ( ¡ ) are critical for safety. Replace only with part
number specified.
7-3. MAIN POWER SWITCH (KV-29SL40A/29XT11A ONLY)
103
101
REF.NO.
PART NO.
102
DESCRIPTION
101
4-052-635-01 BUTTON, MAIN POWER
102 * A-1372-117-A MOUNTED PCB, HZ
103 ¡ 4-064-265-01 SWITCH, MAIN
— 56 —
REMARK
COMMON PARTS LISTING
A
SECTION 8
ELECTRICAL PARTS LIST
REF.NO. PART NO.
DESCRIPTION
REMARK
REF.NO. PART NO.
DESCRIPTION
REMARK
PARTS LISTING TABLE OF CONTENTS
Page
A BOARD COMMON PARTS LIST:
Parts common to all models listed in this manual...................................................... 59
A BOARD VARIANT PARTS LIST:
Parts that belong only to the model specified............................................................ 68
Refer to the designated variant parts list when seeking a part indicated by an asterisk (*) on the A board schematic
or by the word "variant" on the common parts list.
Model
Page
KV-27S40/29XL40M/29XL40P/29SL40....
KV-29SL65C.............................................
KV-27S45/29SL45 ...................................
KV-27S65/29SL65....................................
KV-29SL40C.............................................
68
70
72
74
76
KV-29XT11A/29SL40A............................. 78
C BOARD COMPLETE PARTS LIST (All Models) ................................................................................................................ 79
E BOARD COMPLETE PARTS LIST (All Models)................................................................................................................. 79
K BOARD COMPLETE PARTS LIST (KV-29SL65C, 27S65, 29SL65 only) ......................................................................... 80
P BOARD COMPLETE PARTS LIST (KV-27S45, 29SL45, 29SL65C, 27S65, 29SL65 only) .............................................. 81
HZ BOARD COMPLETE PARTS LIST (KV-29XT11A, 29SL40A only) ................................................................................. 82
ACCESSORIES AND PACKAGING ...................................................................................................................................... 82
— 57 —
A
A
COMMON
COMMONPARTS
PARTSLISTING
LISTING
SECTION 8
ELECTRICAL PARTS LIST
The components identified by [ in this manual
have been carefully factory-selected for each
REMARK
REF.NO. PART
NO. Xset in order to satisfy regulations
regarding
ray radiation. Should replacement be required,
replace only with the value originally used.
Note:
REF.NO.
PART NO.
DESCRIPTION
The components identified by shading
and mark ¡ a re critical for safety.
Replace only with part number specified.
Note:
Les composants identifies per un trame
et une marque ¡ sont critiques pour la
securite. Ne les remplacer que par une
piece portant le numero specifie.
REF.NO.
PART NO.
REMARK
CAPACITORS
•
• Items marked " * " are not stocked since they
are seldom required for routine service. Some
delay should be anticipated when ordering
these items.
• All variable and adjustable resistors have
characteristic curve B, unless otherwise
noted.
DESCRIPTION
REMARK
REF.NO.
A
* A-1298-484-A
* A-1298-485-A
* A-1298-483-A
* A-1298-541-A
* A-1298-542-A
* A-1298-543-A
RESISTORS
• All resistors are in ohms
DESCRIPTION
• F : nonflammable
A BOARD, COMPLETE (KV-27S40/29XL40M/29XL40P/29SL40)
A BOARD, COMPLETE (KV-29SL65C)
A BOARD, COMPLETE (KV-27S45/29SL45)
A BOARD, COMPLETE (KV-27S65/29SL65)
A BOARD, COMPLETE (KV-29SL40C)
A BOARD, COMPLETE (KV-29XT11A/29SL40A)
4-382-854-01 SCREW (M3X8), P, SW (+)
4-382-854-11 SCREW (M3X10), P, SW (+)
CAPACITOR
C001
C004
C005
C006
C007
1-163-259-91
1-107-701-11
1-126-960-11
1-163-035-00
1-163-259-91
CERAMIC CHIP
ELECT
ELECT
CERAMIC CHIP
CERAMIC CHIP
220PF
47MF
1MF
0.047MF
220PF
5%
20%
20%
5%
50V
25V
50V
50V
50V
C008
C010
C011
C012
C014
1-163-009-11
1-163-009-11
1-163-009-11
1-163-009-11
1-164-004-11
CERAMIC CHIP
CERAMIC CHIP
CERAMIC CHIP
CERAMIC CHIP
CERAMIC CHIP
0.001MF
0.001MF
0.001MF
0.001MF
0.1MF
10%
10%
10%
10%
10%
50V
50V
50V
50V
25V
C017
C019
C020
C021
C028
1-126-960-11
1-163-135-00
1-130-495-00
1-163-259-91
1-163-005-11
ELECT
CERAMIC CHIP
FILM
CERAMIC CHIP
CERAMIC CHIP
1MF
560PF
0.1MF
220PF
470PF
20%
5%
5%
5%
10%
50V
50V
50V
50V
50V
C030
C034
C037
C038
C039
1-163-259-91
1-163-037-11
1-164-161-11
1-126-941-11
1-126-964-11
CERAMIC CHIP
CERAMIC CHIP
CERAMIC CHIP
ELECT
ELECT
220PF
0.022MF
0.0022MF
470MF
10MF
5%
10%
10%
20%
20%
50V
50V
50V
25V
50V
C046
C047
C048
C050
C051
1-104-664-11
1-163-259-91
1-163-009-11
1-163-251-11
1-163-251-11
ELECT
CERAMIC CHIP
CERAMIC CHIP
CERAMIC CHIP
CERAMIC CHIP
47MF
220PF
0.001MF
100PF
100PF
20%
5%
10%
5%
5%
25V
50V
50V
50V
50V
— 59 —
MF = µF
INDUCTORS
•
UH = µH, MMH = mH
When indicating parts by reference
number, please include the board name.
PART NO.
DESCRIPTION
REMARK
C052
C053
C060
C062
C065
1-163-251-11
1-163-251-11
1-163-005-11
1-164-161-11
1-163-009-11
CERAMIC CHIP
CERAMIC CHIP
CERAMIC CHIP
CERAMIC CHIP
CERAMIC CHIP
100PF
100PF
470PF
0.0022MF
0.001MF
5%
5%
10%
10%
10%
50V
50V
50V
50V
50V
C070
C074
C080
C081
C091
1-163-259-91
1-163-251-11
1-126-964-11
1-126-964-11
1-163-231-11
CERAMIC CHIP
CERAMIC CHIP
ELECT
ELECT
CERAMIC CHIP
220PF
100PF
10MF
10MF
15PF
5%
5%
20%
20%
5%
50V
50V
50V
50V
50V
C092
C101
C102
C150
C151
1-163-231-11
1-126-963-11
1-126-382-11
1-126-941-11
1-104-664-11
CERAMIC CHIP
ELECT
ELECT
ELECT
ELECT
15PF
4.7MF
100MF
470MF
47MF
5%
20%
20%
20%
20%
50V
50V
16V
25V
25V
C200
C201
C202
C207
C208
1-126-960-11
1-126-960-11
1-126-959-11
1-126-959-11
VARIANT (SEE VARIANT PARTS LIST)
ELECT
1MF
20%
ELECT
1MF
20%
ELECT
0.47MF
20%
ELECT
0.47MF
20%
50V
50V
50V
50V
C209
C211
C212
C213
C216
1-126-963-11
1-126-964-11
1-126-963-11
1-126-964-11
1-126-959-11
ELECT
ELECT
ELECT
ELECT
ELECT
4.7MF
10MF
4.7MF
10MF
0.47MF
20%
20%
20%
20%
20%
50V
50V
50V
50V
50V
C217
C218
C219
C222
C223
1-126-959-11
1-126-941-11
1-130-495-00
1-126-964-11
1-104-664-11
ELECT
ELECT
FILM
ELECT
ELECT
0.47MF
470MF
0.1MF
10MF
47MF
20%
20%
5%
20%
20%
50V
25V
50V
50V
25V
C225
C250
C251
C252
C255
1-163-017-00 CERAMIC CHIP
0.0047MF 10%
VARIANT (SEE VARIANT PARTS LIST)
VARIANT (SEE VARIANT PARTS LIST)
VARIANT (SEE VARIANT PARTS LIST)
1-104-760-11 CERAMIC CHIP
0.047MF 10%
50V
C256
C257
C258
1-126-960-11 ELECT
1-126-960-11 ELECT
1-136-161-00 FILM
50V
50V
50V
1MF
1MF
0.047MF
20%
20%
5%
50V
Note:
A
COMMON PARTS LISTING
REF.NO. PART NO.
DESCRIPTION
Note:
The components identified
with shading and a critical
symbol ( ¡ ) are critical for
safety. Replace only with
part number specified.
REMARK
REF.NO. PART NO.
Les composants identifies per
un trame et une marque ¡ sont
critiques pout la securite. Ne les
remplacer que par une piece
portant le numero specifie.
DESCRIPTION
C259
C284
C285
C286
C287
1-164-232-11
1-104-664-11
1-126-235-11
1-163-251-11
1-136-161-00
10%
20%
20%
5%
5%
50V
25V
16V
50V
50V
C372
C373
C374
C375
C376
1-164-232-11
1-163-038-91
1-126-935-11
1-163-038-91
1-104-664-11
C288
C289
C300
C301
C302
1-126-960-11 ELECT
1MF
20%
1-126-960-11 ELECT
1MF
20%
VARIANT (SEE VARIANT PARTS LIST)
1-163-099-00 CERAMIC CHIP
18PF
5%
VARIANT (SEE VARIANT PARTS LIST)
50V
50V
C377
C380
C381
C382
C390
1-126-964-11 ELECT
10MF
20%
VARIANT (SEE VARIANT PARTS LIST)
VARIANT (SEE VARIANT PARTS LIST)
VARIANT (SEE VARIANT PARTS LIST)
1-126-959-11 ELECT
0.47MF
20%
50V
C303
C304
C305
C306
C307
1-126-963-11
1-163-038-91
1-164-004-11
1-164-004-11
ELECT
4.7MF
20%
CERAMIC CHIP
0.1MF
CERAMIC CHIP
0.1MF
10%
CERAMIC CHIP
0.1MF
10%
VARIANT (SEE VARIANT PARTS LIST)
50V
25V
25V
25V
C399
C400
C401
C402
C403
1-126-964-11
1-126-963-11
1-126-956-91
1-163-017-00
1-126-963-11
ELECT
ELECT
ELECT
CERAMIC CHIP
ELECT
10MF
4.7MF
0.1MF
0.0047MF
4.7MF
20%
20%
20%
10%
20%
50V
50V
50V
50V
50V
C308
C309
C310
C311
C312
1-126-964-11 ELECT
10MF
20%
VARIANT (SEE VARIANT PARTS LIST)
1-126-960-11 ELECT
1MF
20%
1-164-232-11 CERAMIC CHIP
0.01MF
10%
1-126-942-61 ELECT
1000MF 20%
50V
C404
C405
C406
C407
C410
1-126-963-11
1-126-963-11
1-126-963-11
1-126-964-11
1-126-963-11
ELECT
ELECT
ELECT
ELECT
ELECT
4.7MF
4.7MF
4.7MF
10MF
4.7MF
20%
20%
20%
20%
20%
50V
50V
50V
50V
50V
C313
C314
C315
C316
C317
1-164-232-11 CERAMIC CHIP
0.01MF
10%
VARIANT (SEE VARIANT PARTS LIST)
1-102-244-00 CERAMIC
220PF
10%
1-164-232-11 CERAMIC CHIP
0.01MF
10%
1-164-232-11 CERAMIC CHIP
0.01MF
10%
50V
C411
C412
C413
C414
C415
1-126-956-91
1-130-495-00
1-126-967-11
1-163-017-00
1-126-956-91
ELECT
FILM
ELECT
CERAMIC CHIP
ELECT
0.1MF
0.1MF
47MF
0.0047MF
0.1MF
20%
5%
20%
10%
20%
50V
50V
50V
50V
50V
C318
C319
C320
C321
C323
1-164-232-11 CERAMIC CHIP
0.01MF
10%
1-126-963-11 ELECT
4.7MF
20%
VARIANT (SEE VARIANT PARTS LIST)
VARIANT (SEE VARIANT PARTS LIST)
VARIANT (SEE VARIANT PARTS LIST)
50V
50V
C416
C418
C420
C501
C502
1-126-963-11
1-126-964-11
1-126-960-11
1-102-112-00
1-106-383-00
ELECT
ELECT
ELECT
CERAMIC
MYLAR
4.7MF
10MF
1MF
330PF
0.047MF
20%
20%
20%
10%
10%
50V
50V
50V
50V
200V
C324
C325
C330
C331
C350
VARIANT (SEE VARIANT PARTS LIST)
1-102-110-00 CERAMIC
220PF
10%
1-163-003-11 CERAMIC CHIP
330PF
10%
1-163-005-11 CERAMIC CHIP
470PF
10%
VARIANT (SEE VARIANT PARTS LIST)
C503
C504
C505 ¡
C507 ¡
C508 ¡
1-102-212-00
1-102-002-00
1-162-134-11
1-119-969-11
1-107-364-11
CERAMIC
CERAMIC
CERAMIC
MYLAR
MYLAR
820PF
680PF
470PF
14000PF
0.01MF
10%
10%
10%
3%
10%
500V
500V
2KV
2KV
200V
CERAMIC CHIP
ELECT
ELECT
CERAMIC CHIP
FILM
0.01MF
47MF
100MF
100PF
0.047MF
50V
50V
50V
25V
500V
50V
50V
50V
50V
50V
CERAMIC CHIP
CERAMIC CHIP
ELECT
CERAMIC CHIP
ELECT
REMARK
0.01MF
0.1MF
470MF
0.1MF
47MF
10%
20%
20%
50V
25V
16V
25V
25V
50V
C351
C352
C353
C354
C355
VARIANT (SEE VARIANT PARTS LIST)
VARIANT (SEE VARIANT PARTS LIST)
VARIANT (SEE VARIANT PARTS LIST)
VARIANT (SEE VARIANT PARTS LIST)
VARIANT (SEE VARIANT PARTS LIST)
C509 ¡
C510
C511 ¡
C512
C513
1-162-116-00
1-107-649-11
1-117-673-11
1-106-395-00
1-106-343-00
CERAMIC
ELECT
FILM
MYLAR
MYLAR
680PF
2.2MF
1.5MF
0.15MF
0.001MF
10%
20%
5%
10%
10%
2KV
250V
200V
200V
100V
C356
C357
C358
C359
C360
VARIANT (SEE VARIANT PARTS LIST)
VARIANT (SEE VARIANT PARTS LIST)
VARIANT (SEE VARIANT PARTS LIST)
VARIANT (SEE VARIANT PARTS LIST)
VARIANT (SEE VARIANT PARTS LIST)
C514
C515 ¡
C520 ¡
C521
C524
1-117-891-11
1-162-116-00
1-129-722-00
1-164-646-11
1-102-244-00
FILM
CERAMIC
FILM
CERAMIC
CERAMIC
0.62MF
680PF
0.047MF
2200PF
220PF
5%
10%
5%
10%
10%
200V
2KV
630V
500V
500V
C525
C526
C527
1-162-815-11 CERAMIC
1-126-960-11 ELECT
1-126-965-11 ELECT
47PF
1MF
22MF
5%
20%
20%
500V
50V
50V
C361
C362
C370
C371
VARIANT (SEE VARIANT PARTS LIST)
VARIANT (SEE VARIANT PARTS LIST)
1-164-232-11 CERAMIC CHIP
0.01MF
10%
1-164-232-11 CERAMIC CHIP
0.01MF
10%
50V
50V
— 60 —
Note:
Note:
The components identified
with shading and a critical
symbol ( ¡ ) are critical for
safety. Replace only with
part number specified.
Les composants identifies per
un trame et une marque ¡ sont
critiques pout la securite. Ne les
remplacer que par une piece
portant le numero specifie.
REMARK
COMMON PARTS LISTING
REF.NO. PART NO.
DESCRIPTION
C528
C529
C530
C531
C541
1-164-695-11
1-164-161-11
1-163-009-11
1-106-387-00
1-126-969-11
CERAMIC CHIP
CERAMIC CHIP
CERAMIC CHIP
MYLAR
ELECT
0.0022MF
0.0022MF
0.001MF
0.068MF
220MF
5%
10%
10%
10%
20%
50V
50V
50V
200V
50V
CF001 1-767-487-11 VIBRATOR, CRYSTAL
C542
C543
C553
C555
C562
1-126-967-11
1-136-173-00
1-107-662-11
1-164-161-11
1-126-941-11
ELECT
FILM
ELECT
CERAMIC CHIP
ELECT
47MF
0.47MF
22MF
0.0022MF
470MF
20%
5%
20%
10%
20%
50V
50V
250V
50V
25V
CN101 1-508-786-00 PIN, CONNECTOR (5MM PITCH) 2P
CN150
VARIANT (SEE VARIANT PARTS LIST)
CN203 * 1-560-124-00 PLUG, CONNECTOR (2.5MM) 4P
CN301 * 1-564-509-11 PLUG, CONNECTOR 6P
CN302
VARIANT (SEE VARIANT PARTS LIST)
C564
C571
C573
C574
C575
1-126-941-11
1-126-964-11
1-126-963-11
1-107-635-11
1-164-232-11
ELECT
ELECT
ELECT
ELECT
CERAMIC CHIP
470MF
10MF
4.7MF
4.7MF
0.01MF
20%
20%
20%
20%
10%
25V
50V
50V
160V
50V
CN401
CN402
CN501
CN502 *
CN601 *
C576
C591
C604 ¡
C605 ¡
C606 ¡
1-123-024-21
1-137-417-11
1-113-920-11
1-113-920-11
1-117-894-11
ELECT
MYLAR
CERAMIC
CERAMIC
ELECT
33MF
0.0047MF
0.0022MF
0.0022MF
560MF
10%
20%
20%
20%
160V
200V
250V
250V
250V
CN602 1-508-786-00 PIN, CONNECTOR (5MM PITCH) 2P
CN604 * 1-564-506-11 PLUG, CONNECTOR 3P
C607 ¡
C608 ¡
C609 ¡
C610
C611
1-117-894-11
1-113-910-11
1-113-910-11
1-136-173-00
1-136-173-00
ELECT
CERAMIC
CERAMIC
FILM
FILM
560MF
470PF
470PF
0.47MF
0.47MF
20%
10%
10%
5%
5%
250V
250V
250V
50V
50V
C612
C613
C614 ¡
C615
C616
1-164-735-11
1-164-625-11
1-129-718-00
1-136-169-00
1-136-169-00
CERAMIC
CERAMIC
FILM
FILM
FILM
0.0015MF
680PF
0.022MF
0.22MF
0.22MF
10%
10%
5%
5%
5%
500V
500V
630V
50V
50V
C617
C618
C619
C620
C621
1-165-127-11
1-165-127-11
1-123-024-21
1-126-942-61
1-126-941-11
CERAMIC
CERAMIC
ELECT
ELECT
ELECT
470PF
470PF
33MF
1000MF
470MF
10%
10%
20%
20%
500V
500V
160V
25V
25V
C623
C624
C626
C629
C632
1-137-368-11
1-137-417-11
1-104-665-11
1-104-665-11
1-126-964-11
FILM
MYLAR
ELECT
ELECT
ELECT
0.0047MF
0.0047MF
100MF
100MF
10MF
5%
10%
20%
20%
20%
50V
200V
25V
25V
50V
C653
C654
C690
C691
C692
1-104-664-11
1-126-382-11
1-126-959-11
1-126-941-11
1-104-664-11
ELECT
ELECT
ELECT
ELECT
ELECT
47MF
100MF
0.47MF
470MF
47MF
20%
20%
20%
20%
20%
25V
16V
50V
25V
25V
C693
1-136-173-00 FILM
0.47MF
5%
50V
REF.NO. PART NO.
DESCRIPTION
REMARK
FILTER
CONNECTOR
1-564-505-11
1-564-505-11
1-580-798-11
1-564-509-11
1-580-843-11
PLUG, CONNECTOR 2P
PLUG, CONNECTOR 2P
PIN, CONNECTOR (DY) 6P
PLUG, CONNECTOR 6P
PIN, CONNECTOR (POWER)
DIODE
— 61 —
A
D001
D002
D003
D004
D005
8-719-921-44 DIODE MTZJ-5.1C
VARIANT (SEE VARIANT PARTS LIST)
8-719-991-33 DIODE 1SS133T-77
8-719-991-33 DIODE 1SS133T-77
8-719-109-89 DIODE RD5.6ESB2
D080
D201
D202
D204
D205
8-719-991-33
8-719-110-17
8-719-110-17
8-719-110-17
8-719-982-22
DIODE
DIODE
DIODE
DIODE
DIODE
1SS133T-77
RD10ESB2
RD10ESB2
RD10ESB2
MTZJ-30D
D207
D208
D250
D251
D252
8-719-109-66
8-719-110-17
8-719-108-12
8-719-108-12
8-719-110-17
DIODE
DIODE
DIODE
DIODE
DIODE
RD3.3ESB2
RD10ESB2
RD9.1EW
RD9.1EW
RD10ESB2
D253
D254
D255
D301
D302
8-719-110-17
8-719-110-17
8-719-110-17
8-719-991-33
8-719-921-44
DIODE
DIODE
DIODE
DIODE
DIODE
RD10ESB2
RD10ESB2
RD10ESB2
1SS133T-77
MTZJ-5.1C
D303
D304
D305
D306
D403
8-719-991-33
8-719-991-33
8-719-404-49
8-719-404-49
8-719-991-33
DIODE
DIODE
DIODE
DIODE
DIODE
1SS133T-77
1SS133T-77
MA111
MA111
1SS133T-77
D501
D502
D503
D520
D521
8-719-945-80
8-719-908-03
8-719-908-03
8-719-067-63
8-719-302-43
DIODE
DIODE
DIODE
DIODE
DIODE
ERC06-15S
GP08D
GP08D
MDV04-600
EL1Z
Note:
A
COMMON PARTS LISTING
REF.NO. PART NO.
DESCRIPTION
D522
D523
D541
D550
D552
8-719-991-33
8-719-991-33
8-719-908-03
8-719-110-08
8-719-302-43
DIODE
DIODE
DIODE
DIODE
DIODE
D561
D562
D571
D572
D573
8-719-979-85
8-719-979-85
8-719-991-33
8-719-991-33
8-719-110-08
D574 ¡
D581
D601
D602
D604
Note:
The components identified
with shading and a critical
symbol ( ¡ ) are critical for
safety. Replace only with
part number specified.
REMARK
Les composants identifies per
un trame et une marque ¡ sont
critiques pout la securite. Ne les
remplacer que par une piece
portant le numero specifie.
REF.NO. PART NO.
DESCRIPTION
1SS133T-77
1SS133T-77
GP08D
RD8.2ESB2
EL1Z
IC302
IC401
8-759-490-17
4-382-854-11
IC402 8-752-072-39
IC521 ¡ 8-759-700-07
VARIANT (SEE VARIANT PARTS LIST)
IC TDA7057AQ/N2
SCREW (M3X10), P, SW (+) (for IC401)
IC CXA2021S
IC NJM2903M
DIODE
DIODE
DIODE
DIODE
DIODE
EGP20G
EGP20G
1SS133T-77
1SS133T-77
RD8.2ESB2
IC541
IC601 ¡
IC603 ¡
IC604
IC TDA8172
TRANSISTOR MX0541B-F
IC DM-58
IC PQ09RF21
8-719-302-43
8-719-991-33
8-719-510-51
8-719-991-33
8-719-060-90
DIODE
DIODE
DIODE
DIODE
DIODE
EL1Z
1SS133T-77
D3SB60F
1SS133T-77
S2L60F
D605
D610 ¡
D615
D618
D620
8-719-060-90
8-719-057-52
8-719-510-12
8-719-022-97
8-719-022-97
DIODE
DIODE
DIODE
DIODE
DIODE
S2L60F
EZ0150AV1
D10SC4M
D2S4MF
D2S4MF
D621
D622
D650
D670
D690
8-719-052-90
8-719-052-90
8-719-109-89
8-719-991-33
8-719-991-33
DIODE
DIODE
DIODE
DIODE
DIODE
D1NL40-TA2
D1NL40-TA2
RD5.6ESB2
1SS133T-77
1SS133T-77
L001
L002
L003
L101
L150
1-410-470-11
1-412-032-11
1-412-032-11
1-412-029-11
1-412-032-11
D691
8-719-991-33 DIODE 1SS133T-77
L151
L301
L302
L350
L351
1-412-029-11 INDUCTOR CHIP 10UH
1-412-031-11 INDUCTOR CHIP 47UH
1-412-029-11 INDUCTOR CHIP 10UH
VARIANT (SEE VARIANT PARTS LIST)
VARIANT (SEE VARIANT PARTS LIST)
L501 ¡
L502
L503
L504
L520
1-411-976-11
1-412-552-11
1-406-677-11
1-412-533-21
1-409-955-11
JACK
J200
J201
J202
1-410-396-41
1-410-397-21
1-410-397-21
1-410-396-41
JR001 1-216-295-91 SHORT
JR003 1-216-295-91 SHORT
COIL
VARIANT (SEE VARIANT PARTS LIST)
FERRITE
0.45UH
FERRITE
1.1UH
FERRITE
1.1UH
FERRITE
0.45UH
FB602 1-410-396-41 FERRITE
FB603 1-412-911-11 FERRITE
FB605 1-412-911-11 FERRITE
1-774-750-21 JACK BLOCK, 2P
VARIANT (SEE VARIANT PARTS LIST)
VARIANT (SEE VARIANT PARTS LIST)
CHIP CONDUCTOR
FERRITE BEAD
FB350
FB501
FB521
FB522
FB601
8-759-980-58
8-729-039-65
8-749-012-13
8-759-198-03
REMARK
0.45UH
0UH
0UH
INDUCTOR
INDUCTOR CHIP
INDUCTOR CHIP
INDUCTOR CHIP
INDUCTOR CHIP
10UH
100UH
100UH
10UH
100UH
COIL, HORIZONTAL LINEARITY
INDUCTOR
2.2MMH
INDUCTOR
0UH
INDUCTOR
47UH
INDUCTOR
8UH
L591 ¡ 1-412-528-61 INDUCTOR
18UH
IC LINK
IC
IC001
IC002
IC003
IC004
IC010
8-759-496-18
8-759-371-21
8-759-353-44
8-742-014-11
IC202
IC203
IC301
8-759-100-96 IC UPC4558G2
8-759-534-81 IC MM1313AD
VARIANT (SEE VARIANT PARTS LIST)
PS201 1-532-984-11 LINK, IC
IC M37273MF-XXXSP
IC MM1319AFBE
IC ST24C08FM6TR
HYB IC SBX1981-51
VARIANT (SEE VARIANT PARTS LIST)
2A/50V
TRANSISTOR
— 62 —
Q001
Q002
Q081
Q200
Q201
8-729-216-22
8-729-422-27
8-729-216-22
8-729-422-27
8-729-422-27
TRANSISTOR
TRANSISTOR
TRANSISTOR
TRANSISTOR
TRANSISTOR
2SA1162-G
2SD601A-Q
2SA1162-G
2SD601A-Q
2SD601A-Q
Q203
Q204
8-729-119-76 TRANSISTOR 2SA1175-HFE
8-729-422-27 TRANSISTOR 2SD601A-Q
COMMON PARTS LISTING
REF.NO. PART NO.
DESCRIPTION
REMARK
REF.NO. PART NO.
DESCRIPTION
A
REMARK
Q286
Q287
Q288
Q300
Q302
8-729-216-22
8-729-216-22
8-729-422-27
8-729-422-27
8-729-422-27
TRANSISTOR
TRANSISTOR
TRANSISTOR
TRANSISTOR
TRANSISTOR
2SA1162-G
2SA1162-G
2SD601A-Q
2SD601A-Q
2SD601A-Q
R013
R016
R017
R018
R019
1-216-081-00
1-216-041-00
1-216-113-00
1-216-049-91
1-249-425-11
RES, CHIP
RES, CHIP
RES, CHIP
RES, CHIP
CARBON
22K
470
470K
1K
4.7K
5%
5%
5%
5%
5%
1/10W
1/10W
1/10W
1/10W
1/4W
Q305
Q306
Q307
Q308
Q309
8-729-216-22
8-729-216-22
8-729-216-22
8-729-216-22
8-729-216-22
TRANSISTOR
TRANSISTOR
TRANSISTOR
TRANSISTOR
TRANSISTOR
2SA1162-G
2SA1162-G
2SA1162-G
2SA1162-G
2SA1162-G
R020
R021
R022
R023
R025
1-249-427-11
1-249-415-11
1-249-416-11
1-249-421-11
1-249-425-11
CARBON
CARBON
CARBON
CARBON
CARBON
6.8K
680
820
2.2K
4.7K
5%
5%
5%
5%
5%
1/4W
1/4W
1/4W
1/4W
1/4W
Q310
Q350
Q351
Q352
Q353
8-729-216-22 TRANSISTOR 2SA1162-G
VARIANT (SEE VARIANT PARTS LIST)
VARIANT (SEE VARIANT PARTS LIST)
VARIANT (SEE VARIANT PARTS LIST)
VARIANT (SEE VARIANT PARTS LIST)
R026
R027
R028
R031
R032
1-249-425-11
1-249-425-11
1-216-049-91
1-216-045-00
1-247-815-91
CARBON
CARBON
RES, CHIP
RES, CHIP
CARBON
4.7K
4.7K
1K
680
220
5%
5%
5%
5%
5%
1/4W
1/4W
1/10W
1/10W
1/4W
Q354
Q355
Q356
Q357
Q358
VARIANT (SEE VARIANT PARTS LIST)
VARIANT (SEE VARIANT PARTS LIST)
VARIANT (SEE VARIANT PARTS LIST)
VARIANT (SEE VARIANT PARTS LIST)
VARIANT (SEE VARIANT PARTS LIST)
R033
R034
R035
R038
R040
1-247-815-91
1-216-033-00
1-216-033-00
1-216-049-91
1-249-413-11
CARBON
RES, CHIP
RES, CHIP
RES, CHIP
CARBON
220
220
220
1K
470
5%
5%
5%
5%
5%
1/4W
1/10W
1/10W
1/10W
1/4W
Q359
Q360
Q400
Q501
Q502
VARIANT (SEE VARIANT PARTS LIST)
VARIANT (SEE VARIANT PARTS LIST)
8-729-422-27 TRANSISTOR 2SD601A-Q
8-729-140-50 TRANSISTOR 2SC3209LK
8-729-043-43 TRANSISTOR 2SC5426-01
R043
R044
R045
R046
R047
1-249-417-11
1-247-815-91
1-216-065-91
1-247-815-91
1-216-065-91
CARBON
CARBON
RES, CHIP
CARBON
RES, CHIP
1K
220
4.7K
220
4.7K
5%
5%
5%
5%
5%
1/4W
1/4W
1/10W
1/4W
1/10W
Q521
Q522
Q550
Q555
Q571
8-729-422-27
8-729-809-29
8-729-119-78
8-729-422-27
8-729-200-17
TRANSISTOR
TRANSISTOR
TRANSISTOR
TRANSISTOR
TRANSISTOR
2SD601A-Q
2SC4159-E
2SC2785-HFE
2SD601A-Q
2SA1091-O
R048
R049
R050
R051
R054
1-216-025-91
1-216-089-91
1-216-073-00
1-216-033-00
1-216-073-00
RES, CHIP
RES, CHIP
RES, CHIP
RES, CHIP
RES, CHIP
100
47K
10K
220
10K
5%
5%
5%
5%
5%
1/10W
1/10W
1/10W
1/10W
1/10W
Q601
Q604
Q608
Q650
Q670
8-729-119-78
8-729-119-78
8-729-119-76
8-729-111-55
8-729-140-96
TRANSISTOR
TRANSISTOR
TRANSISTOR
TRANSISTOR
TRANSISTOR
2SC2785-HFE
2SC2785-HFE
2SA1175-HFE
2SD1312-K
2SD774-34
R056
R057
R058
R065
R064
1-249-425-11
1-216-065-91
1-216-065-91
1-216-295-91
CARBON
4.7K
5%
RES, CHIP
4.7K
5%
RES, CHIP
4.7K
5%
SHORT
0
VARIANT (SEE VARIANT PARTS LIST)
1/4W
1/10W
1/10W
R066
R067
R068
R069
R070
1-216-033-00
1-216-033-00
1-247-815-91
1-247-815-91
1-249-425-11
RES, CHIP
RES, CHIP
CARBON
CARBON
CARBON
220
220
220
220
4.7K
5%
5%
5%
5%
5%
1/10W
1/10W
1/4W
1/4W
1/4W
R071
R073
R074
R075
R076
1-216-065-91
1-249-425-11
1-216-073-00
1-216-073-00
1-216-121-91
RES, CHIP
CARBON
RES, CHIP
RES, CHIP
RES, CHIP
4.7K
4.7K
10K
10K
1M
5%
5%
5%
5%
5%
1/10W
1/4W
1/10W
1/10W
1/10W
R077
R078
R081
R085
1-216-097-91 RES, CHIP
100K
5%
1-247-815-91 CARBON
220
5%
VARIANT (SEE VARIANT PARTS LIST)
1-216-049-91 RES, CHIP
1K
5%
1/10W
1/4W
RESISTOR
R001
R002
R003
R004
R005
1-216-033-00
1-216-073-00
1-216-033-00
1-216-073-00
1-216-025-91
RES, CHIP
RES, CHIP
RES, CHIP
RES, CHIP
RES, CHIP
220
10K
220
10K
100
5%
5%
5%
5%
5%
1/10W
1/10W
1/10W
1/10W
1/10W
R006
R007
R008
R010
R011
1-216-049-91
1-216-025-91
1-216-033-00
1-216-033-00
1-216-033-00
RES, CHIP
RES, CHIP
RES, CHIP
RES, CHIP
RES, CHIP
1K
100
220
220
220
5%
5%
5%
5%
5%
1/10W
1/10W
1/10W
1/10W
1/10W
— 63 —
1/10W
A
COMMON PARTS LISTING
REF.NO. PART NO.
DESCRIPTION
REMARK
REF.NO. PART NO.
R086
R087
R088
R090
R091
1-216-045-00
1-216-045-00
1-216-045-00
1-249-429-11
1-216-073-00
RES, CHIP
RES, CHIP
RES, CHIP
CARBON
RES, CHIP
680
680
680
10K
10K
5%
5%
5%
5%
5%
1/10W
1/10W
1/10W
1/4W
1/10W
R246
R247
R248
R249
R250
1-249-425-11
1-249-425-11
1-216-049-91
1-216-025-91
1-216-033-00
CARBON
CARBON
RES, CHIP
RES, CHIP
RES, CHIP
4.7K
4.7K
1K
100
220
5%
5%
5%
5%
5%
1/4W
1/4W
1/10W
1/10W
1/10W
R092
R096
R101
R150
R151
1-216-073-00
1-216-045-00
1-216-073-00
1-216-025-91
1-216-025-91
RES, CHIP
RES, CHIP
RES, CHIP
RES, CHIP
RES, CHIP
10K
680
10K
100
100
5%
5%
5%
5%
5%
1/10W
1/10W
1/10W
1/10W
1/10W
R251
R252
R253
R254
R257
1-216-025-91
1-216-033-00
1-215-899-11
1-216-033-00
1-249-429-11
RES, CHIP
RES, CHIP
METAL OXIDE
RES, CHIP
CARBON
100
220
15K
220
10K
5%
5%
5%
5%
5%
1/10W
1/10W
2W F
1/10W
1/4W
R200
R201
R202
R203
R204
1-216-022-00
1-216-113-00
1-216-113-00
1-216-025-91
1-216-043-91
RES, CHIP
RES, CHIP
RES, CHIP
RES, CHIP
RES, CHIP
75
470K
470K
100
560
5%
5%
5%
5%
5%
1/10W
1/10W
1/10W
1/10W
1/10W
R260
R261
R262
R263
R264
1-216-025-91
1-216-025-91
1-216-025-91
1-247-815-91
1-247-815-91
RES, CHIP
RES, CHIP
RES, CHIP
CARBON
CARBON
100
100
100
220
220
5%
5%
5%
5%
5%
1/10W
1/10W
1/10W
1/4W
1/4W
R205
R207
R209
R210
R211
1-216-043-91
1-216-025-91
1-216-025-91
1-216-073-00
1-247-807-31
RES, CHIP
RES, CHIP
RES, CHIP
RES, CHIP
CARBON
560
100
100
10K
100
5%
5%
5%
5%
5%
1/10W
1/10W
1/10W
1/10W
1/4W
R265
R266
R267
R268
R269
1-249-425-11
1-249-425-11
1-216-022-00
1-216-022-00
1-216-049-91
CARBON
CARBON
RES, CHIP
RES, CHIP
RES, CHIP
4.7K
4.7K
75
75
1K
5%
5%
5%
5%
5%
1/4W
1/4W
1/10W
1/10W
1/10W
R212
R213
R214
R215
R216
1-249-425-11
1-216-057-00
1-216-113-00
1-216-033-00
1-216-113-00
CARBON
RES, CHIP
RES, CHIP
RES, CHIP
RES, CHIP
4.7K
2.2K
470K
220
470K
5%
5%
5%
5%
5%
1/4W
1/10W
1/10W
1/10W
1/10W
R270
R271
R272
R273
R274
1-216-022-00
1-216-113-00
1-216-113-00
1-216-065-91
1-216-065-91
RES, CHIP
RES, CHIP
RES, CHIP
RES, CHIP
RES, CHIP
75
470K
470K
4.7K
4.7K
5%
5%
5%
5%
5%
1/10W
1/10W
1/10W
1/10W
1/10W
R217
R218
R219
R220
R221
1-216-033-00
1-216-067-00
1-216-073-00
1-216-073-00
1-216-073-00
RES, CHIP
RES, CHIP
RES, CHIP
RES, CHIP
RES, CHIP
220
5.6K
10K
10K
10K
5%
5%
5%
5%
5%
1/10W
1/10W
1/10W
1/10W
1/10W
R276
R277
R278
R279
R296
1-216-295-91 SHORT
1-216-295-91 SHORT
VARIANT (SEE VARIANT PARTS LIST)
1-249-425-11 CARBON
4.7K
5%
1-249-437-11 CARBON
47K
5%
R222
R223
R224
R225
R226
1-216-067-00
1-216-073-00
1-216-073-00
1-216-073-00
1-249-425-11
RES, CHIP
RES, CHIP
RES, CHIP
RES, CHIP
CARBON
5.6K
10K
10K
10K
4.7K
5%
5%
5%
5%
5%
1/10W
1/10W
1/10W
1/10W
1/4W
R297
R298
R299
R300
R301
1-216-043-91 RES, CHIP
560
5%
1-216-041-00 RES, CHIP
470
5%
1-249-425-11 CARBON
4.7K
5%
VARIANT (SEE VARIANT PARTS LIST)
1-216-295-91 SHORT
R227
R228
R229
R230
R231
1-216-097-91
1-216-065-91
1-216-097-91
1-216-073-00
1-216-055-00
RES, CHIP
RES, CHIP
RES, CHIP
RES, CHIP
RES, CHIP
100K
4.7K
100K
10K
1.8K
5%
5%
5%
5%
5%
1/10W
1/10W
1/10W
1/10W
1/10W
R302
R304
R305
R306
R307
VARIANT (SEE VARIANT PARTS LIST)
1-216-073-00 RES, CHIP
10K
5%
1-216-033-00 RES, CHIP
220
5%
1-208-806-11 RES, CHIP
10K
0.50%
VARIANT (SEE VARIANT PARTS LIST)
R232
R233
R236
R241
R242
1-249-429-11
1-249-429-11
1-249-420-11
1-216-065-91
1-216-083-00
CARBON
CARBON
CARBON
RES, CHIP
RES, CHIP
10K
10K
1.8K
4.7K
27K
5%
5%
5%
5%
5%
1/4W
1/4W
1/4W
1/10W
1/10W
R308
R309
R310
R311
R312
1-249-431-11
1-216-049-91
1-249-427-11
1-216-033-00
R243
R244
R245
1-216-689-11 RES, CHIP
1-216-049-91 RES, CHIP
1-216-049-91 RES, CHIP
39K
1K
1K
5%
5%
5%
1/10W
1/10W
1/10W
R313
R314
R315
1-216-033-00 RES, CHIP
1-216-033-00 RES, CHIP
1-216-033-00 RES, CHIP
— 64 —
DESCRIPTION
REMARK
VARIANT (SEE VARIANT PARTS LIST)
CARBON
15K
5%
RES, CHIP
1K
5%
CARBON
6.8K
5%
RES, CHIP
220
5%
220
220
220
5%
5%
5%
1/4W
1/4W
1/10W
1/10W
1/4W
1/10W
1/10W
1/10W
1/4W
1/10W
1/4W
1/10W
1/10W
1/10W
1/10W
Note:
Note:
The components identified
with shading and a critical
symbol ( ¡ ) are critical for
safety. Replace only with
part number specified.
REF.NO. PART NO.
Les composants identifies per
un trame et une marque ¡ sont
critiques pout la securite. Ne les
remplacer que par une piece
portant le numero specifie.
DESCRIPTION
COMMON PARTS LISTING
REMARK
REF.NO. PART NO.
R316
R317
R318
R319
R320
1-247-807-31 CARBON
100
5%
VARIANT (SEE VARIANT PARTS LIST)
VARIANT (SEE VARIANT PARTS LIST)
1-216-073-00 RES, CHIP
10K
5%
VARIANT (SEE VARIANT PARTS LIST)
1/4W
R321
R322
R323
R324
R328
VARIANT (SEE VARIANT PARTS LIST)
VARIANT (SEE VARIANT PARTS LIST)
1-216-037-00 RES, CHIP
330
5%
1-216-065-91 RES, CHIP
4.7K
5%
1-247-807-31 CARBON
100
5%
1/10W
1/10W
1/4W
R329
R330
R331
R333
R334
1-216-025-91
1-216-025-91
1-216-025-91
1-216-049-91
RES, CHIP
100
5%
RES, CHIP
100
5%
RES, CHIP
100
5%
RES, CHIP
1K
5%
VARIANT (SEE VARIANT PARTS LIST)
1/10W
1/10W
1/10W
1/10W
R335
R336
R337
R340
R341
1-216-057-00
1-216-057-00
1-216-057-00
1-249-417-11
1-216-073-00
RES, CHIP
RES, CHIP
RES, CHIP
CARBON
RES, CHIP
2.2K
2.2K
2.2K
1K
10K
5%
5%
5%
5%
5%
1/10W
1/10W
1/10W
1/4W
1/10W
R342
R343
R344
R345
R346
1-216-069-00
1-216-129-00
1-216-295-91
1-216-129-00
1-216-129-00
RES, CHIP
RES, CHIP
SHORT
RES, CHIP
RES, CHIP
6.8K
2.2M
5%
5%
1/10W
1/10W
2.2M
2.2M
5%
5%
1/10W
1/10W
R347
R350
R351
R352
R353
1-216-049-91 RES, CHIP
1K
5%
VARIANT (SEE VARIANT PARTS LIST)
VARIANT (SEE VARIANT PARTS LIST)
VARIANT (SEE VARIANT PARTS LIST)
VARIANT (SEE VARIANT PARTS LIST)
1/10W
R354
R355
R356
R357
R358
VARIANT (SEE VARIANT PARTS LIST)
VARIANT (SEE VARIANT PARTS LIST)
1-216-059-00 RES, CHIP
2.7K
5%
VARIANT (SEE VARIANT PARTS LIST)
VARIANT (SEE VARIANT PARTS LIST)
R359
R361
R362
R363
R364
VARIANT (SEE VARIANT PARTS LIST)
VARIANT (SEE VARIANT PARTS LIST)
VARIANT (SEE VARIANT PARTS LIST)
VARIANT (SEE VARIANT PARTS LIST)
VARIANT (SEE VARIANT PARTS LIST)
R365
R366
R367
R368
R369
VARIANT (SEE VARIANT PARTS LIST)
VARIANT (SEE VARIANT PARTS LIST)
VARIANT (SEE VARIANT PARTS LIST)
VARIANT (SEE VARIANT PARTS LIST)
VARIANT (SEE VARIANT PARTS LIST)
R370
R372
R373
1-216-033-00 RES, CHIP
220
5%
VARIANT (SEE VARIANT PARTS LIST)
VARIANT (SEE VARIANT PARTS LIST)
1/10W
1/10W
1/10W
— 65 —
DESCRIPTION
A
REMARK
R374
R375
R376
R377
R378
VARIANT (SEE VARIANT PARTS LIST)
VARIANT (SEE VARIANT PARTS LIST)
VARIANT (SEE VARIANT PARTS LIST)
VARIANT (SEE VARIANT PARTS LIST)
VARIANT (SEE VARIANT PARTS LIST)
R379
R380
R381
R387
R388
VARIANT (SEE VARIANT PARTS LIST)
VARIANT (SEE VARIANT PARTS LIST)
VARIANT (SEE VARIANT PARTS LIST)
1-216-073-00 RES, CHIP
10K
5%
1-216-073-00 RES, CHIP
10K
5%
1/10W
1/10W
R399
R400
R401
R402
R403
1-216-295-91
1-249-429-11
1-216-097-91
1-216-121-91
1-247-815-91
SHORT
CARBON
RES, CHIP
RES, CHIP
CARBON
10K
100K
1M
220
5%
5%
5%
5%
1/4W
1/10W
1/10W
1/4W
R404
R405
R406
R432
R501
1-247-815-91
1-216-097-91
1-216-025-91
1-249-429-11
1-247-843-11
CARBON
RES, CHIP
RES, CHIP
CARBON
CARBON
220
100K
100
10K
3.3K
5%
5%
5%
5%
5%
1/4W
1/10W
1/10W
1/4W
1/4W
R502
R503
R504
R505
R506
1-215-892-11
1-249-426-11
1-216-349-00
1-249-401-11
1-215-860-11
METAL OXIDE
CARBON
METAL OXIDE
CARBON
METAL OXIDE
1K
5.6K
1
47
33
5%
5%
5%
5%
5%
2W F
1/4W F
1W F
1/4W
1W F
R507
R508
R509
R510
R520
1-260-097-11
1-216-449-11
1-216-481-11
1-216-449-11
1-215-861-00
CARBON
METAL OXIDE
METALOXIDE
METAL OXIDE
METAL OXIDE
680
56
1.2K
56
47
5%
5%
5%
5%
5%
1/2W
2W F
3W F
2W F
1W F
R521
R522
R523
R524
R525
1-249-411-11
1-249-415-11
1-216-073-00
1-249-429-11
1-249-427-11
CARBON
CARBON
RES, CHIP
CARBON
CARBON
330
680
10K
10K
6.8K
5%
5%
5%
5%
5%
1/4W
1/4W
1/10W
1/4W
1/4W
R526
R527
R528
R529
R530
1-216-081-00
1-216-079-00
1-249-421-11
1-216-101-00
1-216-097-91
RES, CHIP
RES, CHIP
CARBON
RES, CHIP
RES, CHIP
22K
18K
2.2K
150K
100K
5%
5%
5%
5%
5%
1/10W
1/10W
1/4W
1/10W
1/10W
R532
R533 ¡
R534
R535
R541
1-215-437-00
1-215-461-00
1-215-451-00
1-249-441-11
1-249-430-11
METAL
METAL
METAL
CARBON
CARBON
4.7K
47K
18K
100K
12K
1%
1%
1%
5%
5%
1/4W
1/4W
1/4W
1/4W
1/4W
R542
R543
R544
1-249-429-11 CARBON
1-249-429-11 CARBON
1-216-351-00 METAL OXIDE
10K
10K
1.5
5%
5%
5%
1/4W
1/4W
1W F
Note:
A
The components identified
with shading and a critical
symbol ( ¡ ) are critical for
safety. Replace only with
part number specified.
COMMON PARTS LISTING
REF.NO. PART NO.
DESCRIPTION
REMARK
REF.NO. PART NO.
DESCRIPTION
The components identified by [ in this manual
have been carefully factory-selected for each
set in order to satisfy regulations regarding
X-ray radiation. Should replacement be required, replace only with the value originally
used.
REMARK
R546
R547
R548
R549
R550
1-215-890-11
1-249-385-11
1-249-430-11
1-249-429-11
1-249-421-11
METAL OXIDE
CARBON
CARBON
CARBON
CARBON
470
2.2
12K
10K
2.2K
5%
5%
5%
5%
5%
2W F
1/4W F
1/4W
1/4W
1/4W
R630
R631
R641
R642
R647
1-249-421-11
1-249-429-11
1-216-389-11
1-249-437-11
1-249-429-11
CARBON
CARBON
METAL OXIDE
CARBON
CARBON
2.2K
10K
1
47K
10K
5%
5%
5%
5%
5%
1/4W
1/4W
3W F
1/4W
1/4W
R551
R552
R553
R554
R557
1-249-413-11
1-247-887-00
1-260-312-11
1-216-097-91
1-249-421-11
CARBON
CARBON
CARBON
RES, CHIP
CARBON
470
220K
47
100K
2.2K
5%
5%
5%
5%
5%
1/4W
1/4W
1/2W
1/10W
1/4W
R650
R670
R671
R673
R674
1-249-415-11
1-249-421-11
1-249-417-11
1-249-421-11
1-247-863-91
CARBON
CARBON
CARBON
CARBON
CARBON
680
2.2K
1K
2.2K
22K
5%
5%
5%
5%
5%
1/4W
1/4W
1/4W
1/4W
1/4W
R558
R559
R561 ¡
R562 ¡
R571
1-216-065-91
1-216-113-00
1-249-377-11
1-260-288-11
1-216-365-00
RES, CHIP
RES, CHIP
CARBON
CARBON
METAL OXIDE
4.7K
470K
0.47
0.47
0.47
5%
5%
5%
5%
5%
1/10W
1/10W
1/4W F
1/2W
2W F
R675
R690
R691
R692
R699
1-215-859-00
1-216-355-11
1-249-395-11
1-249-395-11
1-249-413-11
METAL OXIDE
METAL OXIDE
CARBON
CARBON
CARBON
22
3.3
15
15
470
5%
5%
5%
5%
5%
1W F
1W F
1/4W
1/4W
1/4W F
R572
R573
R574
R575
R576
1-249-429-11
1-247-895-91
1-249-418-11
1-247-895-91
1-249-441-11
CARBON
CARBON
CARBON
CARBON
CARBON
10K
470K
1.2K
470K
100K
5%
5%
5%
5%
5%
1/4W
1/4W
1/4W F
1/4W
1/4W
R577
R578
R579
R580
R581
1-249-429-11
1-215-902-11
1-208-777-11
1-249-441-11
1-249-427-11
CARBON
METAL OXIDE
RES, CHIP
CARBON
CARBON
10K
47K
620
100K
6.8K
5%
5%
0.50%
5%
5%
1/4W
1W F
1/10W
1/4W
1/4W
R582
R583
[ R584
R585
R586
1-208-806-11
1-208-830-11
1-208-822-11
1-216-073-00
1-216-073-00
RES, CHIP
RES, CHIP
RES, CHIP
RES, CHIP
RES, CHIP
10K
100K
47K
10K
10K
0.50%
0.50%
0.50%
5%
5%
1/10W
1/10W
1/10W
1/10W
1/10W
RELAY
RY601¡ 1-755-018-11 RELAY
RY602¡ 1-755-266-11 RELAY, AC POWER
SWITCH
R587
R591
R600
R601
R602
1-216-073-00 RES, CHIP
10K
5%
1-215-882-00 METAL OXIDE
22
5%
VARIANT (SEE VARIANT PARTS LIST)
VARIANT (SEE VARIANT PARTS LIST)
VARIANT (SEE VARIANT PARTS LIST)
1/10W
2W F
R603
R604
R605
R606
R608
1-260-131-11
1-260-131-11
1-220-926-11
1-220-388-21
VARIANT (SEE VARIANT PARTS LIST)
CARBON
470K
5%
CARBON
470K
5%
FUSIBLE
0.47
10%
METAL OXIDE
68K
5%
1/2W
1/2W
1/2W F
1WF
R609
R610
R611
R612
R613
1-220-388-21
1-220-388-21
1-220-388-21
1-216-353-00
1-216-353-00
METAL OXIDE
METAL OXIDE
METAL OXIDE
METAL OXIDE
METAL OXIDE
68K
68K
68K
2.2
2.2
5%
5%
5%
5%
5%
1W
1W
1W
1W
1W
R618
R622
R623
R624
1-212-857-00
1-249-393-11
1-249-441-11
1-249-421-11
FUSIBLE
CARBON
CARBON
CARBON
10
10
100K
2.2K
5%
5%
5%
5%
1/4W F
1/4W
1/4W
1/4W
S001
S002
S003
S004
S005
1-692-431-21
1-692-431-21
1-692-431-21
1-692-431-21
1-692-431-21
SWITCH, TACTILE
SWITCH, TACTILE
SWITCH, TACTILE
SWITCH, TACTILE
SWITCH, TACTILE
S006
S007
1-692-431-21 SWITCH, TACTILE
1-692-431-21 SWITCH, TACTILE
SWITCH
SW501 1-572-707-11 SWITCH, LEVER
TRANSFORMER
T501
T502
T504 ¡
T602 ¡
T603 ¡
1-437-210-11
1-431-731-11
1-453-268-11
1-429-992-11
1-431-837-11
TRANSFORMER, HORIZONTAL DRIVE
TRANSFORMER, MODULATION
FLYBACK TRANSFORMER ASSY, NX-4005//X4J4
TRANSFORMER, CONVERTER (PRT)
TRANSFORMER, CONVERTER (PIT)
THERMISTOR
F
F
F
F
F
THP601
VARIANT (SEE VARIANT PARTS LIST)
TUNER
TU101¡ 8-598-431-00 TUNER, FSS
— 66 —
BTF-WA411
COMMON PARTS LISTING
REF.NO. PART NO.
DESCRIPTION
REMARK
REF.NO. PART NO.
VARISTOR
VDR602 1-809-267-41 VARISTOR ERZV10D471
CRYSTAL
X300
X301
X302
VARIANT (SEE VARIANT PARTS LIST)
1-567-505-11 OSCILLATOR, CRYSTAL
VARIANT (SEE VARIANT PARTS LIST)
— 67 —
DESCRIPTION
A
REMARK
A
BOARD VARIANT PARTS LIST
The parts on this page belong to the following model(s) only:
KV-27S40/29XL40M/29XL40P/29SL40
REF.NO.
PART NO.
DESCRIPTION
REMARK
REF.NO.
L350
L351
CAPACITOR
1-126-964-11
1-164-232-11
1-163-003-11
1-126-959-11
1-163-133-00
ELECT
CERAMIC
CERAMIC
ELECT
CERAMIC
10MF
0.01MF
330PF
0.47MF
470PF
20%
10%
10%
20%
5%
50V
50V
50V
50V
50V
C323
C324
C350
C351
C352
1-163-243-11
1-163-243-11
1-164-232-11
1-126-964-11
1-164-232-11
CERAMIC
CERAMIC
CERAMIC
ELECT
CERAMIC
47PF
47PF
0.01MF
10MF
0.01MF
5%
5%
10%
20%
10%
50V
50V
50V
50V
50V
C353
C354
C355
C356
C357
1-163-038-91
1-163-038-91
1-164-222-11
1-163-038-91
1-164-232-11
CERAMIC
CERAMIC
CERAMIC
CERAMIC
CERAMIC
0.1MF
0.1MF
0.22MF
0.1MF
0.01MF
10%
25V
25V
25V
25V
50V
C358
C359
C360
C361
C362
1-104-664-11
1-164-232-11
1-164-232-11
1-163-037-11
1-126-964-11
ELECT
CERAMIC
CERAMIC
CERAMIC
ELECT
47MF
0.01MF
0.01MF
0.022MF
10MF
20%
10%
10%
10%
20%
25V
50V
50V
50V
50V
C380
C381
C382
1-164-232-11 CERAMIC
1-164-232-11 CERAMIC
1-164-232-11 CERAMIC
0.01MF
0.01MF
0.01MF
10%
10%
10%
50V
50V
50V
DIODE
8-719-070-80 DIODE LNK0120022G
FERRITE BEAD
1-216-295-91 SHORT
IC
IC301
IC302
8-752-083-09 IC CXA2061S
8-752-385-80 IC CXD2073S
JACK
J201
REMARK
1-412-029-11 INDUCTOR
1-412-031-11 INDUCTOR
10UH
47UH
TRANSISTOR
C307
C309
C314
C320
C321
FB350
DESCRIPTION
COIL
A BOARD VARIANT LIST:
KV-27S40/29XL40M/29XL40P/29SL40
D002
PART NO.
1-774-749-11 JACK BLOCK, PIN
Q350
Q351
Q352
Q353
Q354
8-729-216-22
8-729-422-27
8-729-216-22
8-729-216-22
8-729-216-22
TRANSISTOR
TRANSISTOR
TRANSISTOR
TRANSISTOR
TRANSISTOR
2SA1162-G
2SD601A-Q
2SA1162-G
2SA1162-G
2SA1162-G
Q355
Q356
Q357
Q358
Q359
8-729-422-27
8-729-216-22
8-729-216-22
8-729-422-27
8-729-216-22
TRANSISTOR
TRANSISTOR
TRANSISTOR
TRANSISTOR
TRANSISTOR
2SD601A-Q
2SA1162-G
2SA1162-G
2SD601A-Q
2SA1162-G
Q360
8-729-216-22 TRANSISTOR 2SA1162-G
RESISTOR
R307
R308
R317
R318
R320
1-216-065-91
1-216-025-91
1-216-025-91
1-216-025-91
1-247-807-31
RES, CHIP
RES, CHIP
RES, CHIP
RES, CHIP
CARBON
4.7K
100
100
100
100
5%
5%
5%
5%
5%
1/10W
1/10W
1/10W
1/10W
1/4W
R321
R322
R334
R350
R351
1-216-025-91
1-216-025-91
1-216-025-91
1-208-766-11
1-208-766-11
RES, CHIP
RES, CHIP
RES, CHIP
RES, CHIP
RES, CHIP
100
100
100
220
220
5%
5%
5%
0.50%
0.50%
1/10W
1/10W
1/10W
1/10W
1/10W
R352
R353
R354
R355
R357
1-208-794-11
1-216-295-91
1-208-794-11
1-216-295-91
1-216-091-00
RES, CHIP
SHORT
RES, CHIP
SHORT
RES, CHIP
3.3K
0.50%
1/10W
3.3K
0.50%
1/10W
56K
5%
1/10W
R358
R359
R361
R362
R363
1-216-043-91
1-216-057-00
1-216-049-91
1-216-043-91
1-216-037-00
RES, CHIP
RES, CHIP
RES, CHIP
RES, CHIP
RES, CHIP
560
2.2K
1K
560
330
5%
5%
5%
5%
5%
1/10W
1/10W
1/10W
1/10W
1/10W
R364
R365
R366
R367
R368
1-216-025-91
1-216-025-91
1-216-053-00
1-216-057-00
1-216-033-00
RES, CHIP
RES, CHIP
RES, CHIP
RES, CHIP
RES, CHIP
100
100
1.5K
2.2K
220
5%
5%
5%
5%
5%
1/10W
1/10W
1/10W
1/10W
1/10W
— 68 —
Note:
The components identified
with shading and a critical
symbol ( ¡ ) are critical for
safety. Replace only with
part number specified.
REF.NO.
A
Note:
PART NO.
Les composants identifies per
un trame et une marque ¡ sont
critiques pout la securite. Ne les
remplacer que par une piece
portant le numero specifie.
DESCRIPTION
REMARK
The parts on this page belong to the following model(s) only:
KV-27S40/29XL40M/29XL40P/29SL40
REF.NO.
R369
R372
R373
R374
R375
1-216-041-00
1-216-035-00
1-216-025-91
1-216-025-91
1-216-053-00
RES, CHIP
RES, CHIP
RES, CHIP
RES, CHIP
RES, CHIP
470
270
100
100
1.5K
5%
5%
5%
5%
5%
1/10W
1/10W
1/10W
1/10W
1/10W
R376
R377
R378
R379
R380
1-216-049-91
1-216-049-91
1-216-041-00
1-216-049-91
1-208-790-11
RES, CHIP
RES, CHIP
RES, CHIP
RES, CHIP
RES, CHIP
1K
1K
470
1K
2.2K
5%
5%
5%
5%
0.50%
1/10W
1/10W
1/10W
1/10W
1/10W
R381
R601 ¡
R602 ¡
R603 ¡
1-216-053-00
1-219-513-11
1-205-998-11
1-205-998-11
RES, CHIP
CARBON
CEMENTED
CEMENTED
1.5K
4.7M
1
1
5%
5%
5%
5%
1/10W
1/2W
10W
10W
BOARD VARIANT PARTS LIST
THERMISTOR
THP601 1-809-539-11 THERMISTOR, POSITIVE
— 69 —
PART NO.
DESCRIPTION
REMARK
A
BOARD VARIANT PARTS LIST
The parts on this page belong to the following model(s) only:
KV-29SL65C
REF.NO.
PART NO.
DESCRIPTION
REMARK
REF.NO.
A BOARD VARIANT LIST: KV-29SL65C
C200
C250
C251
C252
C307
1-126-959-11
1-126-960-11
1-126-960-11
1-126-959-11
1-126-964-11
ELECT
ELECT
ELECT
ELECT
ELECT
0.47MF
1MF
1MF
0.47MF
10MF
20%
20%
20%
20%
20%
50V
50V
50V
50V
50V
C309
C314
C320
C321
C323
1-164-232-11
1-163-003-11
1-126-959-11
1-163-133-00
1-163-243-11
CERAMIC
CERAMIC
ELECT
CERAMIC
CERAMIC
0.01MF
330PF
0.47MF
470PF
47PF
10%
10%
20%
5%
5%
50V
50V
50V
50V
50V
C324
C350
C351
C352
C353
1-163-243-11
1-164-232-11
1-126-964-11
1-164-232-11
1-163-038-91
CERAMIC
CERAMIC
ELECT
CERAMIC
CERAMIC
47PF
0.01MF
10MF
0.01MF
0.1MF
5%
10%
20%
10%
50V
50V
50V
50V
25V
C354
C355
C356
C357
C358
1-163-038-91
1-164-222-11
1-163-038-91
1-164-232-11
1-104-664-11
CERAMIC
CERAMIC
CERAMIC
CERAMIC
ELECT
0.1MF
0.22MF
0.1MF
0.01MF
47MF
10%
20%
25V
25V
25V
50V
25V
C359
C360
C361
C362
1-164-232-11
1-164-232-11
1-163-037-11
1-126-964-11
CERAMIC
CERAMIC
CERAMIC
ELECT
0.01MF
0.01MF
0.022MF
10MF
10%
10%
10%
20%
50V
50V
50V
50V
CONNECTOR
1-691-616-11 CONNECTOR, BOARD TO BOARD 15P
1-691-616-11 CONNECTOR, BOARD TO BOARD 15P
DIODE
D002
8-719-070-80 DIODE LNK0120022G
FERRITE BEAD
FB350
1-216-295-91 SHORT
IC
IC010
IC301
IC302
DESCRIPTION
REMARK
JACK
CAPACITOR
CN150
CN302
PART NO.
8-759-710-85 IC NJM2233BD
8-752-083-09 IC CXA2061S
8-752-385-80 IC CXD2073S
— 70 —
J201
J202
1-774-751-11 TERMINAL BLOCK, S
1-774-749-11 JACK BLOCK, 3P
COIL
L350
L351
1-412-029-11 INDUCTOR
1-412-031-11 INDUCTOR
10UH
47UH
TRANSISTOR
Q350
Q351
Q352
Q353
Q354
8-729-216-22
8-729-422-27
8-729-216-22
8-729-216-22
8-729-216-22
TRANSISTOR
TRANSISTOR
TRANSISTOR
TRANSISTOR
TRANSISTOR
2SA1162-G
2SD601A-Q
2SA1162-G
2SA1162-G
2SA1162-G
Q355
Q356
Q357
Q358
Q359
8-729-422-27
8-729-216-22
8-729-216-22
8-729-422-27
8-729-216-22
TRANSISTOR
TRANSISTOR
TRANSISTOR
TRANSISTOR
TRANSISTOR
2SD601A-Q
2SA1162-G
2SA1162-G
2SD601A-Q
2SA1162-G
Q360
8-729-216-22 TRANSISTOR 2SA1162-G
RESISTOR
R278
R307
R308
R317
R318
1-216-295-91
1-216-065-91
1-216-025-91
1-216-025-91
1-216-025-91
SHORT
RES, CHIP
RES, CHIP
RES, CHIP
RES, CHIP
4.7K
100
100
100
5%
5%
5%
5%
1/10W
1/10W
1/10W
1/10W
R320
R321
R322
R334
R350
1-247-807-31
1-216-025-91
1-216-025-91
1-216-025-91
1-208-766-11
CARBON
RES, CHIP
RES, CHIP
RES, CHIP
RES, CHIP
100
100
100
100
220
5%
5%
5%
5%
0.50%
1/4W
1/10W
1/10W
1/10W
1/10W
R351
R352
R353
R354
R355
1-208-766-11
1-208-794-11
1-216-295-91
1-208-794-11
1-216-295-91
RES, CHIP
RES, CHIP
SHORT
RES, CHIP
SHORT
220
3.3K
0.50%
0.50%
1/10W
1/10W
3.3K
0.50%
1/10W
R357
R358
R359
R361
R362
1-216-091-00
1-216-043-91
1-216-057-00
1-216-049-91
1-216-043-91
RES, CHIP
RES, CHIP
RES, CHIP
RES, CHIP
RES, CHIP
56K
560
2.2K
1K
560
5%
5%
5%
5%
5%
1/10W
1/10W
1/10W
1/10W
1/10W
Note:
The components identified
with shading and a critical
symbol ( ¡ ) are critical for
safety. Replace only with
part number specified.
REF.NO.
A
Note:
PART NO.
Les composants identifies per
un trame et une marque ¡ sont
critiques pout la securite. Ne les
remplacer que par une piece
portant le numero specifie.
DESCRIPTION
REMARK
The parts on this page belong to the following model(s) only:
KV-29SL65C
REF.NO.
R363
R364
R365
R366
R367
1-216-037-00
1-216-025-91
1-216-025-91
1-216-053-00
1-216-057-00
RES, CHIP
RES, CHIP
RES, CHIP
RES, CHIP
RES, CHIP
330
100
100
1.5K
2.2K
5%
5%
5%
5%
5%
1/10W
1/10W
1/10W
1/10W
1/10W
R368
R369
R372
R373
R374
1-216-033-00
1-216-041-00
1-216-035-00
1-216-025-91
1-216-025-91
RES, CHIP
RES, CHIP
RES, CHIP
RES, CHIP
RES, CHIP
220
470
270
100
100
5%
5%
5%
5%
5%
1/10W
1/10W
1/10W
1/10W
1/10W
R375
R376
R377
R378
R379
1-216-053-00
1-216-049-91
1-216-049-91
1-216-041-00
1-216-049-91
RES, CHIP
RES, CHIP
RES, CHIP
RES, CHIP
RES, CHIP
1.5K
1K
1K
470
1K
5%
5%
5%
5%
5%
1/10W
1/10W
1/10W
1/10W
1/10W
R380
R381
R600 ¡
R602 ¡
R603 ¡
1-208-790-11
1-216-053-00
1-247-289-00
1-205-997-11
1-205-997-11
RES, CHIP
RES, CHIP
CARBON
CEMENTED
CEMENTED
2.2K
1.5K
8.2M
2.2
2.2
0.50%
5%
5%
5%
5%
1/10W
1/10W
1W
10W
10W
BOARD VARIANT PARTS LIST
THERMISTOR
THP601 1-809-827-11 THERMISTOR, POSITIVE
— 71 —
PART NO.
DESCRIPTION
REMARK
A
BOARD VARIANT PARTS LIST
The parts on this page belong to the following model(s) only:
KV-27S45/29SL45
REF.NO.
PART NO.
DESCRIPTION
REMARK
REF.NO.
L350
L351
CAPACITOR
C200
C307
C309
C314
C320
1-136-161-00
1-126-964-11
1-164-232-11
1-163-003-11
1-126-959-11
FILM
ELECT
CERAMIC
CERAMIC
ELECT
0.047MF
10MF
0.01MF
330PF
0.47MF
5%
20%
10%
10%
20%
50V
50V
50V
50V
50V
C321
C323
C324
C350
C351
1-163-133-00
1-163-243-11
1-163-243-11
1-164-232-11
1-126-964-11
CERAMIC
CERAMIC
CERAMIC
CERAMIC
ELECT
470PF
47PF
47PF
0.01MF
10MF
5%
5%
5%
10%
20%
50V
50V
50V
50V
50V
C352
C353
C354
C355
C356
1-164-232-11
1-163-038-91
1-163-038-91
1-164-222-11
1-163-038-91
CERAMIC
CERAMIC
CERAMIC
CERAMIC
CERAMIC
0.01MF
0.1MF
0.1MF
0.22MF
0.1MF
10%
50V
25V
25V
25V
25V
C357
C358
C359
C360
C361
1-164-232-11
1-104-664-11
1-164-232-11
1-164-232-11
1-163-037-11
CERAMIC
ELECT
CERAMIC
CERAMIC
CERAMIC
0.01MF
47MF
0.01MF
0.01MF
0.022MF
10%
20%
10%
10%
10%
50V
25V
50V
50V
50V
C362
1-126-964-11 ELECT
10MF
20%
50V
CONNECTOR
1-691-616-11 CONNECTOR, BOARD TO BOARD 15P
DIODE
D002
8-719-070-80 DIODE LNK0120022G
FERRITE BEAD
FB350
1-216-295-91 SHORT
IC
IC301
IC302
8-752-083-09 IC CXA2061S
8-752-385-80 IC CXD2073S
JACK
J201
J202
DESCRIPTION
REMARK
COIL
A BOARD VARIANT LIST: KV-27S45/29SL45
CN302
PART NO.
1-774-751-11 TERMINAL BLOCK, S
1-774-749-11 JACK BLOCK, 3P
— 72 —
1-412-029-11 INDUCTOR
1-412-031-11 INDUCTOR
10UH
47UH
TRANSISTOR
Q350
Q351
Q352
Q353
Q354
8-729-216-22
8-729-422-27
8-729-216-22
8-729-216-22
8-729-216-22
TRANSISTOR
TRANSISTOR
TRANSISTOR
TRANSISTOR
TRANSISTOR
2SA1162-G
2SD601A-Q
2SA1162-G
2SA1162-G
2SA1162-G
Q355
Q356
Q357
Q358
Q359
8-729-422-27
8-729-216-22
8-729-216-22
8-729-422-27
8-729-216-22
TRANSISTOR
TRANSISTOR
TRANSISTOR
TRANSISTOR
TRANSISTOR
2SD601A-Q
2SA1162-G
2SA1162-G
2SD601A-Q
2SA1162-G
Q360
8-729-216-22 TRANSISTOR 2SA1162-G
RESISTOR
R307
R308
R317
R318
R320
1-216-065-91
1-216-025-91
1-216-025-91
1-216-025-91
1-247-807-31
RES, CHIP
RES, CHIP
RES, CHIP
RES, CHIP
CARBON
4.7K
100
100
100
100
5%
5%
5%
5%
5%
1/10W
1/10W
1/10W
1/10W
1/4W
R321
R322
R334
R350
R351
1-216-025-91
1-216-025-91
1-216-025-91
1-208-766-11
1-208-766-11
RES, CHIP
RES, CHIP
RES, CHIP
RES, CHIP
RES, CHIP
100
100
100
220
220
5%
5%
5%
0.50%
0.50%
1/10W
1/10W
1/10W
1/10W
1/10W
R352
R353
R354
R355
R357
1-208-794-11
1-216-295-91
1-208-794-11
1-216-295-91
1-216-091-00
RES, CHIP
SHORT
RES, CHIP
SHORT
RES, CHIP
3.3K
0.50%
1/10W
3.3K
0.50%
1/10W
56K
5%
1/10W
R358
R359
R361
R362
R363
1-216-043-91
1-216-057-00
1-216-049-91
1-216-043-91
1-216-037-00
RES, CHIP
RES, CHIP
RES, CHIP
RES, CHIP
RES, CHIP
560
2.2K
1K
560
330
5%
5%
5%
5%
5%
1/10W
1/10W
1/10W
1/10W
1/10W
R364
R365
R366
R367
R368
1-216-025-91
1-216-025-91
1-216-053-00
1-216-057-00
1-216-033-00
RES, CHIP
RES, CHIP
RES, CHIP
RES, CHIP
RES, CHIP
100
100
1.5K
2.2K
220
5%
5%
5%
5%
5%
1/10W
1/10W
1/10W
1/10W
1/10W
Note:
The components identified
with shading and a critical
symbol ( ¡ ) are critical for
safety. Replace only with
part number specified.
REF.NO.
A
Note:
PART NO.
Les composants identifies per
un trame et une marque ¡ sont
critiques pout la securite. Ne les
remplacer que par une piece
portant le numero specifie.
DESCRIPTION
REMARK
The parts on this page belong to the following model(s) only:
KV-27S45/29SL45
REF.NO.
R369
R372
R373
R374
R375
1-216-041-00
1-216-035-00
1-216-025-91
1-216-025-91
1-216-053-00
RES, CHIP
RES, CHIP
RES, CHIP
RES, CHIP
RES, CHIP
470
270
100
100
1.5K
5%
5%
5%
5%
5%
1/10W
1/10W
1/10W
1/10W
1/10W
R376
R377
R378
R379
R380
1-216-049-91
1-216-049-91
1-216-041-00
1-216-049-91
1-208-790-11
RES, CHIP
RES, CHIP
RES, CHIP
RES, CHIP
RES, CHIP
1K
1K
470
1K
2.2K
5%
5%
5%
5%
0.50%
1/10W
1/10W
1/10W
1/10W
1/10W
R381
R601 ¡
R602 ¡
R603 ¡
1-216-053-00
1-219-513-11
1-205-998-11
1-205-998-11
RES, CHIP
CARBON
CEMENTED
CEMENTED
1.5K
4.7M
1
1
5%
5%
5%
5%
1/10W
1/2W
10W
10W
BOARD VARIANT PARTS LIST
THERMISTOR
THP601 1-809-539-11 THERMISTOR, POSITIVE
— 73 —
PART NO.
DESCRIPTION
REMARK
A
BOARD VARIANT PARTS LIST
The parts on this page belong to the following model(s) only:
KV-27S65/29SL65
REF.NO.
PART NO.
DESCRIPTION
REMARK
REF.NO.
A BOARD VARIANT LIST: KV-27S65/29SL65
J201
J202
C200
C250
C251
C252
C307
1-136-161-00
1-126-960-11
1-126-960-11
1-136-173-00
1-126-964-11
FILM
ELECT
ELECT
FILM
ELECT
0.047MF
1MF
1MF
0.47MF
10MF
5%
20%
20%
5%
20%
50V
50V
50V
50V
50V
C309
C314
C320
C321
C323
1-164-232-11
1-163-003-11
1-126-959-11
1-163-133-00
1-163-243-11
CERAMIC
CERAMIC
ELECT
CERAMIC
CERAMIC
0.01MF
330PF
0.47MF
470PF
47PF
10%
10%
20%
5%
5%
50V
50V
50V
50V
50V
C324
C350
C351
C352
C353
1-163-243-11
1-164-232-11
1-126-964-11
1-164-232-11
1-163-038-91
CERAMIC
CERAMIC
ELECT
CERAMIC
CERAMIC
47PF
0.01MF
10MF
0.01MF
0.1MF
5%
10%
20%
10%
50V
50V
50V
50V
25V
C354
C355
C356
C357
C358
1-163-038-91
1-164-222-11
1-163-038-91
1-164-232-11
1-104-664-11
CERAMIC
CERAMIC
CERAMIC
CERAMIC
ELECT
0.1MF
0.22MF
0.1MF
0.01MF
47MF
10%
20%
25V
25V
25V
50V
25V
C359
C360
C361
C362
1-164-232-11
1-164-232-11
1-163-037-11
1-126-964-11
CERAMIC
CERAMIC
CERAMIC
ELECT
0.01MF
0.01MF
0.022MF
10MF
10%
10%
10%
20%
50V
50V
50V
50V
CN150
CN302
1-691-616-11 CONNECTOR, BOARD TO BOARD 15P
1-691-616-11 CONNECTOR, BOARD TO BOARD 15P
DIODE
D002
8-719-070-80 DIODE LNK0120022G
FERRITE BEAD
FB350
1-216-295-91 SHORT
IC
IC010
IC301
IC302
8-759-710-85 IC NJM2233BD
8-752-083-09 IC CXA2061S
8-752-385-80 IC CXD2073S
DESCRIPTION
REMARK
JACK
CAPACITOR
CONNECTOR
PART NO.
1-774-751-11 TERMINAL BLOCK, S
1-774-749-11 JACK BLOCK, 3P
COIL
L350
L351
1-412-029-11 INDUCTOR
1-412-031-11 INDUCTOR
10UH
47UH
TRANSISTOR
Q350
Q351
Q352
Q353
Q354
8-729-216-22
8-729-422-27
8-729-216-22
8-729-216-22
8-729-216-22
TRANSISTOR
TRANSISTOR
TRANSISTOR
TRANSISTOR
TRANSISTOR
2SA1162-G
2SD601A-Q
2SA1162-G
2SA1162-G
2SA1162-G
Q355
Q356
Q357
Q358
Q359
8-729-422-27
8-729-216-22
8-729-216-22
8-729-422-27
8-729-216-22
TRANSISTOR
TRANSISTOR
TRANSISTOR
TRANSISTOR
TRANSISTOR
2SD601A-Q
2SA1162-G
2SA1162-G
2SD601A-Q
2SA1162-G
Q360
8-729-216-22 TRANSISTOR 2SA1162-G
RESISTOR
R278
R307
R308
R317
R318
1-216-295-91
1-216-065-91
1-216-025-91
1-216-025-91
1-216-025-91
SHORT
RES, CHIP
RES, CHIP
RES, CHIP
RES, CHIP
4.7K
100
100
100
5%
5%
5%
5%
1/10W
1/10W
1/10W
1/10W
R320
R321
R322
R334
R350
1-247-807-31
1-216-025-91
1-216-025-91
1-216-025-91
1-208-766-11
CARBON
RES, CHIP
RES, CHIP
RES, CHIP
RES, CHIP
100
100
100
100
220
5%
5%
5%
5%
0.50%
1/4W
1/10W
1/10W
1/10W
1/10W
R351
R352
R353
R354
R355
1-208-766-11
1-208-794-11
1-216-295-91
1-208-794-11
1-216-295-91
RES, CHIP
RES, CHIP
SHORT
RES, CHIP
SHORT
220
3.3K
0.50%
0.50%
1/10W
1/10W
3.3K
0.50%
1/10W
R357
R358
R359
R361
R362
1-216-091-00
1-216-043-91
1-216-057-00
1-216-049-91
1-216-043-91
RES, CHIP
RES, CHIP
RES, CHIP
RES, CHIP
RES, CHIP
56K
560
2.2K
1K
560
5%
5%
5%
5%
5%
1/10W
1/10W
1/10W
1/10W
1/10W
— 74 —
Note:
REF.NO.
A
Note:
The components identified
with shading and a critical
symbol ( ¡ ) are critical for
safety. Replace only with
part number specified.
PART NO.
Les composants identifies per
un trame et une marque ¡ sont
critiques pout la securite. Ne les
remplacer que par une piece
portant le numero specifie.
DESCRIPTION
REMARK
The parts on this page belong to the following model(s) only:
KV-27S65/29SL65
REF.NO.
R363
R364
R365
R366
R367
1-216-037-00
1-216-025-91
1-216-025-91
1-216-053-00
1-216-057-00
RES, CHIP
RES, CHIP
RES, CHIP
RES, CHIP
RES, CHIP
330
100
100
1.5K
2.2K
5%
5%
5%
5%
5%
1/10W
1/10W
1/10W
1/10W
1/10W
R368
R369
R372
R373
R374
1-216-033-00
1-216-041-00
1-216-035-00
1-216-025-91
1-216-025-91
RES, CHIP
RES, CHIP
RES, CHIP
RES, CHIP
RES, CHIP
220
470
270
100
100
5%
5%
5%
5%
5%
1/10W
1/10W
1/10W
1/10W
1/10W
R375
R376
R377
R378
R379
1-216-053-00
1-216-049-91
1-216-049-91
1-216-041-00
1-216-049-91
RES, CHIP
RES, CHIP
RES, CHIP
RES, CHIP
RES, CHIP
1.5K
1K
1K
470
1K
5%
5%
5%
5%
5%
1/10W
1/10W
1/10W
1/10W
1/10W
R380
R381
R601 ¡
R602 ¡
R603 ¡
1-208-790-11
1-216-053-00
1-219-513-11
1-205-998-11
1-205-998-11
RES, CHIP
RES, CHIP
CARBON
CEMENTED
CEMENTED
2.2K
1.5K
4.7M
1
1
0.50%
5%
5%
5%
5%
1/10W
1/10W
1/2W
10W
10W
THERMISTOR
THP601 1-809-539-11 THERMISTOR
BOARD VARIANT PARTS LIST
POSITIVE
— 75 —
PART NO.
DESCRIPTION
REMARK
A
BOARD VARIANT PARTS LIST
The parts on this page belong to the following model(s) only:
KV-29SL40C
REF.NO.
PART NO.
DESCRIPTION
REMARK
REF.NO.
A BOARD VARIANT LIST: KV-29SL40C
C307
C309
C314
C320
C321
1-126-964-11
1-164-232-11
1-163-003-11
1-126-959-11
1-163-133-00
ELECT
CERAMIC
CERAMIC
ELECT
CERAMIC
10MF
0.01MF
330PF
0.47MF
470PF
20%
10%
10%
20%
5%
50V
50V
50V
50V
50V
C323
C324
C350
C351
C352
1-163-243-11
1-163-243-11
1-164-232-11
1-126-964-11
1-164-232-11
CERAMIC
CERAMIC
CERAMIC
ELECT
CERAMIC
47PF
47PF
0.01MF
10MF
0.01MF
5%
5%
10%
20%
10%
50V
50V
50V
50V
50V
C353
C354
C355
C356
C357
1-163-038-91
1-163-038-91
1-164-222-11
1-163-038-91
1-164-232-11
CERAMIC
CERAMIC
CERAMIC
CERAMIC
CERAMIC
0.1MF
0.1MF
0.22MF
0.1MF
0.01MF
10%
25V
25V
25V
25V
50V
C358
C359
C360
C361
C362
1-104-664-11
1-164-232-11
1-164-232-11
1-163-037-11
1-126-964-11
ELECT
CERAMIC
CERAMIC
CERAMIC
ELECT
47MF
0.01MF
0.01MF
0.022MF
10MF
20%
10%
10%
10%
20%
25V
50V
50V
50V
50V
C380
C381
C382
1-164-232-11 CERAMIC
1-164-232-11 CERAMIC
1-164-232-11 CERAMIC
0.01MF
0.01MF
0.01MF
10%
10%
10%
50V
50V
50V
DIODE
8-719-070-80 DIODE LNK0120022G
FERRITE BEAD
FB350
1-216-295-91 SHORT
IC
IC301
IC302
8-752-083-09 IC CXA2061S
8-752-385-80 IC CXD2073S
JACK
J201
1-774-749-11 JACK BLOCK, PIN
COIL
L350
L351
1-412-029-11 INDUCTOR
1-412-031-11 INDUCTOR
DESCRIPTION
REMARK
TRANSISTOR
CAPACITOR
D002
PART NO.
10UH
47UH
— 76 —
Q350
Q351
Q352
Q353
Q354
8-729-216-22
8-729-422-27
8-729-216-22
8-729-216-22
8-729-216-22
TRANSISTOR
TRANSISTOR
TRANSISTOR
TRANSISTOR
TRANSISTOR
2SA1162-G
2SD601A-Q
2SA1162-G
2SA1162-G
2SA1162-G
Q355
Q356
Q357
Q358
Q359
8-729-422-27
8-729-026-49
8-729-216-22
8-729-422-27
8-729-216-22
TRANSISTOR
TRANSISTOR
TRANSISTOR
TRANSISTOR
TRANSISTOR
2SD601A-Q
2SA1037AK-T146-R
2SA1162-G
2SD601A-Q
2SA1162-G
Q360
8-729-216-22 TRANSISTOR 2SA1162-G
RESISTOR
R307
R308
R317
R318
R320
1-216-065-91
1-216-025-91
1-216-025-91
1-216-025-91
1-247-807-31
RES, CHIP
RES, CHIP
RES, CHIP
RES, CHIP
CARBON
4.7K
100
100
100
100
5%
5%
5%
5%
5%
1/10W
1/10W
1/10W
1/10W
1/4W
R321
R322
R334
R350
R351
1-216-025-91
1-216-025-91
1-216-025-91
1-208-766-11
1-208-766-11
RES, CHIP
RES, CHIP
RES, CHIP
RES, CHIP
RES, CHIP
100
100
100
220
220
5%
5%
5%
0.50%
0.50%
1/10W
1/10W
1/10W
1/10W
1/10W
R352
R353
R354
R355
R357
1-208-794-11
1-216-295-91
1-208-794-11
1-216-295-91
1-216-091-00
RES, CHIP
SHORT
RES, CHIP
SHORT
RES, CHIP
3.3K
0.50%
1/10W
3.3K
0.50%
1/10W
56K
5%
1/10W
R358
R359
R361
R362
R363
1-216-043-91
1-216-057-00
1-216-049-91
1-216-043-91
1-216-037-00
RES, CHIP
RES, CHIP
RES, CHIP
RES, CHIP
RES, CHIP
560
2.2K
1K
560
330
5%
5%
5%
5%
5%
1/10W
1/10W
1/10W
1/10W
1/10W
R364
R365
R366
R367
R368
1-216-025-91
1-216-025-91
1-216-053-00
1-216-057-00
1-216-033-00
RES, CHIP
RES, CHIP
RES, CHIP
RES, CHIP
RES, CHIP
100
100
1.5K
2.2K
220
5%
5%
5%
5%
5%
1/10W
1/10W
1/10W
1/10W
1/10W
R369
R372
R373
R374
R375
1-216-041-00
1-216-035-00
1-216-025-91
1-216-025-91
1-216-053-00
RES, CHIP
RES, CHIP
RES, CHIP
RES, CHIP
RES, CHIP
470
270
100
100
1.5K
5%
5%
5%
5%
5%
1/10W
1/10W
1/10W
1/10W
1/10W
Note:
The components identified
with shading and a critical
symbol ( ¡ ) are critical for
safety. Replace only with
part number specified.
REF.NO.
A
Note:
PART NO.
Les composants identifies per
un trame et une marque ¡ sont
critiques pout la securite. Ne les
remplacer que par une piece
portant le numero specifie.
DESCRIPTION
R376
R377
R378
R379
R380
1-216-049-91
1-216-049-91
1-216-041-00
1-216-049-91
1-208-790-11
RES, CHIP
RES, CHIP
RES, CHIP
RES, CHIP
RES, CHIP
R381
R602 ¡
R603 ¡
1-216-053-00 RES, CHIP
1-205-997-11 CEMENTED
1-205-997-11 CEMENTED
REMARK
The parts on this page belong to the following model(s) only:
KV-29SL40C
REF.NO.
1K
1K
470
1K
2.2K
5%
5%
5%
5%
0.50%
1/10W
1/10W
1/10W
1/10W
1/10W
1.5K
2.2
2.2
5%
5%
5%
1/10W
10W
10W
THERMISTOR
THP601 1-809-827-11 THERMISTOR
BOARD VARIANT PARTS LIST
POSITIVE
— 77 —
PART NO.
DESCRIPTION
REMARK
A
BOARD VARIANT PARTS LIST
Note:
The parts on this page belong to the following model(s) only:
KV-29XT11A/29SL40A
REF.NO.
PART NO.
DESCRIPTION
REMARK
REF.NO.
A BOARD VARIANT LIST: KV-29XT11A/20SL40A
CAPACITOR
C300
C302
C309
C320
C321
1-163-099-00
1-163-099-00
1-163-017-00
1-126-957-11
1-163-259-91
CERAMIC
CERAMIC
CERAMIC
ELECT
CERAMIC
C380
C381
C382
1-164-232-11 CERAMIC
1-164-232-11 CERAMIC
1-164-232-11 CERAMIC
18PF
18PF
0.0047MF
0.22MF
220PF
5%
5%
10%
20%
5%
50V
50V
50V
50V
50V
0.01MF
0.01MF
0.01MF
10%
10%
10%
50V
50V
50V
470
5%
1/4W
1.2K
5%
1/10W
8.2M
2.2
2.2
5%
5%
5%
1W
10W
10W
DIODE
D002
8-719-070-79 DIODE LNK0120022G1
IC
IC301
8-752-082-35 IC CXA2060AS
JACK
J201
1-774-749-11 JACK BLOCK, PIN
RESISTOR
R064
R081
R300
R302
R307
1-216-295-91
1-249-413-11
1-216-295-91
1-216-295-91
1-216-051-00
SHORT
CARBON
SHORT
SHORT
RES, CHIP
R600 ¡
R602 ¡
R603 ¡
1-247-289-00 CARBON
1-205-997-11 CEMENTED
1-205-997-11 CEMENTED
THERMISTOR
THP601 1-809-827-11 THERMISTOR, POSITIVE
CRYSTAL
X300
X302
Note:
The components identified
with shading and a critical
symbol ( ¡ ) are critical for
safety. Replace only with
part number specified.
1-579-972-11 VIBRATOR, CRYSTAL
1-579-973-11 VIBRATOR, CRYSTAL
— 78 —
PART NO.
DESCRIPTION
Les composants identifies per
un trame et une marque ¡ sont
critiques pout la securite. Ne les
remplacer que par une piece
portant le numero specifie.
REMARK
Note:
The components identified
with shading and a critical
symbol ( ¡ ) are critical for
safety. Replace only with
part number specified.
REF.NO.
A
Note:
PART NO.
Les composants identifies per
un trame et une marque ¡ sont
critiques pout la securite. Ne les
remplacer que par une piece
portant le numero specifie.
DESCRIPTION
REMARK
REF.NO.
* A-1331-775-A C BOARD, COMPLETE (all models)
CAPACITOR
10MF
20%
0.0047MF
250V
2KV
CONNECTOR
CN1751* 1-564-509-11
CN1752* 1-564-509-11
CN1753 1-695-915-11
CN1754 1-695-915-11
8-719-110-08
8-719-991-33
8-719-991-33
8-719-901-83
8-719-901-83
DESCRIPTION
R1756
R1757
R1758
R1759
R1760
1-260-099-11
1-260-099-11
1-260-099-11
1-260-087-11
1-260-123-11
CARBON
CARBON
CARBON
CARBON
CARBON
1K
1K
1K
100
100K
5%
5%
5%
5%
5%
1/2W
1/2W
1/2W
1/2W
1/2W
R1761
R1762
R1763
R1764
R1765
1-216-373-11
1-216-375-00
1-247-807-31
1-247-807-31
1-247-807-31
METAL OXIDE
METAL OXIDE
CARBON
CARBON
CARBON
2.2
3.3
100
100
100
5%
5%
5%
5%
5%
2WF
2WF
1/4W
1/4W
1/4W
*A-1343-525-A E BOARD, COMPLETE
*A-1343-526-A E BOARD, COMPLETE
DIODE
DIODE
DIODE
DIODE
DIODE
RD8.2ESB2
1SS133T-77
1SS133T-77
1SS83
1SS83
C5000
C5002
C5003
C5004
C5006
IC
JACK
COIL
ELECT
ELECT
FILM
MYLAR
MYLAR
10MF
10MF
0.01MF
0.001MF
0.001MF
20%
20%
10%
5%
5%
250V
250V
630V
50V
50V
MYLAR
MYLAR
ELECT
ELECT
CERAMIC
470PF
0.001MF
22MF
120MF
0.0047MF
5%
5%
20%
20%
20%
50V
50V
50V
35V
125V
CONNECTOR
68UH
CN5000* 1-580-843-11
CN5001* 1-564-506-11
CN5002* 1-580-844-11
CN5003 1-508-786-00
TRANSISTOR
Q1751 8-729-119-78 TRANSISTOR 2SC2785-HFE
RESISTOR
1-249-441-11
1-249-427-11
1-249-421-11
1-249-429-11
1-249-413-11
(KV-27S45, 29SL45, 27S40, 29XL40M,
29XL40P, 29SL40, 27S65, 29SL65)
(KV-29SL65C, 29SL40C, 29XT11A, 29SL40A)
C5050 ¡ 1-136-311-51 FILM
0.47MF
20%
125V
KV-27S40/27S45/27S65/29SL40/29SL45/29SL65/29XL40M/29XL40P only)
C5050 ¡ 1-136-311-61 FILM
0.47MF
20%
300V
(KV-29SL40A/29SL40C/29SL65C/29XT11A only)
J1751 ¡ 1-251-688-11 SOCKET, CRT
R1751
R1752
R1753
R1754
R1755
1-107-652-11
1-107-652-11
1-136-601-11
1-130-471-00
1-130-471-00
C5007 1-130-467-00
C5008 1-130-471-00
C5009 1-126-965-11
C5010 1-115-804-91
C5020 ¡ 1-113-941-11
IC1751 8-759-535-08 IC TDA6108Q
4-382-854-11 SCREW (M3X10), P, SW (+) (for IC1751)
1-408-613-31 INDUCTOR
REMARK
CAPACITOR
D1756 8-719-901-83 DIODE 1SS83
L1751
PART NO.
E
PLUG, CONNECTOR 6P
PLUG, CONNECTOR 6P
TAB (CONTACT)
TAB (CONTACT)
DIODE
D1751
D1752
D1753
D1754
D1755
CE
COMPLETE
LISTING
The parts on PARTS
this page belong
to the following model(s) only:
C
C1751 1-107-652-11 ELECT
C1752 1-162-114-00 CERAMIC
BOARD VARIANT PARTS LIST
PIN, CONNECTOR (POWER)
PLUG, CONNECTOR 3P
PIN, CONNECTOR (POWER)
PIN, CONNECTOR (5MM PITCH) 2P
DIODE
CARBON
CARBON
CARBON
CARBON
CARBON
100K
6.8K
2.2K
10K
470
5%
5%
5%
5%
5%
1/4W
1/4W
1/4W
1/4W
1/4W
— 79 —
D5001
D5002
D5003
D5004
D5005
8-719-911-55
8-719-911-55
8-719-055-18
8-719-991-33
8-719-991-33
DIODE
DIODE
DIODE
DIODE
DIODE
U05G
U05G
ERA22-08TP3
1SS133T-77
1SS133T-77
A
EK
BOARD VARIANT PARTS LIST
Note:
PARTS
LISTING
The parts on this pageCOMPLETE
belong to the following
model(s)
only:
REF.NO.
PART NO.
DESCRIPTION
Note:
The components identified
with shading and a critical
symbol ( ¡ ) are critical for
safety. Replace only with
part number specified.
REMARK
REF.NO.
PART NO.
Les composants identifies per
un trame et une marque ¡ sont
critiques pout la securite. Ne les
remplacer que par une piece
portant le numero specifie.
DESCRIPTION
REMARK
K
D5006 8-719-109-93 DIODE RD6.2ESB2
D5007 8-719-510-48 DIODE D1N20R
D5008 8-719-510-26 DIODE D1NL20-TA
* A-1380-579-A K BOARD, COMPLETE (KV-29SL65C, 27S65, 29SL65)
FUSE
F5050 ¡ 1-576-193-11 FUSE
6.3A/125V
(KV-27S40/27S45/27S65/29SL40/29SL45/29SL65/29XL40M/29XL40P only)
F5050 ¡ 1-532-506-51 FUSE
6.3A/250V
(KV-29SL40A/29SL40C/29SL65C/29XT11A only)
TRANSISTOR
CAPACITOR
C1001
C1002
C1003
C1004
C1005
1-126-968-11
1-104-664-11
1-126-964-11
1-126-969-11
1-126-960-11
ELECT
ELECT
ELECT
ELECT
ELECT
C1006 1-137-368-11 FILM
C1007 1-126-960-11 ELECT
Q5001 8-729-044-30 TRANSISTOR 2SK2845-LB102
Q5002 8-729-119-78 TRANSISTOR 2SC2785-HFE
100MF
47MF
10MF
220MF
1MF
20%
20%
20%
20%
20%
50V
25V
50V
50V
50V
0.0047MF 5%
1MF
20%
50V
50V
CONNECTOR
RESISTOR
R5001
R5002
R5003
R5007
R5008
1-249-389-11
1-215-485-00
1-240-205-91
1-249-421-11
1-249-429-11
CARBON
METAL
CARBON
CARBON
CARBON
4.7
470K
22M
2.2K
10K
5%
1%
5%
5%
5%
1/4WF
1/4W
1/2W
1/4W
1/4W
R5009
R5010
R5011
R5012
R5013
1-249-437-11
1-249-415-11
1-260-302-51
1-249-417-11
1-249-415-11
CARBON
CARBON
CARBON
CARBON
CARBON
47K
680
6.8
1K
680
5%
5%
5%
5%
5%
1/4W
1/4W
1/2W
1/4W
1/4W
2.2M
5%
1/2W
R5050 1-219-512-11 CARBON
TRANSFORMER
CN1001* 1-691-632-11 CONNECTOR, BOARD TO BOARD 15P
CN1002* 1-564-507-11 PLUG, CONNECTOR 4P
COIL
L1001
L1002
1-408-421-00 INDUCTOR
1-410-470-11 INDUCTOR
100UH
10UH
TRANSISTOR
Q1001
Q1002
Q1003
Q1004
Q1005
8-729-119-78
8-729-026-41
8-729-026-41
8-729-026-41
8-729-026-41
TRANSISTOR
TRANSISTOR
TRANSISTOR
TRANSISTOR
TRANSISTOR
2SC2785-HFE
2SA933AS-QRT
2SA933AS-QRT
2SA933AS-QRT
2SA933AS-QRT
RESISTOR
T5001 ¡ 1-431-852-11 TRANSFORMER, CONVERTER (SRT)
T5050 ¡ 1-426-717-11 TRANSFORMER, LINE FILTER (LFT)
VARISTOR
VDR5050 1-801-074-41 VARISTOR ERZV10D271
(KV-27S40/27S45/27S65/29SL40/29SL45/29SL65/29XL40M/29XL40P only)
VDR5050 1-809-267-41 VARISTOR ERZV10D471
(KV-29SL40A/29SL40C/29SL65C/29XT11A only)
R1001
R1002
R1003
R1004
R1006
1-247-807-31
1-247-807-31
1-249-434-11
1-249-436-11
1-249-419-11
CARBON
CARBON
CARBON
CARBON
CARBON
100
100
27K
39K
1.5K
5%
5%
5%
5%
5%
1/4W
1/4W
1/4W
1/4W
1/4W
R1007
R1008
R1009
R1010
R1011
1-247-863-91
1-247-863-91
1-247-863-91
1-247-863-91
1-249-414-11
CARBON
CARBON
CARBON
CARBON
CARBON
22K
22K
22K
22K
560
5%
5%
5%
5%
5%
1/4W
1/4W
1/4W
1/4W
1/4W
R1012
R1013
R1014
R1015
1-249-414-11
1-247-807-31
1-247-807-31
1-249-419-11
CARBON
CARBON
CARBON
CARBON
560
100
100
1.5K
5%
5%
5%
5%
1/4W
1/4W
1/4W
1/4W
TUNER
TU1002¡ 8-598-430-00 TUNER, FSS BTF-FA401
— 80 —
A
BOARD VARIANT PARTS LIST
P
COMPLETE
LISTING
The parts onPARTS
this page belong
to the following model(s) only:
REF.NO.
PART NO.
DESCRIPTION
REMARK
REF.NO.
P
PART NO.
DESCRIPTION
REMARK
CONNECTOR
CN3301* 1-691-632-11 CONNECTOR, BOARD TO BOARD 15P
*A-1190-306-A P BOARD, COMPLETE (KV-27S45, 29SL45,
29SL65C, 27S65, 29SL65)
IC
CAPACITOR
C3319
C3320
C3321
C3322
C3323
1-163-031-11
1-126-960-11
1-163-239-11
1-163-239-11
1-163-031-11
CERAMIC CHIP
ELECT
CERAMIC CHIP
CERAMIC CHIP
CERAMIC CHIP
0.01MF
1MF
33PF
33PF
0.01MF
C3324
C3328
C3329
C3330
C3331
1-126-967-11
1-126-967-11
1-126-967-11
1-163-031-11
1-126-967-11
ELECT
ELECT
ELECT
CERAMIC CHIP
ELECT
47MF
47MF
47MF
0.01MF
47MF
20%
20%
20%
C3332
C3334
C3335
C3336
C3337
1-104-664-11
1-163-031-11
1-163-038-91
1-163-038-91
1-164-005-11
ELECT
CERAMIC CHIP
CERAMIC CHIP
CERAMIC CHIP
CERAMIC CHIP
47MF
0.01MF
0.1MF
0.1MF
0.47MF
20%
C3340
C3346
C3347
C3348
C3350
1-163-031-11
1-163-251-11
1-126-960-11
1-126-967-11
1-163-259-91
CERAMIC CHIP
CERAMIC CHIP
ELECT
ELECT
CERAMIC CHIP
0.01MF
100PF
1MF
47MF
220PF
C3352
C3353
C3354
C3355
C3359
1-163-031-11
1-164-346-11
1-163-031-11
1-126-967-11
1-163-038-91
CERAMIC CHIP
CERAMIC CHIP
CERAMIC CHIP
ELECT
CERAMIC CHIP
0.01MF
1MF
0.01MF
47MF
0.1MF
C3360
C3361
C3362
C3363
C3364
1-163-038-91
1-163-038-91
1-126-967-11
1-163-031-11
1-163-231-11
CERAMIC CHIP
CERAMIC CHIP
ELECT
CERAMIC CHIP
CERAMIC CHIP
0.1MF
0.1MF
47MF
0.01MF
15PF
C3365
C3366
C3367
C3368
C3369
C3370
C3371
C3372
1-163-133-00
1-164-005-11
1-126-963-11
1-164-005-11
1-163-251-11
1-164-346-11
1-163-017-00
1-164-005-11
CERAMIC CHIP
CERAMIC CHIP
ELECT
CERAMIC CHIP
CERAMIC CHIP
CERAMIC CHIP
CERAMIC CHIP
CERAMIC CHIP
470PF
0.47MF
4.7MF
0.47MF
100PF
1MF
0.0047MF
0.47MF
20%
5%
5%
20%
5%
20%
20%
5%
20%
20%
5%
5%
20%
5%
10%
50V
50V
50V
50V
50V
16V
16V
16V
50V
16V
25V
50V
25V
25V
25V
IC3302 8-759-231-53 IC TA7805S
IC3303 8-759-438-61 IC SDA9288X-A141
IC3304 8-752-078-83 IC CXA2019Q
COIL
L3302
1-410-473-11 INDUCTOR
TRANSISTOR
Q3301
Q3307
Q3309
Q3310
Q3312
8-729-422-27
8-729-422-27
8-729-422-27
8-729-422-27
8-729-216-22
TRANSISTOR
TRANSISTOR
TRANSISTOR
TRANSISTOR
TRANSISTOR
RESISTOR
R3301
R3302
R3312
R3313
R3314
1-216-295-91
1-216-295-91
1-216-037-00
1-216-295-91
1-216-049-91
SHORT
SHORT
RES, CHIP
SHORT
RES, CHIP
50V
16V
50V
16V
25V
R3322
R3324
R3329
R3330
R3331
1-216-295-91
1-216-295-91
1-216-069-00
1-216-035-00
1-216-295-91
SHORT
SHORT
RES, CHIP
RES, CHIP
SHORT
25V
25V
16V
50V
50V
R3335
R3337
R3338
R3339
R3340
1-216-295-91
1-216-033-00
1-216-033-00
1-216-057-00
1-216-041-00
R3341
R3342
R3343
R3344
R3346
1-216-057-00
1-216-057-00
1-216-073-00
1-216-065-91
1-216-049-91
— 81 —
2SD601A-Q
2SD601A-Q
2SD601A-Q
2SD601A-Q
2SA1162-G
Q3314 8-729-216-22 TRANSISTOR 2SA1162-G
50V
50V
50V
16V
50V
50V
25V
50V
25V
50V
16V
50V
25V
18UH
330
5%
1/10W
1K
5%
1/10W
6.8K
270
5%
5%
1/10W
1/10W
SHORT
RES, CHIP
RES, CHIP
RES, CHIP
RES, CHIP
220
220
2.2K
470
5%
5%
5%
5%
1/10W
1/10W
1/10W
1/10W
RES, CHIP
RES, CHIP
RES, CHIP
RES, CHIP
RES, CHIP
2.2K
2.2K
10K
4.7K
1K
5%
5%
5%
5%
5%
1/10W
1/10W
1/10W
1/10W
1/10W
A
BOARD VARIANT PARTS LIST
COMPLETE PARTS LISTING
Note:
P HZ
The components identified
with shading and a critical
symbol ( ¡ ) are critical for
safety. Replace only with
part number specified.
The parts on this page belong to the following model(s) only:
DESCRIPTION
REF.NO.
PART NO.
REMARK
R3347
R3352
R3358
R3360
R3362
1-216-073-00
1-216-049-91
1-216-295-91
1-216-295-91
1-216-043-91
RES, CHIP
RES, CHIP
SHORT
SHORT
RES, CHIP
10K
1K
560
5%
1/10W
R3363
R3364
R3369
R3370
R3371
1-216-043-91
1-216-043-91
1-216-053-00
1-216-053-00
1-216-033-00
RES, CHIP
RES, CHIP
RES, CHIP
RES, CHIP
RES, CHIP
560
560
1.5K
1.5K
220
5%
5%
5%
5%
5%
1/10W
1/10W
1/10W
1/10W
1/10W
R3375
R3376
R3377
R3378
R3379
1-216-037-00
1-216-071-00
1-216-073-00
1-216-053-00
1-216-077-00
RES, CHIP
RES, CHIP
RES, CHIP
RES, CHIP
RES, CHIP
330
8.2K
10K
1.5K
15K
5%
5%
5%
5%
5%
1/10W
1/10W
1/10W
1/10W
1/10W
R3380
R3381
R3382
R3383
R3384
1-216-025-91
1-216-025-91
1-216-057-00
1-216-025-91
1-216-033-00
RES, CHIP
RES, CHIP
RES, CHIP
RES, CHIP
RES, CHIP
100
100
2.2K
100
220
5%
5%
5%
5%
5%
1/10W
1/10W
1/10W
1/10W
1/10W
R3385
R3387
R3388
R3392
R3393
1-216-109-00
1-216-295-91
1-216-295-91
1-216-295-91
1-216-025-91
RES, CHIP
SHORT
SHORT
SHORT
RES, CHIP
330K
5%
1/10W
100
5%
1/10W
R3394 1-216-025-91 RES, CHIP
R3395 1-216-061-00 RES, CHIP
R3401 1-216-295-91 SHORT
100
3.3K
5%
5%
1/10W
1/10W
5%
5%
Note:
1/10W
1/10W
REF.NO.
PART NO.
Les composants identifies per
un trame et une marque ¡ sont
critiques pout la securite. Ne les
remplacer que par une piece
portant le numero specifie.
DESCRIPTION
REMARK
HZ
*A-1372-117-A HZ BOARD, COMPLETE (KV-29XT11A, 29SL40A)
CONNECTOR
CN901 * 1-580-843-11 PIN, CONNECTOR (POWER)
CN902 * 1-580-843-11 PIN, CONNECTOR (POWER)
SWITCH
S901 ¡ 1-571-433-21 SWITCH, PUSH (AC POWER)
ACCESSORIES AND PACKING MATERIAL
3-861-824-41
3-861-907-21
MANUAL, INSTRUCTION
MANUAL, INSTRUCTION
KV-29XT11A/29SL40A (only)
KV-27S40/27S45/27S65 (US models only)
3-861-907-31
3-861-918-41
MANUAL, INSTRUCTION
MANUAL, INSTRUCTION
KV-27S40/27S45/27S65 (CND models only)
KV-29SL40/29XL40M/29XL40P/29SL40C/
29SL45/29SL65C/29SL65 (only)
4-041-255-01 * BAG, PROTECTION
4-064-061-01 * CARTON, INDIVIDUAL
4-064-062-01 * CARTON, INDIVIDUAL
4-064-063-01 * CARTON, INDIVIDUAL
4-064-065-01 * CARTON, INDIVIDUAL
KV-29XL40M/29XT11A (only)
KV-29SL40/29SL40C/29SL45/29SL65C/
29SL65/29SL40A (only)
KV-29XL40P (only)
KV-27S40/27S45/27S65 (only)
CRYSTAL
X3302 1-760-095-21 VIBRATOR, CRYSTAL
X3303 1-577-611-11 OSCILALTOR, CERAMIC
X3304 1-567-505-11 OSCILLATOR, CRYSTAL
4-064-069-01 * CUSHION ASSY, UPPER
4-064-071-01 * CUSHION ASSY, LOWER
REMOTE COMMANDER
1-475-801-11
1-475-802-11
4-978-977-01
— 82 —
REMOTE COMMANDER (RM- Y165) KV-27S40/29SL40/29XL40M/
29XL40P/29XT11A/29SL40C/
29SL40A (only)
REMOTE COMMANDER (RM-Y167) KV-27S45/27S65/29SL45/
29SL65C/29SL65 (only)
BATTERY COVER (for remote)
A
BOARD VARIANT PARTS LIST
The parts on this page belong to the following model(s) only:
REF.NO.
PART NO.
DESCRIPTION
REMARK
REF.NO.
PART NO.
DESCRIPTION
REMARK
Sony Corporation
Sony Technology Center
9-965-841-01
Product Quality Division
Service Promotion Department
— 84 —
English
98DJ74425-1
Printed in U.S.A.
© 1998.4