1
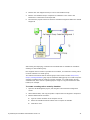
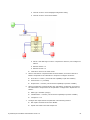
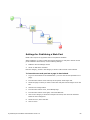
18. Connect all of the components together.
19. Click OK three times to exit the component editors. The new smart task will be
applied the next time you deploy the process.
NOTE:
Smart tasks may or may not complete the task to which they are associated. If the
checkbox “Resolve Workflow Task on Exit” is selected, the smart task would resolve
the task. If the checkbox is left unchecked, the smart task can be run as many times
and the task would remain unresolved.
It is possible to configure smart tasks to appear conditionally, so they only appear when
it makes sense. This example will demonstrate how to configure the “Search Altiris KB”
smart task created in the preceding steps so it only appears when the ticket name
contains the word “Altiris.”
Additionally, a date range can be specified for making the smart task available by using
the “Date Validity” setting for the smart task.
To enable smart tasks to appear conditionally
1.
In Symantec Workflow, open the SD.IncidentManagement project. Please see
Editing the Core ITIL Processes (page 18) if this is the first time opening Incident
Managment from its package; there is an important, required step regarding
unpacking.
2.
Within the Main Incident Work model, double-click the “Diagnose and Work
Incident” Linked Model component.
3.
Double-click the “Initial Diagnosis” Dialog Workflow component.
4.
Select the Interaction Setup tab.
5.
Click on the Search Altiris KB smart task and click on Edit.
6.
From the Setup tab, check the “Conditionally Use” checkbox.
7.
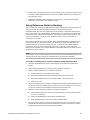
Open the Conditional Use Model. For this mdoel, only the Text Contains Rule
component is needed to evaluate the incident name for the word “Altiris.”
8.
Add a Text Contains Rule component to the model.
9.
Since the Text Contains Rule component has two outcomes, another End component
is needed. Add an End component.
10. Connect the components accordingly.
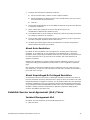
11. Double-click the Text Contains Rule component and in the Contains field, select
Constant Value and type “Altiris” in the value field. Click OK.
12. In the Variable Name field, select the variable Incident.IncidentName. Click OK.
13. Click OK to close the Text Contains Rule editor.
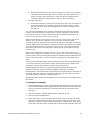
14. Double-click the End component connected to the “Contains” output path.
15. Open its Mapping field, select Create Value, and set the value to “true” by checking
the Value checkbox.
16. In the other End component, open its Mapping field, and select Create Value, but
leave the Value checkbox unchecked.
17. This completes configuration of the model. Click OK to close.
Symantec® ServiceDesk Customization Guide 7.0
52