1
Configuring Communication
8. Obtain the System Number and Master IP Address from NetLinx Studio. This information must be
specific for the system used with the configured Modero panel.
9. Press the Front Setup Access button for 4 seconds to open the Setup page.
10. Press the Protected Setup button (located on the lower-left of the panel page) to open the Protected Setup
page.
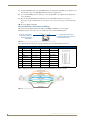
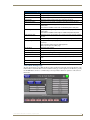
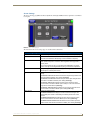
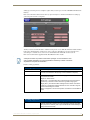
11. Press the System Settings button (located on the Protected Setup page) to open the System Settings page
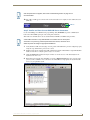
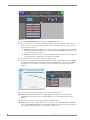
(FIG. 24) and begin configuring the communication settings on the panel to match those of the target
Master.
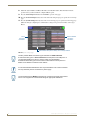
Panel
connection
information
NetLinx Master’s
connection
information
MAC Address from panel is factory set to a unique address
FIG. 24 System Settings page
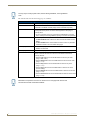
The two possible Master Connection Types available are USB or Ethernet.
A USB connection type is a direct connection from the panel’s mini-USB port to a
corresponding USB port on the PC, which is acting as a Virtual Master.
An Ethernet connection type involves indirect communication from the panel to a
Master via an Ethernet connection to the network.
It is recommended that firmware KIT files only be transferred over a direct connection
and only when the panel is connected to a power supply.
The mini-USB connector MUST be plugged into a panel that is already active before
the PC can recognize the connection and assign an appropriate USB driver.
24
NXD-700i & NXT-CA7 7” Modero Touch Panels