1
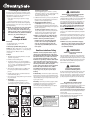
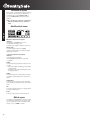
This kit contains:
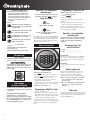
(2) lag screws, (2) washers, (2) masonry anchors (Fig. A)
Tools needed for floor mounting: Drill, wrench,
(11.0 mm) drill bit, for wood anchoring: 9⁄32" (7.2
mm) drill bit, for masonry anchoring: 3⁄8" (9.50 mm)
masonry drill bit.
7⁄16"
IMPORTANT: Please read the following instructions
carefully. For your protection, new keys CAN, and
combinations CANNOT, be issued by telephone
request. To order replacement keys and/or
combinations, it is essential that you e-mail or fax
to the Sentry Customer Service at the appropriate
contact address or number on the back cover. If you
need assistance in preparing your order, or wish to
purchase via credit card (Visa/Mastercard only),
please call Sentry Customer Service at the
appropriate contact number on the back cover.
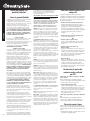
Lost combination: First, find your safe’s Model and
Serial Number, then call your local Sentry retailer. The
Serial Number is on the back cover, and is also printed
on the small label beside the door hinge (outside).
Lost keys: To obtain replacement keys, please contact
your local Sentry retailer with the safe Serial Number.
The Serial Number is on the back cover, and is also
printed on the small label beside the door hinge (outside).
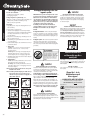
WARNING
Nocomputerdisks, audio-visualmediaor
photonegatives.
This product in not intended to protect computer floppy
or 2-1/4” diskettes, cartridges and tapes, audio or video
cassettes or photo negatives. For fire-resistant storage
of these materials, ask your retailer for the SentrySafe
Fire-Safe Media storage products.
IMPORTANT
Using a mechanical combination lock
NOTE: It may be required to push the bolt button which,
in turn, will throw the bolts to a locked position while
the door is open (Fig. G). Proceed to test your combination. The handle should be all the way UP, in the
horizontal position before attempting to dial out
safe. Your combination lock is now ready to use. You
will find your safe’s combination on the sticker on the
back of the owner’s manual. Depending upon the model
you chose, you will have either a 3-number or 4-number
combination.
G
a
Instructions:
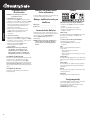
1. Tip the safe onto its right side. (Door hinges horizontal with the floor.)
2. Unlock the safe and open the door.
3. Look on the bottom of the safe for two indentations
in opposite corners. Using the 7⁄16" (11.0 mm) bit,
drill a hole through each indentation perpendicular
to the bottom of the safe. (Fig. B)
4. Close the door and tip the safe upright. Place it where
desired and reopen the door.
5. Use a screw or drill bit to mark the floor through both
holes. (Fig. C)
6. Move the safe aside to clear both marked spots for
drilling.
7. Drill into the floor:
A. For wood: Using the 9⁄32" (7.2 mm) bit, drill a hole
21⁄2" (64 mm) deep in each marked spot. (Fig. D)
B. For masonry:
Using the 3⁄8" (9.50 mm) masonry bit, drill a hole
21⁄2" (64 mm) deep in each marked spot. (Fig. D)
Install a masonry anchor in each hole.
8. Replace the safe in the desired position, with the
holes in the safe aligned with those in the floor.
9. Securing the safe:
A. For wood: Pass each lag screw through a washer,
then through the safe and into a hole. Tighten with
the wrench. (Fig. E)
B. For masonry: Pass each lag screw through a
washer, then through the safe and into a masonry
anchor. Tighten with the wrench. (Fig. F)
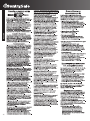
Lost combination or keys
ENGLISH
aa
Instructions for floor mounting
NOTE: Drill holes through feet only, not through
the back or sides.
NOTE: Bolting/unbolting of the unit is at the
consumers expense and discretion. Sentry Group
is not responsible for any costs incurred if the
unit is to be replaced.
A
B
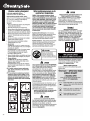
WARNING
DO NOT store delicate items directly in your safe.
SentrySafe products which offer fire protection have a
patented insulation that has a high moisture content. In
addition the SentrySafe advanced safes close airtight to
offer water resistance, which may also cause moisture to
accumulate inside your safe. The desiccant packet
included in your safe during shipment, should be left in
your safe. DO NOT DISCARD IT. It is intended to help
absorb moisture which may accumulate inside your safe.
Please open your unit periodically to avoid moisture
accumulation.
If you choose to store delicate items such as jewelry with
working parts, watches, stamps, or photos in your safe,
we recommend putting them in an air-tight container,
prior to placing them in the safe for storage.
NOTE: Sentry Group will not be responsible for any
damage or loss of items placed in the unit due
to moisture.
WARNING
C
D
For added security, some safes have a dual locking
system. Combination and key are required to unlock dual
locking system locks. NOTE: The safe will lock with
or without key.
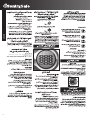
To unlock and open
Insert the key in the lock and turn until the plunger pops
out. Remove key.
Open first – test combination
with door open!
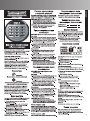
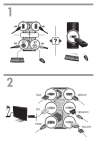
3-NUMBER COMBINATION
See back cover of this manual for your combination.
NOTE: This combination cannot be changed.
Start at zero.
Turn dial right past ZERO 3 rotations. Stop
at the first number of your combination
after third rotation.
Turn the dial to left 2 rotations. Stop at
second number on second rotation.
Turn dial to the right. Stop at third number
on first rotation.
a
DO NOT store pearls in this safe unit.
In the event of a fire, potential damage to delicate pearls
occurs at temperatures much lower than the 350°F interior performance measure which the UL classification
performance standard indicated guarantees. Therefore,
DO NOT store pearls in your SentrySafe product.
Dual security combination
and key lock safes
E
F
3