1
L9EAZ_WA(VA-20LAN_INSTALLATION).book
4 ページ
2006年5月10日 水曜日 午後4時10分
2. Configuring the Network Settings
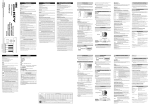
Configure the settings required for connecting the camera to the network (LAN) in the menu screen.
• For accessing the Main menu, see pages 5 - 7 on the INSTRUCTION MANUAL supplied with the camera.
• After you turn on the power, it takes approximately one minute for the “NETWORK” setting menu to appear on the
“OPTION” screen. When connected to the network, the option board link lamp (D6453) flashes.
SYNC
BLC
IRIS
WHITE BALANCE
AGC GAIN
GAMMA
SHUTTER
APERTURE
DAY/NIGHT
·OPTION
PRESET
MENU
·OPTION
(SET)
SET
R
R
·NETWORK
(SET)
LEFT
PRESET
MENU
OFF
SET
SET
SET
SET
SET
y
y
y
y
y
SET
R
OFF
BACK
1 Select “IP ADDRESS”, specify the option for
SET
SET
S4002
LEFT
TITLE
PRIVACY MASK
PASSWORD
ALARM
LANGUAGE
·NETWORK
UP
2
UP
OPTION
INT
OFF
SET y
ATW
NORM
0.45
60
HIGH
AUTO y
SET y
OFF
END
1
Link
lamp
retrieving the IP address, and press the SET
button.
RIGHT
NETWORK SETTING
RIGHT
S4001
DOWN
MONITOR
OUT
CN411
MONITOR OUT
TP431
·IP ADDRESS
PORT
DOWN
1 SET button
Press and hold for over a second for the settings
screen to appear.
2 Select button
Press up, down, left, right to select an item on
the settings screen or change a setting value.
·IP ADDRESS
FIX y
00080
MAC ADDRESS
08-00-7B-81-12-20
FIX
: Manual configuration (Default IP address: 192.168.0.2)
AUTO : Automatic configuration (DHCP)
RThe “IP ADDRESS SETTING” screen appears.
MEMO: The “MAC ADDRESS” cannot be changed.
4
SET
R