1
#10 x 1-1/2” SCREWS
Tornillos #10 x 1-1/2”
#12 x 2” SCREWS
Tornillos #12 x 2”
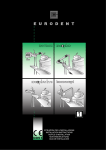
Insert a #12 x 2” self-tapping pan head Phillips screw halfway into the outward tab hole. This
will support the HUG bracket until two #10 x 1-1/2” self-tapping screws are installed. Install
one #10 x 1-1/2” self-tapping screw into the middle two holes of the HUG Bracket. The HUG
Bracket is now properly installed to the HUGS Hawaii Bracket and truss. When two or more
HUG Brackets have been installed, the railing process can begin.
Inserte un tornillo Phillips de cabeza plana y auto roscando a la mitad del agujero de la lengüeta hacia
afuera. Esto va a dar apoyo a la HUG bracket hasta que dos tornillos de auto roscado de #10 x 1-1/2
sean instalados. Instale un tornillos de auto roscado de #10 x 1-1/2” al los dos agujeros del medio de la
HUG bracket. La HUG bracket está ahora apropiadamente instalada a la Hawaii Bracket HUGS y a la
cercha. Cuando dos o más HUG bracket han sido instaladas, los procesos de riel pueden comenzar.
23